Thursday 27 April 2023

Launch X431 Activate & Register FCA SGW AutoAuth Tutorial

 This is a tutorial on how to use Launch X431 diagnostic tool to activate & register FCA SGW AutoAuth account. Guide to introduce AutoAuth account login, purchase and tool model pairing for all Launch e-commerce products.

Applicability

Launch X431 CRP909E, CRP909X, CRP919E, CRP919X, PRO MINI, PROS MINI, PROS, PRO3S+, PRO5, V, V+, PAD III, PAD V, PAD VII

How to unlock AutoAuth account on Launch?

Local diagnose >> Chrysler >> OK >> 16 PIN Connector >> Manually select >> Chrysler >> 2022(VIN 10th) >> Pacifica/ Voyager

Launch X431 Activate and Register FCA SGW AutoAuth Tutorial

Launch X431 Activate and Register FCA SGW AutoAuth Tutorial

Launch X431 Activate and Register FCA SGW AutoAuth Tutorial

Please check if there are any other OBD communication components are installed on the vehicle. Remove it if yes and then perform Diagnosis. Press "OK".

Please keep the network connection and login normal. Otherwise, the data may be inaccurate. Press "OK".

The vehicle is equipped with SGW(Security Gateway) Module.

Do you want to login with FCA account to unlock SGW(Security Gateway) Module?

Supports European region or North American region(USA & Canada & Mexico). It depends on the business area of your dealer.

Press "Yes" to login with FCA account, unlock the SGW(Supports version information, read DTC, read data stream, actuation test and special function).

Select region >> Login with your AutoAuth account to unlock FCA SGW

SGW(Security Gateway) has been unlocked successfully.

Launch X431 Activate and Register FCA SGW AutoAuth Tutorial

Launch X431 Activate and Register FCA SGW AutoAuth Tutorial

Launch X431 Activate and Register FCA SGW AutoAuth Tutorial

How to diagnose without AutoAuth account on Launch?

Select region >>Skip

In case of non-FCA users.

The diagnostic software only supports version information, read DTC and read data stream functions.

Launch X431 Activate and Register FCA SGW AutoAuth Tutorial

Launch X431 Activate and Register FCA SGW AutoAuth Tutorial

How to register AutoAuth account on Launch?

Select region >> New registration >> Register >> Purchase Standard/Standard Plus service

Manage Tools >> Add Tool >> Fill in details

MANUFACTURER: Launch

TOOLS MODEL: Other

Completed!

Launch X431 Activate and Register FCA SGW AutoAuth Tutorial

Launch X431 Activate and Register FCA SGW AutoAuth Tutorial

Launch X431 Activate and Register FCA SGW AutoAuth Tutorial

Launch X431 Activate and Register FCA SGW AutoAuth Tutorial

Launch X431 Activate and Register FCA SGW AutoAuth Tutorial

www.obdexpress.co.uk

XTOOL D9 Pro User Guide: Registration upgrade and menu function introduction

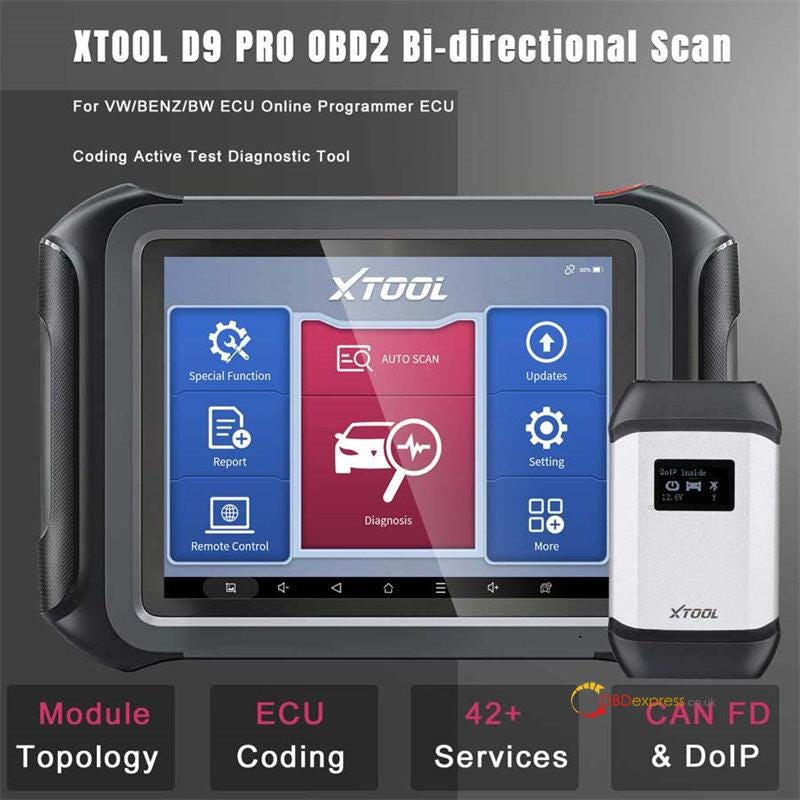
 XTOOL D9 Pro is an OE-level professional full diagnostic scanner which provides you with more efficient diagnostic service, supporting full system diagnosis, smart AutoVin & Auto Scan, 42+ reset services, ECU coding, and specially for VW/Benz/BMW ECU online programming, etc. It's equipped with 5.1 Android System, touchscreen, 2GB RAM + 64GB ROM memory and offers 3 years free Update and 5 years warranty.


XTOOL D9 Pro User Registration upgrade and menu function introduction


PART I:

Xtool D9 Pro Register (Activation)

For the first time to use this Xtool diagnostic tool, you need to register and activate it so that can use normally.

Press the power button on the top right of the device to turn on


XTOOL D9 Pro User Registration upgrade and menu function introduction


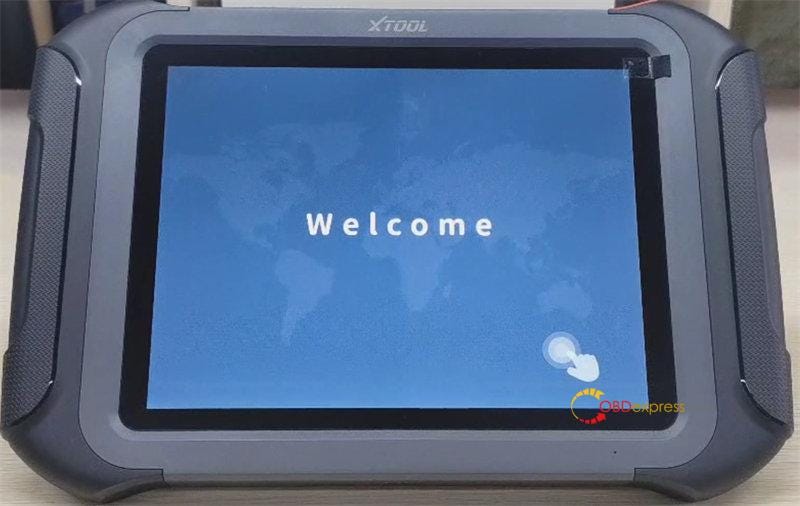
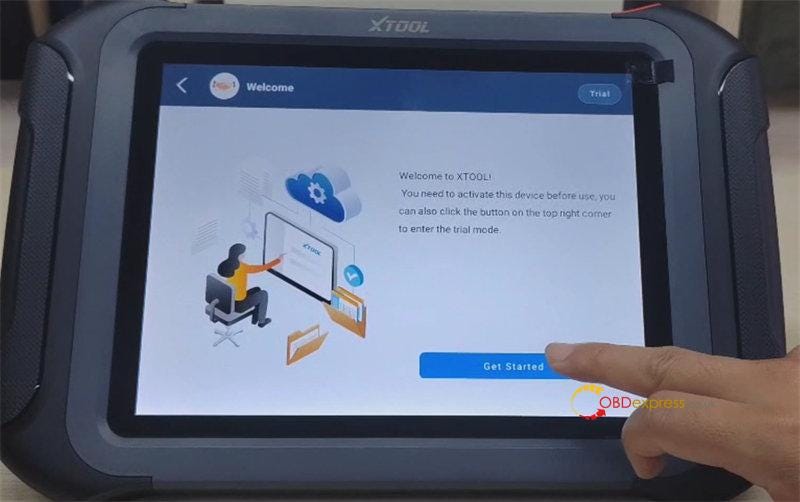
When it shows "Welcome", tap the circle button


XTOOL D9 Pro User Registration upgrade and menu function introduction


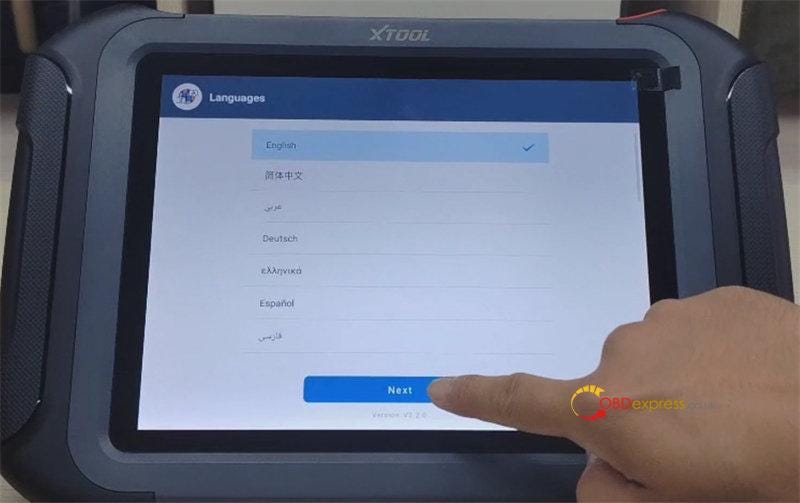
Then select the device language

*14 multi-language are available, and English is default. If you need other language, just send the Serial Number(S/N) of D9 Pro to obdexpress.co.uk to change English to Spanish, Portuguese, French, Japanese, German, Polish, Russian, Italian, Korean, Dutch, Swedish, etc.

Click "Next"


XTOOL D9 Pro User Registration upgrade and menu function introduction


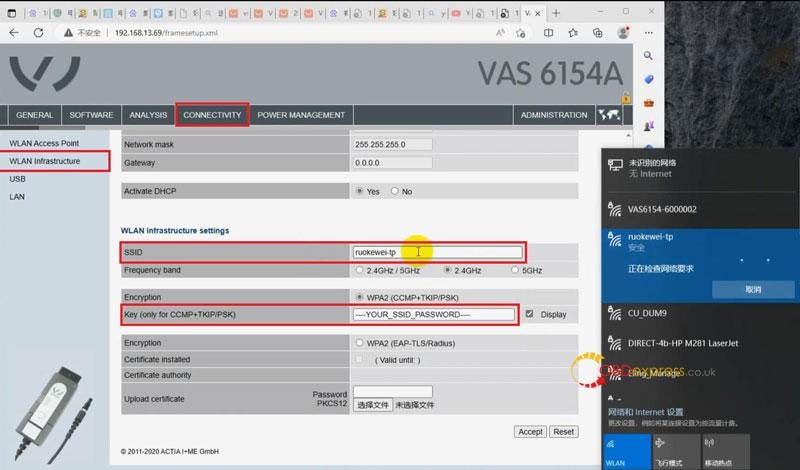
Connect with an available wifi


XTOOL D9 Pro User Registration upgrade and menu function introduction


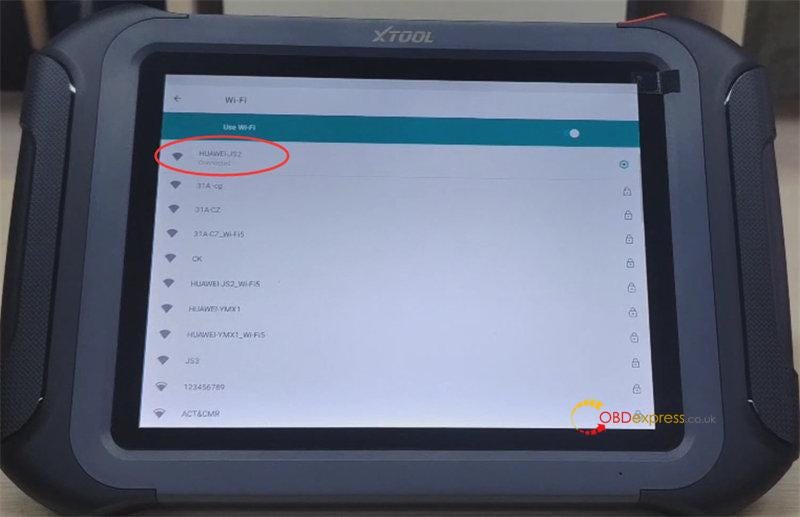
Then click "Get Started"


XTOOL D9 Pro User Registration upgrade and menu function introduction


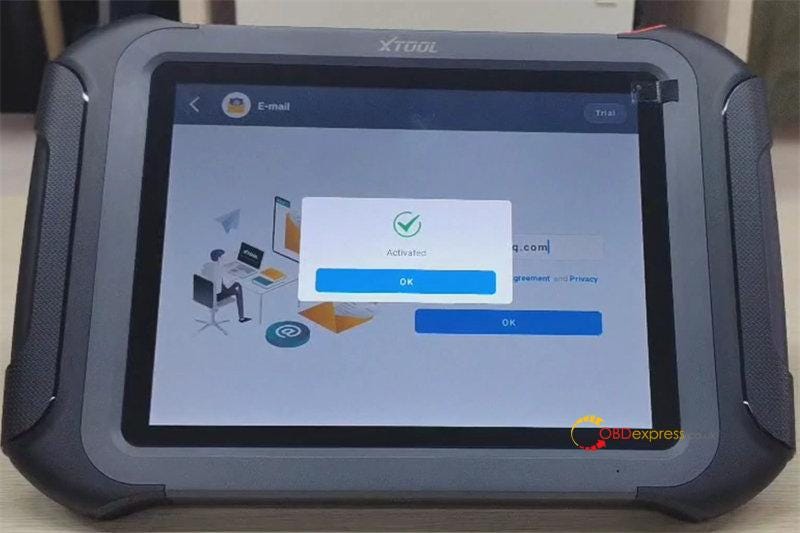
Input your email-address and accept user agreement, click "OK" to register

The scanner is activated, and it's ready to use.


XTOOL D9 Pro User Registration upgrade and menu function introduction


PART II:

Xtool D9 Pro Menu Function Display


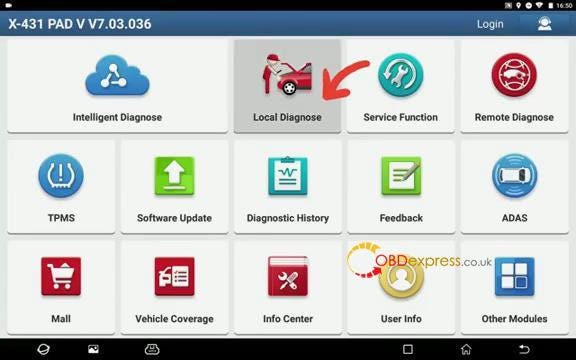
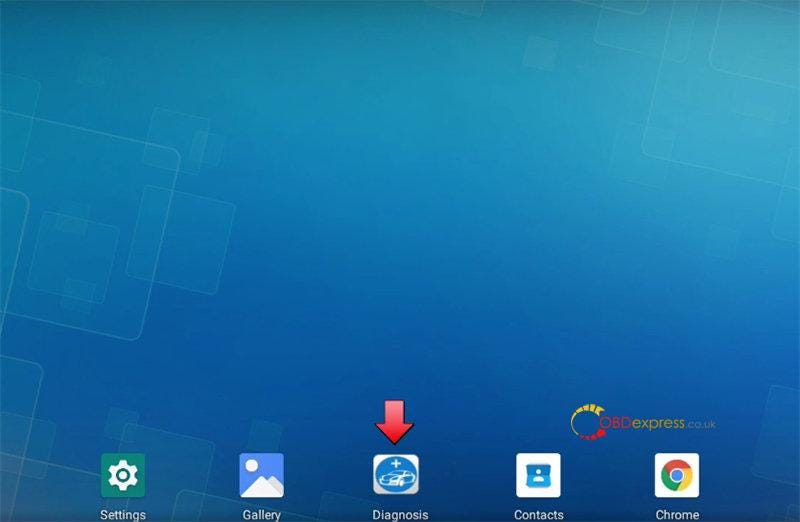
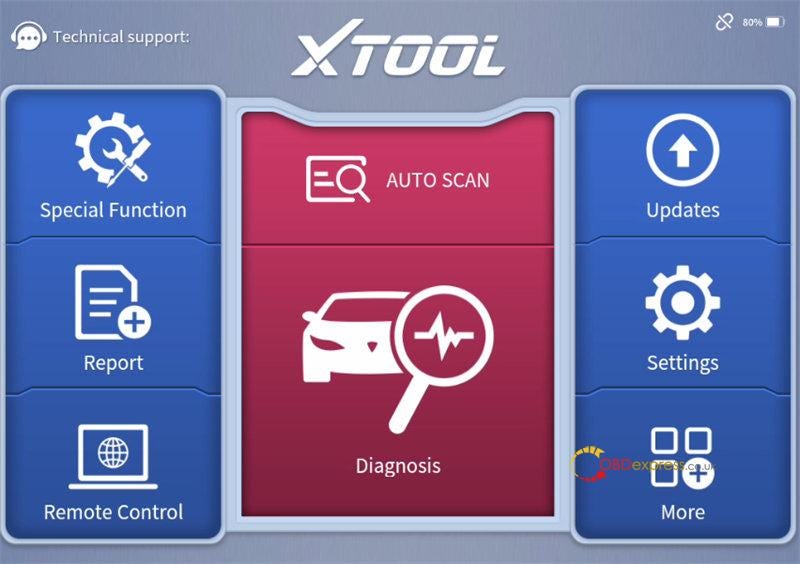
Tap "Diagnosis" to enter the main menu, and you can see 8 items on the main interface below:

Special Function, Report, Remote Control, Auto Scan, Diagnosis, Updates, Settings and More.


XTOOL D9 Pro User Registration upgrade and menu function introduction

XTOOL D9 Pro User Registration upgrade and menu function introduction


1.Special function

42+ services:

Oil Reset, Throttle Relearn, EPB, SAS Adjustment, Key programming, Instrument Cluster, Gearbox Match, BMS Reset, Injector Coding, DPF, Gear Learning, TPMS Reset, Power Balance, Language Change, Transport Mode, AdBlue Reset, Rain/Light Sensor, A/F Reset, HV Battery, FRM Reset, ADAS, Headlight, Electronic Pump Activation, Suspension, NOx Reset, Seat Match, EEPROM, ECU Configurations, Control Unit Reset, Odometer Read, ABS Bleeding, Speed Limit, Clutch Adaption, Stop/Start Reset, Write VIN, EGR Relearn, A/C Relearn, SRS, Windows Initialization, VGT Relearn, Airbag Reset, Tire Upgrade

Note: Service functions don't support all vehicles.

2.Report

Contains Diagnosis Report, Data Playback, File Manager and Data View

The file manager is for professionals only. Amateurs are not suggested to perform this function.

Internal storage, external storage and storage of diagnosis details are inside.

3.Remote Control

This function can make technician to solve your device problem easier.
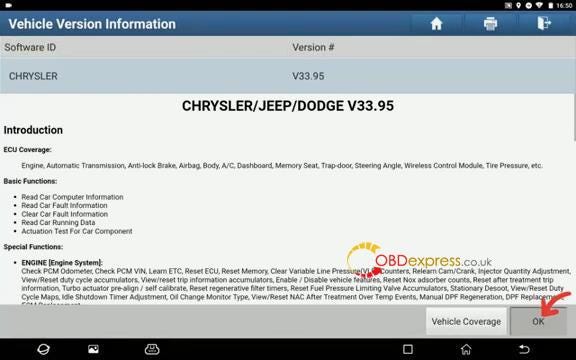
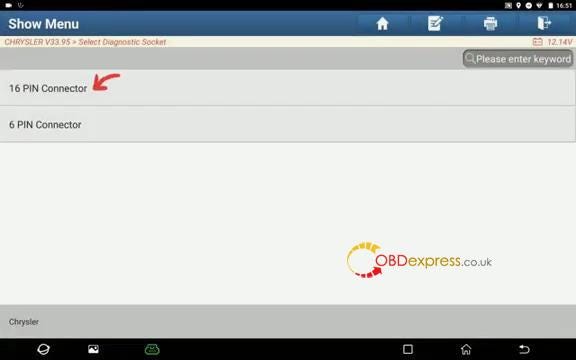
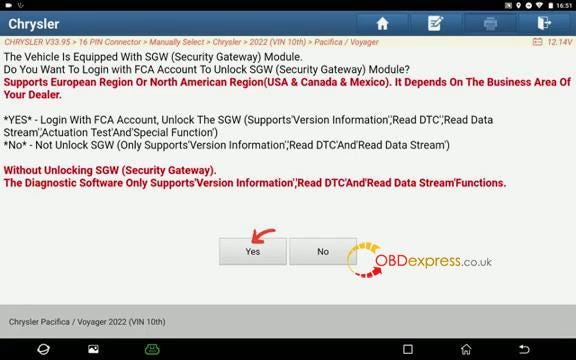
4.Diagnosis

Xtool D9 Pro vehicle coverage:

Europe: Abarth, Alfa Romeo, Astonmartin, Audi, Bentley, Benz, BMW, Bugatti, Citroen, Dacia, Ferrari, Fiat, Ford (EU), GAZ, IZH, VAZ, Jaguar, Lamborghini, Lancia, Landrover, Maserati, Maybach, Mini, Opel, Peugeot, Porsche, Renault, Rolls- Royce, SAAB, Seat, Skoda, Smart, UAZ, Vauxhall, VAZ, Volvo, VW, VW-CV, ZAZ

Aisa: (JAPAN) Acura, Daewoo, Daihatsu, Honda, Hyundai, Hyundai CV, Infiniti, Isuzu, Kia, Lexus, Luxgen, Mazda, Mitsubishi, Nissan, Nissan GTR, Perodua, Proton, Renault Samsung, Scion, Ssangyong, Subaru, Suzuki, Tlisuzu, Toyota

China: Brilliance, BYD, Changhe, Chery, Faw Audi, Faw VW, GAC Gongw, GAC Motor, Geely, Great Wall, JAC, Lifan, MG, Roewe, Saic Maxus, SHVW

Americas: Buick, Cadillac, Chevrolet, Chrysler, Dodge, Ford (USA), GM, GMC, Hummer, Jeep, Lincoln, Saturn

Australia: Ford (AU), Holden
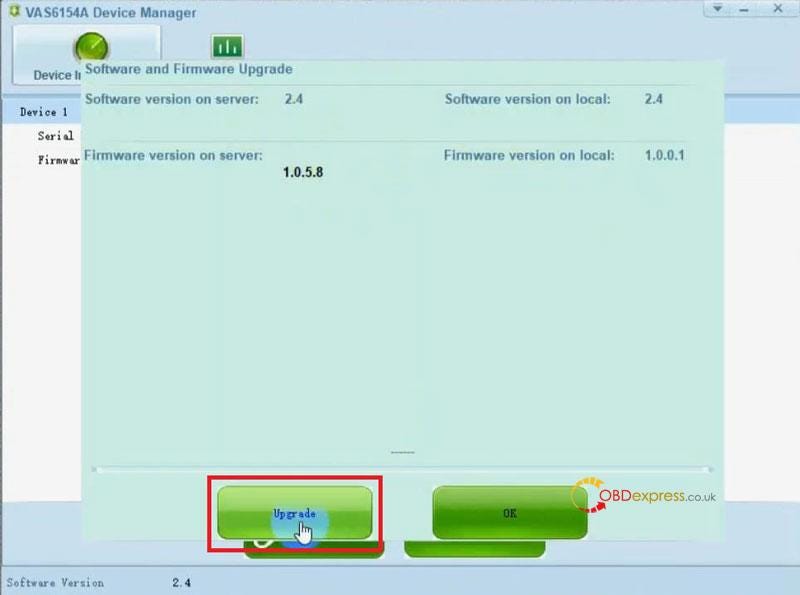
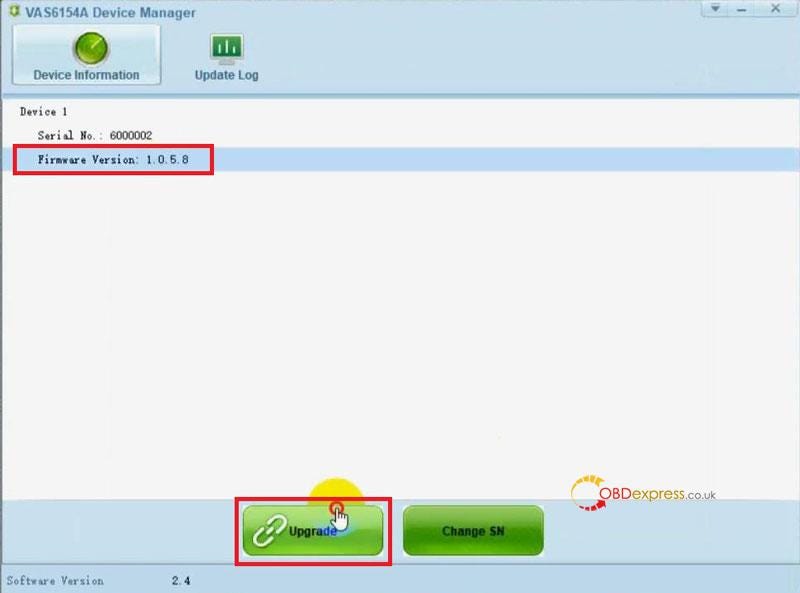
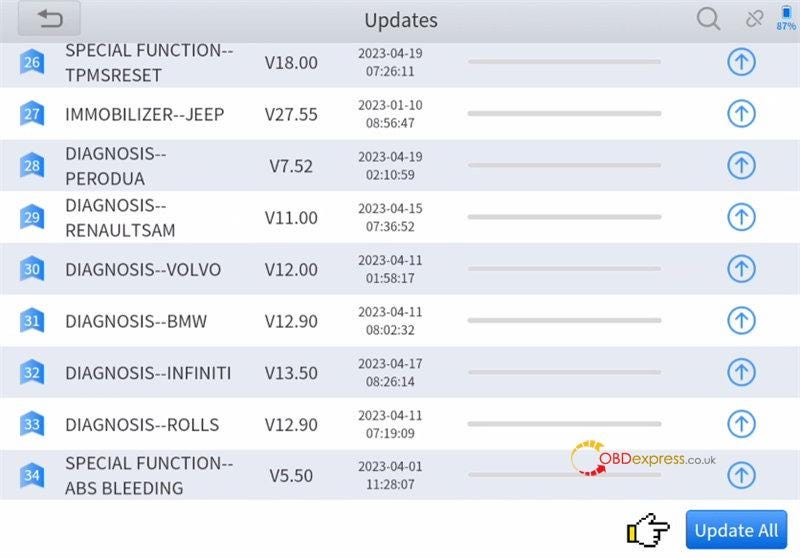
5.Update

Xtool D9 Pro diagnostic tool supports 3 years free update online via Bluetooth and WiFi.

Click "Updates" function, if there is new software for upgrade, click "Update All" at the bottom right to update directly.


XTOOL D9 Pro User Registration upgrade and menu function introduction


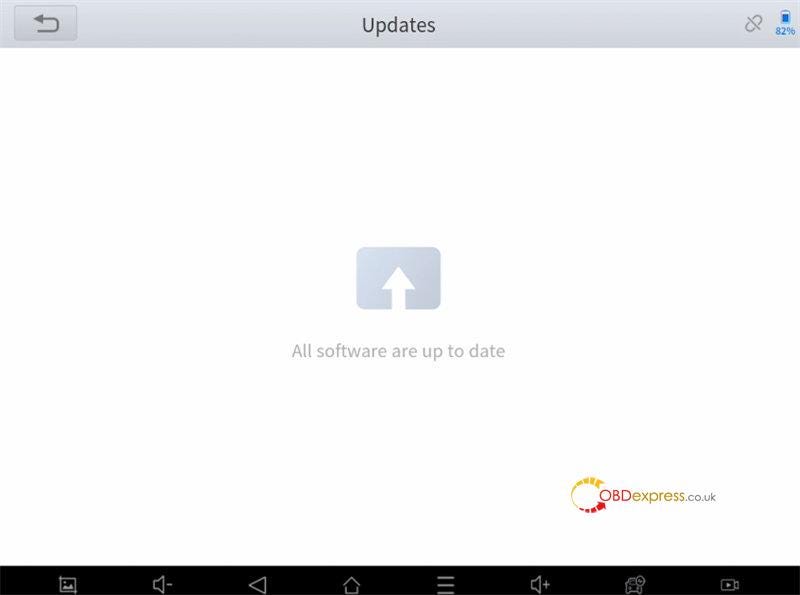
After updating, check again, then it shows "All software are up to date".


XTOOL D9 Pro User Registration upgrade and menu function introduction


6.Settings

You can see language, unit, self-test, Bluetooth, workshop information, firmware information and About.

  • Unit: Metric Units, Imperial Units, U.S Units
  • Bluetooth: display the Bluetooth connected, also can open Bluetooth setting
  • Workshop information: you can fill in company, address, website, telephone, mailbox and contact person info, and they will be displayed in the diagnosis report.
  • Firmware information: firmware name, latest firmware version and current firmware version
  • About: APP, Subscription Expiration, SN and VCI
  • Self- test:

Steps to self- test Xtool D9 Pro OBD2 Scanner:

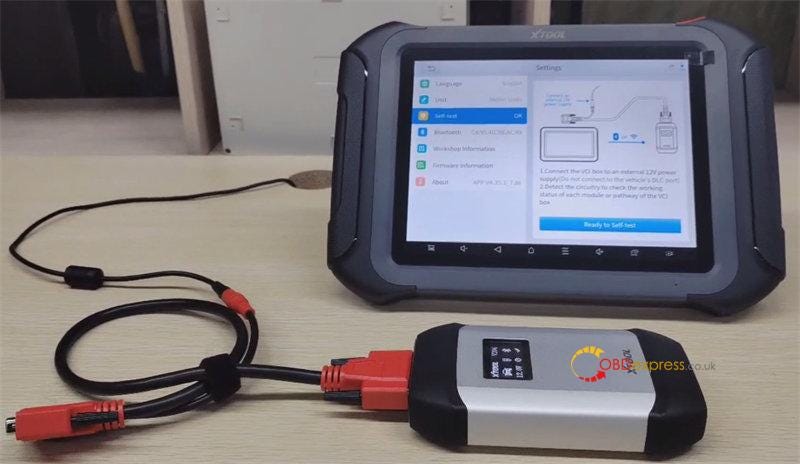
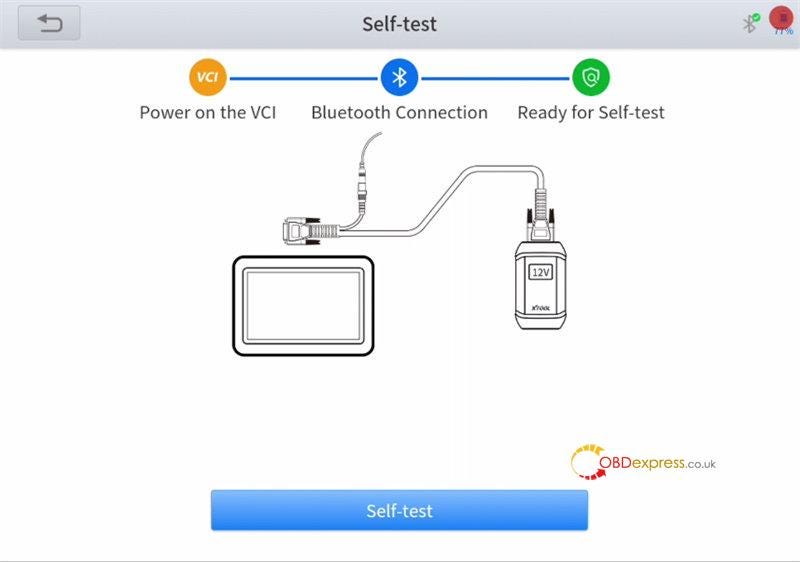
Step 1: Connect the VCI box to the external 12V power supply

Do not connect to the vehicle's DLC port

Step 2: Detect the circuitry to check the working status of each model or pathway of the VCI box

Make sure the tablet is paired with the VCI Box via Bluetooth

Click "Ready to Self-test"
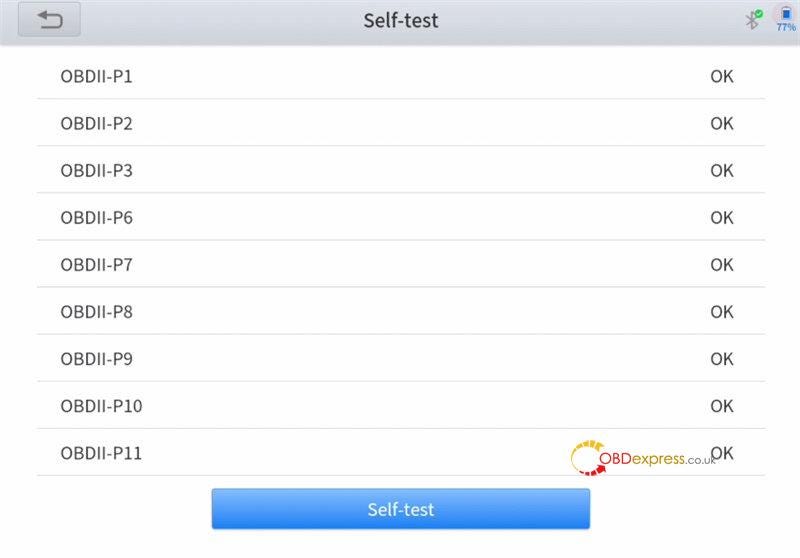

XTOOL D9 Pro User Registration upgrade and menu function introduction


Self-test is OK


XTOOL D9 Pro User Registration upgrade and menu function introduction

XTOOL D9 Pro User Registration upgrade and menu function introduction


7.More

Incl. XTOOL and Endoscope

PART III

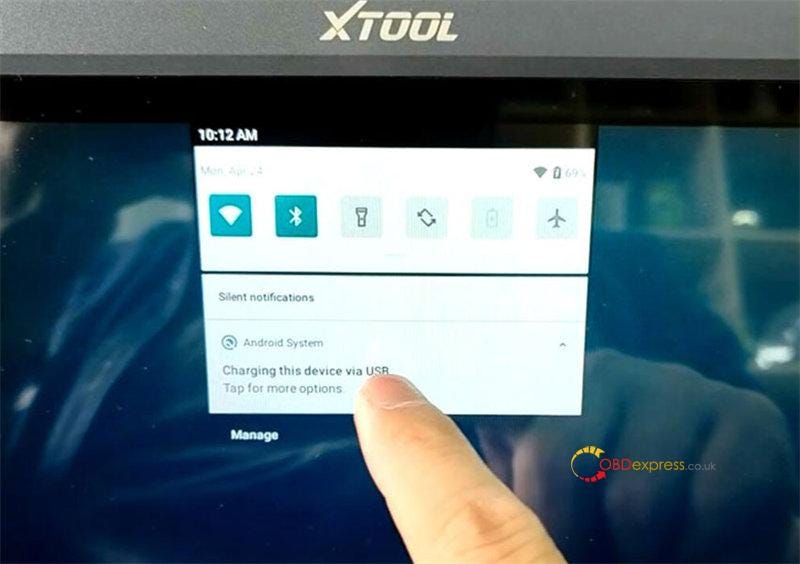
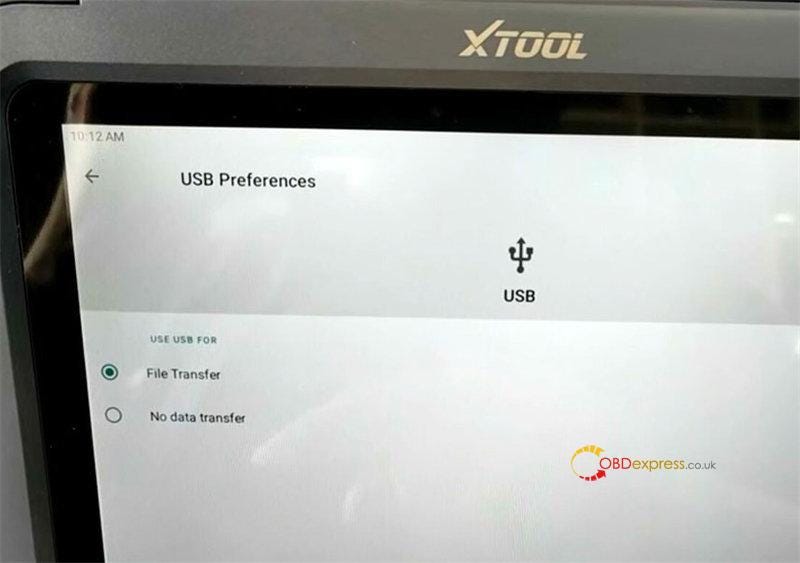
Xtool D9 Pro Export/Import Data via USB

In the Home menu, pull down main screen, and select "Charging this device via USB"

Select use USB for File Transfer, and then you can transfer file from tablet to PC.


XTOOL D9 Pro User Registration upgrade and menu function introduction

XTOOL D9 Pro User Registration upgrade and menu function introduction


Learn more:

https://www.obdexpress.co.uk/wholesale/xtool-d9-pro-diagnostic-tool.html

Monday 24 April 2023

How to Read and Write Nissan EDC17C84 TC1782 with Foxflash?

 Foxflash ECU Chip Tuning Tool can read and write Nissan Bosch EDC17C84 TC1782 EEPROM in Bench and Boot mode, but cannot via OBD currently.

Read and Write Nissan EDC17C84 TC1782 with Foxflash

1.Foxflash read/write Nissan EDC17C84 on bench

  • Pinout:

BOSCH EDC17 C84 [1782] — Renault, Nissan [Diesel]

Connect the multifunction cable as follows:

Red: +12 V (Pin D1-Q4)

Black: Ground (Pin H4)

Blue: CAN-H (Pin A1)

Orange: CAN- L (Pin A2)

White: Pin M2

Brown: Pin K3

Read and Write Nissan EDC17C84 TC1782 with Foxflash

  • Select driver:

Run foxflash Manager APP, active it and keep opening

Then run foxflash software

Select the driver to read and write ECU as below:

BENCH TRICORE>> RENAULT or NISSAN>> TC1782 — RENAULT>> EDC17 C84

NOTE:

Some EDC17C84 enter in Bench mode with the white and brown wires on pins F4 and G4. If it doesn't enter in bench Tricore mode with the above pinout, please try again by connecting it as follows:

Red: +12 V (Pin D1-Q4)

Black: Ground (Pin H4)

Blue: CAN-H (Pin A1)

Orange: CAN- L (Pin A2)

White: Pin F4

Brown: Pin G4

Read and Write Nissan EDC17C84 TC1782 with Foxflash

2.Foxflash read/write Nissan EDC17C84 in boot mode

BOSCH EDC17 C84 [TC1782 INT.F.] — Renault, Nissan

Run foxflash Manager APP, active it and keep opening

Then run foxflash software

Step 1: Password search

Connect the pinout with multifunction cable as below:

Red: +12 V (Pin D1-Q4)

Black: Ground (Pin H4)

Blue: CAN-H (Pin A1)

Orange: CAN- L (Pin A2)

White: Pin F4

Violet: Pin G4

Read and Write Nissan EDC17C84 TC1782 with Foxflash

Select driver>> TOOLS BOOT MODE>> INFINEON TRICORE Tool Password>> PASSWORD BFT

Click on "Find Password" and follow the software messages to complete the process

NOTE:

If the password was found, go directly to read and write the control unit in Boot mode.

Otherwise, try again with the driver PASSWORD BFT connecting the white and violet wires on the PCB:

Read and Write Nissan EDC17C84 TC1782 with Foxflash

Step 2: Read and Write ECU

Follow the pinout and the boot below to connect foxflash ECU Programmer and ECU with the multifunction cable:

Red: +12 V (Pin Q4)

Black: Ground (Pin H4)

Green: Ignition (Pin D1)

Blue: CAN-H (Pin A1)

Orange: CAN- L (Pin A2)

Read and Write Nissan EDC17C84 TC1782 with Foxflash

The select the driver below to read and write ECU:

TOOLS BOOT MODE>> INFINEON TRICORE Boot>> SAK TC1782

Done!

In addition to Bosch EDC17C84 ECU, Foxflash ECU Tool also supports many Nissan ECUs.

Such as Delphi DDCR, DCM3.4, Siemens EMS3232, Bosch EDC15C2, EDC15C3, EDC17C11, EDC17C42, EDC17C45, EDC17C58, EDC17C84, EDC17CP51, SID305, SID307, SID309, SID310, EDC16, EDC16+, EDC16CP33, EDC16CP36, EDC16C8, EDC16C36, EDC16C41, MD1CS006, EMS3125, EMS3132, EMS3155, CM2150, CM2150E, MEC31–940, MEC35, MEC37–650, MEC37–900, MEC37, MEC940-xxx, MEC107–209, ME17.9.5, ME17.9.51, EC92, MS6.4, etc.

Read and Write Nissan EDC17C84 TC1782 with Foxflash

Read and Write Nissan EDC17C84 TC1782 with Foxflash

Read and Write Nissan EDC17C84 TC1782 with Foxflash

For more ECU TCU models, check foxflash ECU TCU Support List (pdf)

VNCI 6154A Guide: Firmware Update, USB Connection, Change SN

 VNCI 6154A is a OEM diagnostic adapter for VW group vehicles, and compatible with latest ODIS software. This is a VNCI 6154A VAG Diagnostic Tool instruction guide on how to update firmware, connect by USB and change serial number. Read the article carefully to learn how to do.

How to update VNCI 6154A firmware?

Run VNCI 6154A Device Manager >> Upgrade

If there are new software releases, continue clicking "Upgrade".

After the update is completed, VNCI 6154A will emit a beep sound, Click "OK".

Selected latest firmware version >> Upgrade >> OK

VNCI 6154A Guide - Firmware Update, USB Connection, Change SN

VNCI 6154A Guide - Firmware Update, USB Connection, Change SN

VNCI 6154A Guide - Firmware Update, USB Connection, Change SN

How to connect VNCI 6154A via USB?

Connect VNCI 6154A and computer via USB, enter 192.168.13.69.

Select language >> Connectivity >> WLAN infrastructure >> Selected "WLAN operating mode after startup">> Type WiFi name in SSID, password in Key >> Accept

Make sure to connect computer and device in the same WiFi.

VNCI 6154A Guide - Firmware Update, USB Connection, Change SN

If VNCI 6154A is connected to the car OBD power supply and unable to connect via USB. At this time, we can use AP connection(WiFi) method.

Details refer to:

How Configure VNCI 6154A VAG ODIS Tool Connection?

How to change VNCI 6154A Serial Number?

Run VNCI 6154A Device Manager>> Change SN >> Enter New SN: 6000490 >> Change SN

The Serial Number has been changed.

Done.

Notification:

  • PC must be online to change SN.
  • You must have at least 1 token to change SN.
  • You can contact your dealer to charge token.
    1. VNCI 6154A Guide - Firmware Update, USB Connection, Change SN

      VNCI 6154A Guide - Firmware Update, USB Connection, Change SN

      VNCI 6154A Guide - Firmware Update, USB Connection, Change SN

      www.obdexpress.co.uk


      Install JLR SDD V164 on Win7 or Win10

       Here is the guide to install JLR SDD V164 software on Win7/8/10 32/64 bit for Jaguar and Land rover 2005–2017 diagnosis.

      JLR SDD V164 compatible devices:

      Godiag GD101 J2534 Passthru Diagnostic Cable, JLR Mangoose SDD Pro, VXDIAG VCX SE JLR DOIP and VXDIAG VCX NANO JLR, etc

      Free download V164 JLR SDD software

      For more software info, click here to view.

      Main installation steps:

      Step 1: install SDD_164.00.001.FULL

      There are three items in the JLR SDD 164 folder: Driver, SDD Patch, and SDD_164.00.001_FULL

      Install JLR SDD V164 on Win7 or Win10

      Open SDD_164.00.001_FULL application

      Choose the setup language

      Install JLR SDD V164 on Win7 or Win10

      Accept the terms of the license agreement

      Read the SDD and Firewall compatibility

      Select the destination drive>> language

      If the Adobe Reader date is expired, then the system will prompt "The installed level of Adobe Reader of date is out of date and in order to use SDD as intended this needs to be updated. For further details please navigate to the system information page."

      Click OK to continue

      Then start to install

      Install HV Safety installer

      Install JLR SDD V164 on Win7 or Win10

      Install MOXA UPort 1110/1130/1150 Windows driver

      Install JLR SDD V164 on Win7 or Win10

      Wait a moment till the JLR SDD V164 is installed successfully.

      Before you can use the program, you must restart your computer. Just select restart now or later, and then click "Finish"

      Install JLR SDD V164 on Win7 or Win10

      Step 2: install SDD Patch

      Extract SDD Patch folder

      There are 5 items inside:

      • SDD.Offline.exe
      • SDD.Offline.Fix.2020.7.14.exe
      • SDD.Online.exe
      • read me.txt
      • 说明 (instruction).txt

      Install JLR SDD V164 on Win7 or Win10

      Click JLR.SDD.Offline.exe, and you will get a JLR.SDD.user.txt which contains user ID and password

      Install JLR SDD V164 on Win7 or Win10

      Then you can run JLR SDD program with them to diagnose vehicles.

      Install JLR SDD V164 on Win7 or Win10

      Install JLR SDD V164 on Win7 or Win10

      If the communication device status is not ok, and the VCM is disconnected, run JLR.SDD.Offline.Fix.2020.7.14.exe, and the problem can be solved soon.

      Install JLR SDD V164 on Win7 or Win10

      Install JLR SDD V164 on Win7 or Win10

      www.obdexpress.co.uk

      OBDSTAR DC706 Clone Renault EMS3120 ECM by Boot

        Question: Is it possible to clone Renault Continental EMS3120 TC1738 ECM by OBDSTAR DC706 ? Obdexpress.co.uk engineer replied: Yes. ...