Car model and year:
2002 - 2005 Porsche 996 that had the OBC but not cruise control.
Pre 2002 the wiring is very different t…it needs to be fed to the DME in the rear of the car rather than the instrument cluster (It’s MY2001 onwards I believe).
Time to use:
From start to finish it took me around 3 hours.
This included reading my instructions, re-reading my instructions, taking pictures and taking my time. I also haven’t factored in the time for coding the DME once the work has been completed.
The list below is a high level grouping of what I did, and the order I did it.
- Find and buy all the parts…know exactly what you’re doing with each
- Remove the instrument cluster
- Remove the steering wheel
- Remove the old stalk unit
- Clean the now-visible parts of the dashboard (you find a lot of dust and dirt)
- Put together the wiring
- Fit the new stalk unit
- Wire up the new stalk unit to the instrument cluster
- Re-fit the steering wheel
- Re-fit the instrument cluster
- Connecting the new stalk unit to the fuse-box
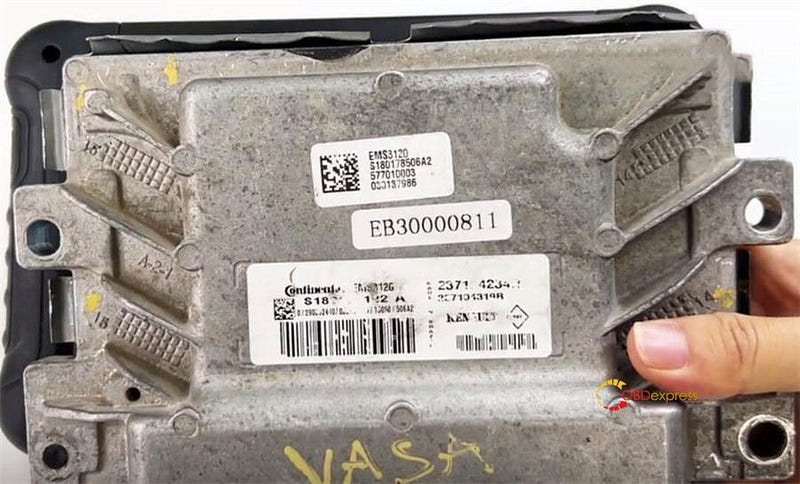
- Coding the DME
Step 1 – What you’ll need to buy
All parts and prices were correct as of September 2016 and were purchased from OPC Bournemouth and Breeze VW Poole.
Part Name: 4-Stalk cluster (Indicators, Wipers, OBC, Cruise)
Part Number: 996-613-219-10 EWC
Quantity: 1
Price: £202 (£168.97 + VAT)
Part Name: Cruise control cap for stalk cluster
Part Number: 9
Quantity: 1
Price: £4.70
Part Name: Wiper/Cruise stalk cluster grommet
Part Number: 9
Quantity: 1
Price: £9.97
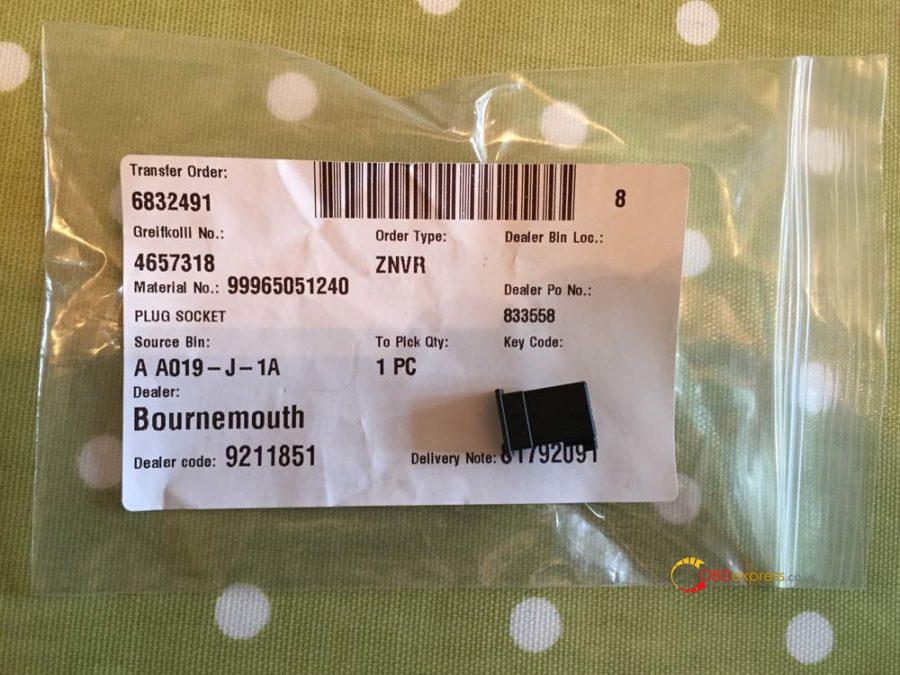
Part Name: Cruise stalk cluster wiring connector
Part Number: 999-650-512-40
Quantity: 1
Price: £0.07p
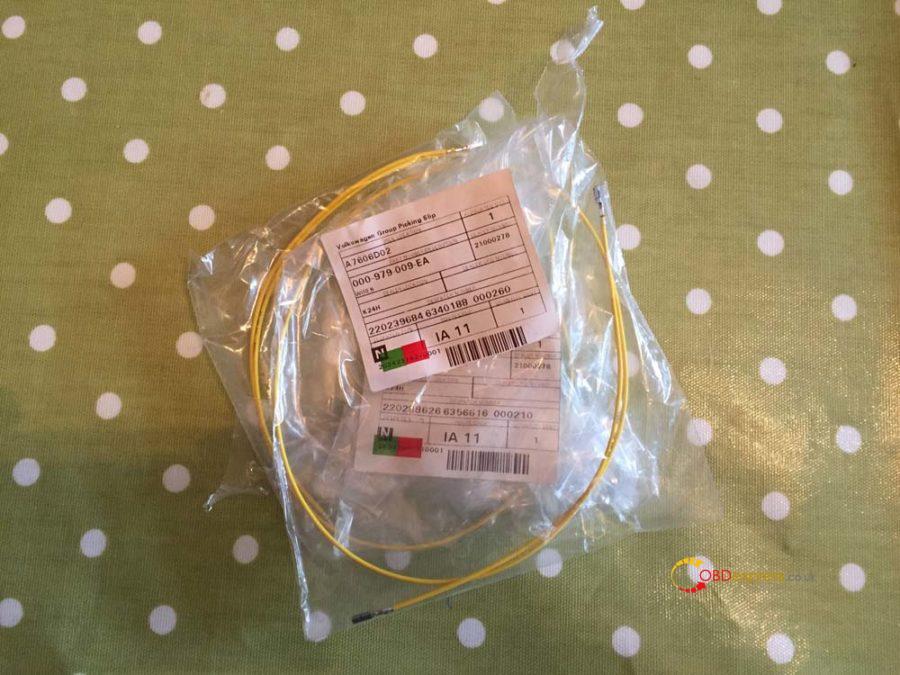
Part Name: VW repair wires (Yup from VW)
Part Number: 000-979-009 EA
Quantity: 4
Price: £20.16 (£5.04 each)
Part Name: 22-gauge wire
Quantity: 1m
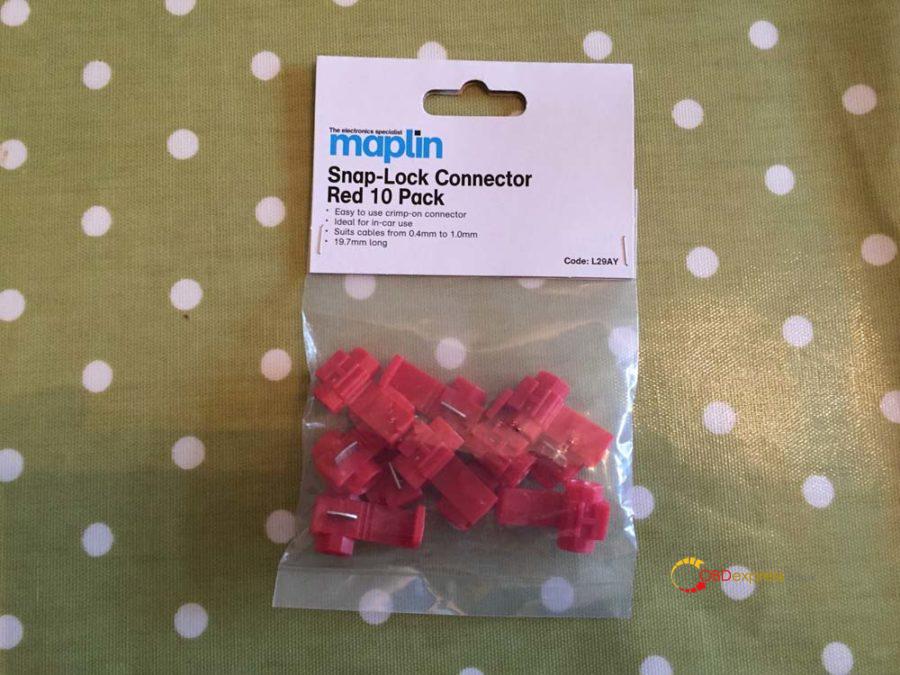
Part Name: Snap-Lock connectors
Quantity: 2
Price: £2.39 for 10 from Maplin
DME coding by OPC: £66
Total price for the project: £305.29 (£239.29 if you can do the coding yourself)
You’ll need to have the following tools:
- 24mm socket
- T30 torx
- T20 torx
- T10 torx
- Philips screwdriver
- Blunt knife
- Wire cutters
[So here’s the picture of all the part’s (excluding the 1m wire)
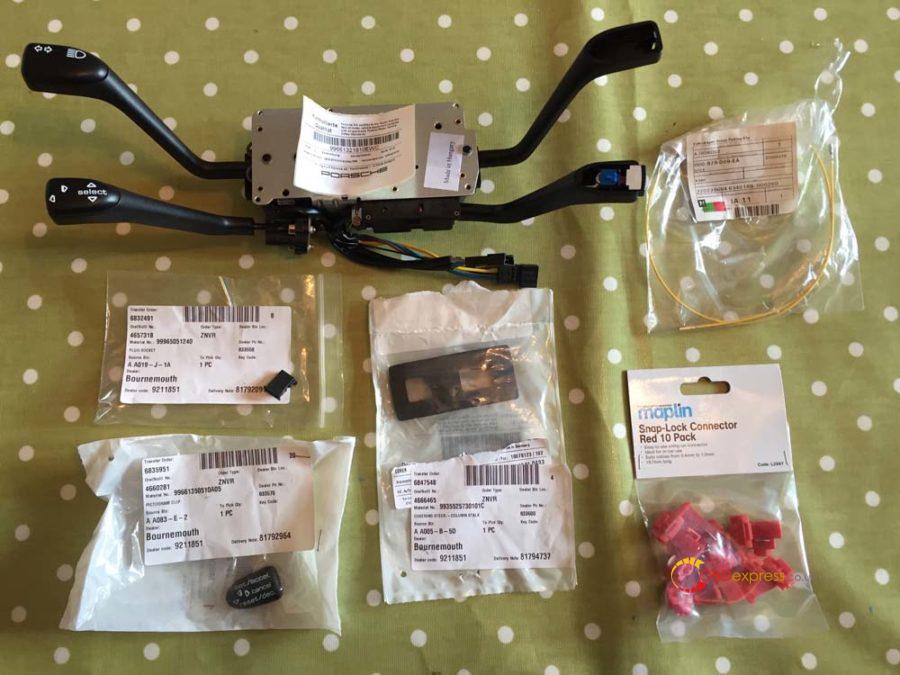
And here’s a close up of each part:
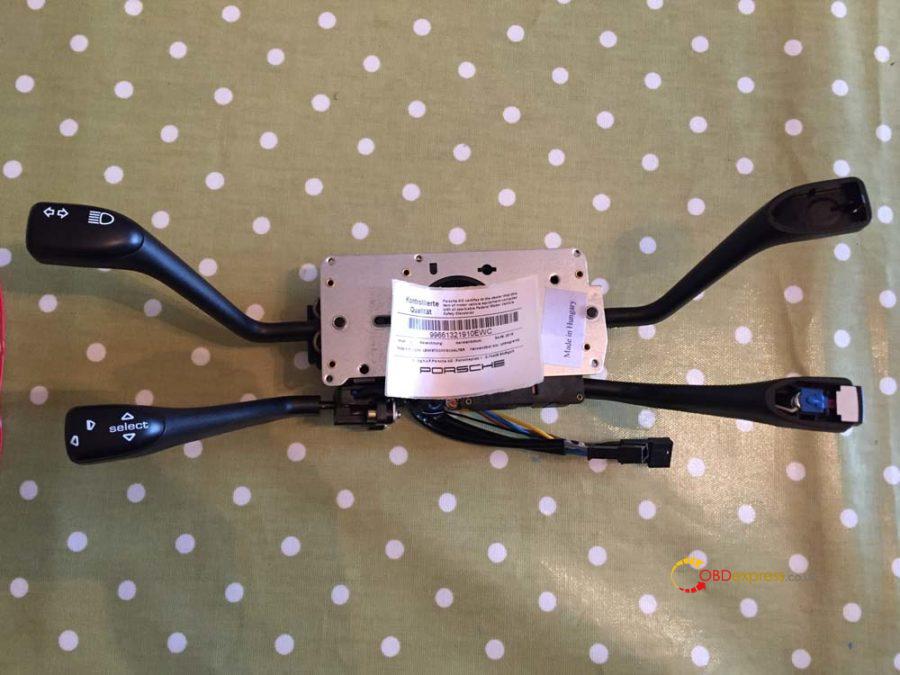
The 4-Stalk cluster (Indicators, Wipers, OBC, Cruise). You’ll notice it doesn’t come with the cruise cap or the wiper cap so you can transfer the wiper crap from your old stalk cluster.
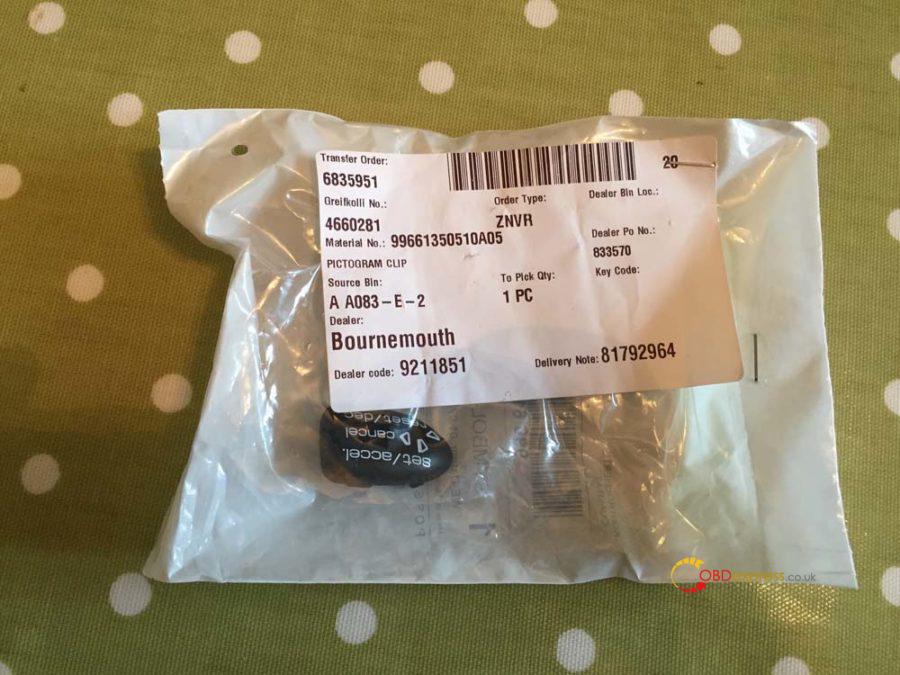
Cruise control cap for stalk cluster.
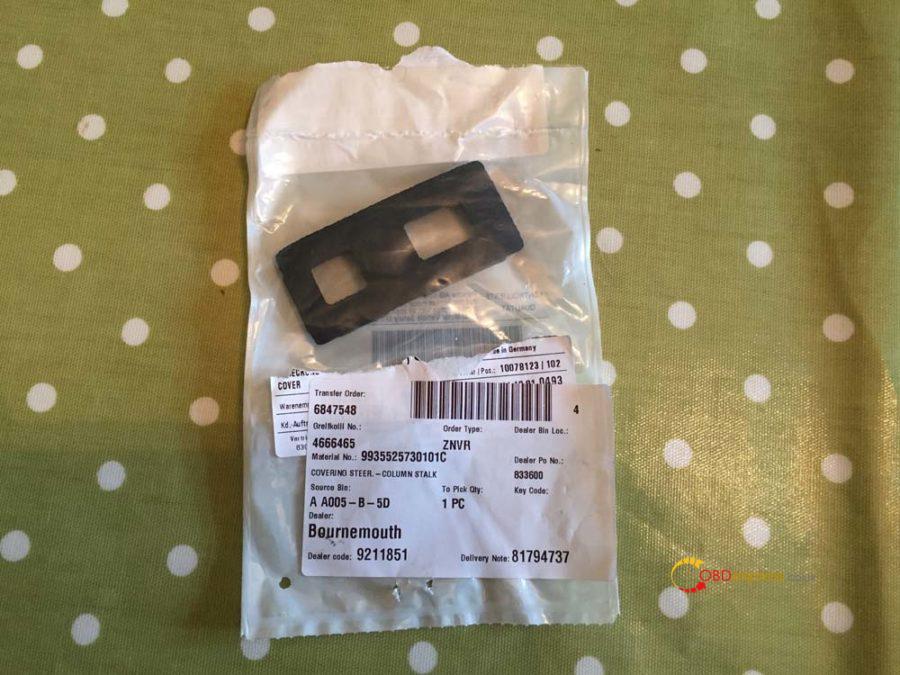
Wiper/Cruise stalk cluster grommet. If you don’t want to buy the grommet, when you take the old one out you’ll see there is a square mark you can cut along…saves a few quid.
Cruise stalk cluster wiring connector.
VW repair wires – They will generally have these in stock as they’re a fairly common part.
Snap-Lock connectors from Maplin.
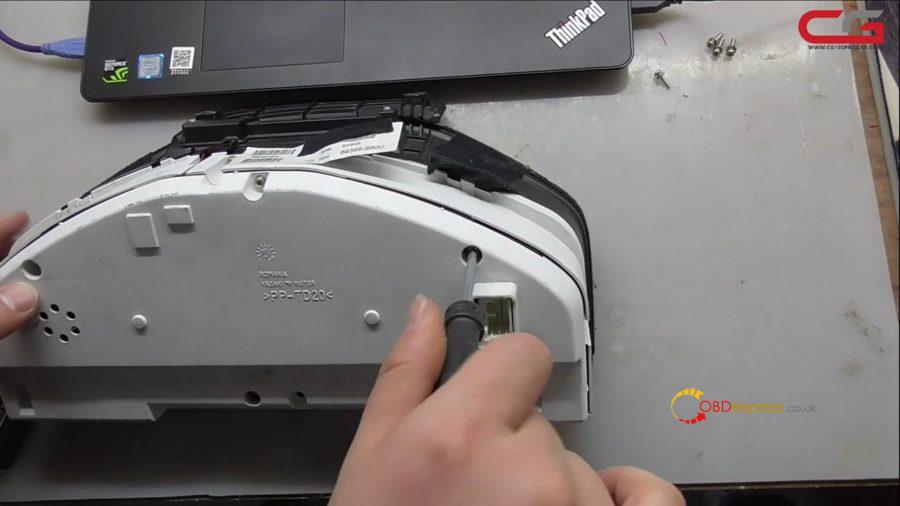
 Step 2 – Removal of the Instrument Cluster
Before you begin make sure you disconnect the battery and leave it at least 15-20 min to ensure the airbag’s have completely disengaged. Put the key in the ignition and turn it all the way but do not start the engine, then disconnect the battery. This will prevent the alarm from sounding. Leave the key in the ignition until you have finished and are ready to re-connect the battery. It’s also worth mentioning and may seem like common sense but leave the frunk open otherwise you lock yourself out of the battery and it’s a faff to get back in.
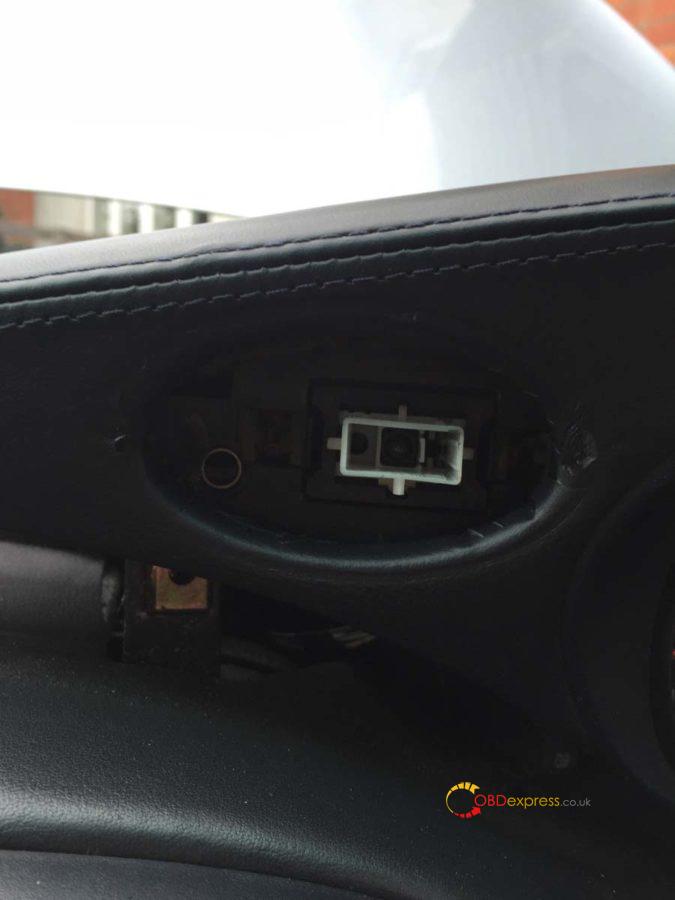
To remove the instrument cluster there are two torx screws you need to undo. One is behind the microphone on the right and the other is behind the hazard light on the left.
If you use a blunt knife (with a microfiber cloth under so you don’t damage the dash) you should be able to lift the microphone out and you’ll see the screw at the back. Don’t worry if the screw falls, there is enough stuff to stop it disappearing into the cluster. I believe these screws were the T20 torx screws.
Push the hazard light button in so it pops out and you can then pull the button out of its housing. Then you should be able to remove the button surround, there are two clips inside the surround you need to push in when pulling it out.
Once you’ve removed the hazard light and surround you’ll see the torx screw in the bottom left corner:
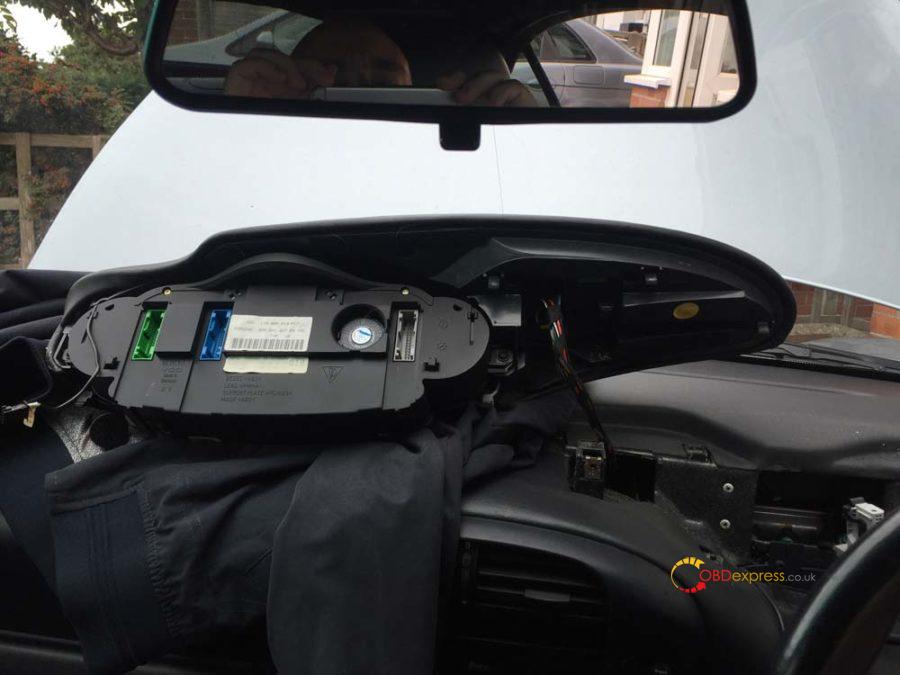
Once you’ve undone the two screws just lift the instrument cluster upwards. You may need to use a little force (not too much) and give it a slight wiggle. It’s also at this point you’ll find any missing parking tickets…I found a valet parking ticket for the Lanesborough hotel (from the cars previous owner unfortunately).
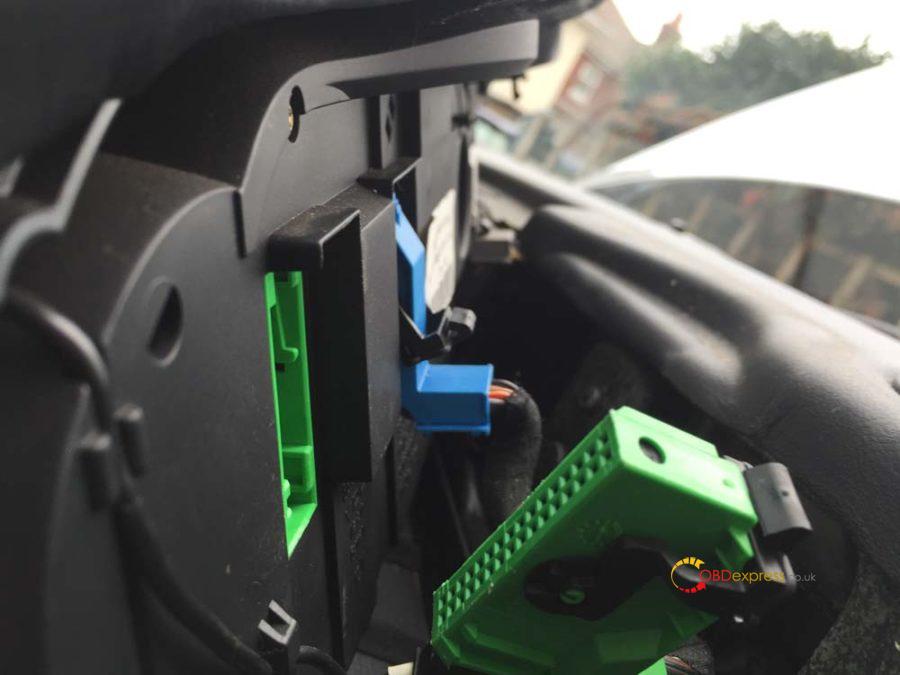
Once it’s free you’ll find 3 coloured plugs in the back, green, blue and gray. You’ll also find a connection for the hazard switch and the microphone. You only need to unplug the green, blue and gray connectors as well as the microphone…leave the hazard plug in.
Here you can see the green and blue cables and in-between them the microphone connector.

These disconnect by pushing in the clip in the middle and then sliding the black bar all the way to the top. Click the bar in place at the top and the connector will pop out.
Put some cloths or sheets across the dash and swivel the instrument cluster across and out of the way.
The gray connector is the only one we’ll be working with.
 Step 3 – Removal of the steering wheel
We firstly need to remove the center piece of the steering wheel, the airbag and horn. On the back of the wheel just in front of the stalks you’ll find two holes with spring-loaded screws. These are T30 torx screws and when undone should not come out.

You should be able to lift the air bag out carefully. At this point I rested it on my knee and with the blunt knife carefully lifted the yellow connector out. Place the airbag unit to one side with the Porsche crest facing upwards.
Disconnect the two spade connectors you’ll see on the next picture.
Draw a line with a marker pen down the center nut to mark its position. This is to make sure when you put it back together it goes back in the same place.

Using a 24mm socket undo the wheel nut. You will find the steering wheel wants to turn so carefully hold it in place with one hand whilst you undo it (You’ll notice at this point I hadn’t undone the two spade connectors).
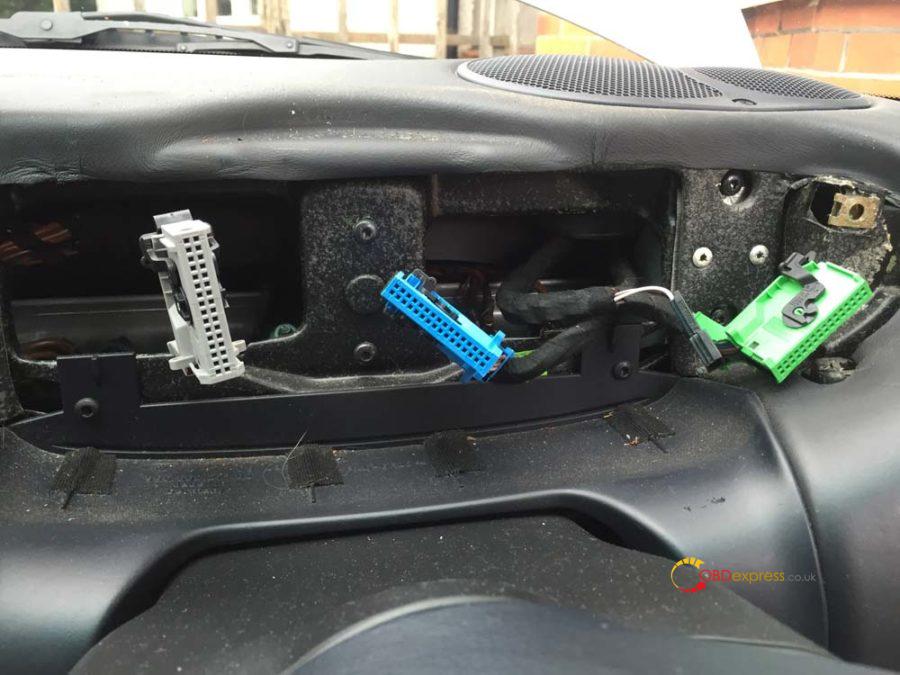
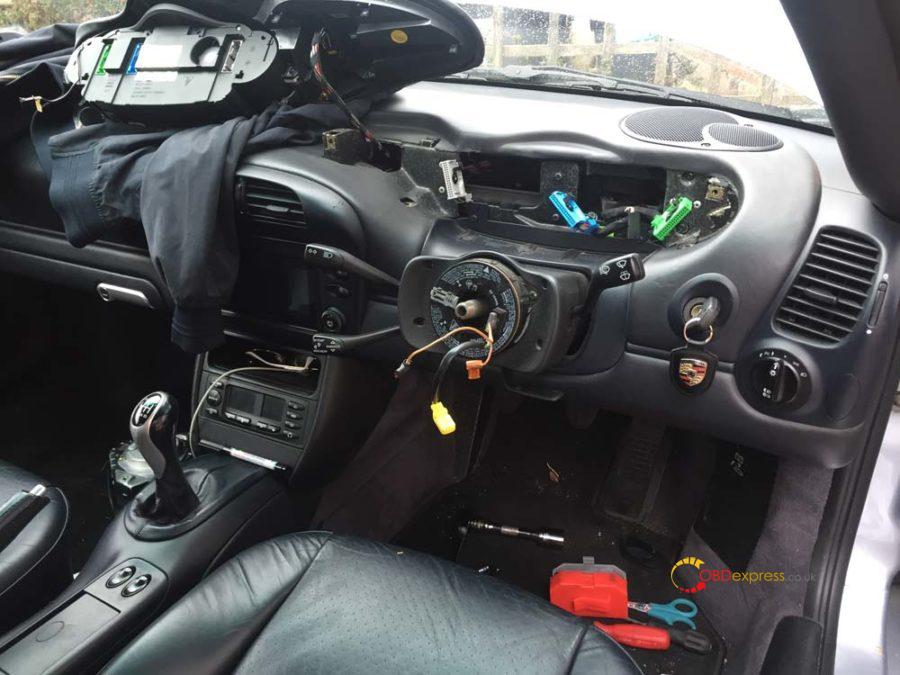
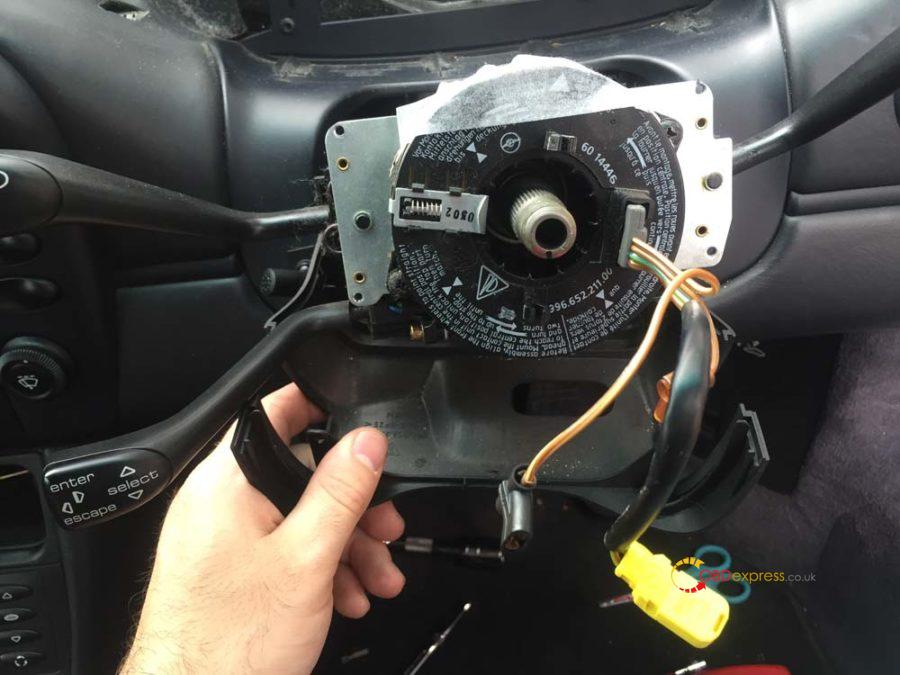
This should be the current state of your dash.
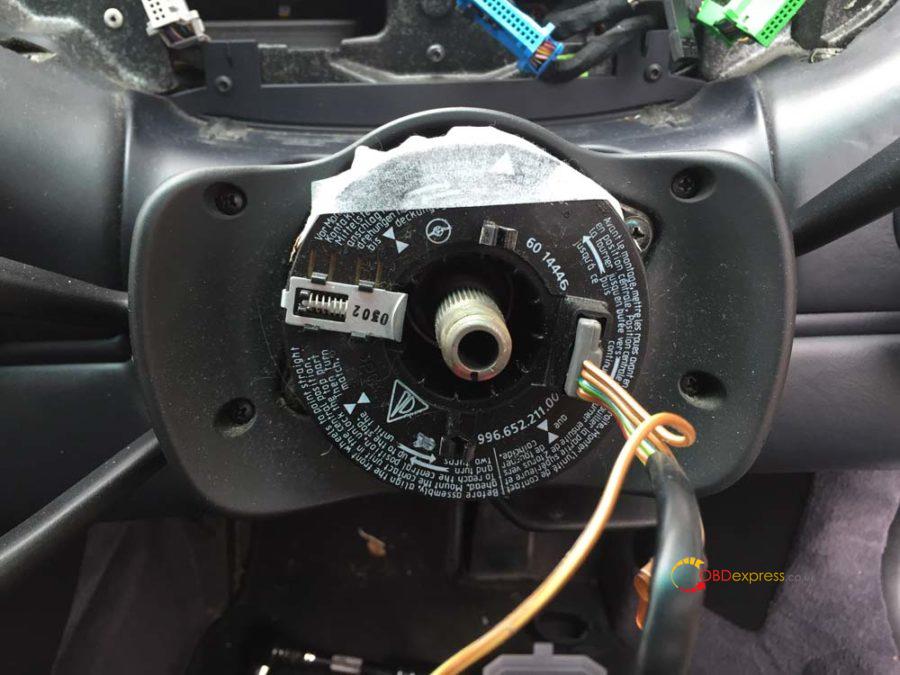
Tape the clock-spring connector unit to stop it moving around. Be careful of the two plastic prongs, if you snap these it’s an expensive part to replace. Undo the 4 screws and remove the faceplate. You can also undo the two screws securing the clock-spring connector unit at this point or wait until after removing the steering column panels.
Here’s a helpful video for removal of the steering wheel to make some of that a bit clearer (it’s not my video).
https://youtu.be/hux78ZoPcAI
Step 4 – Removing the stalk cluster
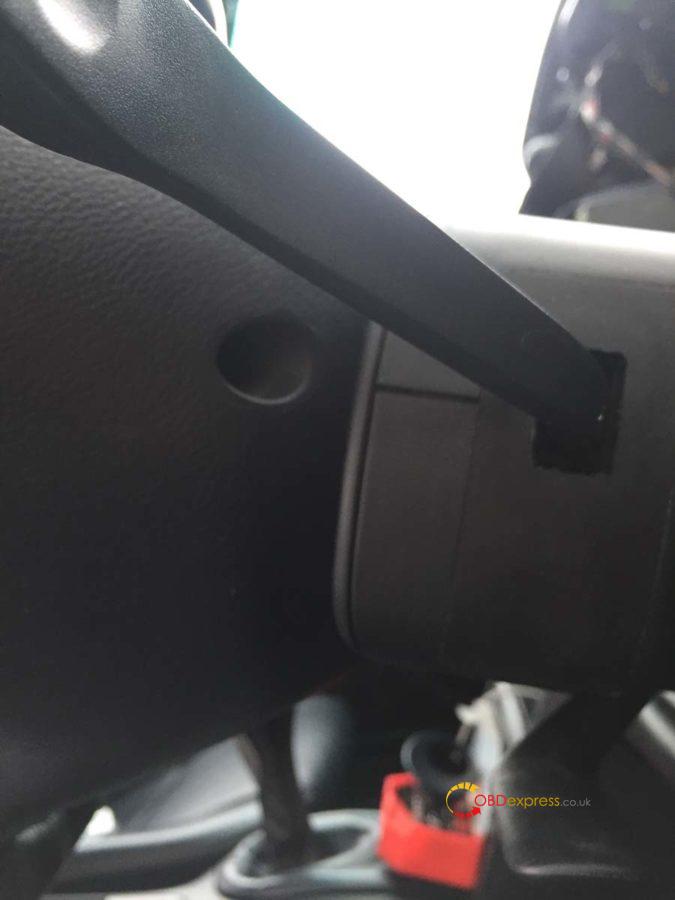
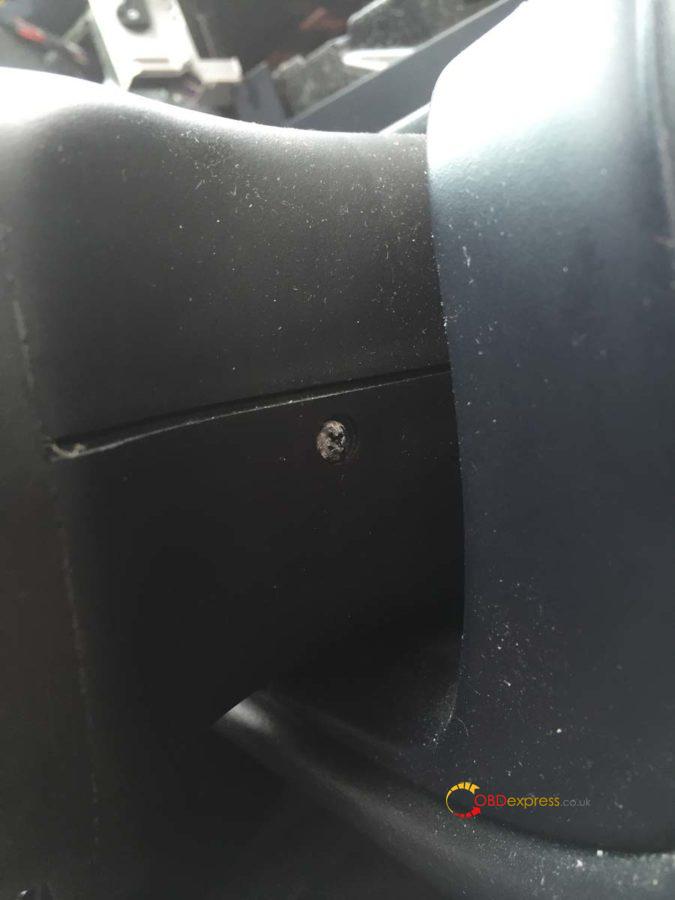
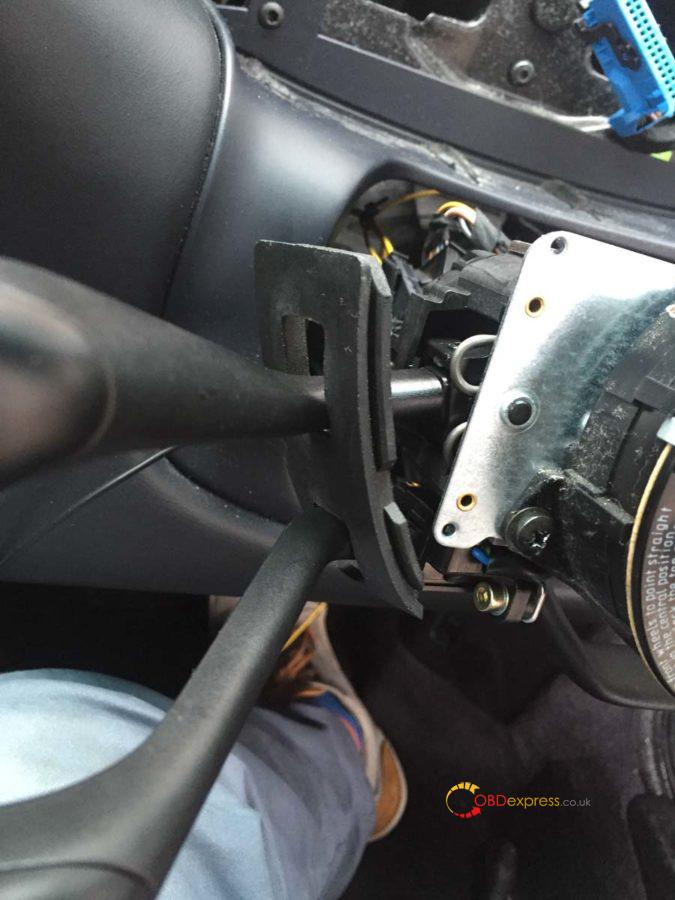
Remove the two small T10 torx screws on either side of the steering column.
Lift the top away first and put it to one side.
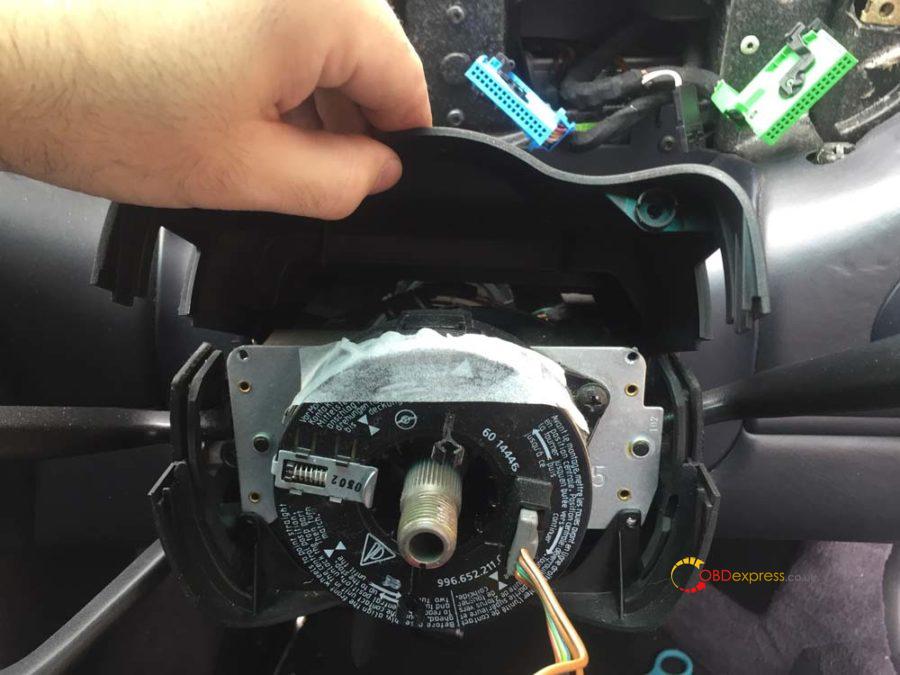
Now start to remove the rubber grommets that the indicator and wiper stalks feed through. You’ll more than likely need to move the indicator down and the OBC (if you have it) up to pull it off.
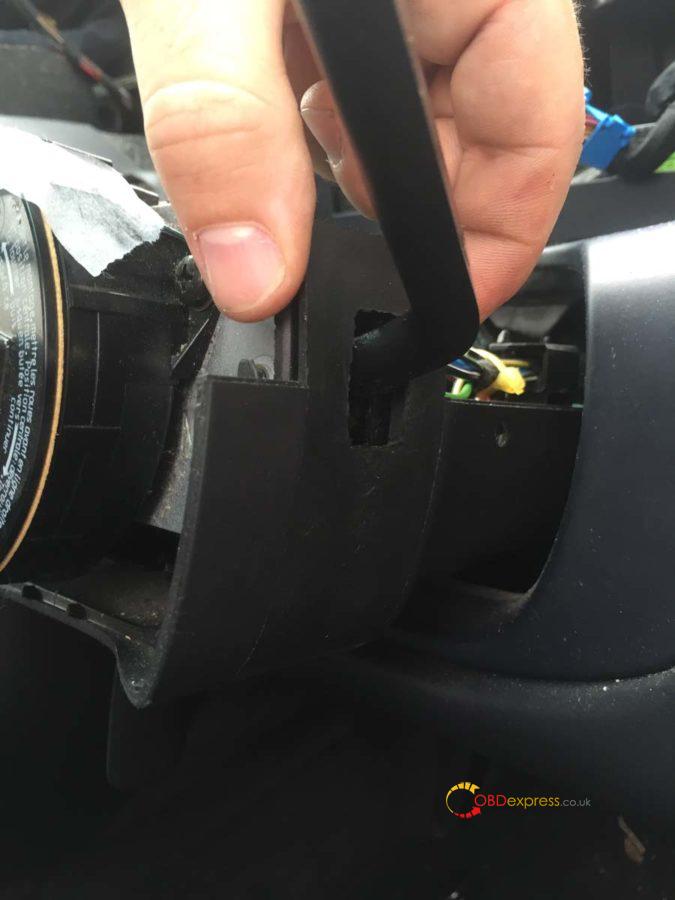
Once both grommets are off you can remove the lower panel.
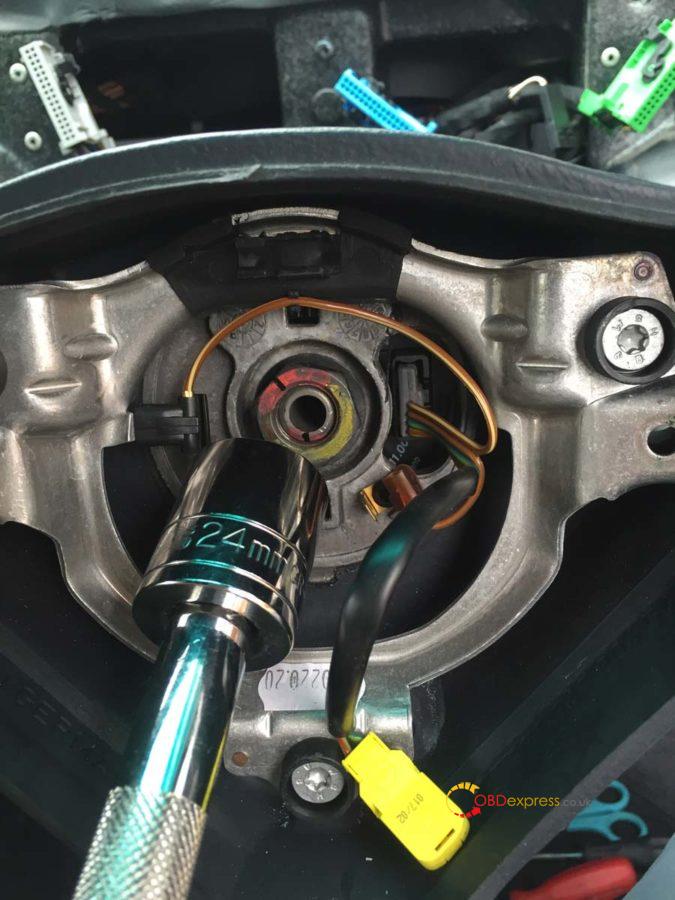
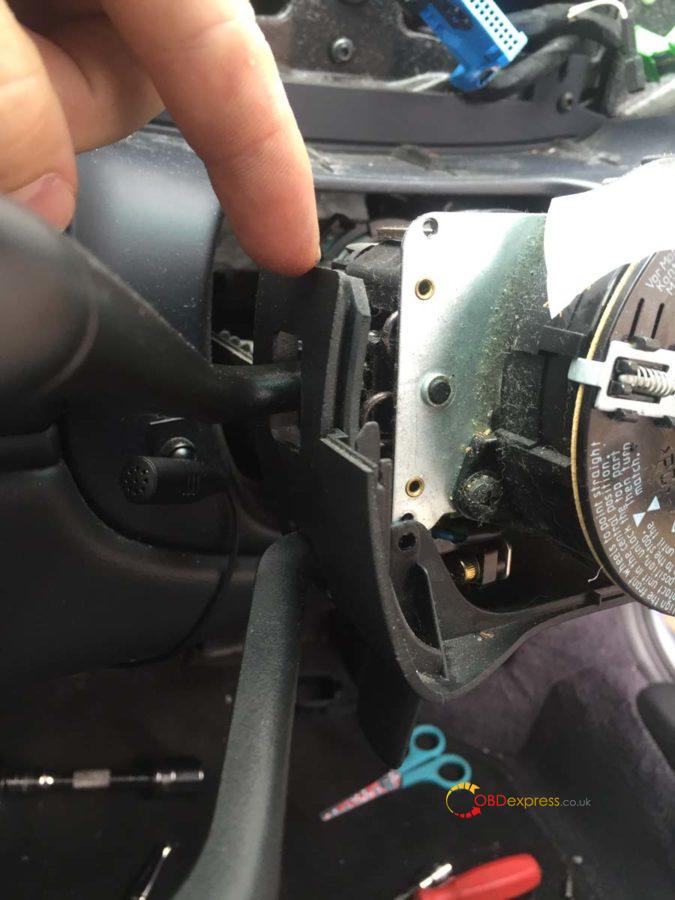
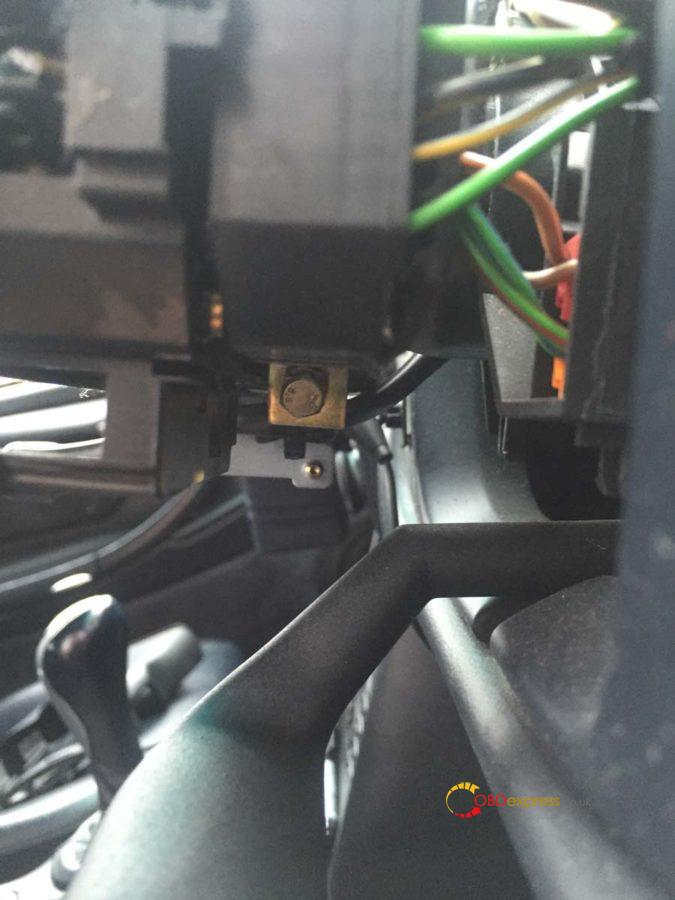
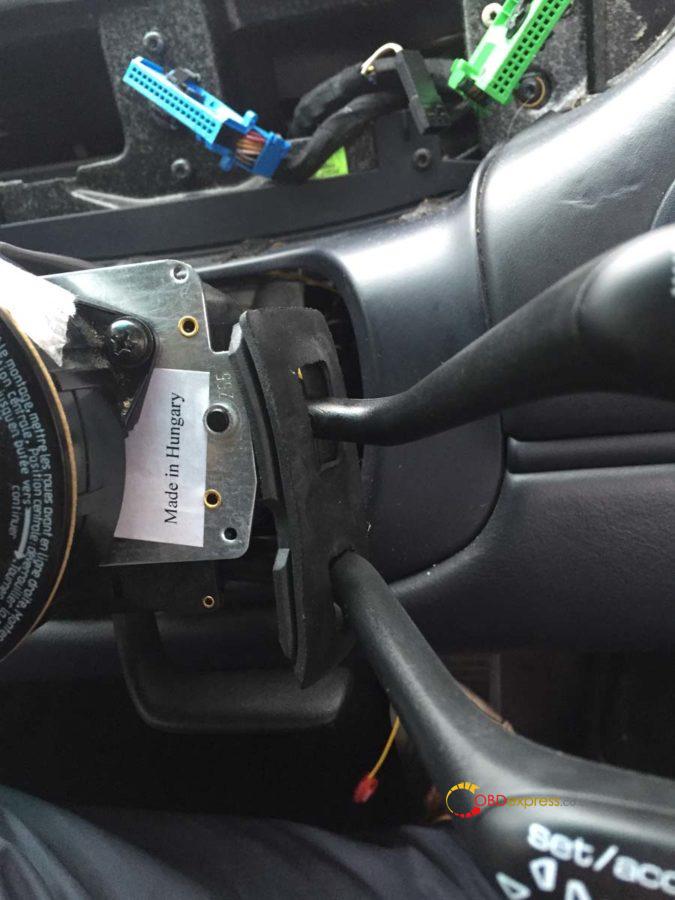
Measure the position of your current stalk cluster to the end of the steering shaft. It should be 55mm. Mark this position on the shaft as we’ll need to put the new stalk cluster at the same point. Now loosen the bolt you can see in the image below, don’t undo it fully.
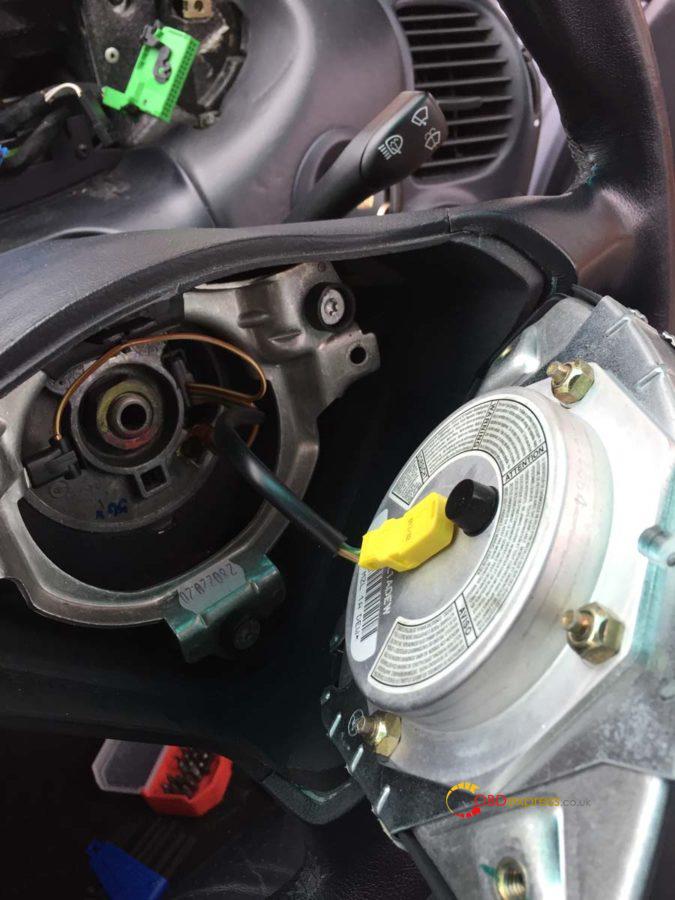
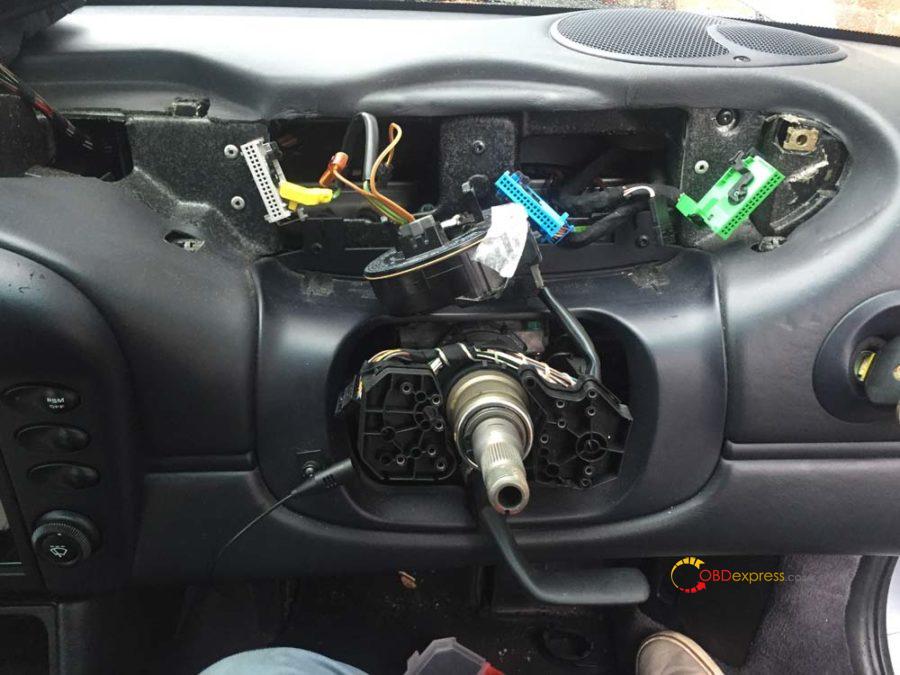
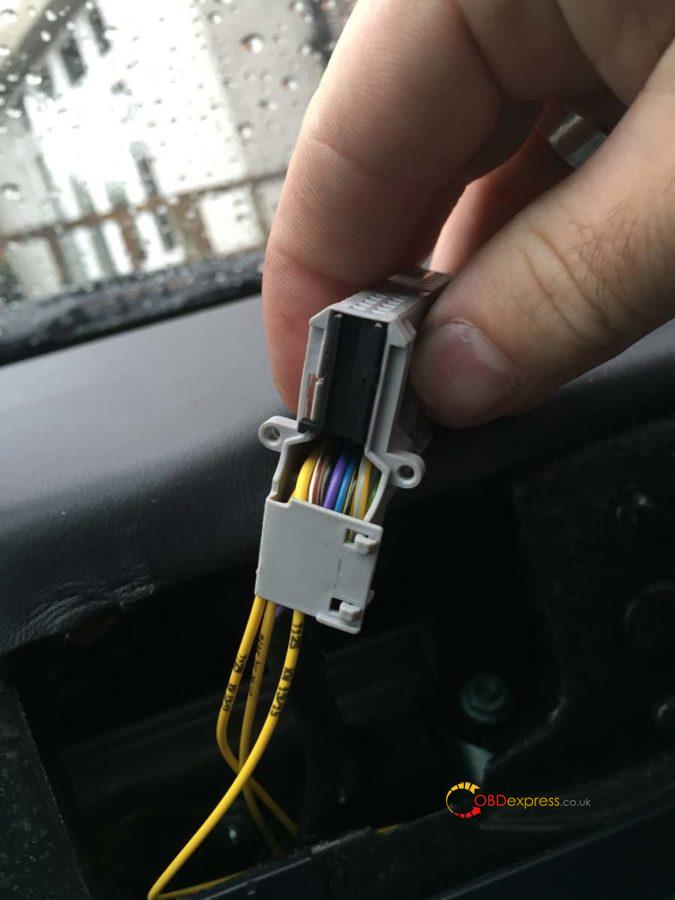
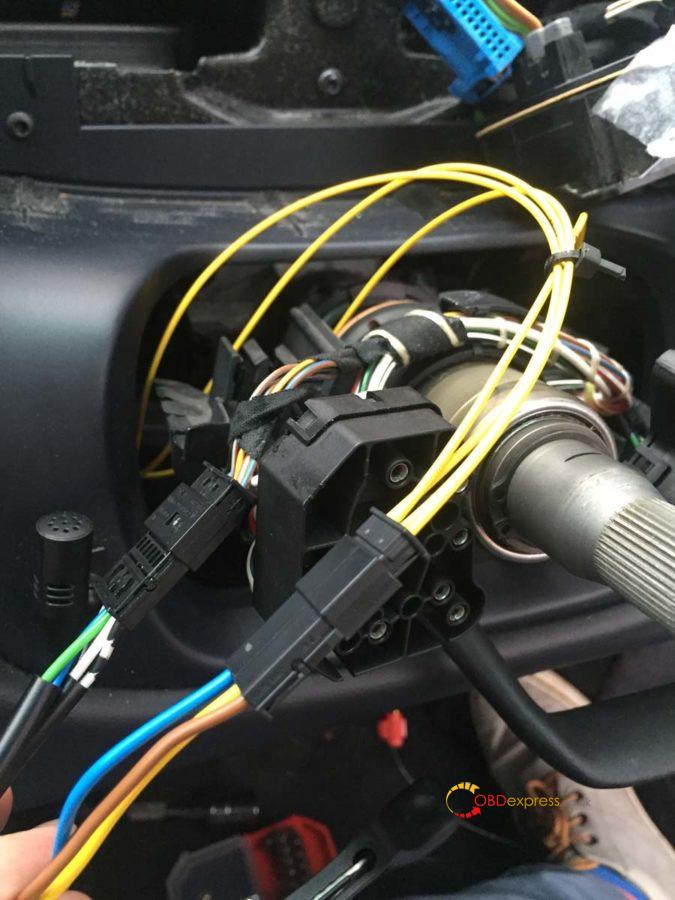
Disconnect the two large connectors either side of the stalk cluster and then remove the stalk cluster from the steering shaft.
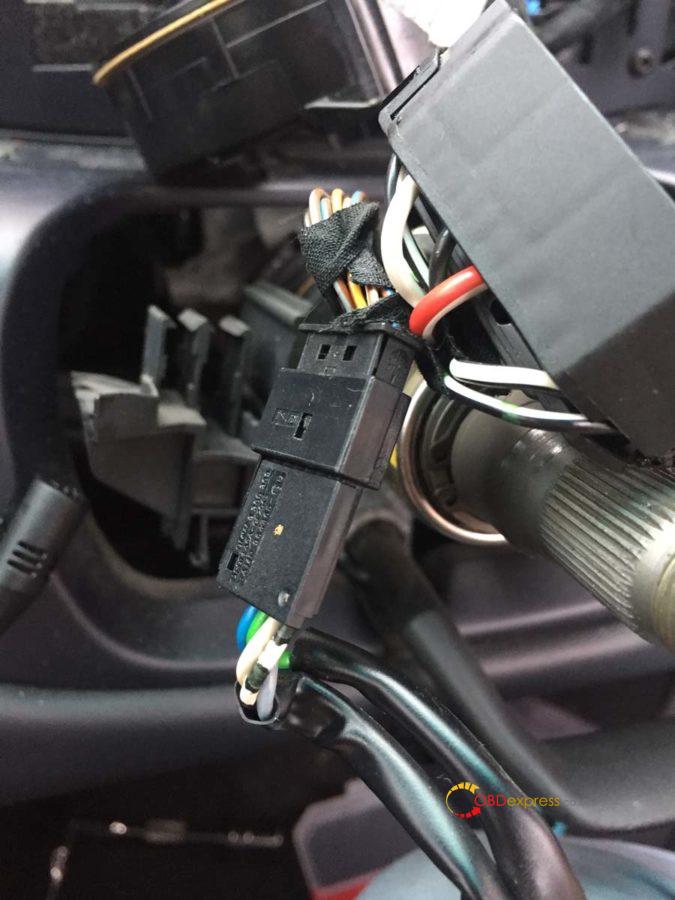
This is one of the large connectors.
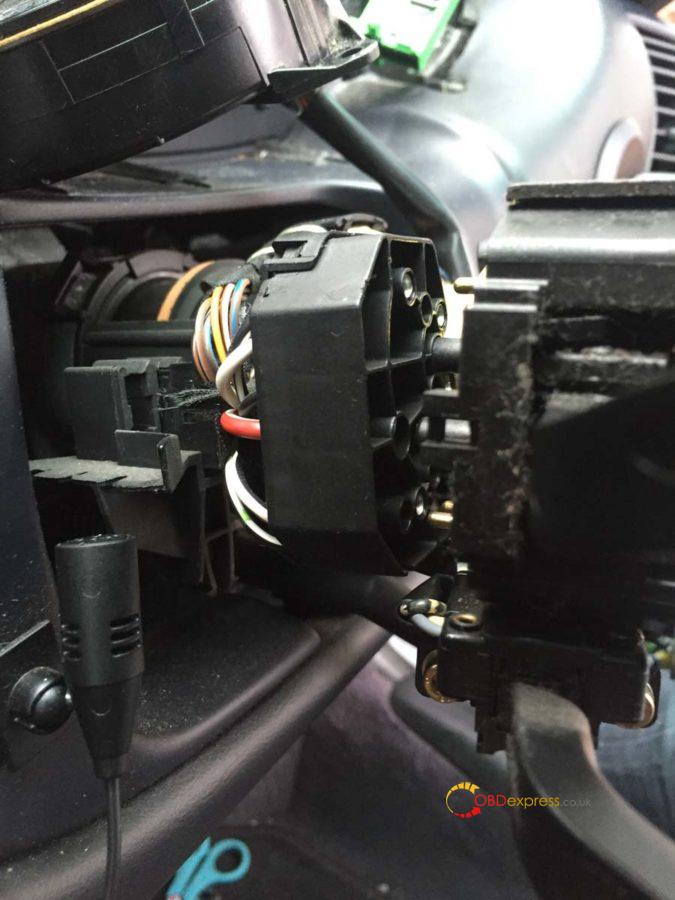
If you have the OBC you’ll find a smaller additional connector you need to undo. It may be housed in the small black clips you can see in the background of the image below.
I found this clip a real pain to undo. Use your blunt knife to stick in and undo the latch (for reference in the image I pushed the knife down into this connector from the top and lifted it up slightly to free that tiny bit of plastic in the hole.
It was at this point I stopped for some tea and also gave the dash a good wipe down as it was very dusty.
 Step 5 – Wire up and fit the new stalk cluster
Take the 4 yellow VW repair wires and plug them all into the small 4 pin connector you bought. You’ll find the numbers 1 and 4 on one side of the connector indicating which is pin 1 and which is pin 4.
Using the snap-lock connectors, attach the yellow wire from pin 2 to the piece of 1m wire. This will need to be routed down to the fuse box which we’ll cover off in the last section.
Pins 1, 3 and 4 will be plugged into the gray instrument cluster connector.
On the gray connector you’ll see a sort of door which is protecting the cables and keeping them tidy, undo this. On the side of the connector you’ll see a small latch that will allow the black bar the cables are plugged into to slide out. Remember which way you took it out as it must go back in that way.
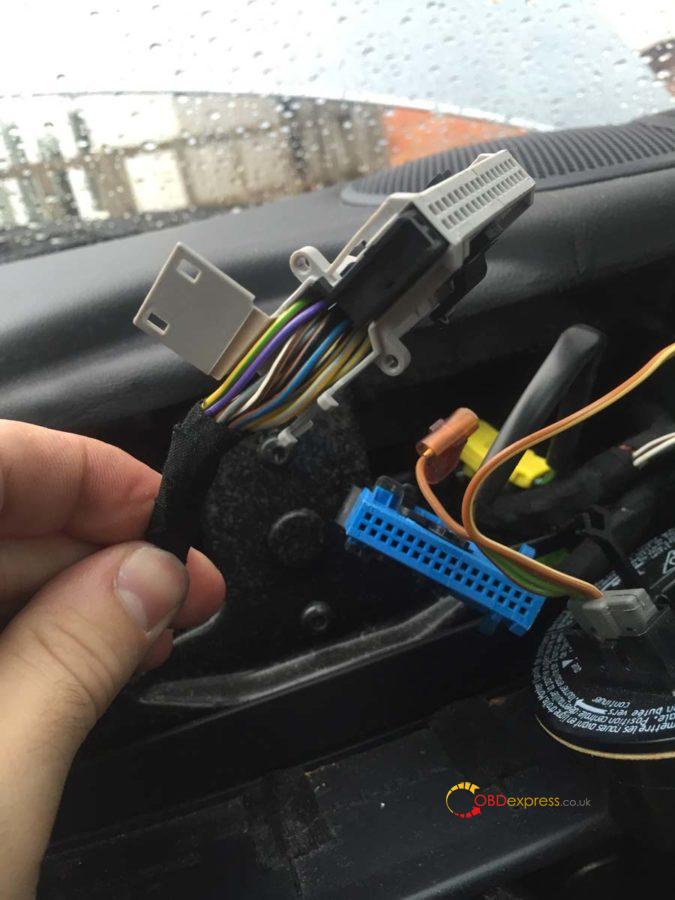
Like before you’ll find numbers at either end of this connector indicating the pin slots. This is a double decker so pins 1-16 are on the top and 17-32 are on the bottom.
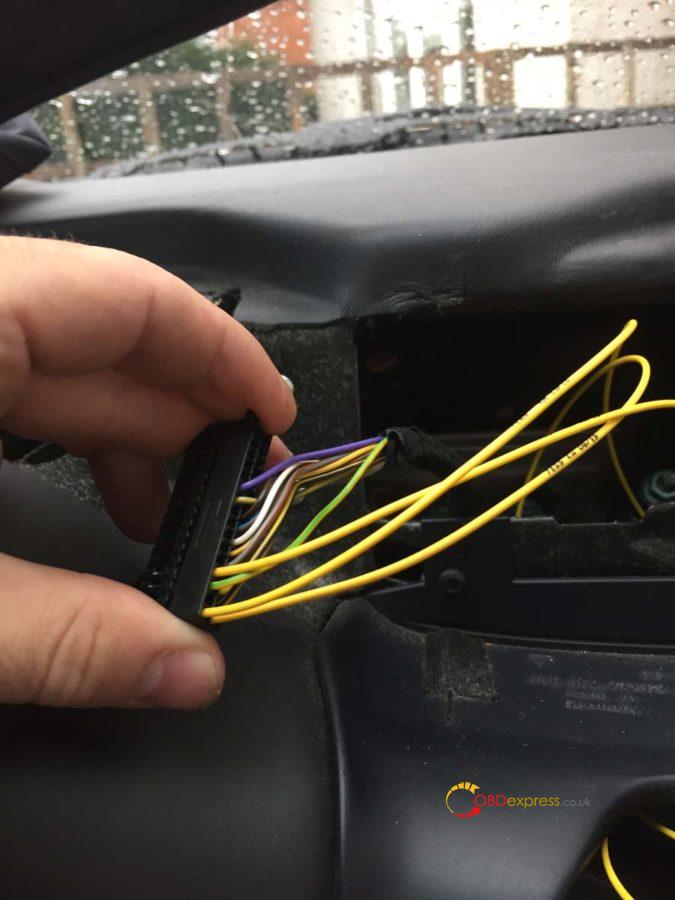
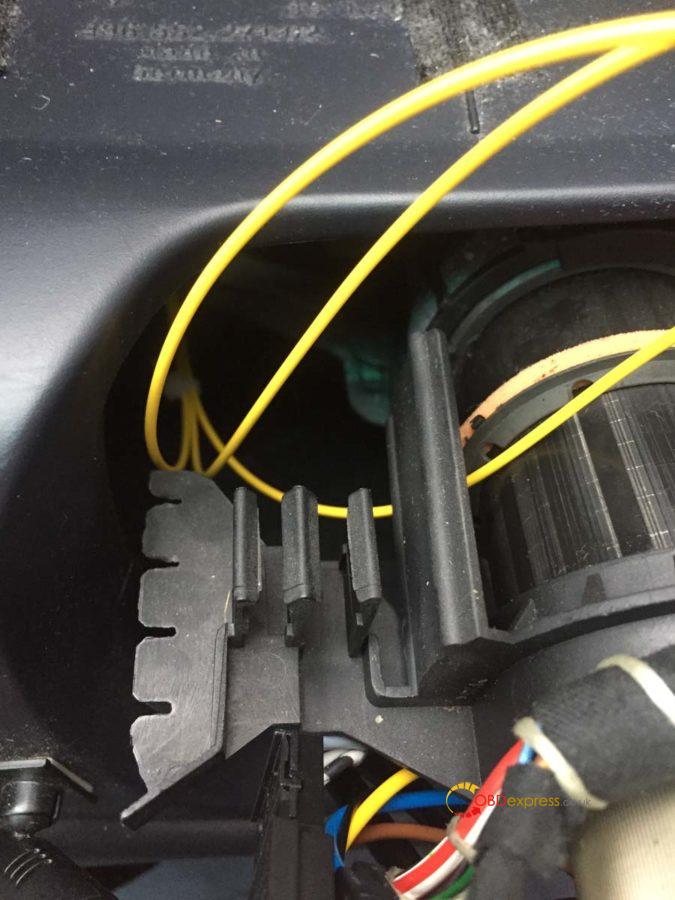
Feed the wire from pin 2 of the stalk cluster down the right side of the steering shaft and into the drivers footwell. You should be able to poke your hand up from underneath to help pull it through.
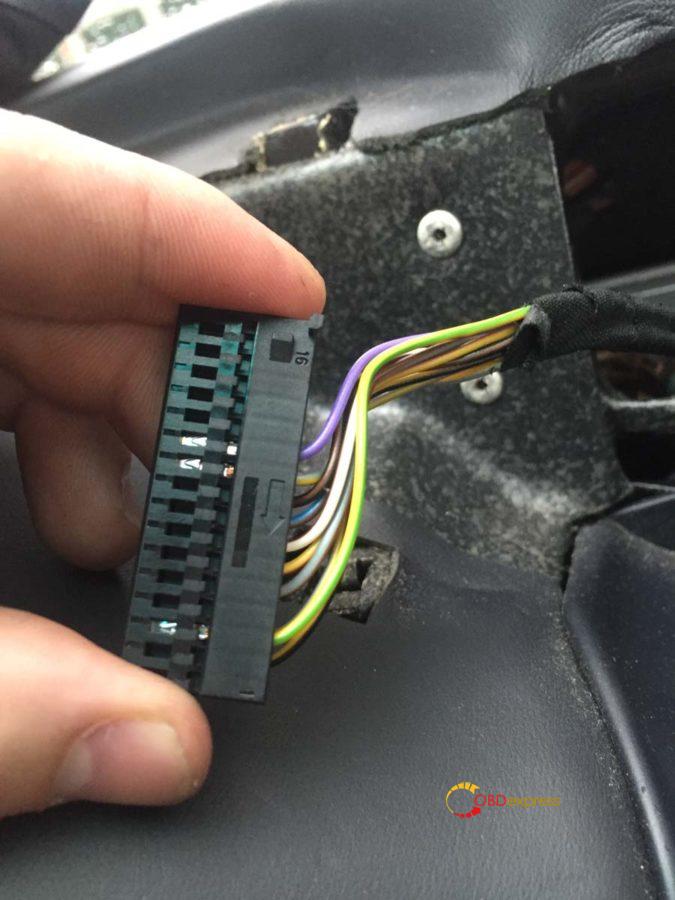
One at a time, feed the other remaining yellow wires from the stalk cluster through the left side of the steering shaft and up through the top slot of the dash (it should follow the same path as the gray connector). Connect the wires to the following slots on the gray connector:
Stalk cluster pin 1 > instrument cluster pin 17
Stalk cluster pin 3 > instrument cluster pin 4
Stalk cluster pin 4 > instrument cluster pin 1
So it should look like this:
Doing it one at a time means you should connect the correct cable to the correct slot.
Push the connector bar back in and close the wire door keeping the wires tidy.
Plug the cruise connector we’ve just wired up into the stalk cluster and also plug in the OBC 5 pin connector. Using some small cable ties, tie the wires together and tidy it up.
Place the two connectors in these slots to keep them secure. The OBC, if you have it, should have been in one of these already.
 Step 6 – Fit the new stalk cluster
These steps are now basically the reverse of what we’ve done to get to this point. Slide the new stalk cluster onto the steering shaft and back to the same position as the old one (55mm from the end of the shaft). Tighten up the bolt from underneath when it is in position and straight.
Reconnect the large connectors at the back of the stalk cluster.
You can now slide on the rubber grommets. The left side is easier than the right as both the indicator and OBC stalks move to the center. Be careful with the cruise stalk as it doesn’t feel like it wants to move up for you to get the grommet on.
Reattach the clock-spring connector unit, the steering column panels and faceplate. You can now remove the tape holding the clock-spring connector unit.
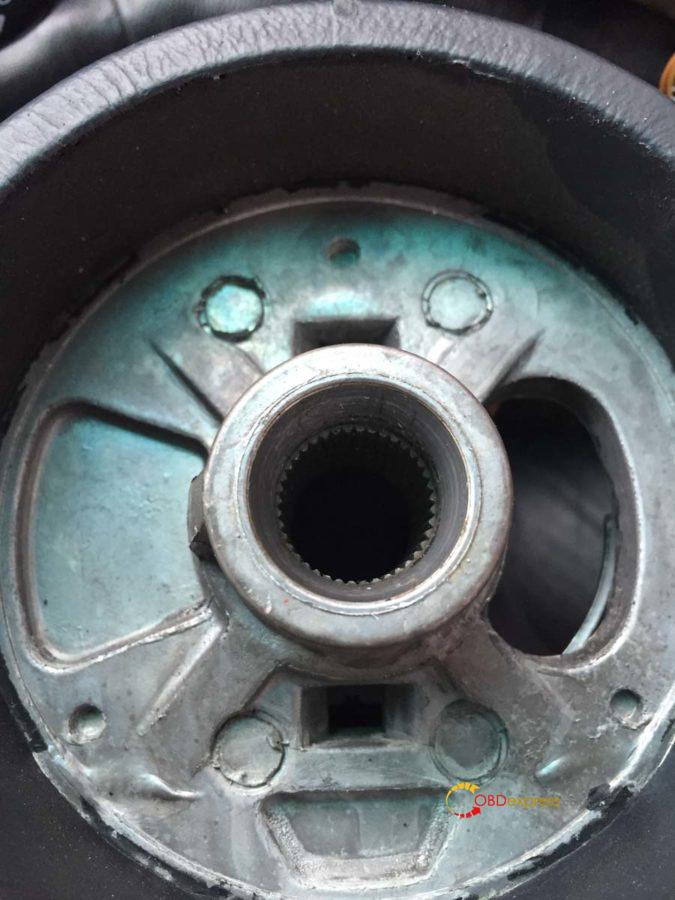
Push on the steering wheel. The two plastic prongs on the clock-spring connector unit feed into two slots on the steering wheel.

This is the back of the steering wheel – the two slots top and bottom is what I referenced above.
Tighten up the nut to attach the steering wheel and tighten it so your marker pen is back in line. Plug in the two spade connectors and re-attach the airbag.
Now to re-attach the instrument cluster. Swivel it back around into position and re-attach the 3 coloured plugs plus the microphone cable. Push the plugs in and pull the black bar down to secure it in place. The cluster should slot back in without too much trouble, remember to tighten your screws and push your hazard button and trim back into place.
Everything should now be done and your 996 should be drivable…apart from the last wire we need to connect to the fuse box.
Step 7 – Connecting the stalk cluster to the fuse box
Take off the fuse box cover and undo the 4 screws holding it in place. This should allow you to remove the carpet surround.
There are 4 clips on the side of the fuse box holding it in place, using your blunt knife press it into each clip to release it.
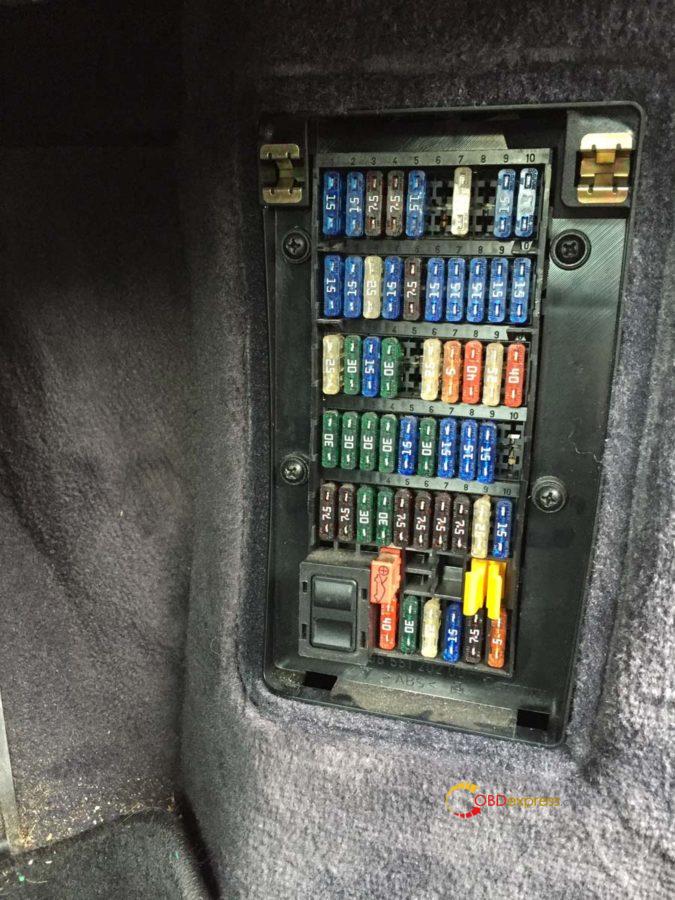
The fuse we need to connect to is B7. This is the second row from the top and the 4th fuse in from the right (as indicated by the number sequence).
Run the cable along the bulk of cables to the fuse box so you know what length you need and trim the cable down.
Find the black wire and using a snap-lock connector, attach your cable.
My 1m wire was black as well and you can see that running off to the right of the picture.
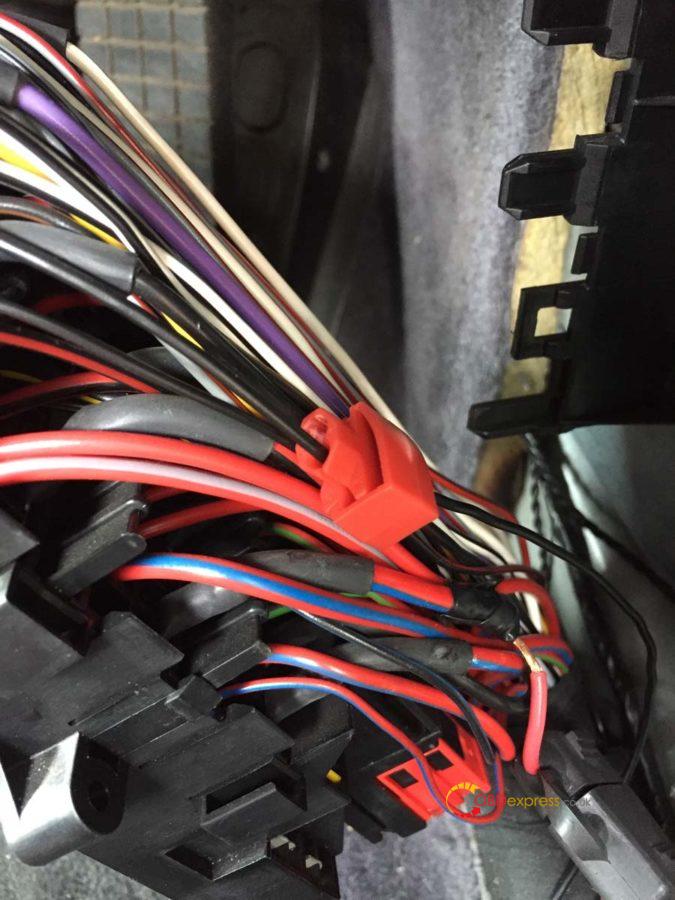
You can see the black cable just under the white and black one I’m holding. It crosses over a brown and black cable.
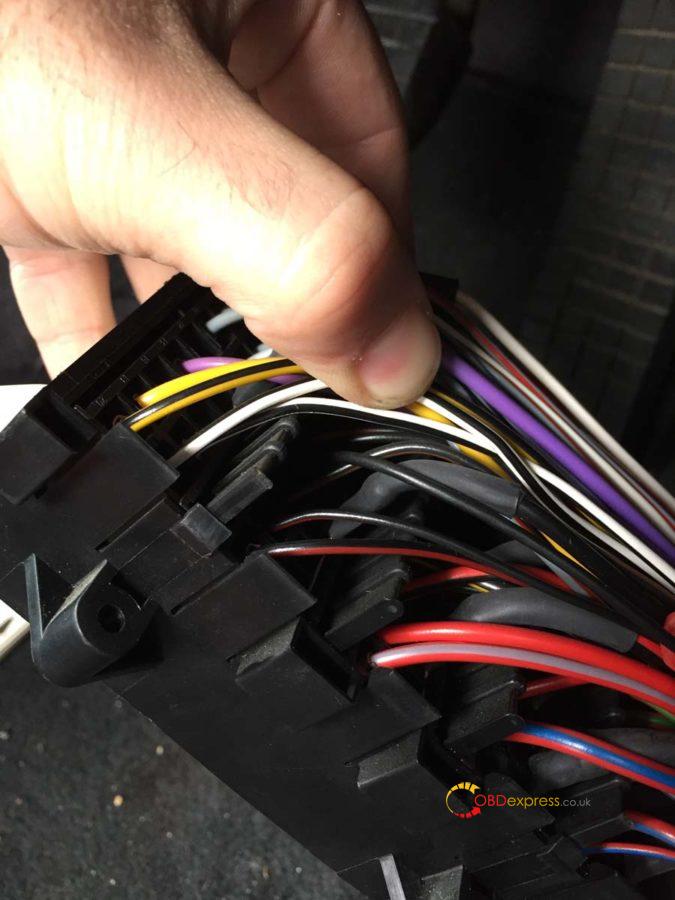
Tidy the cables up and push the fuse box back into its holder. Using some cable ties attach the new wire to the bulk of wires to keep it tidy. Put the carpet surround back and you’re done.
Now take a drive to your local OPC and get them to enable the cruise control coding in the DME (or anyone with a PST2 or PIWIS Tester in engineering Mode).
Project “Fix my broken indicators and retro-fit cruise control”.…completed it mate!
Credits to @ Leon1davies.
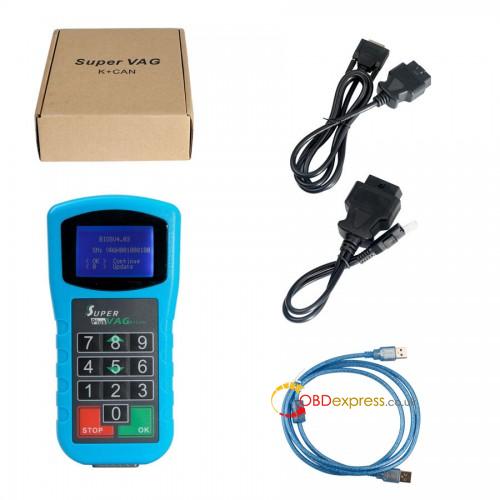
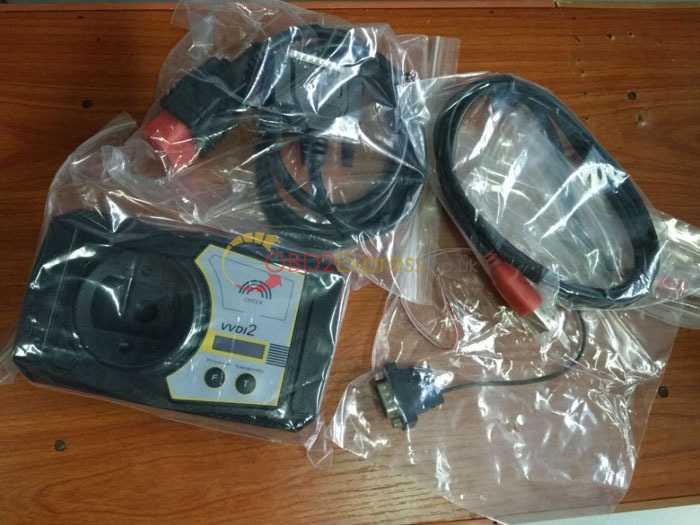
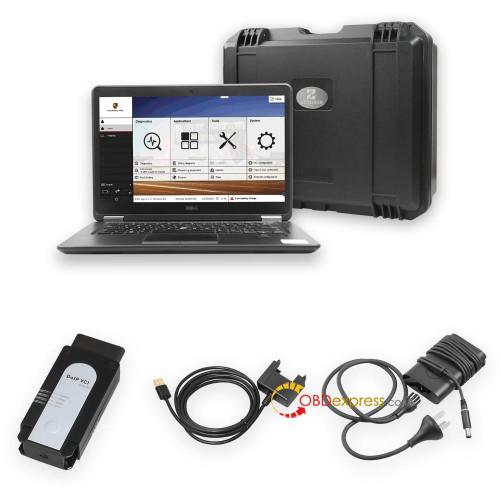
Source of PIWIS Tester 3 with engineering Mode that can enable the cruise control coding.
http://www.obdexpress.co.uk/wholesale/piwis3-porsche-tester-diagnostic-tool.html
Source:
http://blog.obdexpress.co.uk/2020/03/21/how-to-retrofit-cruise-control-of-porsche-996-2002-2005/