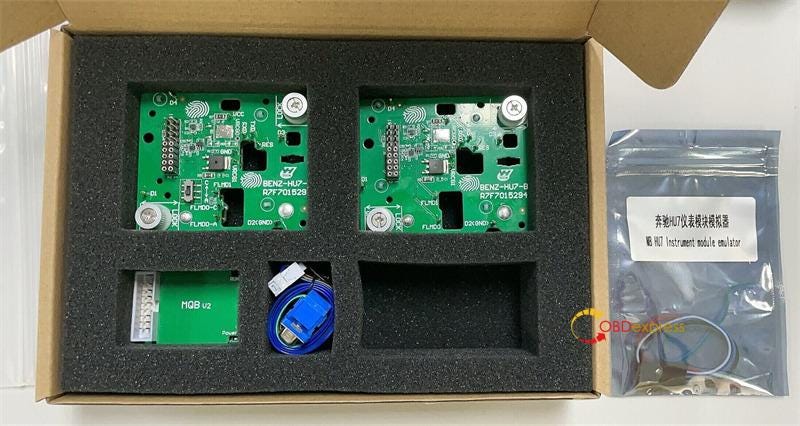
Yanhua ACDP Module 39 is equipped with two kinds
of interface boards, one MQB V2 Adapter, and one MB HU7 Instrument Module Emulator. This guide
will walk you through the installation process of the interface board and
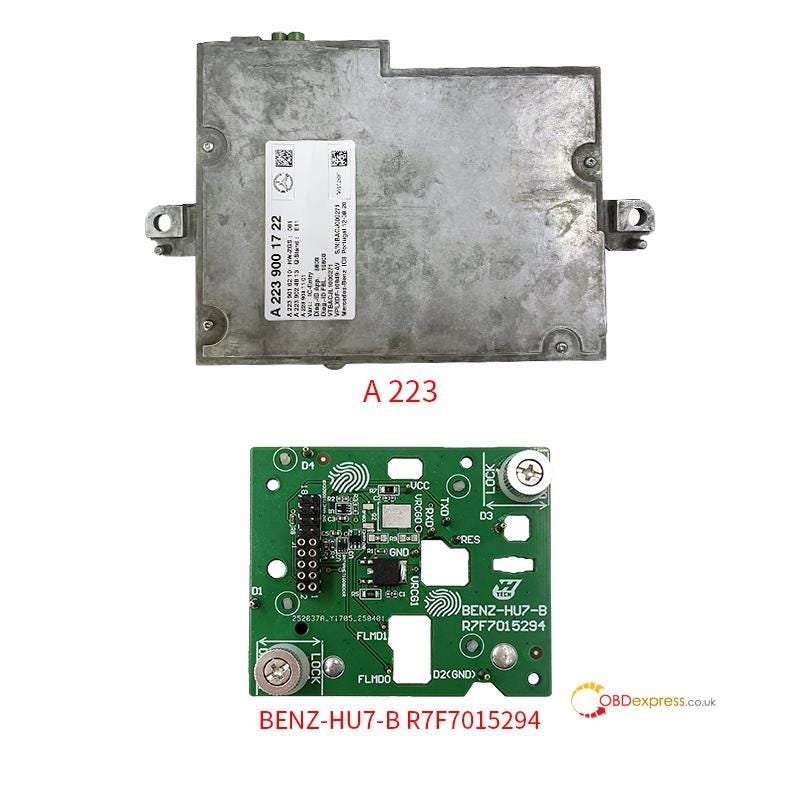
emulator for Mercedes-Benz HU7 instrument module (A206/A223/A 177) with chip
model R7F7015293/ R7F7015294.
PART 1: Install interface board for mileage correction
PART 2: Install emulator after mileage correction
PART 1: Install interface board for mileage correction
How to choose Yanhua Module 39
Interface Board for different instrument types?
1.Yanhua BENZ-HU7-A R7F7015293 Interface Board:
For BENZ HU7 A223, A206, A177 dashboard types with R7F7015293 chip
below.

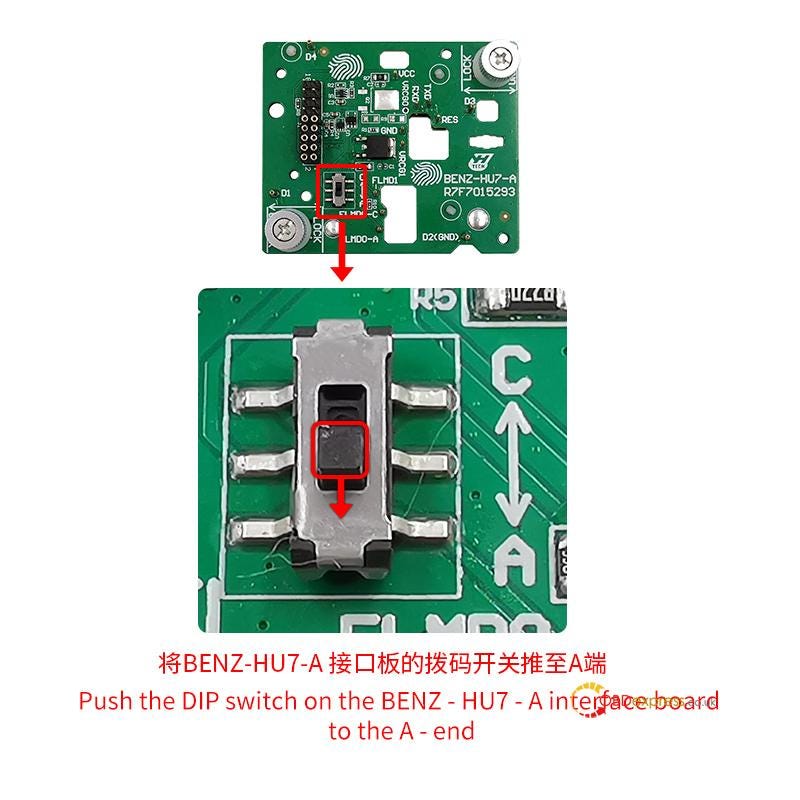
- For BENZ HU7 A223, A206 dashboard types (set the DIP switch
on the BENZ-HU7-A interface board to the A-
end)
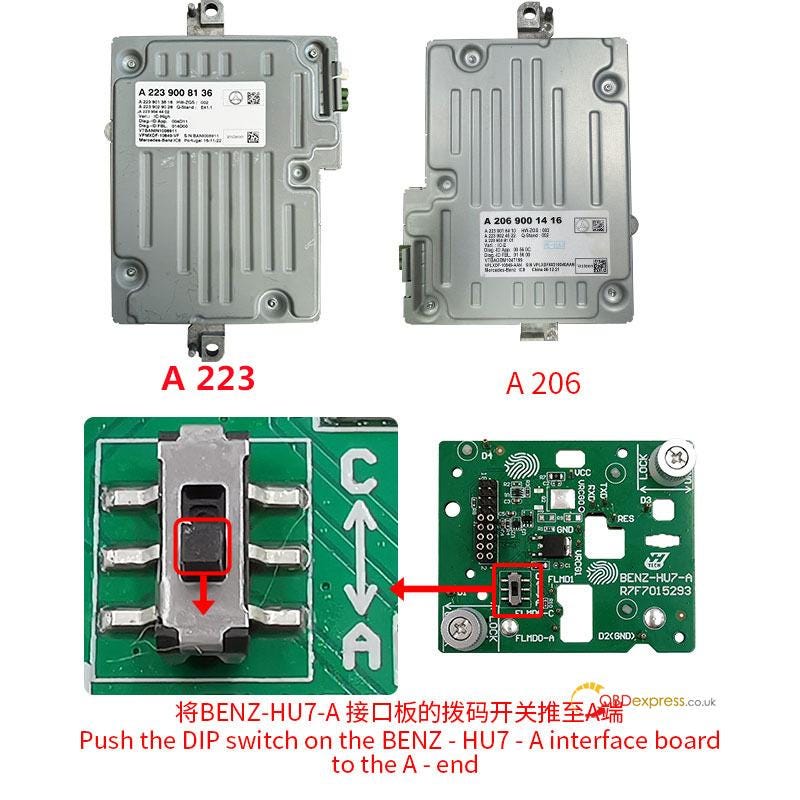
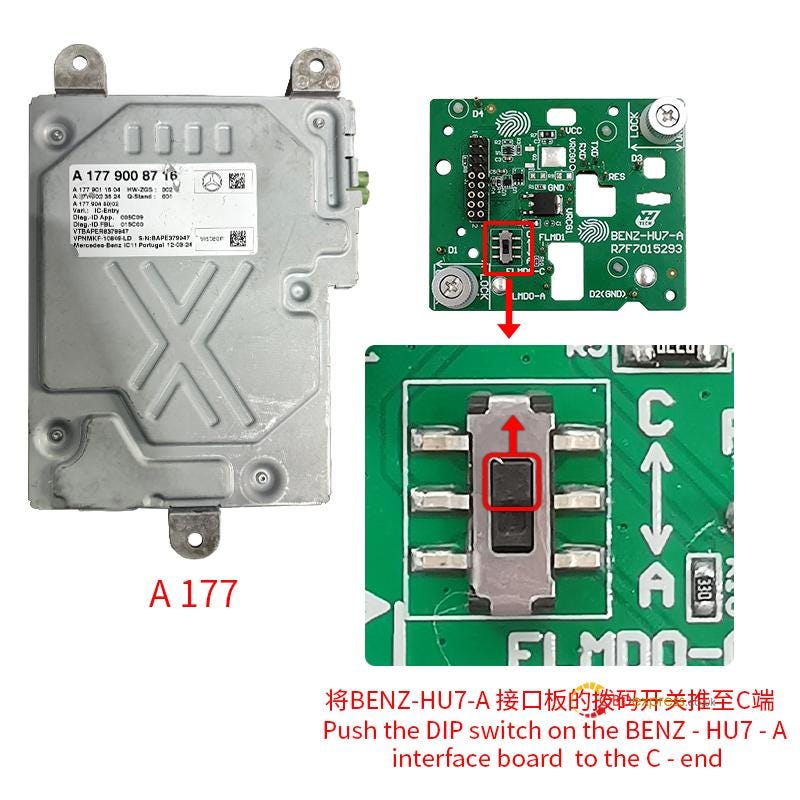
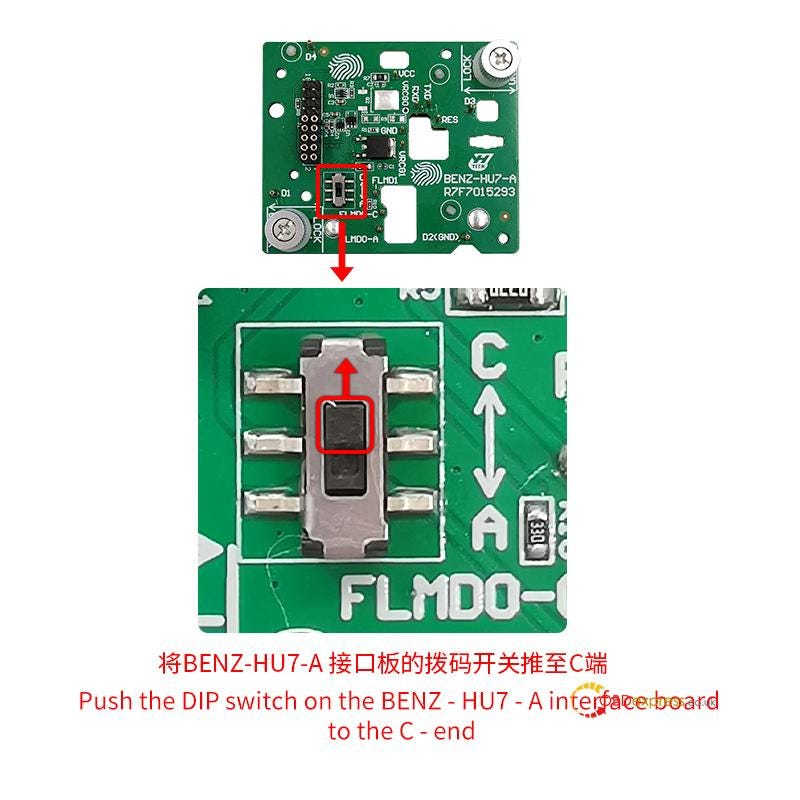
- For BENZ HU7 A177 dashboard type (set the DIP switch on the
BENZ-HU7-A interface board to the C- end)
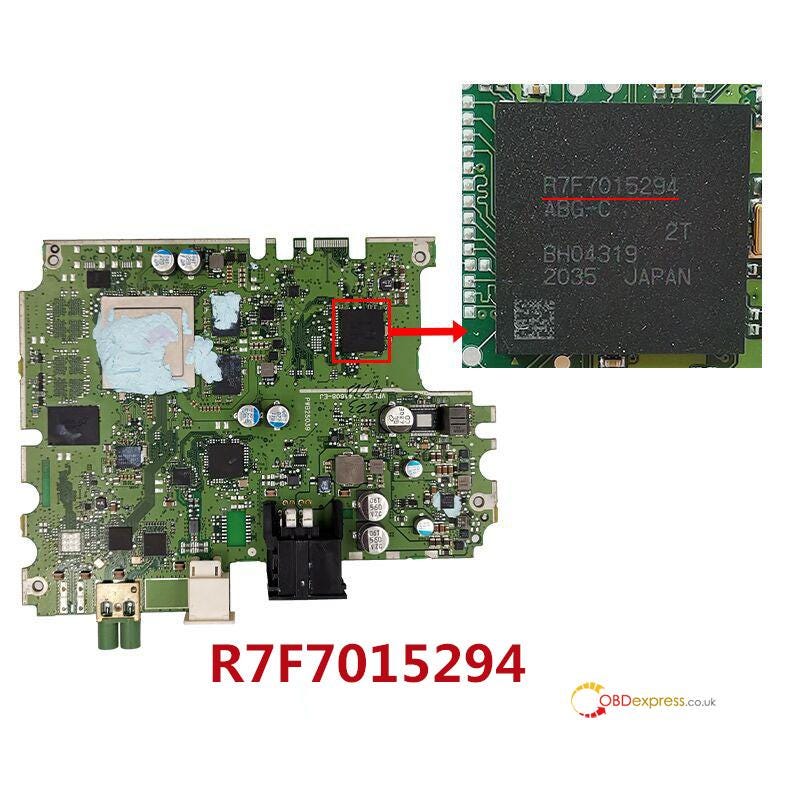
2.Yanhua BENZ-HU7-B R7F7015294 Interface Board:
For BENZ HU7 A223 dashboard type with R7F7015294 chip below
Yanhua Module 39 Interface
Board Installation Guide:
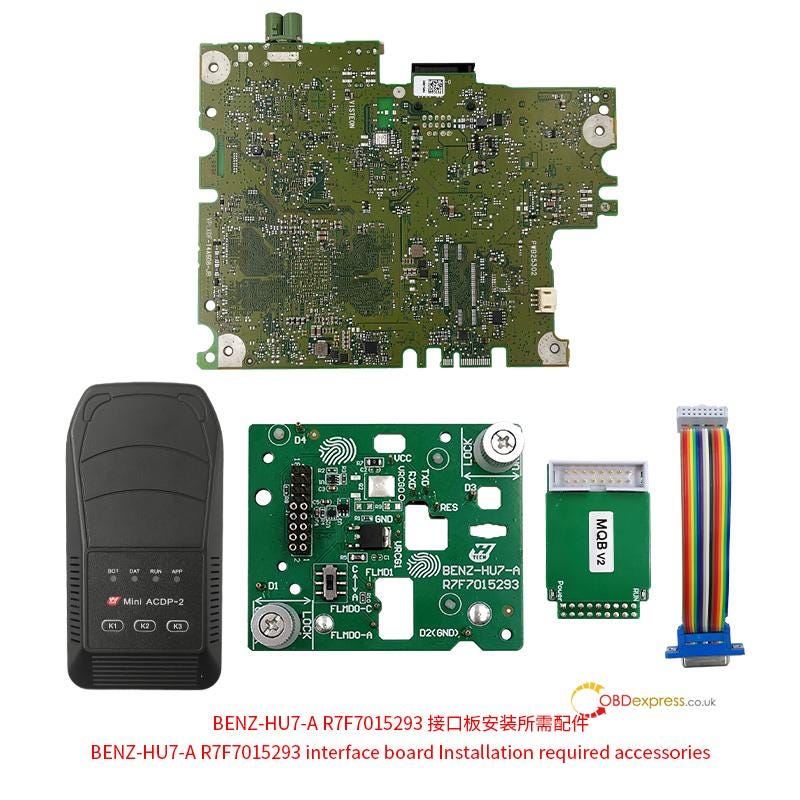
1.For Yanhua BENZ-HU7-A R7F7015293 Interface Board
Requirement:
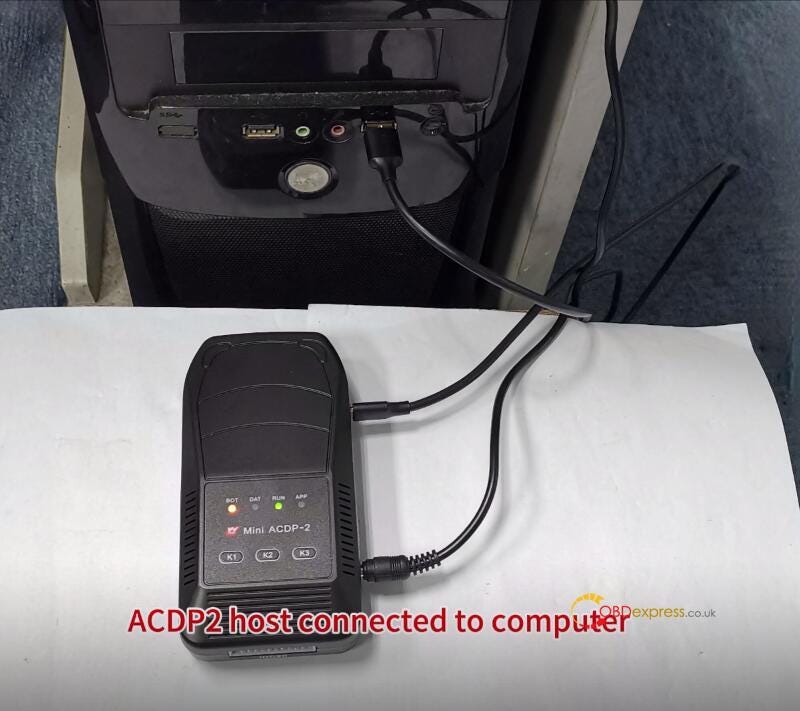
- Yanhua ACDP2
- BENZ-HU7-A R7F7015293 Interface Board
- MQB V2 Adapter
- 20 PIN cable
- BENZ HU7 A223/ A206 dashboard module with R7F7015293 chip
Step 1:
Push the latch on the interface board to the unlock position. Then, identify
the correct installation area on the instrument based on the positioning pillars
of the interface board.
Step 2:
Move the DIP switch on the BENZ-HU7-A Interface Board to the A-end
position.
Step 3:
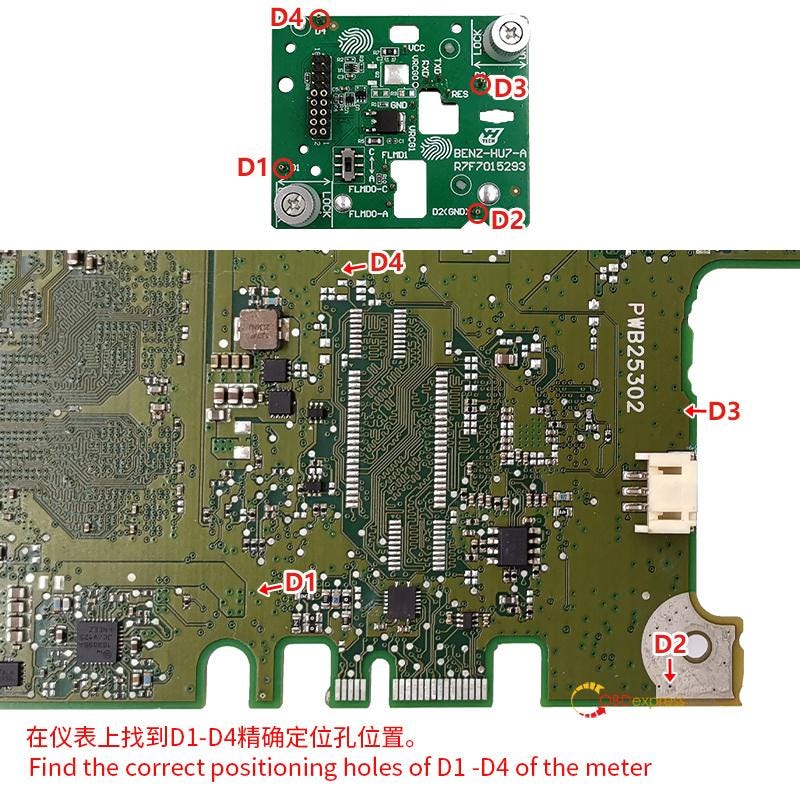
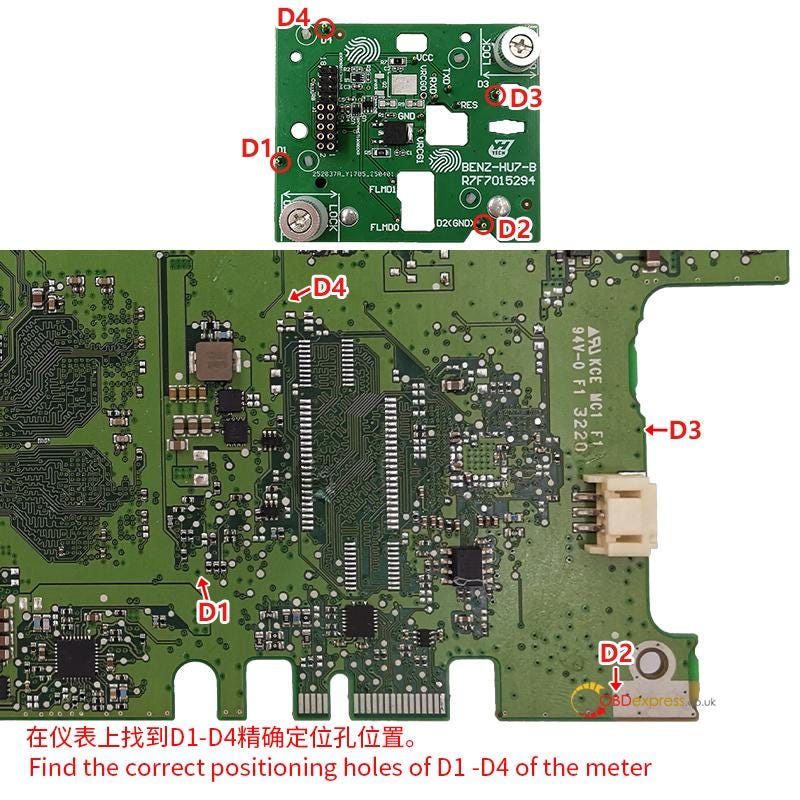
Locate the correct positioning holes for D1 — D4 on the meter.
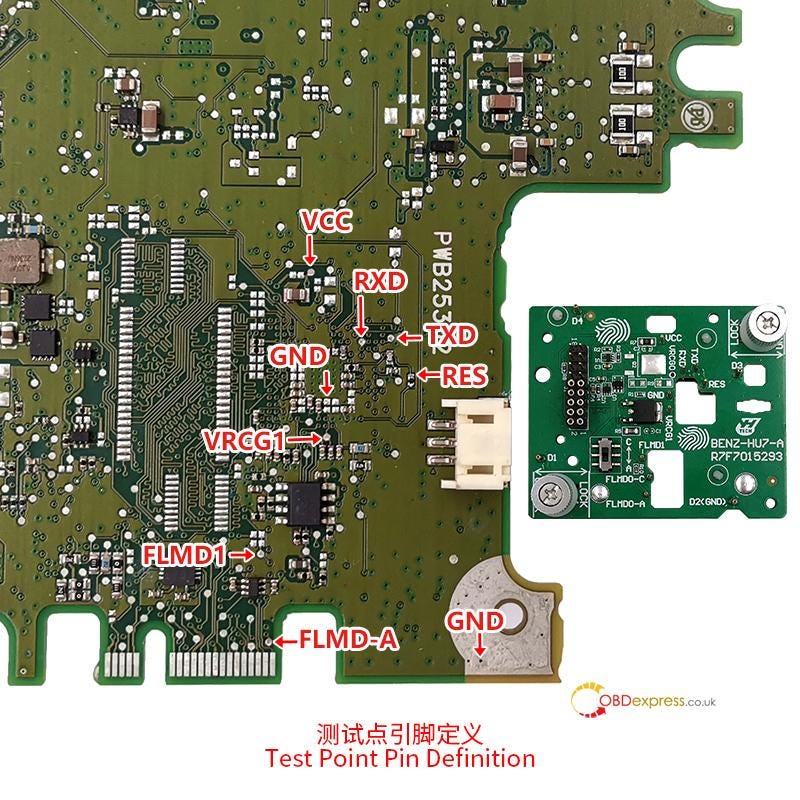
Step 4:
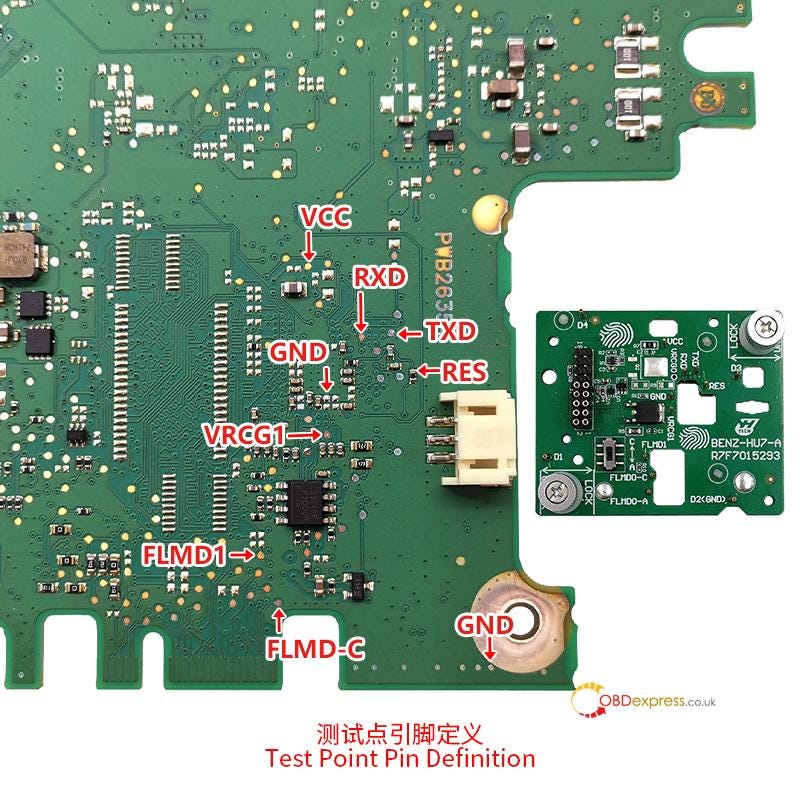
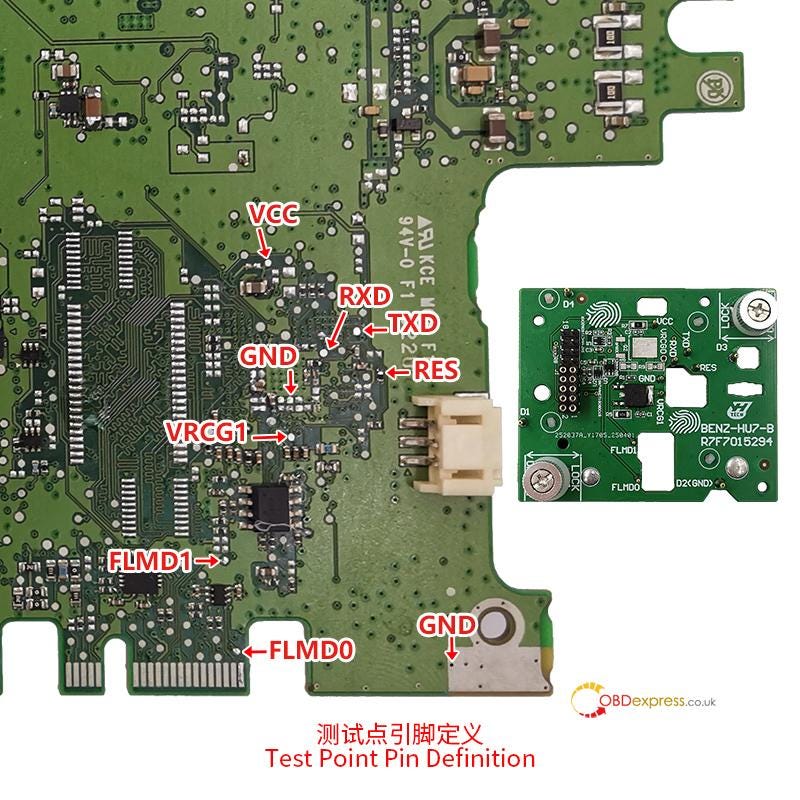
Verify the test point pin definitions.
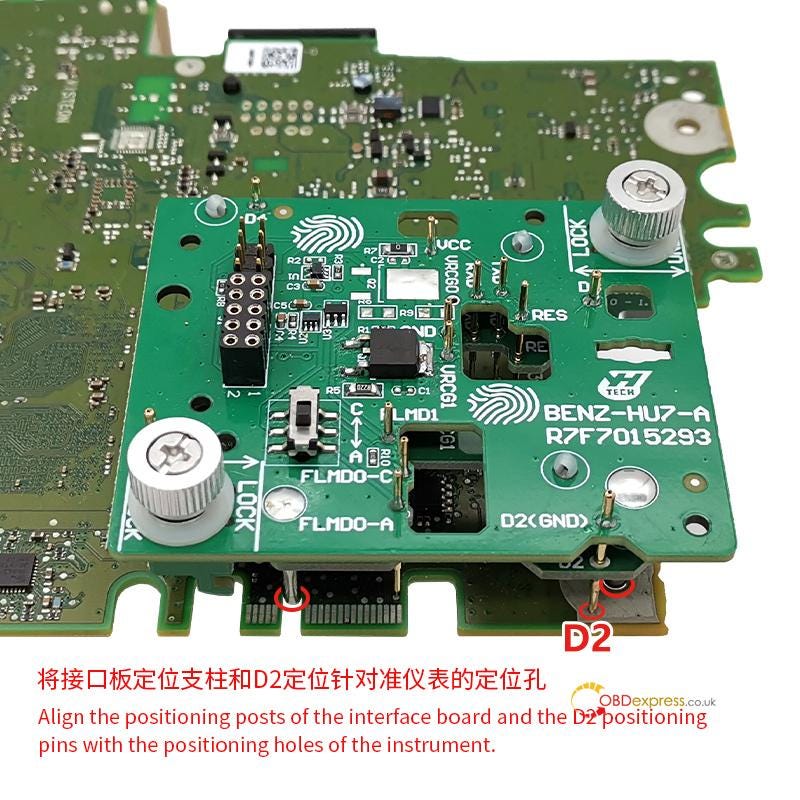
Step 5:
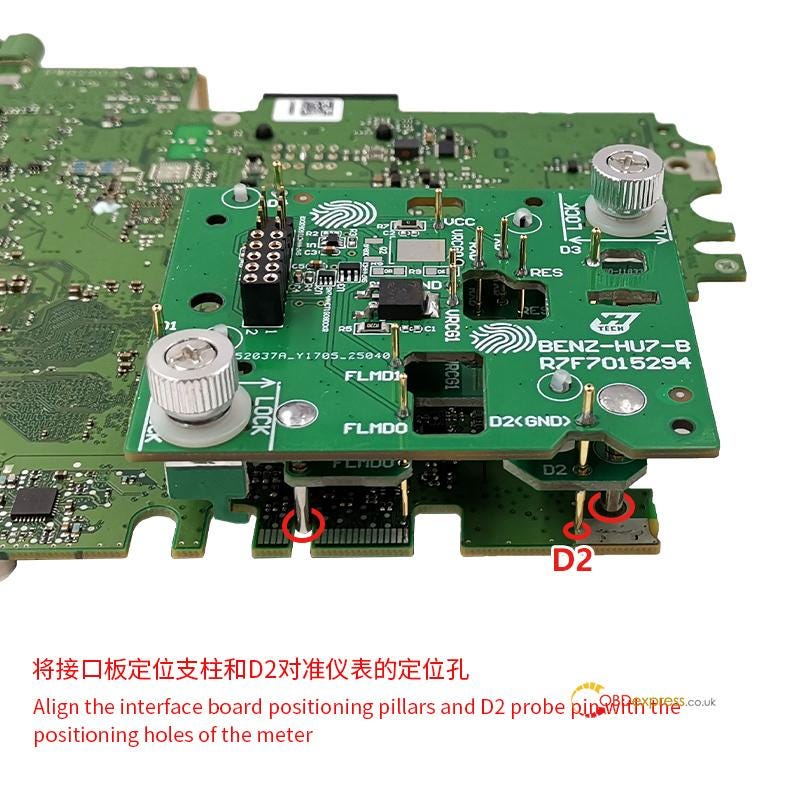
Align the positioning posts on the interface board and the D2 positioning
pins with the corresponding positioning holes on the instrument.
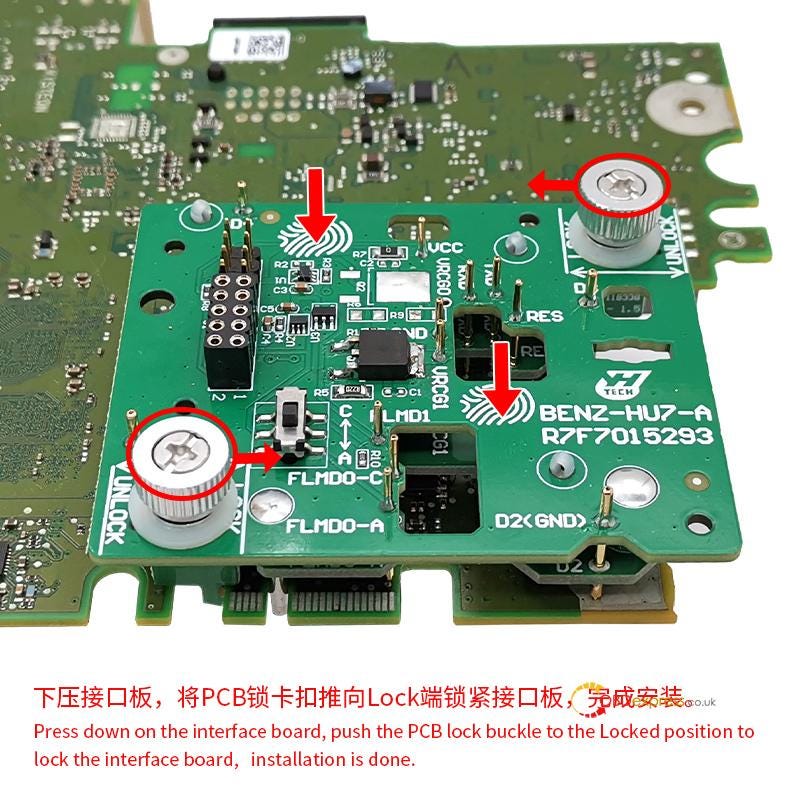
Step 6:
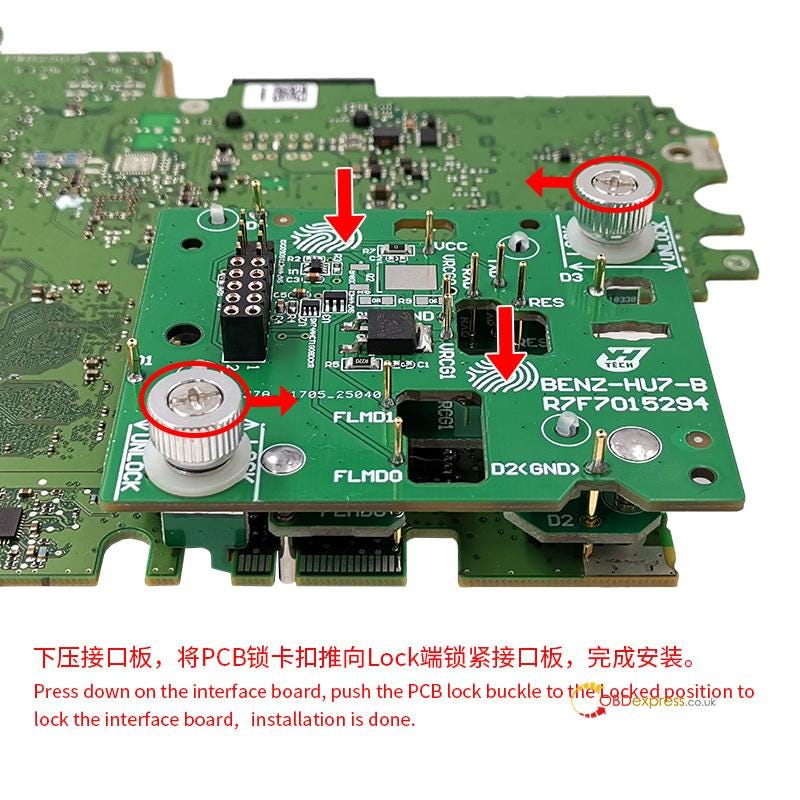
Press down on the interface board and then push the PCB lock buckle to the
locked position to secure the interface board in place. The installation is now
complete.

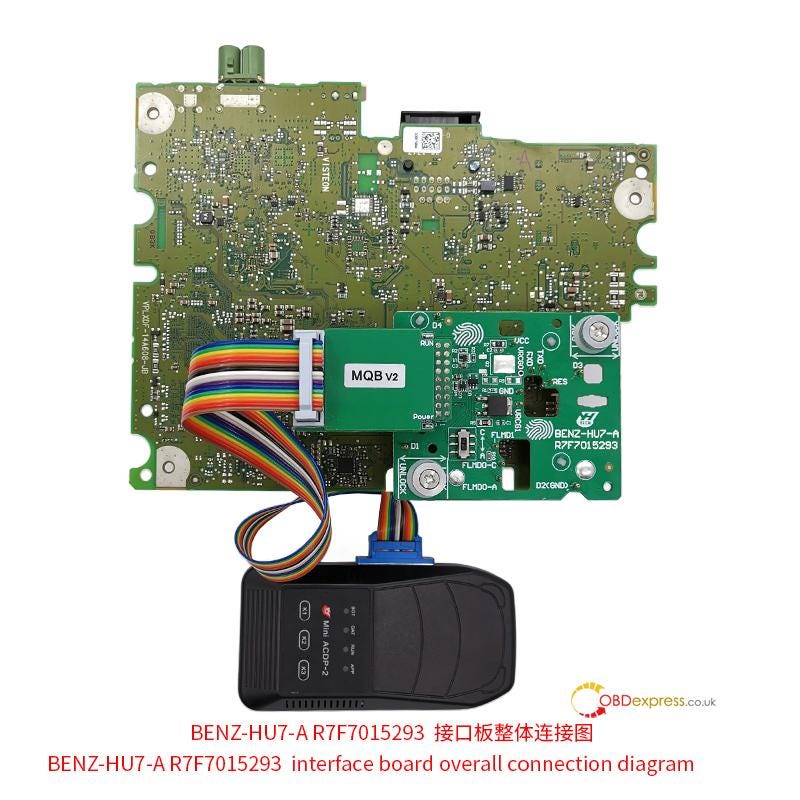
BENZ-HU7-A R7F7015293 Interface Board Overall Connection Diagram
Note:
The Benz HU7 A177 installation steps are the same as A223/ A206.
The only differences are step 2 and step 4.
For A177 dashboard module:
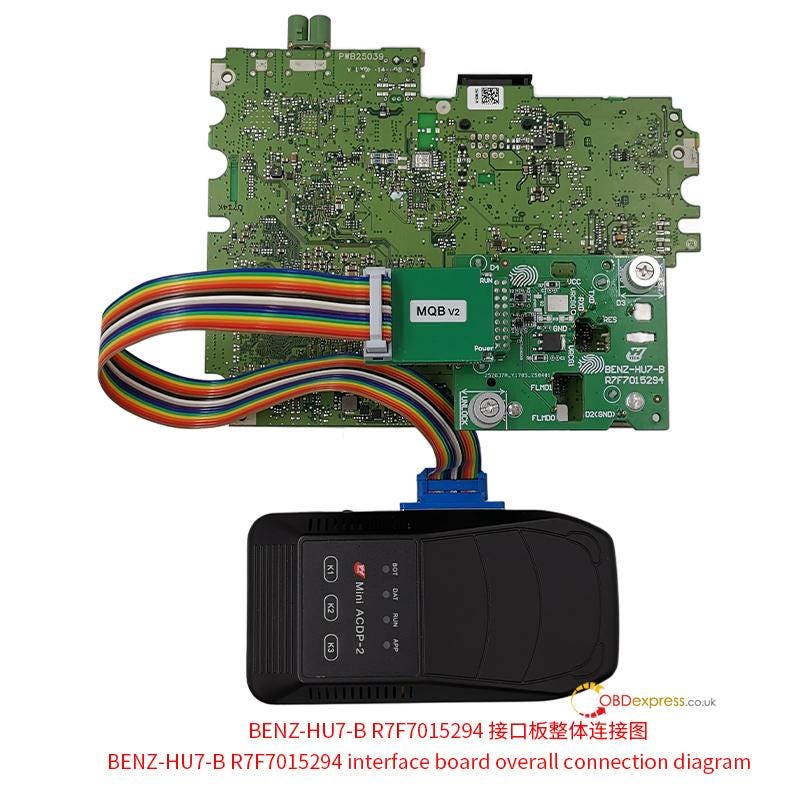
2.For Yanhua BENZ-HU7- B R7F7015294 Interface
Board
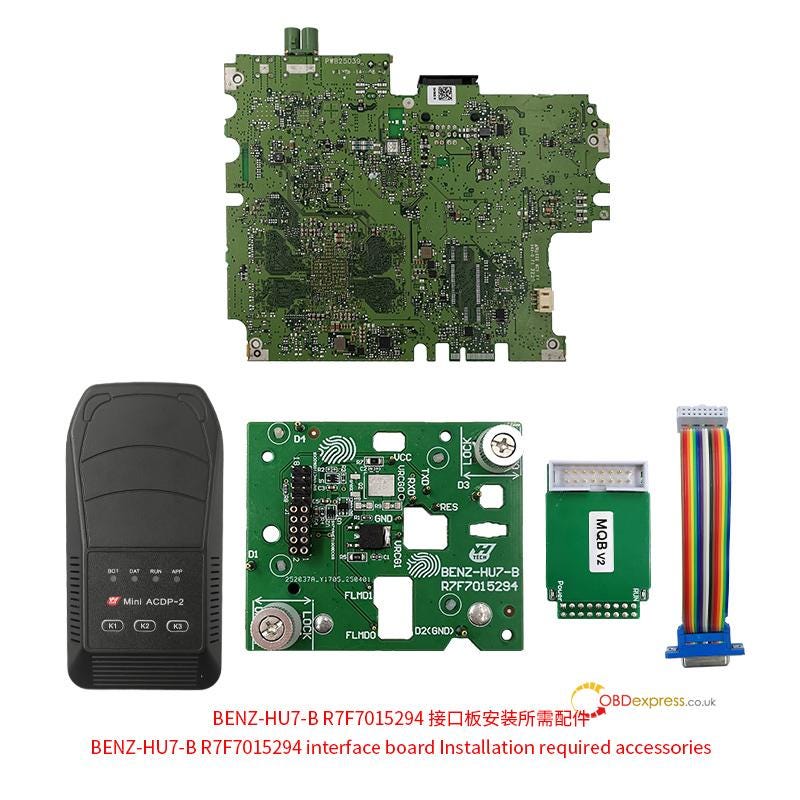
Requirement:
- Yanhua Mini ACDP2
- BENZ-HU7-B R7F7015294 Interface Board
- MQB V2 Adapter
- 20 PIN cable
- BENZ HU7 A223 dashboard module with R7F7015294 chip
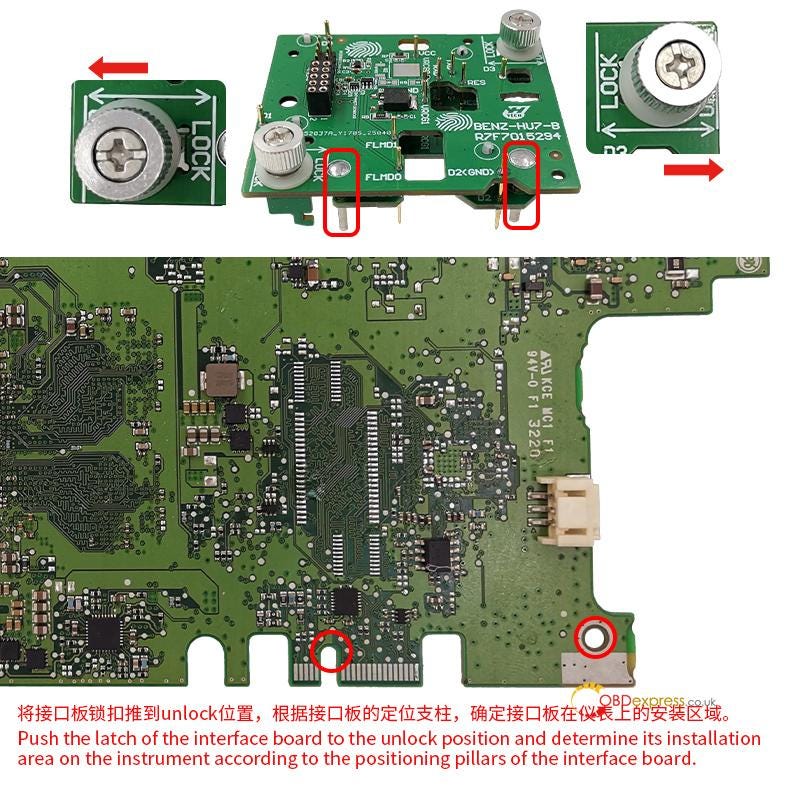
Step 1:
Push the latch of the interface board to the unlock position and determine
its installation area on the instrument according to the positioning pillars of
the interface board.
Step 2:
Find the correct positioning holes of D1 — D4 of the meter.
Step 3:
Check the test point pin definition
Step 4:
Align the positioning posts of the interface board and the D2 positioning
pins with the positioning holes of the instrument.
Step 5:
Press down on the interface board, push the PCB lock buckle to the Locked
position to lock the interface board, installation is done.
PART 2: Install emulator after mileage correction
The Yanhua MB HU7 Instrument Module Emulator is
designed to prevent black screen issues on the dashboard. It must be permanently
soldered into the vehicle and is intended for one-time use — each vehicle
requires its own emulator, and it cannot be reused.
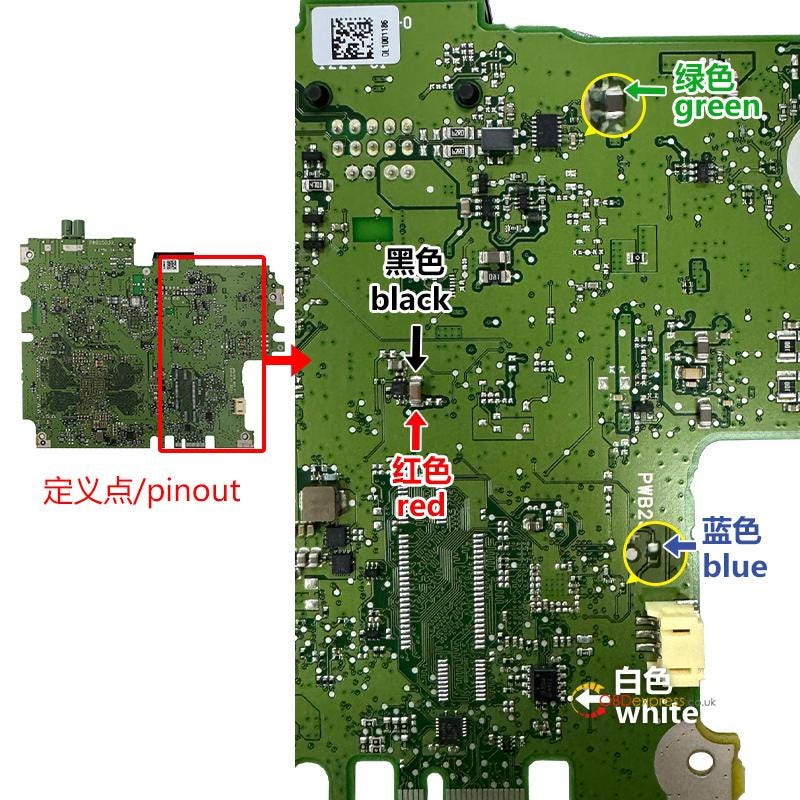
After modifying the mileage by Mini ACDP2, proceed to solder the HU7 Emulator as shown below:
Check wire colors (black, red, green, blue, white) for correct
pinouts.
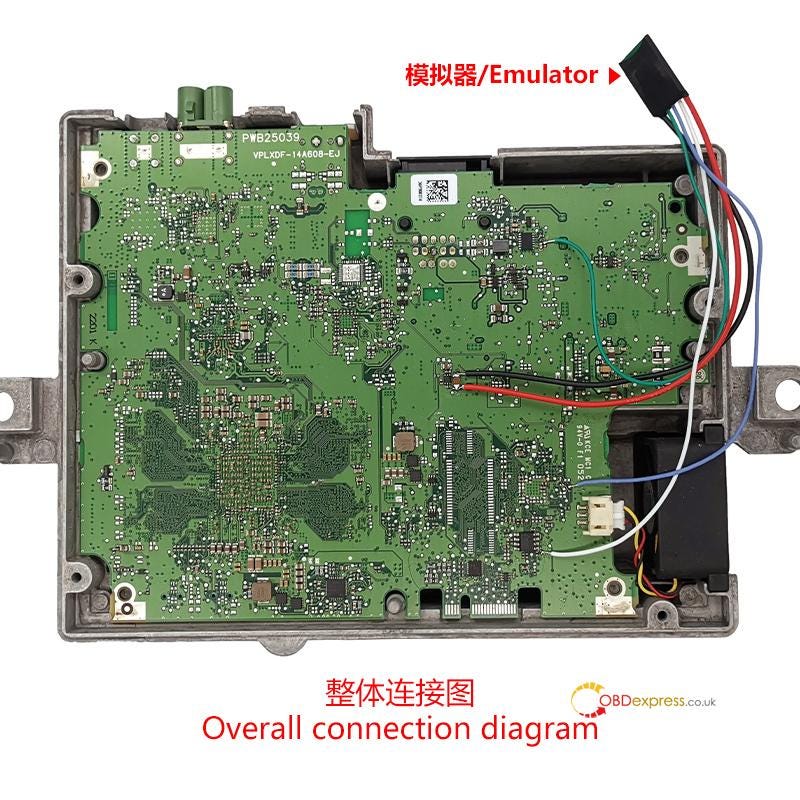
The overall connection diagram:
Learn more:
http://blog.obdexpress.co.uk/2025/06/06/yanhua-module-39-correct-benz-mb-hu7-instrument-mileage/