Wednesday, 10 November 2021

Xhorse VVDI Mini Prog introduction and evaluation

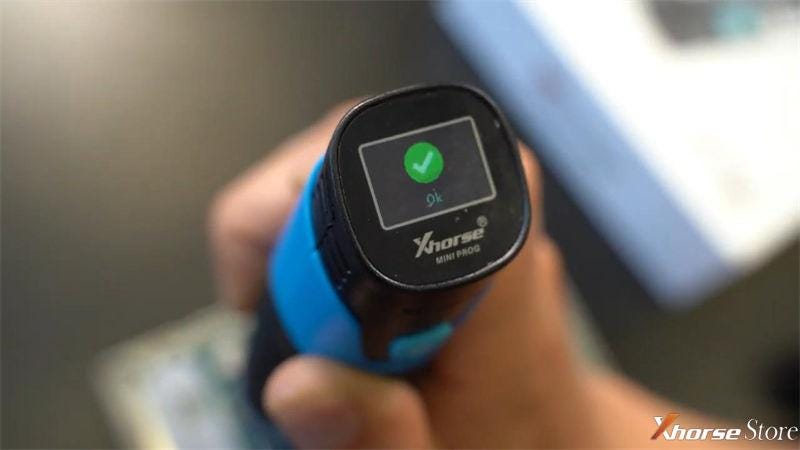
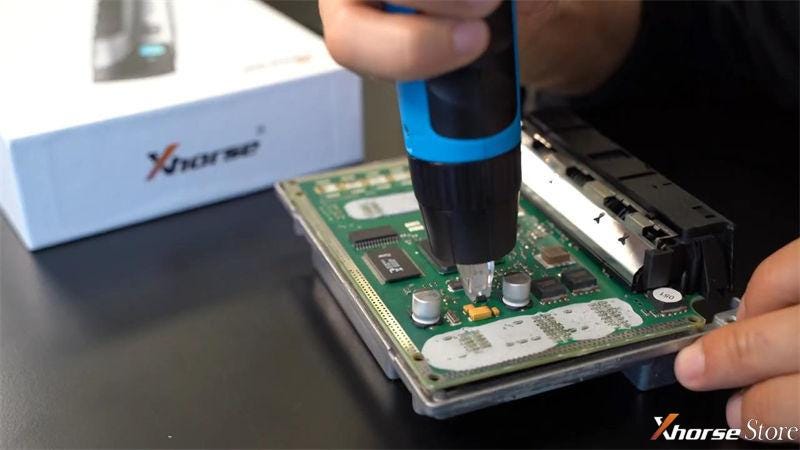
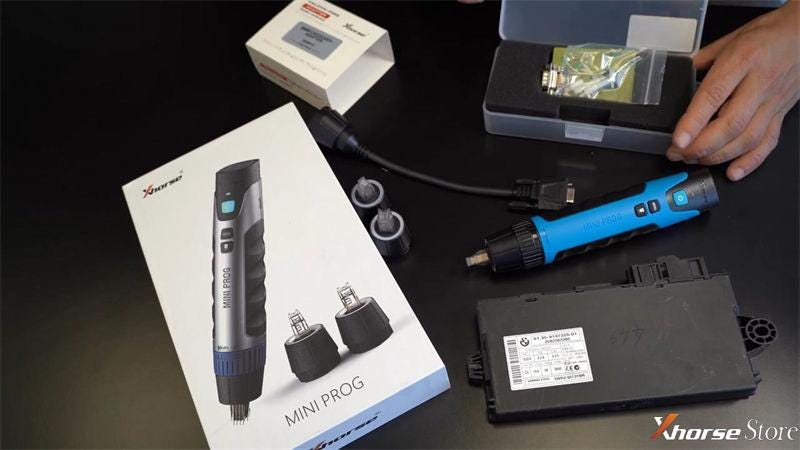
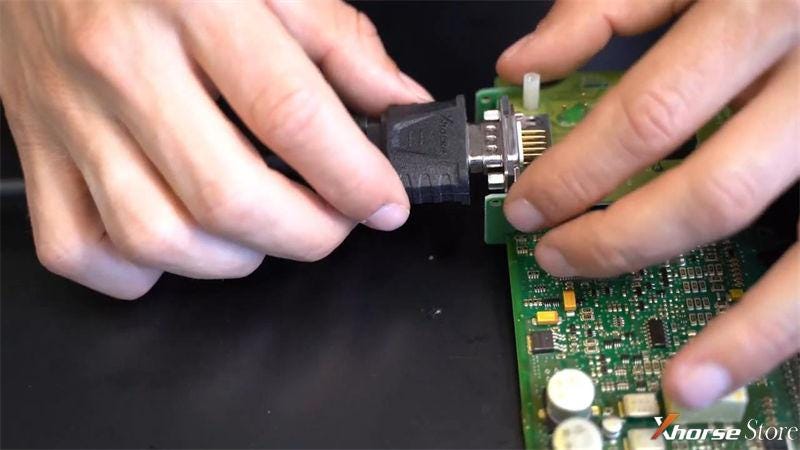
 Xhorse VVDI MINI Prog Pen is the latest Xhorse product dedicated to chip programming, portable, stable and safe. It allows you to read, modify and write EEPROM data without desoldering.


  • Highlights

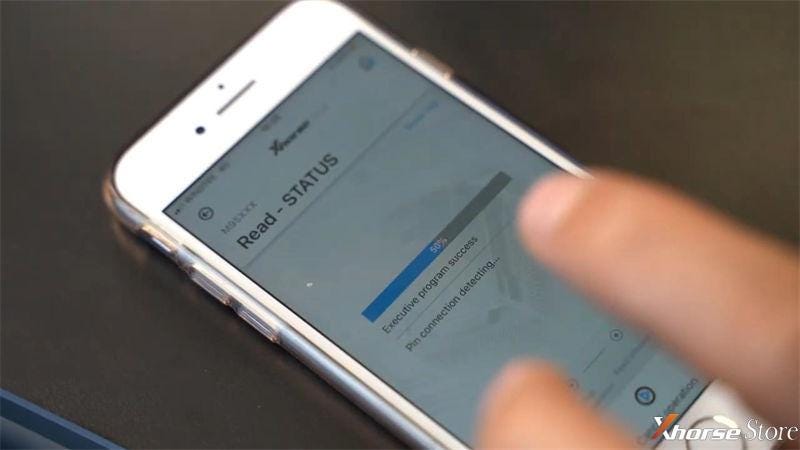
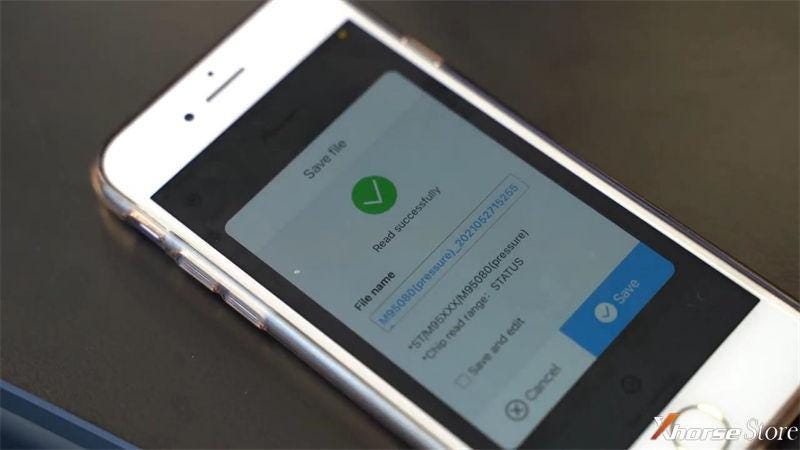
VVDI MINI Prog is a multifunction programmer that supports memories and processors used in vehicle electronic units. Through the Xhorse app, downloadable on smartphones with Android or iOS systems, you can connect via Bluetooth and WiFi for chip programming.


VVDI MINI Prog supports 18 languages, is equipped with a screen to display the status of the process instantly.


Thanks to the innovative design of Pin detection function & connections status real-time verification, MINI Prog is allowed to process much safer and precise. It is self-powered by a battery incorporated in the programmer.

Xhorse VVDI Mini Prog introduction and evaluation

Xhorse VVDI Mini Prog introduction and evaluation

Xhorse VVDI Mini Prog introduction and evaluation

  • Features
  1. VVDI MINI Prog programmer allow to store data without having to use a computer. It also supports to upload to Cloud account to avoid data loss.

Xhorse VVDI Mini Prog introduction and evaluation

Xhorse VVDI Mini Prog introduction and evaluation


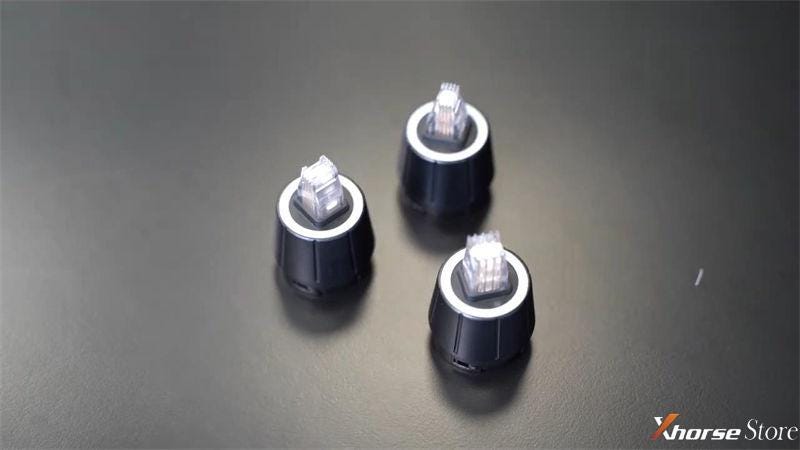
  1. 3 different 8-pin headers can be easily switched to read and write different chips.

Xhorse VVDI Mini Prog introduction and evaluation

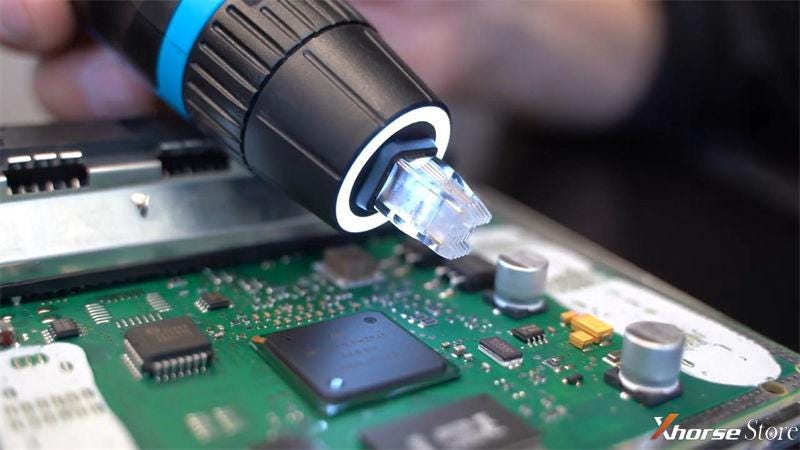
  1. MINI Prog has became one of the simplest & effective devices in chip programming. The most unique ability is to program chips directly on circuit board without soldering. Equipped with LED incorporated to have a greater visibility.

Xhorse VVDI Mini Prog introduction and evaluation

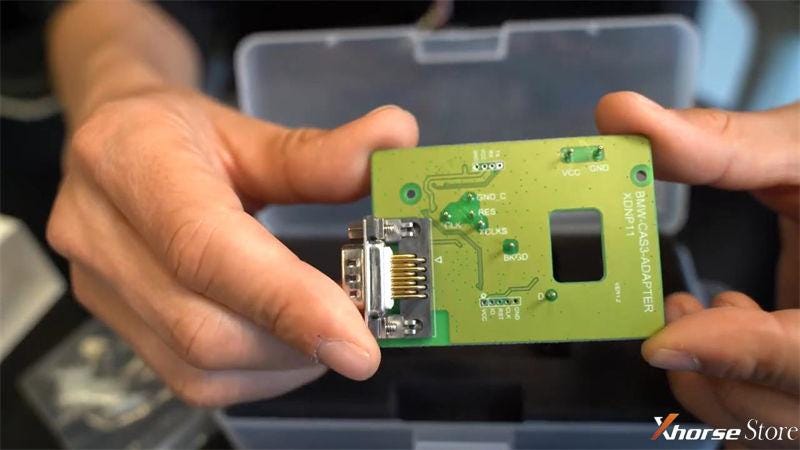
  1. Xhorse provides Solder-free Full Set Adapters to meet the needs for various car models. If you need to carry out a BMW CAS/FRM module for programming, use the specific adapter to read, modify or write EEPROM will be much efficient.


Buy Solder Free Adapters + MINI Prog together is more affordable.


Obviously, all above features guarantee a safety work and save much time.

Xhorse VVDI Mini Prog introduction and evaluation

Xhorse VVDI Mini Prog introduction and evaluation

Xhorse VVDI Mini Prog introduction and evaluation

Summarize the Characteristics

  • Solder-free programming
  • Read & write EEPROM
  • Read & write dashboard data,
  • PIN status detection
  • App control
  • Data Backup on Cloud storage
  • Edit data
  • 3 press headers


More questions welcome to contact us.

https://www.xhorsestore.co.uk/

Xhorse VVDI Key Tool Plus use case: add Mazda3 key

 How to use Xhorse VVDI Key Tool Plus Pad to add a new key for 2012 Mazda 3 via OBD? Following I’m gonna make a quick demo to show the procedure.


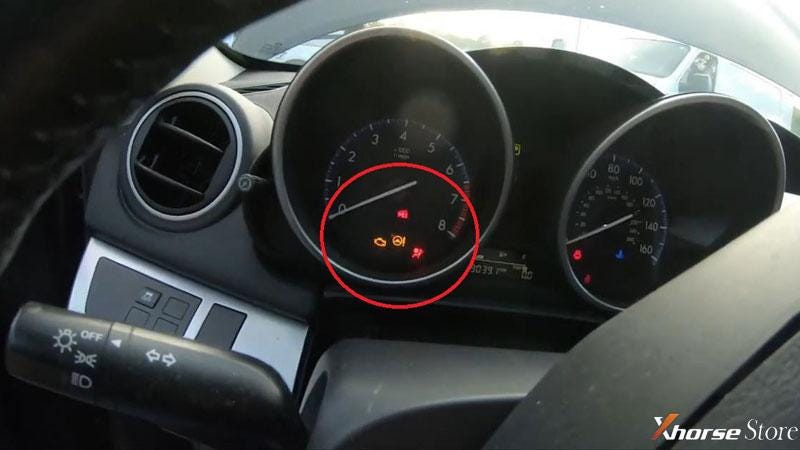
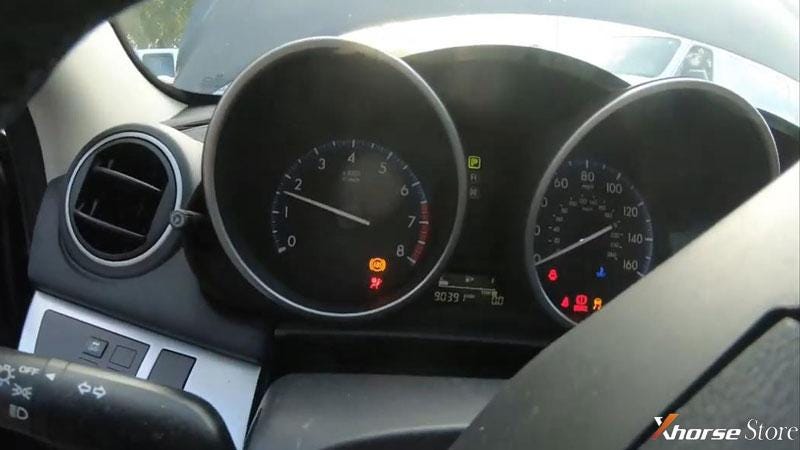
This is a basically F4 Mazda, it has got an IMMO light flashes on dashboard, which means it’s not programmed.

Xhorse VVDI Key Tool Plus adds key for 2012 Mazda3

Xhorse VVDI Key Tool Plus adds key for 2012 Mazda3


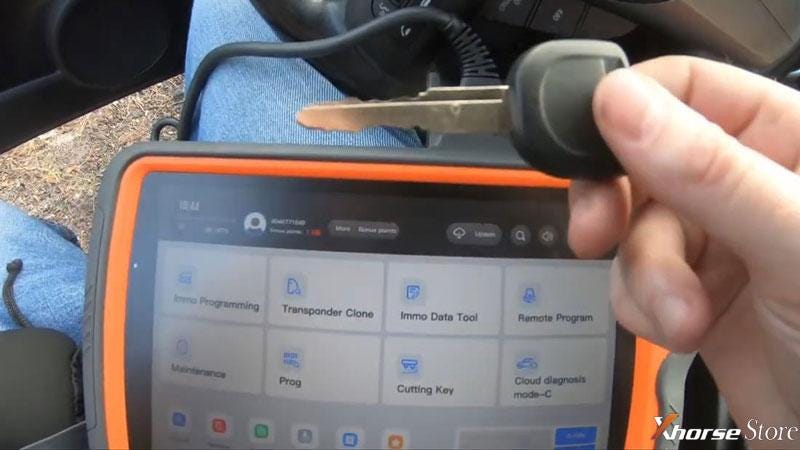
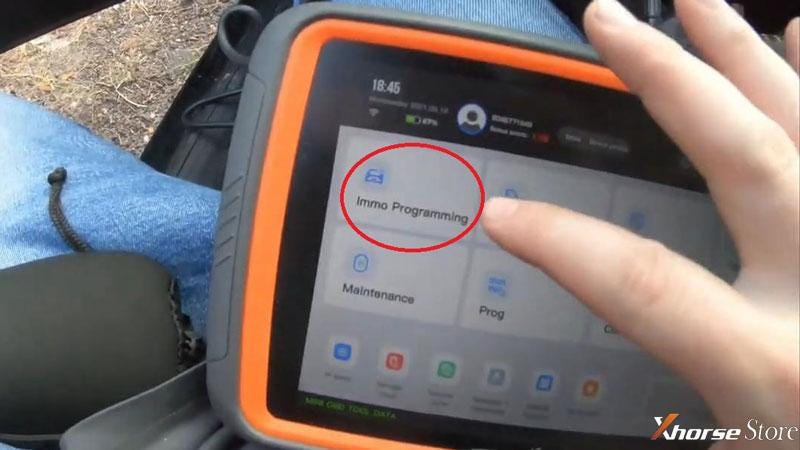
Here we go to plug VVDI Key Tool Plus connector into OBD, press

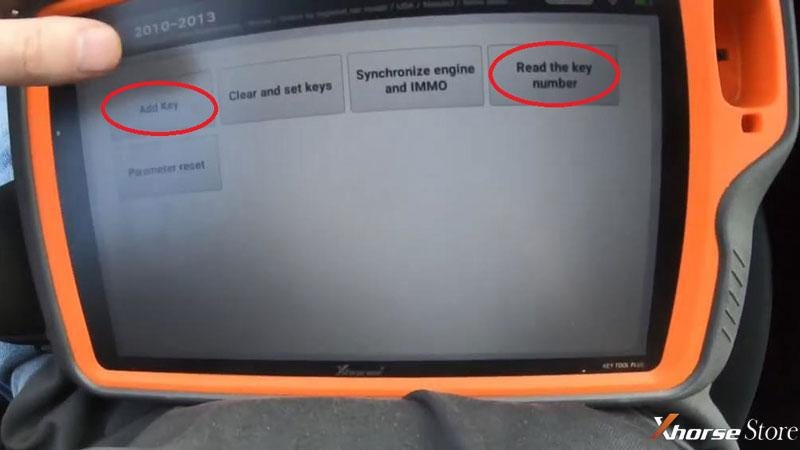
Immo programming >> Mazda >> Select by regional car model >> USA >> Mazda 3 >> Immo system >> 2010-2013 >> Start programming


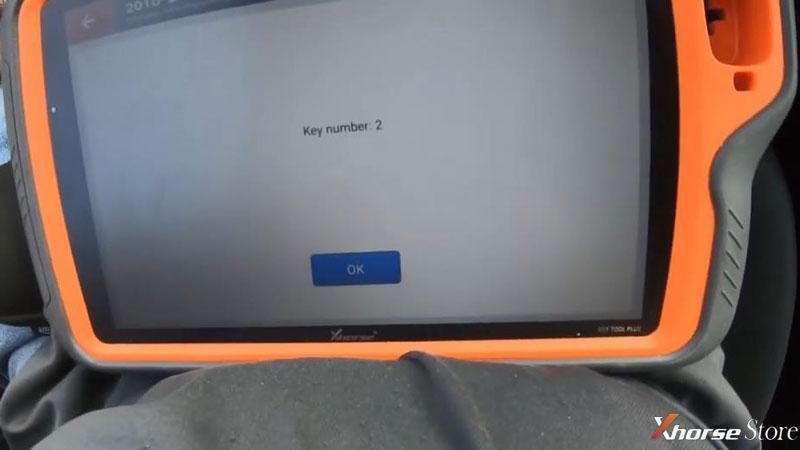
Press “Read the key number” to check, it’s 2 in total.


Go to “Add key”.

Xhorse VVDI Key Tool Plus adds key for 2012 Mazda3

Xhorse VVDI Key Tool Plus adds key for 2012 Mazda3

Xhorse VVDI Key Tool Plus adds key for 2012 Mazda3

Switch ignition on.

Insert the new key to ignition switch, turn the ignition switch on.


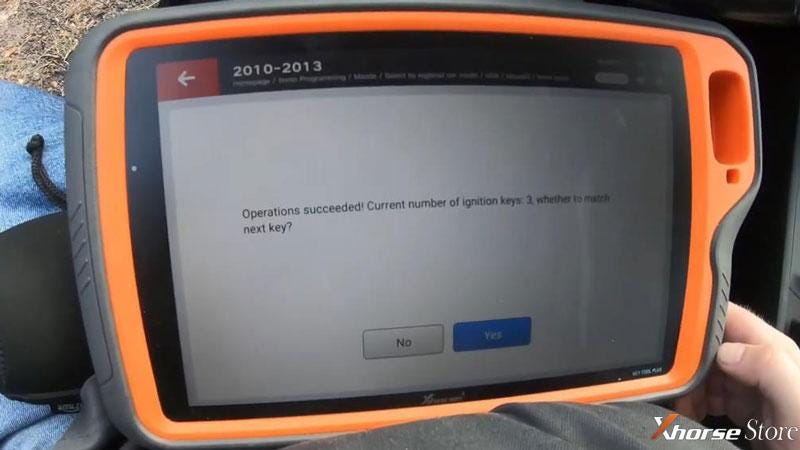
Operations succeeded!

Key Tool Plus shows the current number of ignition key is 3 now.

Press “Yes” to program next one, press “No” to complete.


Okay the immo light on dashboard went out.

Let me try the new key, it does start the engine.

Done!

Xhorse VVDI Key Tool Plus adds key for 2012 Mazda3

Xhorse VVDI Key Tool Plus adds key for 2012 Mazda3

Awesome easy and fast!

It only takes me 2 minutes to add Mazda 3 key successfully via VVDI Key Tool Plus.

Technical support by: https://www.xhorsestore.co.uk/

Tuesday, 9 November 2021

Xhorse Dolphin cutting machine battery replacement tutorial

 This is a quick guide on how to replace battery for Xhorse Dolphin XP-005/ XP-007 Key Cutting Machine by yourself.


Xhorse Dolphin Machine Battery Replacement Procedure

It’s taking a Dolphin XP-005 as example.


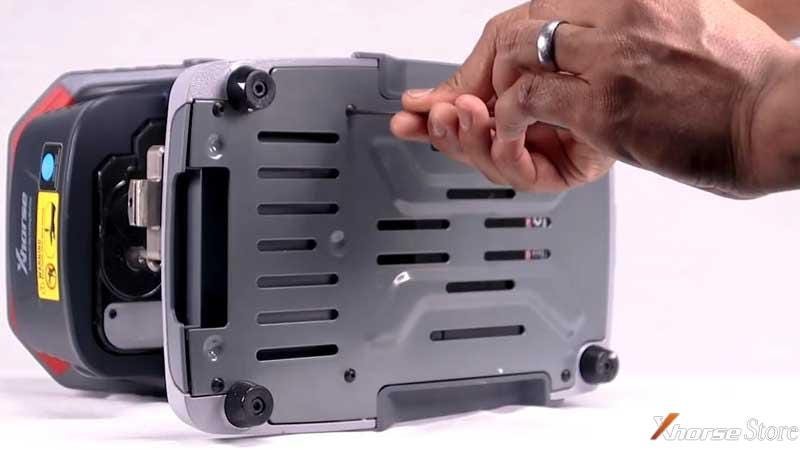
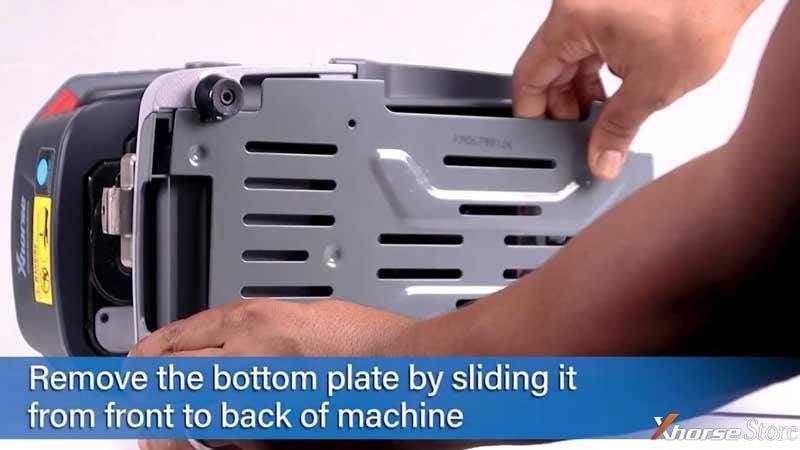
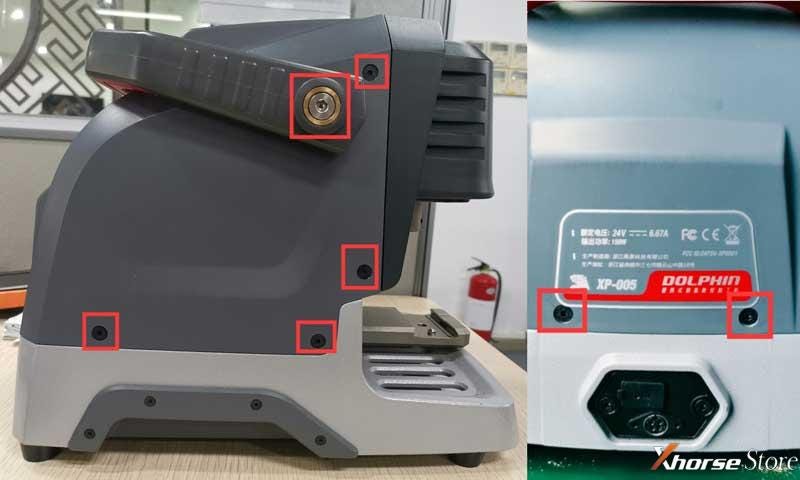
  1. Use a 2.5mm hex wrench to remove the screws located at the bottom case. Remove the bottom plate by sliding it from front to back of machine.

Xhorse Dolphin cutting machine battery replacement tutorial

Xhorse Dolphin cutting machine battery replacement tutorial

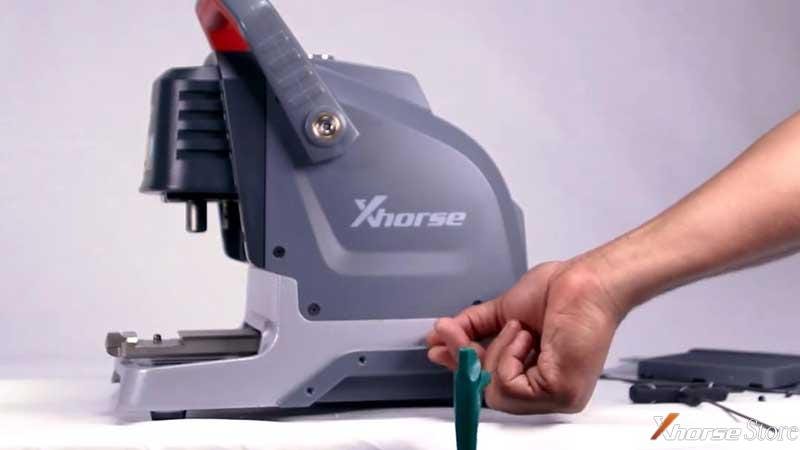
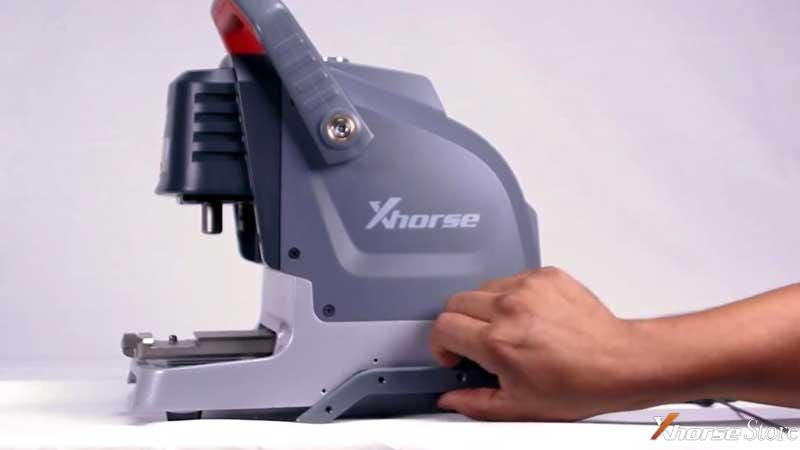
  1. Use a 2mm hex wrench to remove screws holding on the grip covers on each side of machine.

Xhorse Dolphin cutting machine battery replacement tutorial

Xhorse Dolphin cutting machine battery replacement tutorial

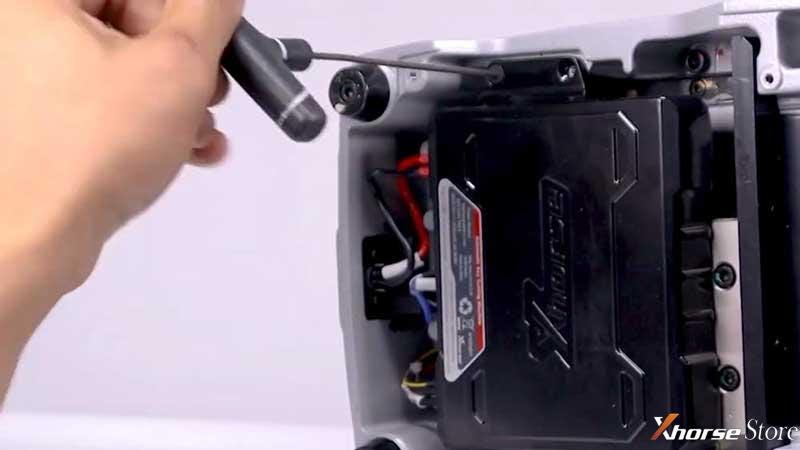
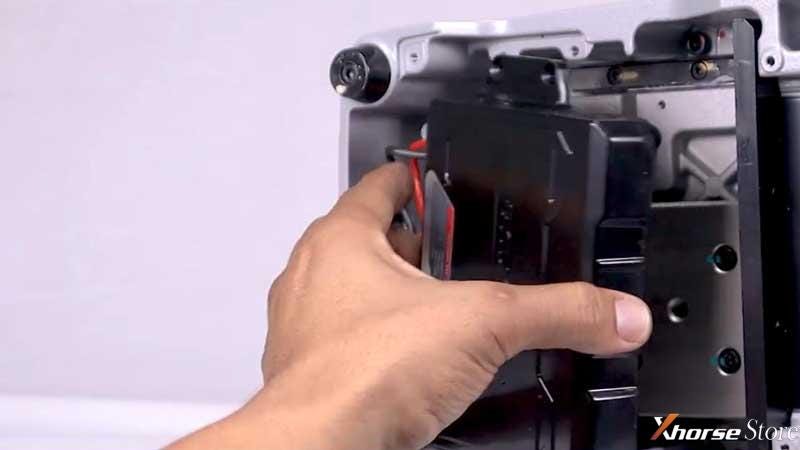
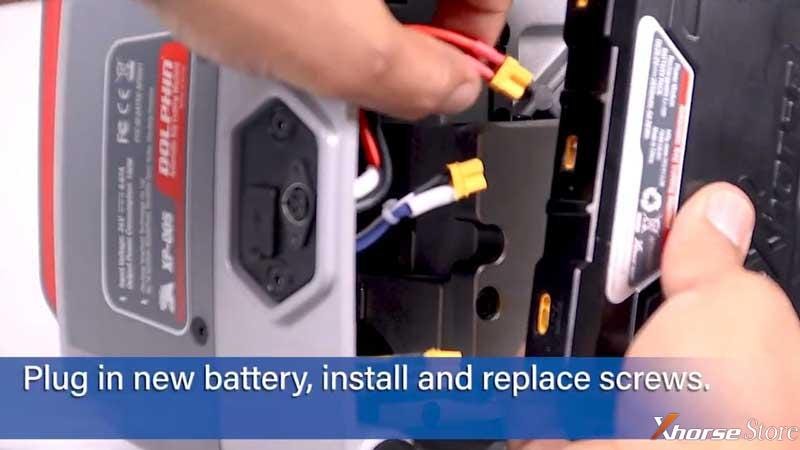
  1. With 2.5mm hex wrench, remove screws holding the battery, unplug and remove old battery, plug in new battery, install and replace screws.

Xhorse Dolphin cutting machine battery replacement tutorial

Xhorse Dolphin cutting machine battery replacement tutorial

Xhorse Dolphin cutting machine battery replacement tutorial

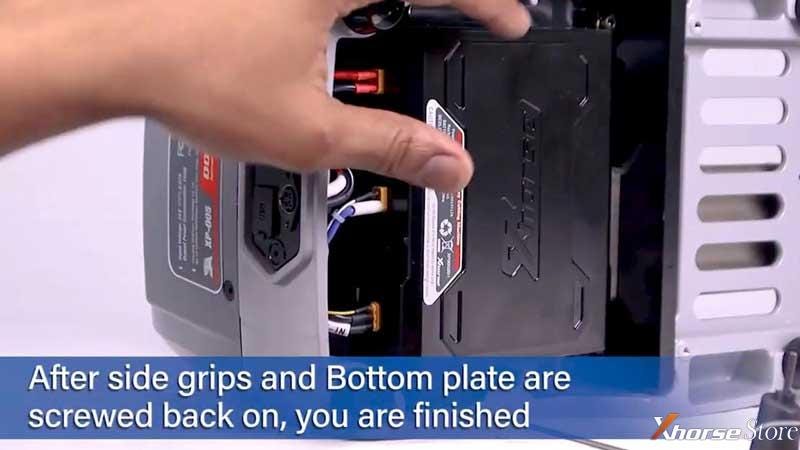
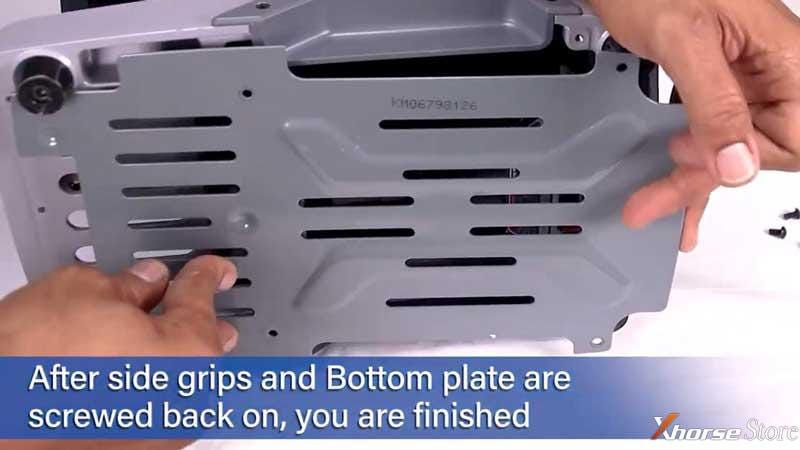
  1. After side grips and bottom plate are screwed back on, you are finished.
Xhorse Dolphin cutting machine battery replacement tutorial

Xhorse Dolphin cutting machine battery replacement tutorial

More questions welcome to contact us.

Technical support by: xhorse store

Xhorse Dolphin XP005 teardown tutorial (Check Probe & Cutter Conductivity)

 How to check if your Xhorse Dolphin XP-005 probe and milling cutter are abnormal conductivity? Following is the method to help detect the problem.


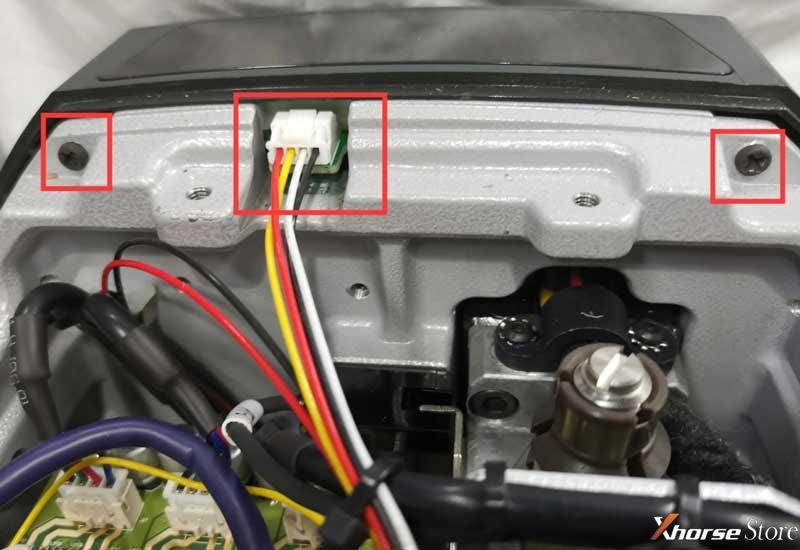
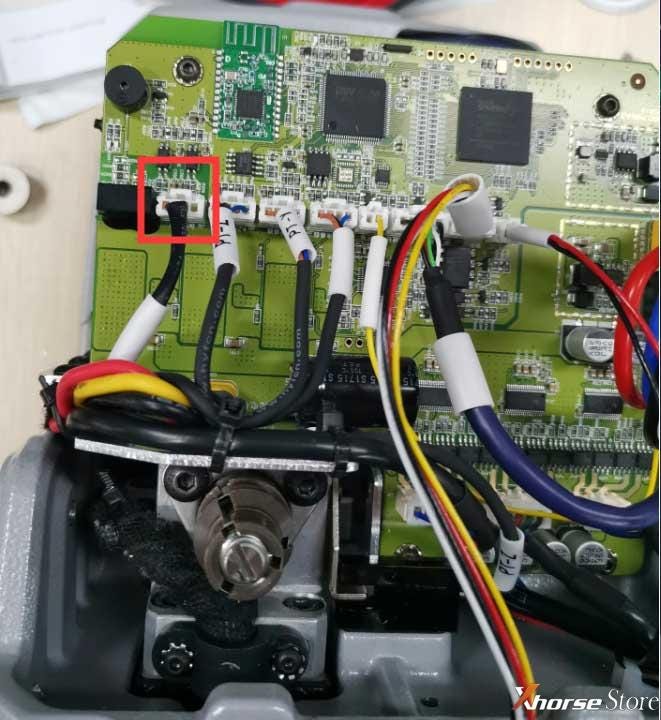
Step1. Take apart the back cover, please be careful of the wiring harness when disassembling.

Xhorse Dolphin XP005 Check Probe Cutter Conductivity

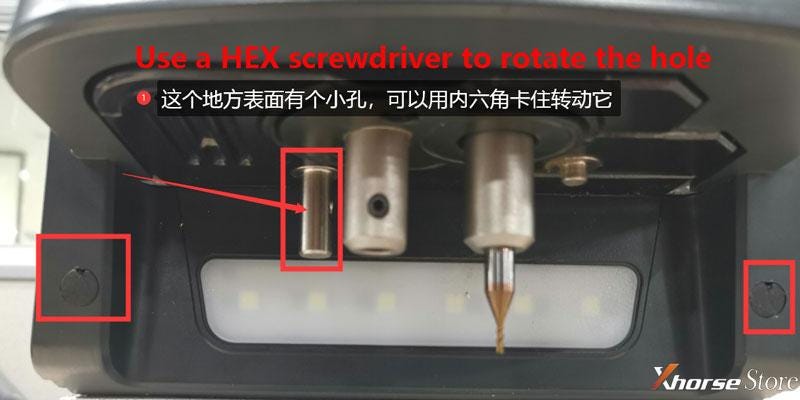
Step2. Take off the wire harness, and remove the Phillips screws(pic2). Take out the rubber pellets to remove screws inside, use a HEX screwdriver to rotate the hole to remove long strip(pic3).

Xhorse Dolphin XP005 Check Probe Cutter Conductivity

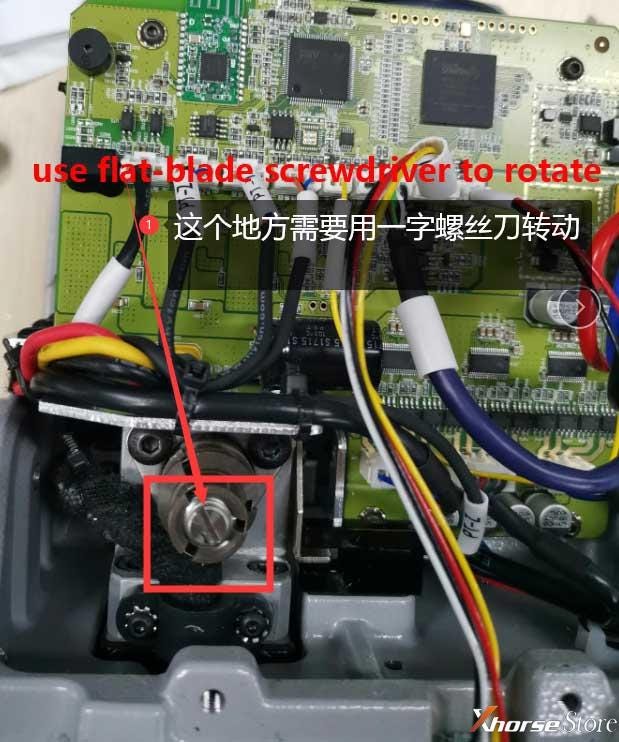
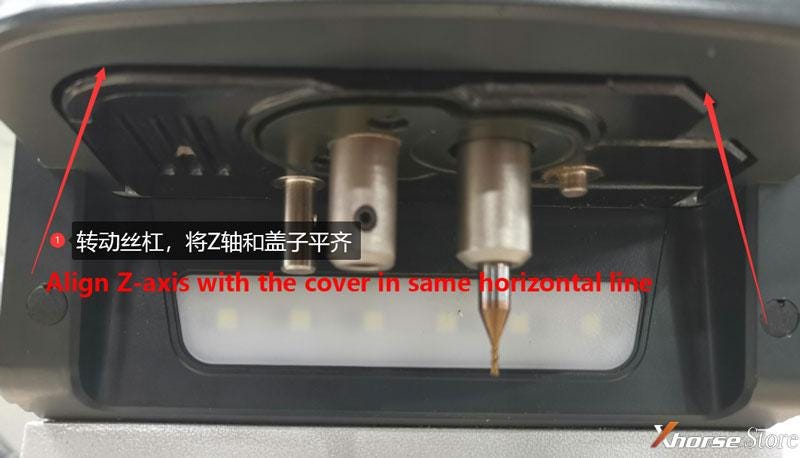
Step3. Use a flat-blade screwdriver to rotate the lead screw, align Z-axis with the cover in  same horizontal line(pic4-5). Remove Z-axis housing after alignment, install the probe next to it(pic6).

Remove the screws in pic6.

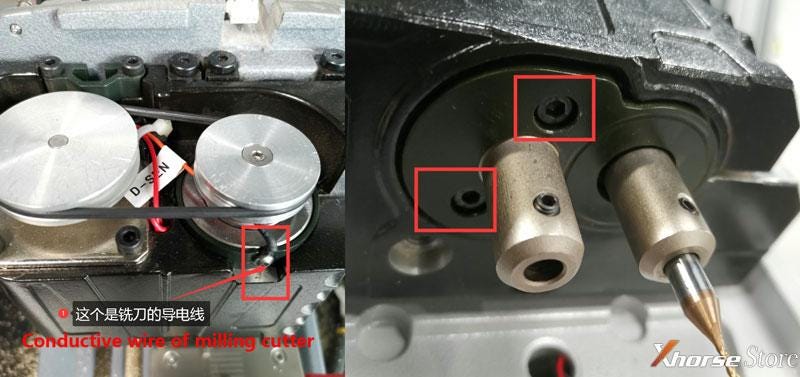
Note: there is a conductive wire inside, please be careful(pic7).

Xhorse Dolphin XP005 Check Probe & Cutter Conductivity


Xhorse Dolphin XP005 Check Probe Cutter Conductivity

Xhorse Dolphin XP005 Check Probe Cutter Conductivity

Xhorse Dolphin XP005 Check Probe Cutter Conductivity

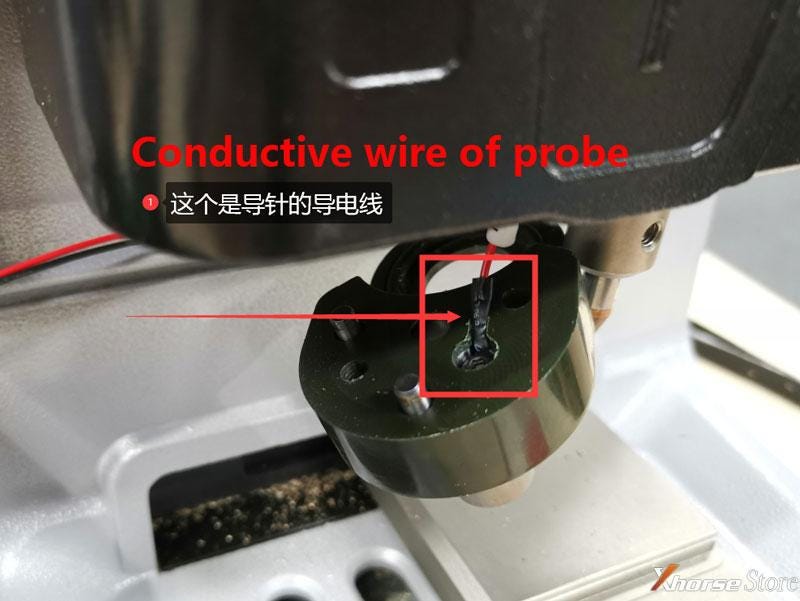
Step4. Detect if the conductive wires of the probe & milling cutter are conductive or short. It need to combine with main board to detect(pic8). Or plug in the cable on main board to detect.

Xhorse Dolphin XP005 Check Probe Cutter Conductivity

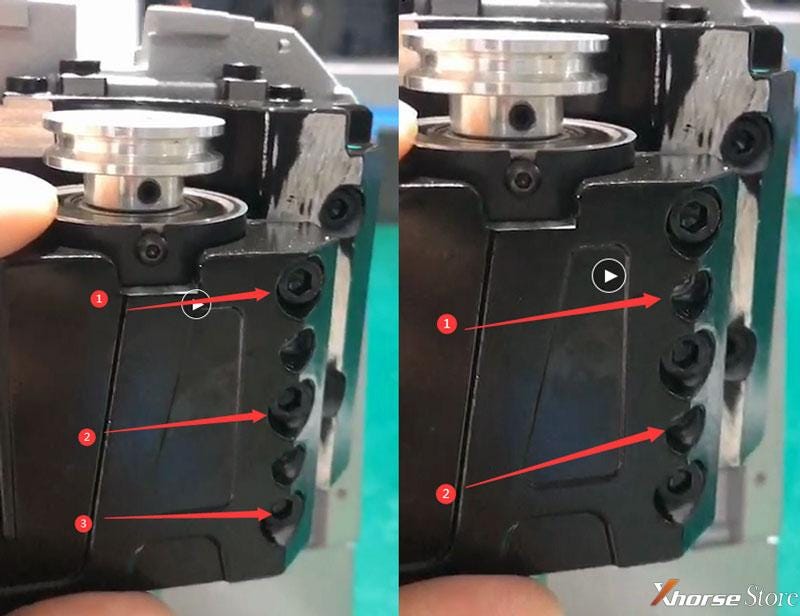
Step5. Loosen and tighten the screws of Z-axis(pic9). Push these 2 screws to the inside until there is a gap.


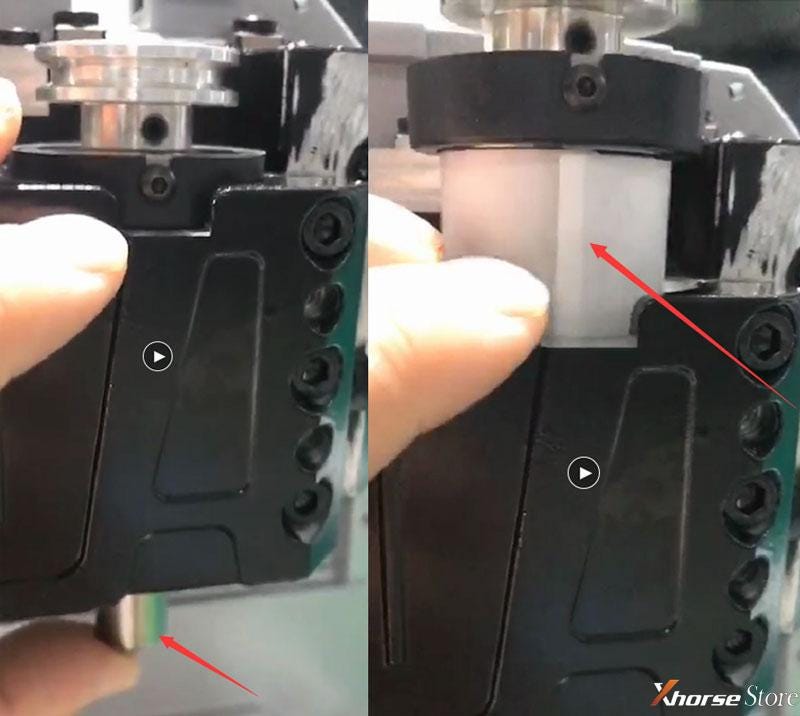
That’s to take out a shaft. Press on the position of milling cutter hole, push it up with a little force. Observe if the white paper inside is broken(pic10).

If it is broken, it needs to be replaced;

If it is not broken, observe whether there’s iron fillings in the bearing hole.

Xhorse Dolphin XP005 Check Probe Cutter Conductivity

Xhorse Dolphin XP005 Check Probe Cutter Conductivity

This is how to detect the Dolphin XP005 Machine probe and milling cutter conductivity.

More questions welcome to contact us.

Technical support by: www.xhorsestore.co.uk

Xhorse Smart Key Box tested on Honda City car

 Just got a new gadget Xhorse XDSKE0EN Smart Key Box this week, so I’m gonna make an unboxing quick review and test it on a Honda City.


What’s in Smart Key Box Package?

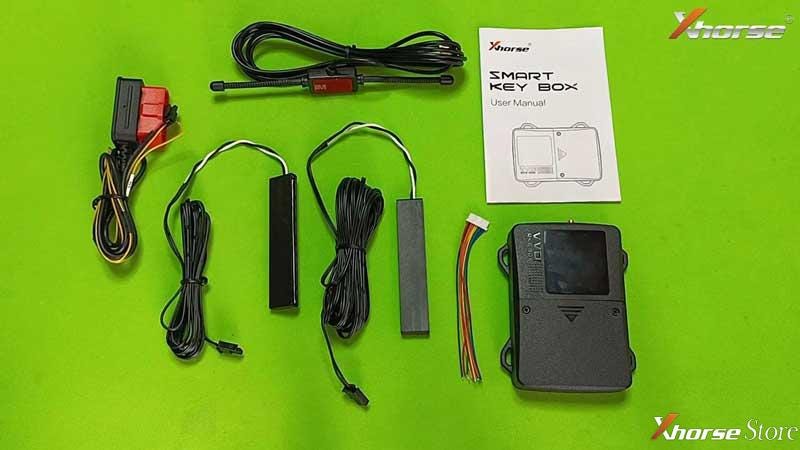
  • 1pc Smart Key Box;
  • 2pcs LF antenna;
  • 1pc HF antenna;
  • 1pc Power Supply Cable;
  • 1pc Remote Soldering Line;
  • 1pc User Manual;
  • 1pc Product Quality Certificate.

Xhorse Smart Key Box tested on Honda City car

  • Set Up Smart Key Box
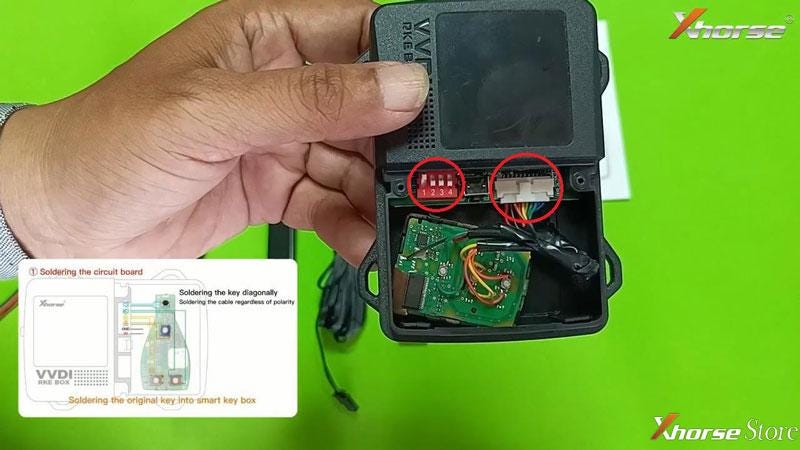
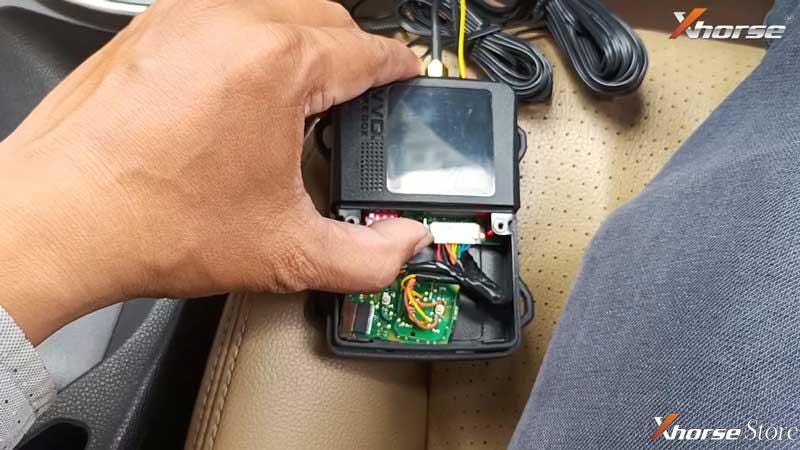
  1. Solder the remote soldering lines with circuit board of smart key, then insert into Smart Key Box;
  2. Turn on the DIP switch 1.


Don’t know how to install? It may help:

How to download & start to use Xhorse Smart Key Box?

http://blog.xhorsestore.co.uk/xhorse-keys-chips/how-to-download-start-to-use-xhorse-smart-key-box/


The soldering is not difficult, anyone who has the operational ability can do it. Just follow the instructions.

Xhorse Smart Key Box tested on Honda City car

  • Connect Smart Key Box via OBD & Key Learning
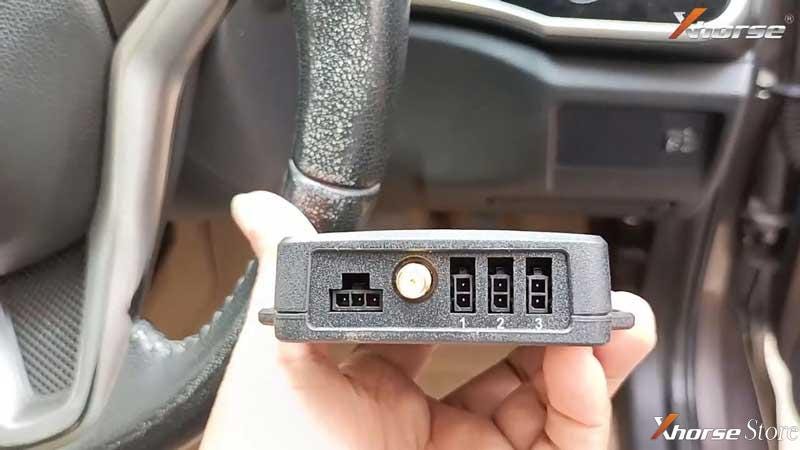
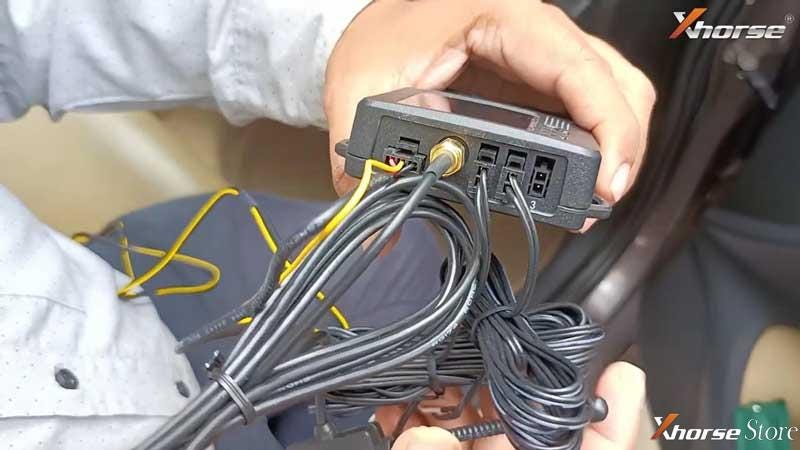
  1. Take out Smart Key Box to the vehicle. Insert power supply cable, RF antenna and LF antenna into the port. Connect to vehicle via OBD.

Xhorse Smart Key Box tested on Honda City car

Xhorse Smart Key Box tested on Honda City car

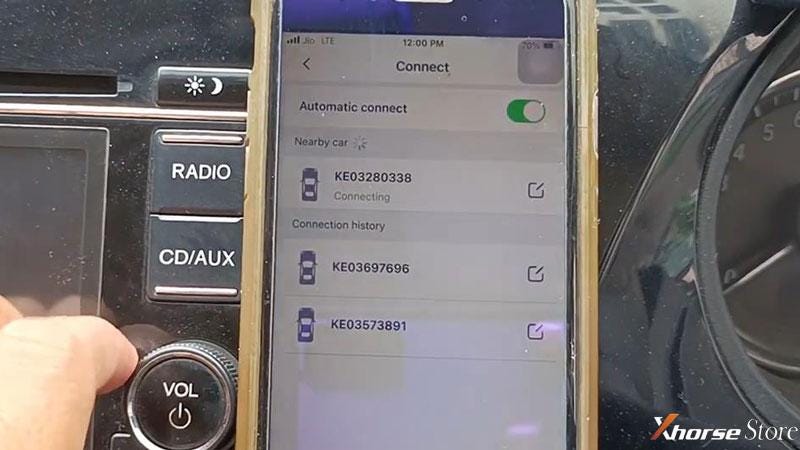
  1. Start Smart Key Box app to connect device via Bluetooth, long press the “learn button” until hearing a beep with a indicate lights on.

Xhorse Smart Key Box tested on Honda City car

Xhorse Smart Key Box tested on Honda City car


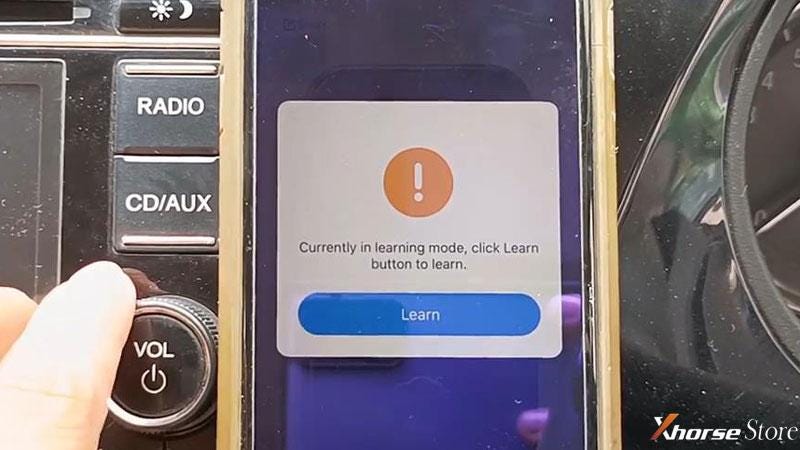
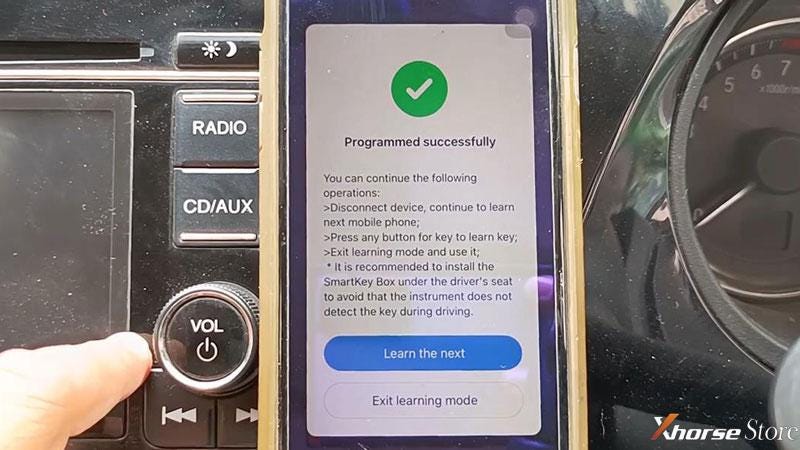
  1. It’s in learning mode, press “Learn”. You’ll hear 2 short beeps when programming successfully.


To learn the next one, press “Learn the next”, otherwise, press “Exit learning mode”.

Don’t forget to long press “learn button” again when completed.


It’s quite easy and smart until now. Let’s test if the functions work.

Xhorse Smart Key Box tested on Honda City car

Xhorse Smart Key Box tested on Honda City car

  • Test Keyless Entry/Go Function

Take the phone to go away.

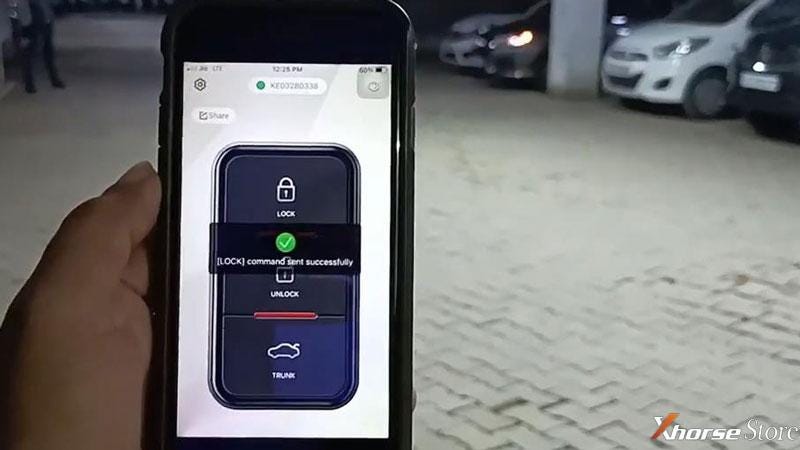
  1. Press LOCK, okay.
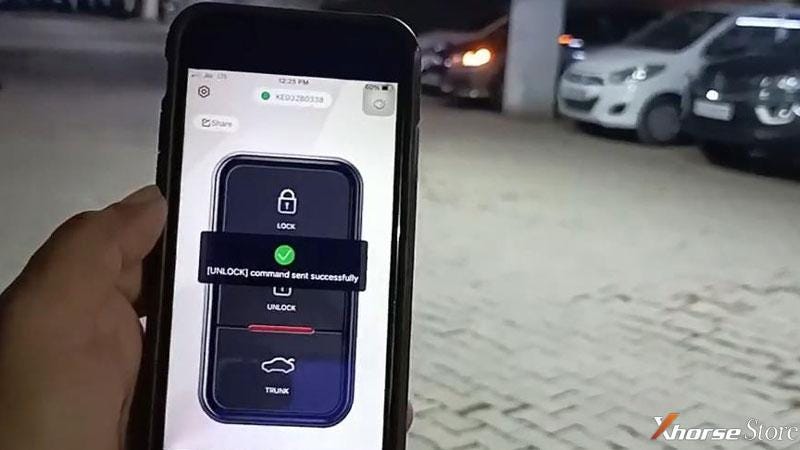
  2. Press UNLOCK, okay.

The Xhorse Smart Key Box is working on Honda City successfully!


It is a great and amazing tool that will bring me convenience simply to have a phone at hand.

Xhorse Smart Key Box tested on Honda City car

Xhorse Smart Key Box tested on Honda City car


Technical support by: https://www.xhorsestore.co.uk/

Friday, 29 October 2021

USB Elm327 code scanner install Forscan software

 Car model: Ford Transit Mk6 & Mk7


Purpose:

To replace the PRV and SCV or do I need to do learns on these two as well? The vans undriveable atm and can’t get it to someone.


Prepare:

Elm327 switchable wired

Here: https://www.obdexpress.co.uk/wholesale/elm327-ford-elmconfig.html

Comes with the software in CD


Forscan

https://forscan.org/download.html

you will need to download forscan to the computer.


Install Forscan for USB ELM327

 (PLEASE SEE WiFi PRODUCT DESCRIPTION FOR WiFi SETUP GUIDE).


This guide is only for modified ELM327.

STEP 1 - DRIVERS.

All USB devices require drivers and ours is no different. Without them your laptop cannot see or communicate with the ELM327.
Some newer versions of Windows will automatically detect and install drivers.
If yours does not then you will need to manually install.

Which drivers do I need?

As we use different suppliers for our parts, your ELM327 could have one of 4 different USB chips. It is important to install the correct drivers.

To help you identify which drivers to install, please look on the back of the ELM327 where you should see the USB type clearly stated e.g. CH340 or FTDI.

When you know the USB type, please download the correct driver (see our links page for the driver link).
Note: We do not provide drivers. If the driver link is dead or does not install then use Google to find an alternative site.

Installing Drivers.

I am surprised at how many people get this wrong so please follow carefully!
If your freshly downloaded driver pack is contained within a Zip file, you MUST extract this to a new folder first. DO NOT RUN THE DRIVER WITHIN THE ZIP FILE!
Once you have extracted the driver files look for the exe file and run it as administrator.
The driver will then install correctly.
Failure to do this will prevent the driver from fuctioning correctly!

STEP 2 - TESTING.
When you have installed the drivers you can plug in the ELM327.
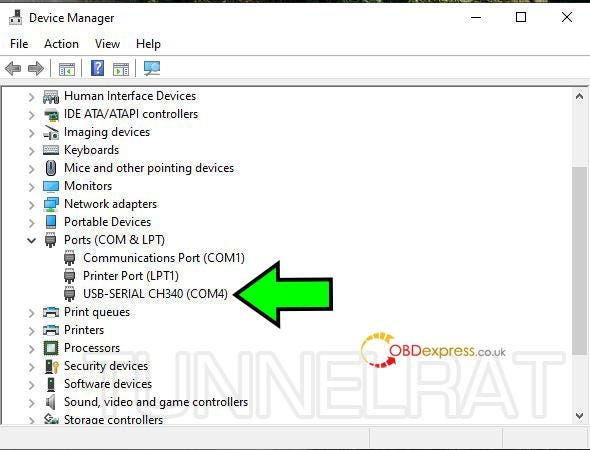
To check that your laptop can now see the device, launch Windows Device Manager:
install Forscan for USB Elm327 code scanner

Look at Ports and you should see the device listed (your device COM number may be different). In our example this is CH340 - yours could be the same, FTDI or Silicon Labs.

If you do not see your device or there is a yellow triangle, then the drivers have not installed correctly. Please go back to step 1 and check that you did everything correctly.
If you are still having problems please contact us for more support stating which USB chipset you have and which version of Windows you are trying to install on.

STEP 3 - SOFTWARE.
If all is well, download and install FORSCAN for windows.

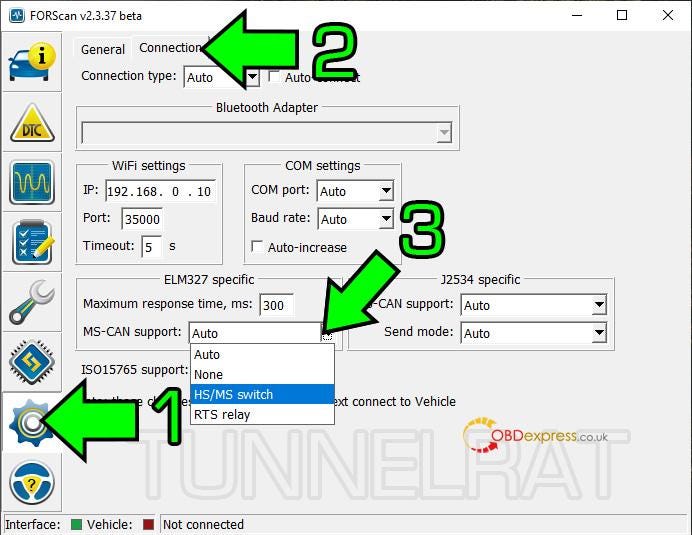
Looking at the diagram below, select:
1. Settings
2. Connection tab
3. MS-CAN Support options:
If you purchased an ELM327 with switch select the "HS/MS Switch" option.
If you purchased an auto switching ELM327 select the "RTS Relay" option.
install Forscan for USB Elm327 code scanner

With your ELM327 plugged into your laptop, plug the other end into your car and turn on the ignition.

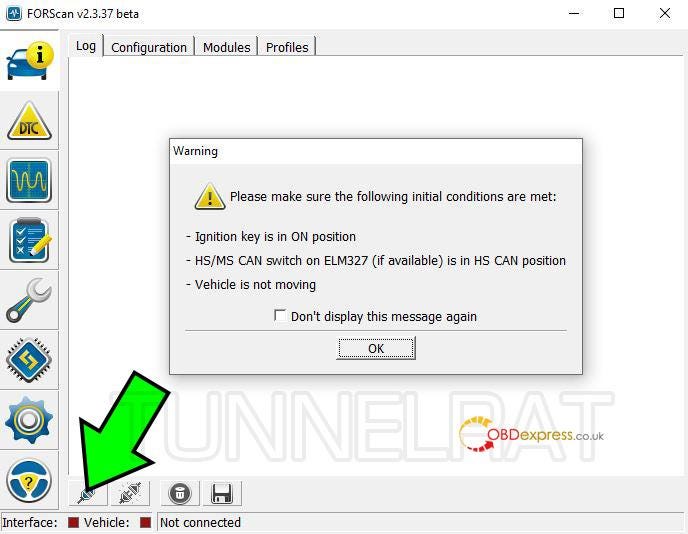
Now click the connect icon on the Forscan screen:
install Forscan for USB Elm327 code scanner

Forscan will then ask you to check that Ignition is on (engine not running) and that the switch on the ELM327 is set to the "HS" position (not required for our auto switch device).

The switched ELM327 now has the HS position marked with an H or a white dot or there may be some other indication on the top label to help you identify the correct position.

When connection has been established with your car Forscan will start to list the modules it has found on the HS CAN BUS.
You will then be asked to flip the switch and Forscan will continue to read modules on the MS CAN BUS (older cars do not have MS CAN).

Only flip the switch when prompted. Do not flip the switch,  unplug the ELM, or allow your laptop to switch off when forscan is reading from the vehicle! 

You are now connected to Forscan!
Please refer to the Forscan website for further operating instructions.


https://www.obdexpress.co.uk/
Autel IM508 OEM key learning not work(Jeep compass keyless chip)

 Have a problem with Jeep compass OEM key learning using Autel MaxiIM IM508

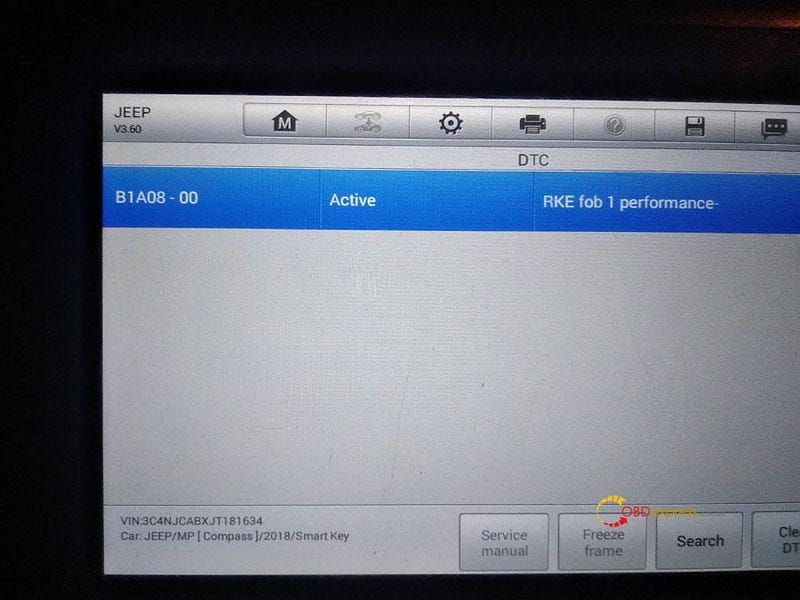
Try to add key. Key was added successfully, but the buttons, keyless, chip won't works. I bought keys from different sellers and have the same result. DTC RKE key fob performance. Chinese Xhorse key was added works perfectly.

Autel IM508 OEM key learning not work

Solution:

If your remotes the problem read out the frequency and compare it with the OEM.


Please check if the key chip is correct, and then send the datalog: both with the OEM key failure datalog and after-market key xhorse successful datalog.


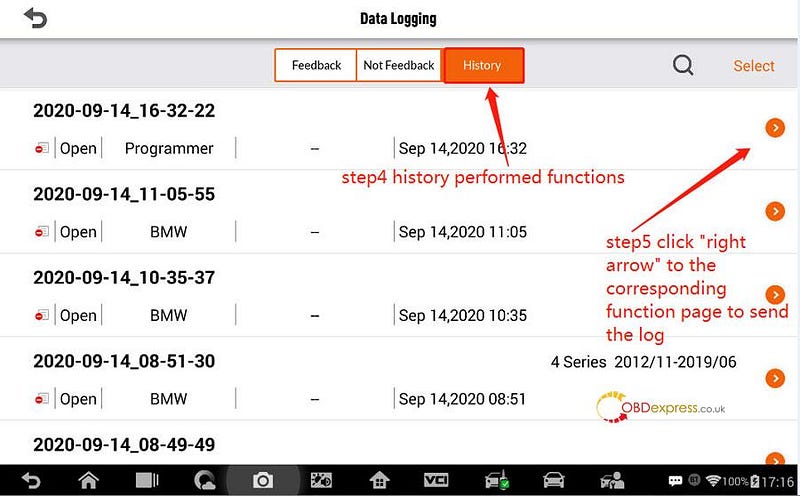
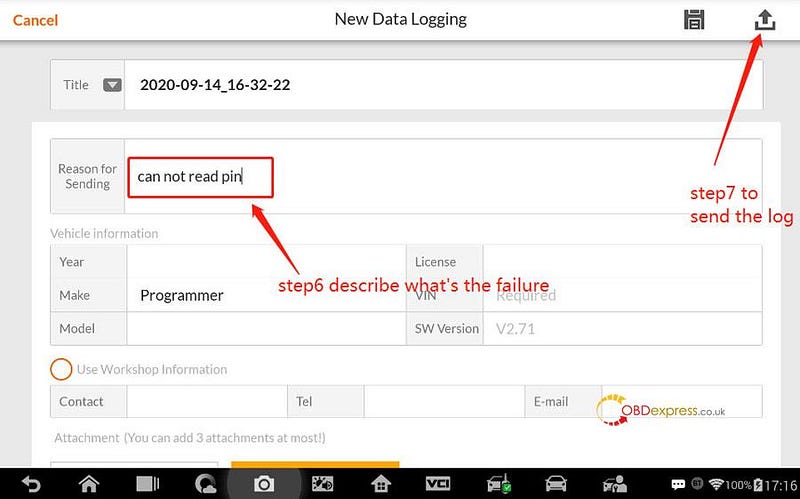
Steps to send your datalog with Autel IM508:

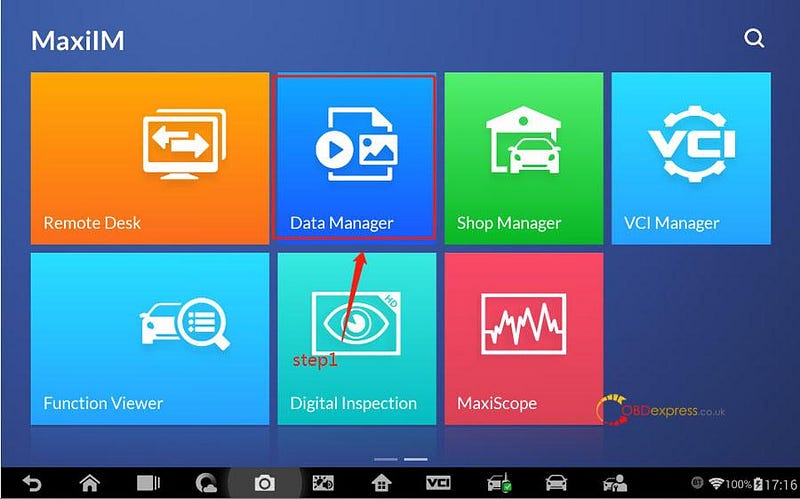
Step 1. Click on "Data Manager".

Autel IM508 OEM key learning not work

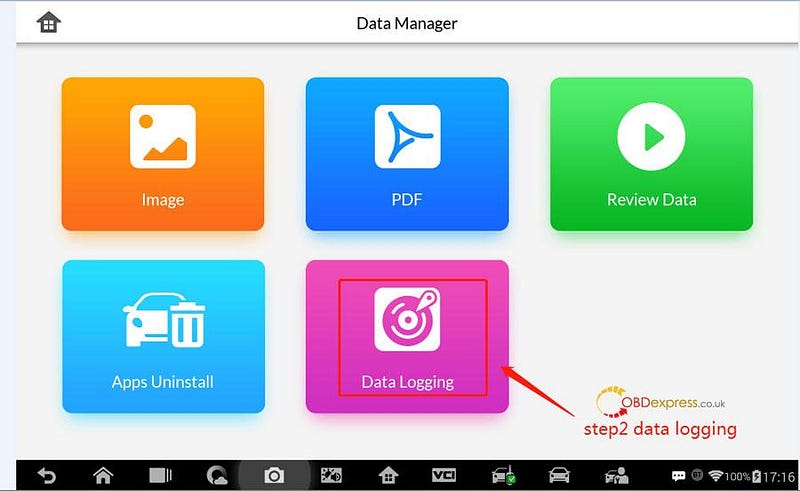
Step 2. Click on "Data Logging".

Autel IM508 OEM key learning not work

Step 3. history performed functions.

Step 4. Click on "Right arrow" to the corresponding function page to send the log.

Autel IM508 OEM key learning not work

Step 5. Describe what's the failure.

Step 6. To send the log.

Autel IM508 OEM key learning not work

If you still have questions, you can contact us:

www.obdexpress.co.uk

Hope it helps!

How to Unlock Ford BOSCH MD1CP006 with OBDSTAR ECU Master via Boot?

 This guide covers the procedure for unlocking, reading, and writing locked Bosch MD1 CP006 engine control units found on Ford F-250 and F-...