Wednesday, 20 April 2022

OBDSTAR P003 Kit read BOSCH ECU PinCode via Bench mode

 OBDSTAR P003 Kit can work with OBDSTAR X300 DP Plus (Key Master DP Plus)/X300 Pro4 (Key Master 5) to read BOSCH ECU data/CS/PinCode, etc via Bench/Boot on Audi, Citroen, DS, Mahindra, Peugeot, Skoda, SEAT, Volkswagen etc. It only takes less than 5 minutes. Faster than the general operation!

OBDSTAR P003 Kit

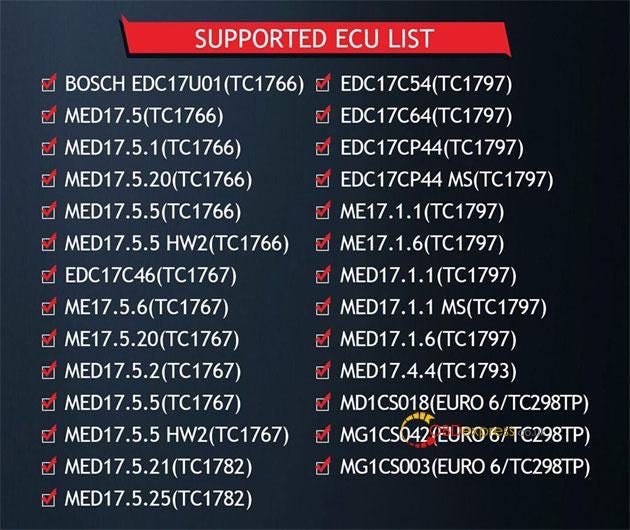
OBDSTAR P003 Kit Supported ECU List:

BOSCH EDC17U01 (TC1766)

MED17.5 (TC1766)

MED17.5.1 (TC1766)

MED17.5.20 (TC1766)

MED17.5.5 (TC1766)

MED17.5.5 HW2 (TC1766)

EDC17C46 (TC1767)

ME17.5.6 (TC1767)

ME17.5.20 (TC1767)

MED17.5.2 (TC1767)

MED17.5.5 (TC1767)

MED17.5.5 HW2 (TC1767)

MED17.5.21 (TC1782)

MED17.5.25 (TC1782)

EDC17C54 (TC1797)

EDC17C64 (TC1797)

EDC17CP44 (TC1797)

EDC17CP44 MS (TC1797)

ME17.1.1 (TC1797)

ME17.1.6 (TC1797)

MED17.1.1 (TC1797)

MED17.1.1 MS (TC1797)

MED17.1.6 (TC1797)

MED17.4.4 (TC1793)

MD1CS018 (Euro 6/TC298TP)

MG1CS042 (Euro 6/TC298TP)

MG1CS003 (Euro 6/TC298TP)

etc.

OBDSTAR P003 Kit read BOSCH ECU PinCode via Bench mode

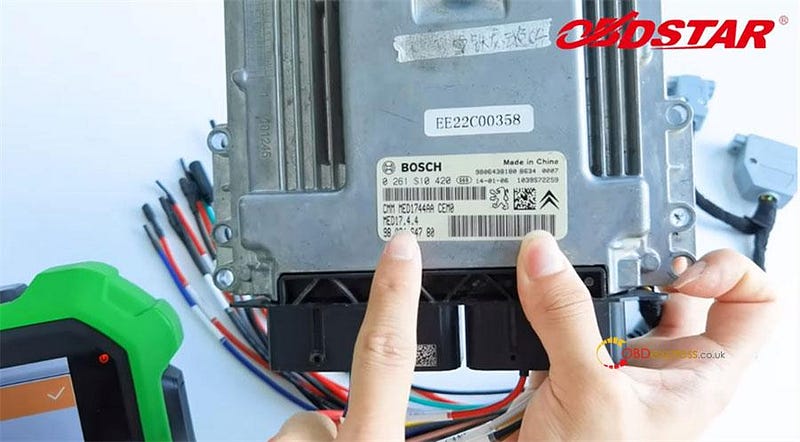
Here takes ECU (MED17.4.4) as an example to show how to read pincode with x300 DP Plus and P003 kit.

What's required:

OBDSTAR X300 DP Plus with main cable & charge

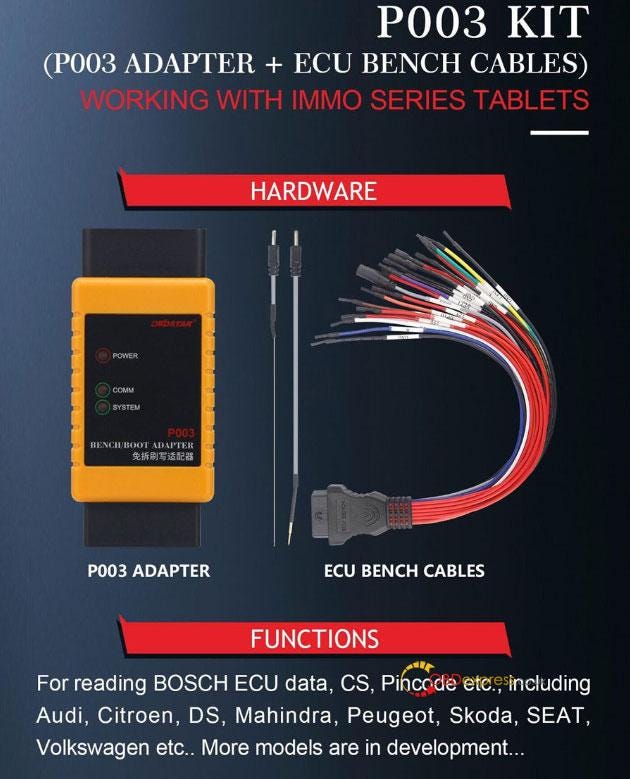
OBDSTAR P003 Kit (P003 adapter+ ECU BENCH cables)

PEUGEOT/CITROEN/DS ECU (MED17.4.4)

OBDSTAR P003 Kit read BOSCH ECU PinCode via Bench mode

OBDSTAR P003 Kit read BOSCH ECU PinCode via Bench mode

Operation mode:

On bench

Step-by-step to read PinCode:

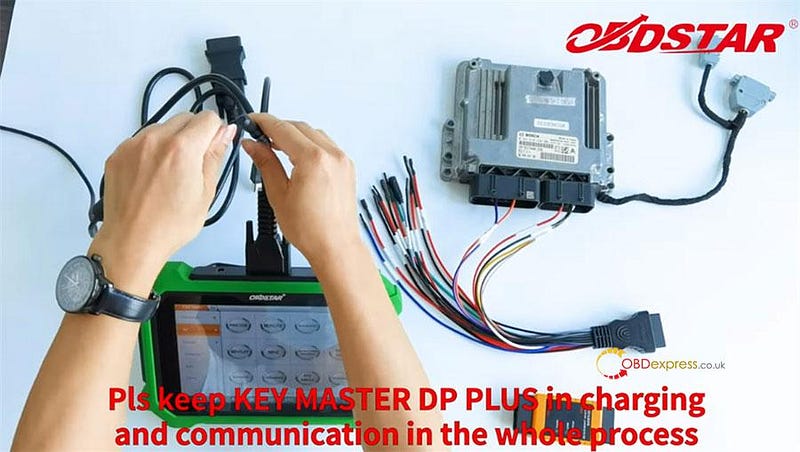
Keep the X300 DP Plus in charging with 12 V power and communication in the whole process.

OBDSTAR P003 Kit read BOSCH ECU PinCode via Bench mode

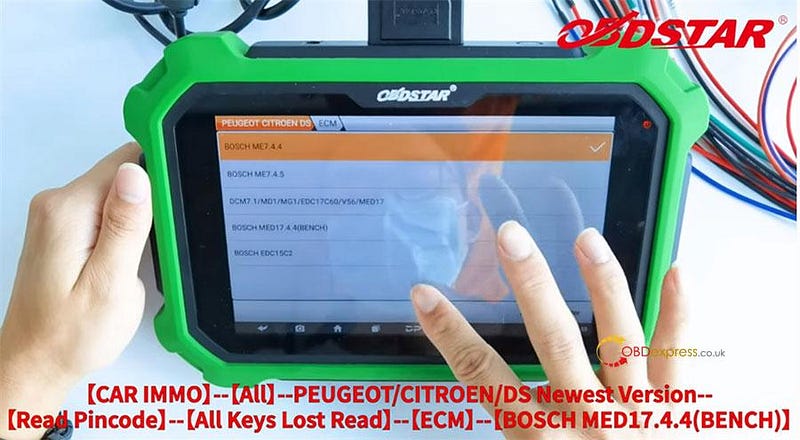
Select CAR IMMO>> All>> PEUGEOT/CITROEN/DS Newest version>> Read Pincode>> All keys Lost Read>> ECM>> BOSCH MED17.4.4 (BENCH)>> Read PinCode

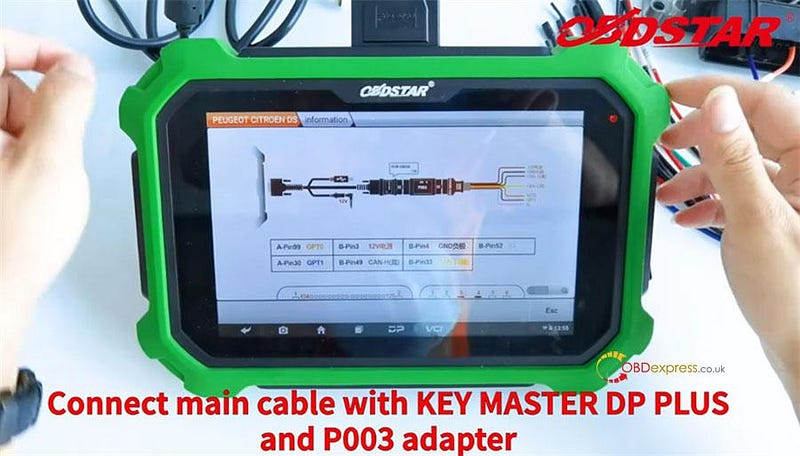
Click 'Guide' in the lower left to check the wiring diagram

OBDSTAR P003 Kit read BOSCH ECU PinCode via Bench mode

OBDSTAR P003 Kit read BOSCH ECU PinCode via Bench mode

OBDSTAR P003 Kit read BOSCH ECU PinCode via Bench mode

Connect X300 DP Plus and OBDSTAR P003 adapter by the main cable

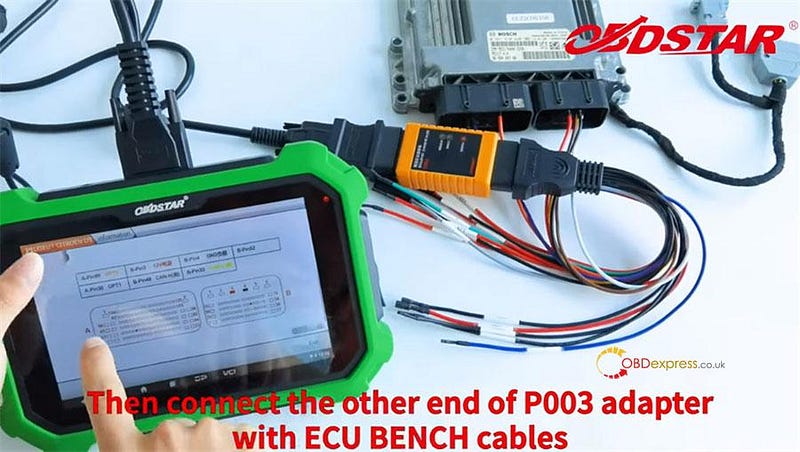
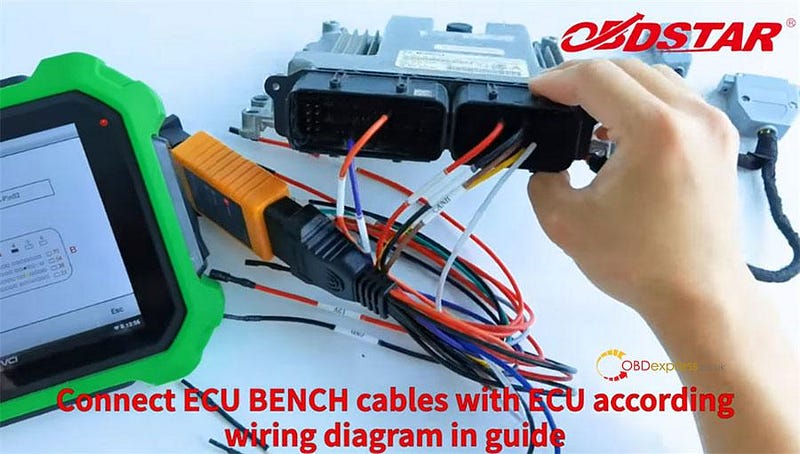
Then connect the other end of P003 adapter to ECU with the ECU BENCH cables

OBDSTAR P003 Kit read BOSCH ECU PinCode via Bench mode

OBDSTAR P003 Kit read BOSCH ECU PinCode via Bench mode

OBDSTAR P003 Kit read BOSCH ECU PinCode via Bench mode

Click Esc>> Enter to read PinCode
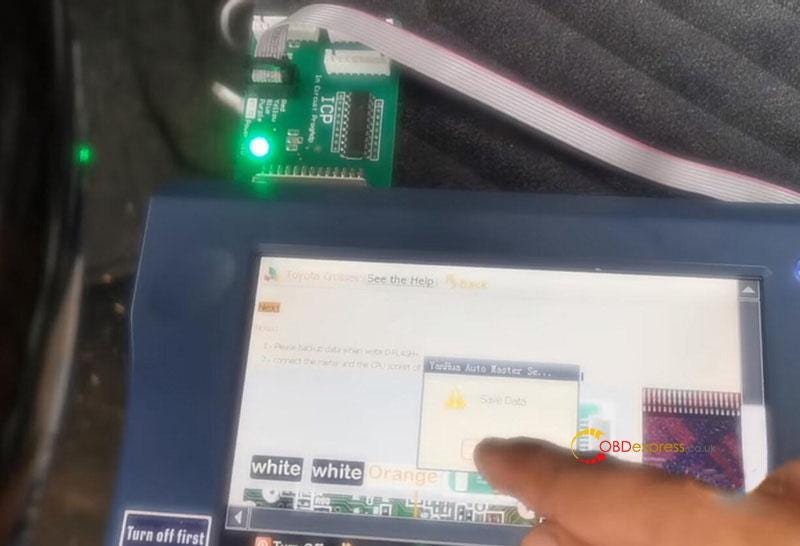
Reading DFLASH…

Firmware configuring…

Reading PinCode…

This process takes about 1–8 minutes.

OBDSTAR P003 Kit read BOSCH ECU PinCode via Bench mode

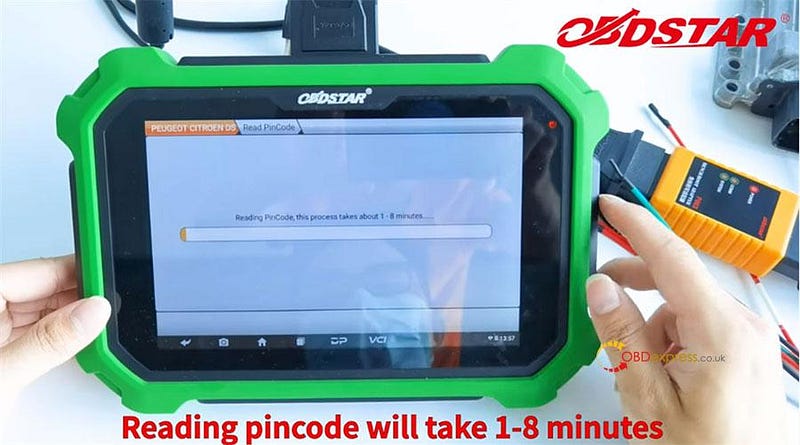
Read out the PinCode is N7G6

OBDSTAR P003 Kit read BOSCH ECU PinCode via Bench mode

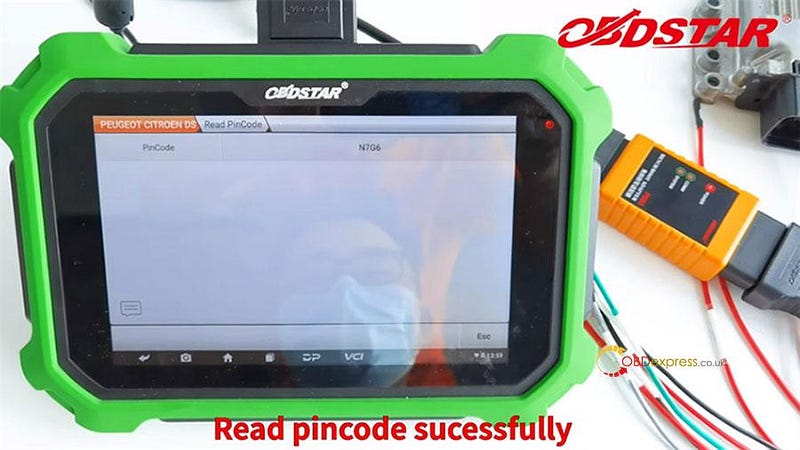
It's so simple and fast to read Pincode by OBDSTAR P003 Kit. Save you much time!

MTDIAG M1 or OBDSTAR iScan: which one is better for BMW motorcycles?

 2022 latest BMW motorcycle diagnostic tools: MTDIAG M1 or OBDSTAR iScan, which is better? What’s the differences?

MTDIAG M1 vs. OBDSTAR iScan Comparison Table

Differences

  • MTDIAG M1 has ability to program old BMW immo keys while Obdstar iScan does not.
  • MTDIAG M1 is a Bluetooth connector to control on Android phone. Obdstar iScan is a tablet with touchscreen to control directly, connecting by OBD cable.
  • MTDIAG M1 is cheaper than Obdstar iScan.
  • MTDIAG M1 is smaller & lighter than Obdstar iScan.
  • Obdstar iScan covers more functions than MTDIAG M1: OBDII scan, action test, ecu programmer, coding, CO adjustment.
  • MTDIAG M1 is equipped with 10 pin cable while Obdstar iScan is optional purchase.
  • MTDIAG M1 supports 2 year free update while Obdstar iScan supports 1 year free.
  • Obdstar iScan supports to switch 11 languages while MTDIAG M1 dose not.
    1. Summary

      MTDIAG M1 is better value for money, compact to carry, suitable for DIYers or motor owners. It’s recommended to work as an entry level motorcycle scanner.

      Obdstar iScan is a medium level motorcycle scan tool, which covers more advanced diagnostic functions and user experience. It’s recommended for mechanics or motor repair shop.

      To program more BMW motor keys, it’s recommended to go for higher level OBDSTAR MS50/ MS80 + P001 IMMO Kit.

      www.obdexpress.co.uk

      Should PCMtuner software be updated to 1.2.3?

       PCMtuner software has been updated to V1.2.3(As of 2022.4.20). 1.2.2 fixed the network connection problem in France. And 1.2.3 fixed the "int32" problem.

      PCMTuner has two softwares, PCMflash and PCMTuner client. If PCMtuner has an update, please do not hesitate to update the latest version directly.

      But PCMflash is different, please don't update its version at will, see below for details.

      Guide to update pcmtuner software:

      Open your pcmtuner software, and you will get the Update available prompt 'There is new version 1.2.3 available.' If you are using an earlier version of the software. This is required update. Press OK to begin updating the application.

      PCMtuner software update

      (Enable network connection and press 'OK' to update directly).

      Note:

      Pcmtuner software can be updated online continuously. Just update it when you get the update available with new version in the future.

      The current version of pcmflash software is 1.20. There is no new version so far.

      If it asks you to update to v1.2.5, DON'T UPDATE! Update by dongle ONLY! Otherwise the device will be damage.

      The PCM flash software update is done thru buying a new PCMTuner USB dongle when the new version comes out.

      PCMtuner software update

      Read also:

      Solution: PCMtuner Software Register, Version, Dongle Errors

      For any problems, please feel free to contact our customer service: www.obdexpress.co.uk

      Monday, 18 April 2022

      What is the difference between PCMtuner and CGDI FC200?

       2022 best ECU programmer: PCMTUNER or CGDI FC200, which one to buy? Both tools were well received since released. Which one is more recommended?

      Obdexpress.co.uk engineer suggested:PCMTUNER is used to program gearbox & ECU more while CGDI FC200 works for BOSCH ECU more. It’s mainly depended on the supported ECU coverage. Both are professional ECU tools. Any questions welcome to contact online service for a check.

      However, if you want to know more differences, move forward. Below is a comparison table to let you be clear at a glance.

      PCMTUNER vs CGDI FC200

      PCMTUNER vs CGDI FC200

      PCMTUNER vs. CGFC200

      Differences

    2. PCMTuner supports to work on Bosch, Magneti Marelli, Continetial or Siemens while CG FC200 only supports Bosch and certain old Siemens.
    3. PCMTuner supports paid virtual reading online while CG FC200 does not.
    4. PCMTuner has its own tuner account for paid dpf, egr, adblue off and remap while CG FC200 does not.
    5. PCMTuner supports to do checksum while CG FC200 is only workable online during subscription period.
    6. CG FC200 has more protocols than PCMTuner.
    7. CG FC200 support multi-languages while PCMTuner only supports English & Russian.
    8. CG FC200 supports to read & modify BMW ISN, VIN while PCMTuner cannot.
    9. PCMTuner is cheaper but cannot do BMW ECUs(EDC17xx, etc.)
      1. Conclusion

        For mainly doing ECU chip tuning or programming more ECUs, PCMTuner is recommended & good-value.

        For reading & modifying BMW ISN or programming mostly Bosch ecus, CG FC200 is recommended.

        Anyhow, it’s never wrong to choose according to needs. For more Car ECU Programmers, please visit www.obdexpress.co.uk

        How does Launch X431 scanner clear the history of diagnostics?

        It’s easy to check diagnostic history on Launch-X431 scanner. But how to completely delete or backup the recorded file data? This is a guide to locate it and explain how to empty all relevant files. Apply to most X431 scan tools like X431 PAD 7, X431 PRO5, etc.

        Clear Diagnostic History on Launch-X431 Scanner

        Clear Diagnostic History on Launch-X431 Scanner

        X431 Diagnostic History Folder Path:

        Other module >> Files >> Local >> cnlaunch >> X431PADV >> DIAGNOSTIC

        Users are able to move, backup or clear diagnostic history data here by perform copy/cut/delete button.

        Clear Diagnostic History on Launch-X431 Scanner

        Clear Diagnostic History on Launch-X431 Scanner

        Clear Diagnostic History on Launch-X431 Scanner

        Clear Diagnostic History on Launch-X431 Scanner

        How to totally clear diagnostic history?

        Step1. Locate the diagnostic folder, click “Delete”.

        Are you sure to move folder DIAGNOSTIC to recycle bin? OK

        Put the file into recycle bin successfully.

        Clear Diagnostic History on Launch-X431 Scanner

        Step2. Go access User info >> Settings >> Clear cache

        Clearing the cache will restart the App. Continue? OK

        Clear Diagnostic History on Launch-X431 Scanner

        Clear Diagnostic History on Launch-X431 Scanner

        Go back to check diagnostic history, no record any more.

        Done.

        Clear Diagnostic History on Launch-X431 Scanner


        What are the recommended tools for Toyota Vios mileage correction?

         Customer’s question:

        I need to correct odometer on my toyota vios. Which tool is recommended to use?

        Obdexpress.co.uk engineer replied:

        Yanhua digimaster 3 is a very good mileage programmer for Japanese cars, especially Toyota, some supports till year 2020/2021. All EEPROM job.

        It comes with high performance hardware platform which takes high-speed CPLD and the ARM11 processor as the core technology. Works with various types of adapter, supporting odometer correction, Audio decoding, airbag resetting, engine ECU resetting, IMMO, key programming for Benz & BMW etc. Moreover, it can be updated online lifetime for free.

        Yanhua digimaster 3 for Toyota Vios mileage correction

        Digimaster 3 Toyota VIOS (Japan& Korea) odometer correction car models including 93C46, 93C56, 93C66 by memory directly with OBP adapter in cluster storage location.

        Guides to correct mileage on Toyota VIOS:

        e.g.Toyota Vios MB91F061BS instrument dashboard eeprom 93c46

        By ICP adapter

        1.Connect the meter and digimaster III

        The wiring diagram can be found in digimaster 3.

        Select Toyota>> Vios

        Then you can see the related wiring diagram

        Connect the meter and the CPU socket of digimaster iii ICP adapter correctly

        2.Backup data

        Backup data when writing DFLASH

        3.Read current kilometer

        Read the current kilometer by D3 and confirm it is correct

        4.Change mileage

        Manually enter the mileage you desired

        Writing data until completed.

        Check the new mileage after correction.

        Yanhua digimaster 3 for Toyota Vios mileage correction

        Yanhua digimaster 3 for Toyota Vios mileage correction
        Yanhua digimaster 3 for Toyota Vios mileage correction
        Yanhua digimaster 3 for Toyota Vios mileage correction
        Yanhua digimaster 3 for Toyota Vios mileage correction
        Yanhua digimaster 3 for Toyota Vios mileage correction

        Besides TOYOTA VIOS, Yanhua digimaster III also supports TOYOTA Aristo, Astime, Avalon, Avensis, Camry, Cellica, Celsior 3.0, corolla, Corolla, Crown, Echo, Elipsun, Granvia, Harrier, Hiace, Highlander, Hilux, Hj100, Ipsum, Landcruiser, Kijang, Mark X, Mr2, Picnic, Prado, Premio, Previa, Previs, Prius, Rav4, Reiz, Rav5, Starlet, Sienna, Terios, Yaris, Zelas, Tundra, Estima, Vellfire, EZ.

        Yanhua digimaster 3 for Toyota Vios mileage correction

        Yanhua digimaster 3 for Toyota Vios mileage correction
        Yanhua digimaster 3 for Toyota Vios mileage correction
        Yanhua digimaster 3 for Toyota Vios mileage correction
        Yanhua digimaster 3 for Toyota Vios mileage correction
        Yanhua digimaster 3 for Toyota Vios mileage correction

        Search the specific model, click Yanhua Digimaster 3 odometer correction car list.

        Wednesday, 13 April 2022

        Yanhua Mini ACDP connected to iPhone tutorial (using Hotspot)

         This is a guide to setup Yanhua Mini ACDP hotspot connection on IOS iPhone. Introduced 2 methods: scanning & non-scanning modes. Need to pay attention to confirm if there’s a “scan” mark on device backside.

        Read also:

        How to connect Yanhua Mini ACDP to Android Phone Hotspot?

        How Yanhua Mini ACDP connect to WIFI on IOS Android phone?

        ACDP connect via IOS Hotspot Scanning

        Note: This is for users who have a “scan” mark on the back of ACDP device.

        Make sure IOS system version is 9.0 or later, storage space is over 1.5G.

        Phone Settings

      2. Settings >> Privacy >> Location Services >> Turn on location services button
      3. Settings >>Mini ACDP>> Location >> Make sure location is on “While Using”.
      4. Settings >> Mini ACDP >> Turn on Bluetooth button
      5. Settings >> Wi-Fi >> Turn on Wi-Fi button
      6. Settings >> Bluetooth >> Turn on Bluetooth button
      7. Settings >> General >> About >> Name >> Hotspot name cannot contain Chinese characters or special characters.
      8. Settings >> Personal Hotspot >> Turn on Allow others to join button, set hotspot password as simple as possible.
        1. * for iPhone 12 or later, turn on Maximize Compatibility button.

          Keep iPhone on Personal Hotspot screen. Be careful no to click back.

          Press Home button or pull up to exit.

          Yanhua Mini ACDP Connect to iPhone Using Hotspot

          Yanhua Mini ACDP Connect to iPhone Using Hotspot

          Yanhua Mini ACDP Connect to iPhone Using Hotspot

          Yanhua Mini ACDP Connect to iPhone Using Hotspot

          Mini ACDP APP Settings

          Mini ACDP >> Settings >> Initial use settings

          Make sure Bluetooth & Location are both authorized.

          Yes >> Scan the QR code on ACDP backside >> Hotspot name & password will be automatically entered >> Start configuration

          Once connection is successful, ACDP will jump to main screen automatically.

          You can see the info at upper right corner.

          Yanhua Mini ACDP Connect to iPhone Using Hotspot

          Yanhua Mini ACDP Connect to iPhone Using Hotspot

          ACDP connect via IOS Hotspot Non-scanning

          Note: This is for users who don’t have a “scan” mark on the back of ACDP device.

          Make sure IOS system version is 9.0 or later, storage space is over 1.5G.

          Make sure iPhone settings are ALL SAME as above IOS Hotspot Scanning method.

          Mini ACDP APP Settings

          Mini ACDP >> Settings >> Initial use settings

          Make sure Bluetooth & Location are both authorized.

          No >> Follow the instructions to operate:

        2. Keep pressing SET button, ACDP will beep once, then beeps twice to start initial programming.
        3. Holding the button until hearing a long beep to finish initial programming.
        4. Release SET button.
          1. Next >> Select ACDP SN >> Confirm Hotspot name & password are all correct >> Start configuration

            Once done, ACDP will jump to main screen automatically.

            You can see the info at upper right corner.

            Yanhua Mini ACDP Connect to iPhone Using Hotspot

            Yanhua Mini ACDP Connect to iPhone Using Hotspot

            Yanhua Mini ACDP Connect to iPhone Using Hotspot


            How to Program NIO EV Keys with OBDSTAR G3 & C1031 Harness?

             Thinking about programming a key for a high-end EV like a NIO, but worried about messing up the complex gateway electronics? You’re not al...