Sunday, 7 January 2018

How to test VVDI BE Key Pro frequencey


Had good successs with frequency test of VVDI BE key pro improved version, frequency between 315Mhz and 433Mhz, tested with and without VVDI Mercedes software

This is how to test VVDI BE Key Pro frequencey…

For those have no VVDI MB:
You can change key frequency 315 MHZ or 433MHZ with removal of a PCB resistor

Put the VVDI BE Key to the VVDI MB BGA TOOL to test the key frequency

vvdi-be-key-pro-2 vvdi-be-key-pro-3
This is a complete new BE key unused.
Test the frequency with VVDI key tool, it is 315MHZ.
Here is a square resistor marked with “FRE”, just remove it.
vvdi-be-key-pro-4
Put the BE key into the VVDI key tool to read out 433MHZ frequency.

For those have VVDI MB TOOL:
You can change key frequency 315 MHZ or 433MHZ with VVDI MB tool


Open VVDI MB tool, Enter Menu -> Other functions -> reset key frequency.
Click on ” Read out key frequency”, the result is 315MHZ.
Put the VVDI BE key on the top of the VVDI KEY TOOL and the key frequency is 315MHZ.
Insert the VVDI BE key into VVDI MB tool.
Choose” 433MHZ” then “Change key frequency”, reset successfully.
Put the VVDI BE key on the top of the VVDI KEY TOOL and read out 433MHZ.93.
Insert the VVDI BE key into VVDI MB tool and you can see ” the key frequency is 433MHZ.93″, click “OK” to confirm.
Explanation to the option “through PCB resistor”. who don’t have VVDI MB tool, then change the key frequency through PCB resistor.
http://blog.obdexpress.co.uk/2018/01/08/vvdi-be-key-pro-frequencey-test-withwithout-vvdi-mb-tool/

Xhorse VVDI BE Key Pro Improved Version for VVDI MB and Other Tools Support Benz XNBZ01CH Remote Key Chip

XHORSE VVDI BE Key Pro For Benz XNBZ01CH Remote Key Chip Improved Version

VVDI BE key Pro improved version features:
More compatibility
New design
High Stability
High reliability
Digital signature

VVDI BE key Pro improvements:  
1. Fix the bug that W164/W639 EIS data doesn't synchronize the key. 
2. Fix the bug that the BE key fails to turn on the ignition after repeat try.
3. Fix the bug of trunk remote open 
4. Fix the bug that the BE key only sent RF signal for one time, after update, the RF signal can be sent for two times when press and release the key. 
5. Modify the rolling algorithm, fix some errors of BE key. 
6. Add pre-roll algorithm: the HASH value can roll ahead. 
7. Adopt car-grade quartz crystal, improve infrared communication stability. 
8. Boost the infrared signal when you press the button.  
9. Support resetting the key frequency between 315MHZ and 433.92 in the way of VVDI MB tool or the PCB SMD resistor 
Tip: VVDI MB tool has priority over the SMD resistor, which means if you reset the key frequency with VVDI MB tool at first, the SMD resistor won't work, and you need to use the VVDI MB tool to erase the frequency then use the SMD resistor.
xhorse-vvdi-BE-key-1
xhorse-vvdi-BE-key-pro
xhorse-vvdi-BE-key-pro-vvdi-mb-tool
Package includes:

1pc x VVDI BE key Pro improved version (PCB only without case)


Where to buy :


Wednesday, 3 January 2018

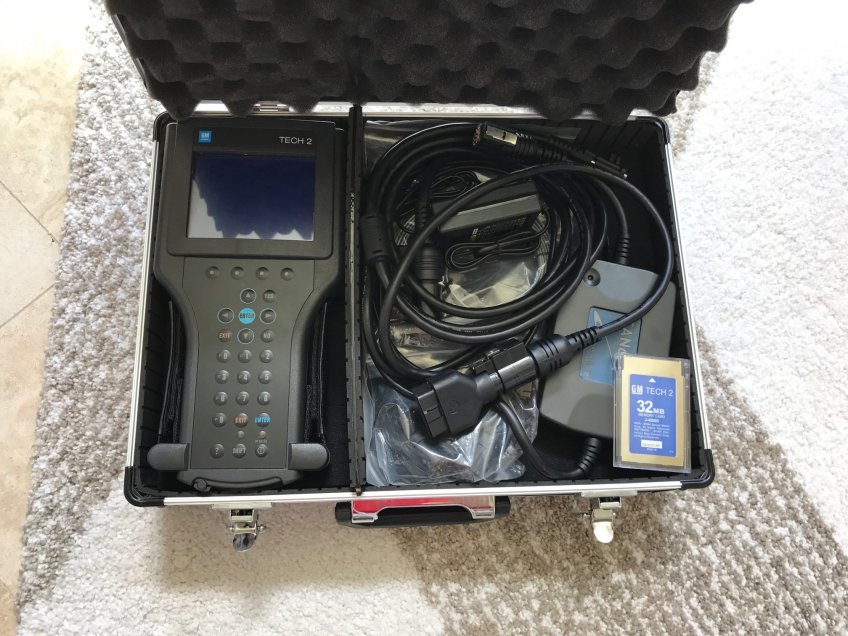
Tech 2 scan tool deletes the F45/F55 option

OBDexpress customer feedback on Tech 2 scan tool deletes the F45/F55 option

Here, I would write up a summary and share my experiences of using Tech 2 scanner to delete the F45 option.

To delete F/45 you have 3 options: 1. spend $200+ or – on simulator plug-ins to go in the shock sensor plugs. 2. Install 10W 10 Ohm wire wound resistors (from Radioshack) into the shock sensor wire’s. 3. Program it out with a Tech II and disconnect the ride control module.

To delete F/55 your only option is the Tech II delete – resistors will not work.

Using the sims or the resistors assumes that all the other components in the system (sensors, modules and wiring harness) are operating correctly and if something breaks you will have to fix it or get codes. In my case I had a very annoying intermittent code from a wheel position sensor that was due to a short in the wiring harness in an unreachable location. I elected to go the Tech II route as it was so easy, cheap and imo the most complete solution.

The hardest part is finding a Tech II – all GM dealers have them but they may hesitate at the programming or want to overcharge you ($125 at mine). Just start calling local shops and if they don’t have one ask them if they know who does – it only took me 2 calls to get a referral to a shop that had one. Don’t bother if they tell you they have a different scantool that will work – it won’t, it must be a GM Tech II. Try a shop that specializes in Cadillac repair, that’s what I used and it turns out they had been programming out selective ride from certain Caddy’s for years because the replacement shocks are $1300 each (I guess the Caddy tax is higher than the Vette tax) and knew exactly what I wanted to do.

Here, steps 2-14 is the instruction on what to do with the Tech II. Then copy and print these procedure sequence instructions:


  1. Hook up your Tech 2 (Driver’s footwell), turn the car ON, make sure the module in the left rear storage compartment (pull back the velcro lining on the front of the compartment) is plugged in. DO NOT UNPLUG THIS MODULE *NOTE from Zoxxo : A correction is needed here. The F55 module on the C6 is not in the rear of the car. It’s under the right front fender liner. The service manual (at least the ones I have – 2006 & 2007 – were never updated from what the C5 manuals said. F45 was the C5 version of F55 (and even that transitioned to “F55” the last year of the C5.)

  1. Now use the Tech 2 to delete the F45 option ( F55 option does not appear on the Tech 2 menu screen – SO – DELETE THE F45 OPTION (use the screen captures – steps 2-14)

Step 2: Startup TECH2
tech2-disable-f55-1
Step 3: Enter Diagnostics menu
tech2-disable-f55-2
Step4: Enter year of car
tech2-disable-f55-3
Step5: Enter Passenger Car menu
tech2-disable-f55-4
Step 6: Select Body from the menu
tech2-disable-f55-5
Step 7: Select Y body from menu
tech2-disable-f55-6
Step 8: Select body style from menu (Coupe/Sedan is FRC/ZO6)
tech2-disable-f55-7
Step 9: Select transmission type
tech2-disable-f55-8
Step 10: Enter body control module menu for adding/deleting option codes such as automatic headlamps,F45 suspension. If you’re interested in adding the tire pressure monitoring system please skip to Step 15 below.
tech2-disable-f55-9
Step 11: Enter Special Functions menu
tech2-disable-f55-10
Step 12: Enter BCM RPO Reprogram
tech2-disable-f55-12
Step 13: Enter cars country of origin
tech2-disable-f55-13
Step 14: Toggle functions on and off. The asterisk next to the option code indicates this function has been turned on. Note that the Automatic and Manual HVAC controls are both turned on. This is normal and should be ignored. Go ahead and hit the save option button when your done and power off the TECH2.
13
  1. Save the new configuration
  2. DO NOT TURN THE CAR OFF DO NOT REMOVE THE TECH 2 Go to the module in the rear of the car, unplug the GRAY connector – IT IS THE WIDEST ONE – leave the other 1 (F/45) or 2 (F/55) plugged in.
  3. Turn off the car but LEAVE THE TECH 2 PLUGGED IN
  4. Remove remaining plugs from module in the rear of the car – Never plug them back in again, if you do the F/45 turns on automatically.
  5. Now the moment of TRUTH – Turn the car on and verify that the dreaded – MAX SPEED 80 MPH – is gone. This message was only present if you had already disconnected the shock sensors. Some people have had to disconnect their battery to allow the computer to reset to remove this message, but I would confirm with the Tech II that the F/45 was actually deleted first and if not reconnect everything and start again with step 1.
  6. Unplug the Tech 2 scan tool– Get in the car and take it for a ride. Smile as you pass the DREADED 80 MPH.
With these instructions in their hands even the most inexperienced tech can do this. It took mine 5 minutes and they charged me $25. I would have spent much more time and effort getting and installing resistors.
If you haven’t already changed your shocks drive home carefully as the shocks become very soft, not dangerous but as GM advises keep it under 80MPH.

Hope this helps somebody else.
Originally Posted by Kokopelli

Source:

http://www.obdexpress.co.uk/service/review-on-how-to-use-tech-2-to-delete-the-f45-f55-option-25653.html

Tuesday, 2 January 2018

VVDI key tool clone VW remote (Manual)

Hi. I have own VVDI key tool, and can't clone remote for vw, when try read original key for cloning remote and pressing unlock and lock there codes always changing, when write and check clone remote there only 1 code writed and doesn't changes, maybe there is special keys for vw ?


Reply:
Hello
If the vw remote is original you have to choose remote program or remote prepare from the menu
And then choose vw and choose the remote from frequency and fcc
And about cloning remote it used for fixed code remote
Regards
Good luck

Reference: How to program VW 1KO959753N remote with Xhorse vvdi key tool:
First, power on VVDI KEY TOOL, you will see a disclaimer message, press OK button to confirm.
Next, you will see the main menu as below. Choose “Remote Prepare” function.
vvdi-key-tool-vw-remote-1
Select car brand region “Europe”.
vvdi-key-tool-vw-remote-2
And select “VW” according to the icon.
vvdi-key-tool-vw-remote-3
Then, select the key chip type you want to generate. In this case it’s “1KO 959 753 N”.
vvdi-key-tool-vw-remote-4
You will see the remote key picture and frequency 434.0MHz.
vvdi-key-tool-vw-remote-5
Last, connect the remote key PCB board with VVDI KEY TOOL via the cable come with package.
vvdi-key-tool-vw-remote-6
Press OK button and select “Wire” mode to generate new remote key chip.

vvdi-key-tool-vw-remote-7
vvdi-key-tool-vw-remote-8

Friday, 29 December 2017

What did I do for Corvette C7with Tech II clone

I have a lot to recommend having a Tech II clone for DIY work on our cars.
Tech II clone

For the way that you are going to be using the Tech II clone, your going to be fine with it.

As for why GM is going to the GM MDI and a GDS2, instead of using a Tech II with TIS2000 software, it because the MDI with GDS2 flashes a hell of lot faster when you have flash a new module with either it orginal firmware or upgraded firmware. Its also faster to use than having to press buttons on the Tech II for basic commands during diagnostics as well.


So in regards to the vets, Tech II clone will cover all the Chevrolet Corvette C6 cars and older since the last of the updated firmware on the unit covers from here back. If you do need to reflash something, it's done via Tis2000 with the Tech II as the pass through device.


On a Chevrolet Corvette C7, since GM did not make upgraded firmware to flash into the Tech II's to cover these cars, then it's a MDI that is needed instead. As for the MDI's firmware, they will cover no only the new cars, but the cars that the old Tech II's used to cover as well.

Now the glitch on the MDI regarding cloning it, since it has to use the GDS2 software for the pass through only device, GDS2 software has not been cracked like Tis2000 software has been isntead.

So the only way that even a clone MDI is going to work, is to have a subscription to GM (Few $K a year) to allow you to use the GDS2 software that has to log into GM each time it used instead.

Hence the Clone Tech II unit you get will already be loaded with the most current firmware, and for most of the stuff you going to use the Tech II clone, will just be using the unit by itself without being connected to a lap top.

Also the cracked copy of Tis2000 that you get with the clone model, does not have to be connected/logged into GM to use it for 99% of the stuff (do not need an account with GM).
Note, if push comes to shove and you can not find a copy of the needed firmware to flash into a unit to upgrade a module, then you can get a one day subscription to GM to pull down the needed file from them.

Another place the people have had good luck with as well.


Do not worry about what version of windows you are running.
Hence if you are running win 10, and the software needs to run on wp, then you can runs something like VM player (free) to vm XP on the machine to run under that shell. Hell the cracked version of Tis2000 will come with VM player to begin with. So the Cracked TIS200 disc first installs VM player to your machine with a XP shell, then installs Tis2000 to that shell when you install the disc.
So when you start the cracked TIS200 program after loading the disc, it first loads the VM player software, then opens TIS2000 in that VM player running in XP, on your win 10 machine.
As for a cracked version of GDS2 and all the other software needed as well like Tis2web), if someone has skinned that cat, and it will work with a GM MDI II clone, then it just a mater of time before they hit the market as well.
Hence with the Tech II since it preflashed with 33.004 firmware , it does not have to be connected to a PC for 99% of what is going to be use for. Since the Mdi II is PC driving only, then you get into the can of worms with all the needed Software cracked so you don't have to web connect to GM to run the software instead.
Quick way of how GDS2 works, with having to renew the software lease every 14 days, and also needing a SPS subscription to reflash as well.


Really to sum it up, since the clone Tech II work on the c6 vets, we have lucked out that the clone units are dirt cheap now. Its the C7 guys that are now having to play the waiting game to get their hands on a Working cloned MDI 2 with all its needed cracked software so they are not being raped by the dealers ever time the tool is needed. Hence just like the C6, the C7 has a pump in the ABS system that needs to be cycled via the tool every time you bleed the brakes to flush the old fluid (and air if the systemwhen dry) out every few years, and although there are other tools that can be used to do such instead, none of them are currently cheap instead.
Hell, with a clone Tech II going for around $200, if you did the inflation math of when you used to have to buy a timing light for tuning a engine of the old of say pre 90's, pretty much about the same price; while the Tech II doing so much more instead. Plus when you go to sell the vet in a private party sale, having a Tech II to go with the car is a huge selling factor as well; so your really not out of money in the end no mater how you look at it buying one .
The way I look at it, the vet should have come with not only a Tech II to being with, but also a battery tender and TPMS reset tool as well. Think about that, since most cars today will still display codes on the dash if it has problems (no scanner needed), while on the vet it will not. C5 you could a magnet to reset the TPMS, while on the C6 you can not. And battery drain when the car sits for days/weeks, hell the C6 should of had a plug in port with a built in tender on the car as well.


Last edited by Dano523; 12-13-2017 at 09:13 AM.


SOURCE:
http://blog.obdexpress.co.uk/2017/12/29/tech-ii-clone-perfect-with-chevrolet-corvette-c7/

Thursday, 28 December 2017

How to update key - Diatronik CALC Tool

Q: Please can you tell me how to update Diatronik SRS+DASH+CALC+EPS OBD Tool ?
A: Diatronik key update help. Here you go.

  1. After the first run utility screen will appear where you select to Start new dongle remote update session:
  2. how-to-update-Diatronik-SRS+DASH+CALC+EPS-OBD-Tool-1
  3. On the next page displayed is the generated update request (number-question) is a sequence of hexadecimal characters containing information about your key:
how-to-update-Diatronik-SRS+DASH+CALC+EPS-OBD-Tool-2
The update query can be stored in a file (button [To file]), copied with the button [To clipboard] or sent as email to developer ([mail]).
Archive the text file with results using your GCT serial # as file name and email it to developer. The update program can be closed at this stage. Wait for response email from the developer.
  1. Data updates are transmitted in encrypted form and can only be used once
  2. When generating the update data and during firmware update the key performs a series of checks on key options (ID, Shared code, and some others). This excludes the possibility of substitution of the key.
You must then run the client update utility again and select “Resume previously started remote update session”, then click [Next] button.
how-to-update-Diatronik-SRS+DASH+CALC+EPS-OBD-Tool-3

The screen will display the wizard page that contains the input field and display dump updates. Enter the dump received via email using one of the buttons: [Paste] or [Browse…]:
how-to-update-Diatronik-SRS+DASH+CALC+EPS-OBD-Tool-4
After inserting the dump and pressing [Next] button the operation for updating the key memory with new data. Then last screen will display the outcome of the operation:
how-to-update-Diatronik-SRS+DASH+CALC+EPS-OBD-Tool-5
Important!
Next steps are only needed when the update key is in fact the firmware or image template. If the update was performed based on data of the image file, then step 3 is the final stage of the upgrade.

In the process of updating the key memory client utility will generate the final code-confirmation containing information about the updates (successfull/unsuccessfull). Code-confirmation is to be saved (button [To file]) or copied  [To clipboard], renamed using your serial # as file name and sent to developer of the application by any convenient way (email, PM, Skype: moe03071 ).

Youtube video (Russian)

Crdits to Moe who share all above with us.

Source:
http://www.obdexpress.co.uk/service/diatronik-calc-tool-key-update-25651.htm

Wednesday, 27 December 2017

(Solved) Elsawin Error: ELSAWINDB could not be installed

Here are customer solutions of Elsawin install failure with error message “The SQL Server instace ELSAWINDB could not be installed” with different error codes.

The error message will be displayed like this and the like
Elsawin Error

Elsawin ErrorCode: -2068052713

if has problem “ELSAWINDB could not be installed.ErrorCode: -2068052713”
Go to:
Control Panel
Program and Features
On the left Turn Windows Features On or Off
Make sure .NET Framework 3.5 (includes .NET 2.0 and 3.0) box is checked (Check every box inside it).
It should work now

Elsawin ErrorCode: -2068054016

if has problem “ELSAWINDB could not be installed.ErrorCode: -2068054016”
Location: %ProgramFiles%\Microsoft SQL Server\100\Setup Bootstrap\Log\
Purpose: This log is the clean and user friendly log file that contains the basic information about the problem. This file shows which SQL server components were detected, the operating system environment, the command-line parameters that were specified, the values that were specified, and the overall status of each MSI and MSP file that was executed.
Troubleshooting: To find errors in this file, search for “error” or “failed” keywords. For more information about details of the failure, open the file that is listed in the line starting with “Log with failure”.
My error:
Another version of Microsoft Visual Studio 2008 has been detected on this system that must be updated to SP1. Please update all Visual Studio 2008 installations to SP1 level, by visiting Microsoft Update.

Elsawin Error Code: -2068025713

ElsaWin is the official Windows Software for servicing Audi and VW cars globally. Due to Windows 8 and 10, 32-bit and 64-bit versions, sometimes we don’t get them to install correctly or having problems installing them.
For 64-bit version of Windows 8 and 10 (most of newer computer or laptops), the only ElsaWin that support are versions 4 or newer. The current one now is 5.2 which includes some of the 2016 models.
ElsaWin requires .NET Framework 2.0, 3.0 and 3.5 to work. Windows 8 & 10 use .NET Framework 4.x but they also have the options can be turn on in “Turn Windows features on or off” in Control Panel/Programs and Features. If you don’t have these enabled correctly, we should get Error Code: -2068025713 ELSAWINDB could not be installed.
Elsawin Version 4.0 and 4.1 update should not have any problems installing first regardless, but most of the problems exist in the version 5.0 update when the SQL 2008 is installed. Windows 10 will give warning that the SQL 2008 may not be compatible, but it won’t stop the installation if everything is update correctly.
*** Make sure to run the setup.exe with Administrator permission ***

Source:
http://blog.obdexpress.co.uk/2017/12/28/elsawindb-could-not-be-installed/

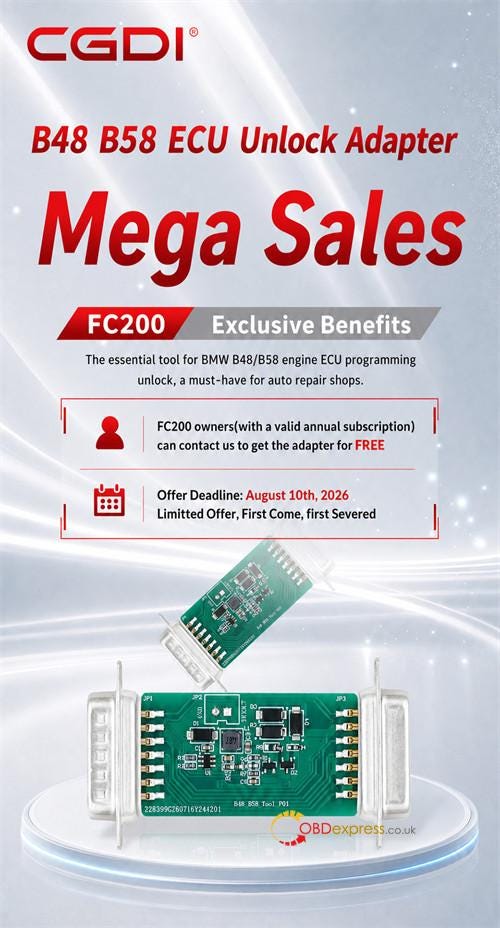
How to Get Free CG FC200 BMW B48 B58 Unlock Adapter?

  CG FC200 owners can receive a free BMW B48/B58 ECU Unlock Adapter for MG1CS024 and MG1CS201 bench setups by paying a€9 shipping charge ...