Monday, 2 June 2025

How to Choose Yanhua Interface Board for Toyota R7F701401?

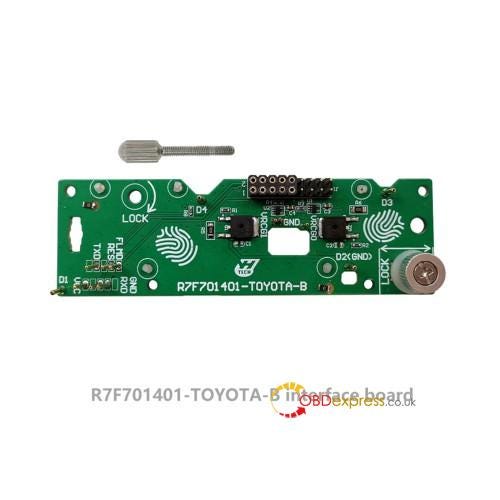
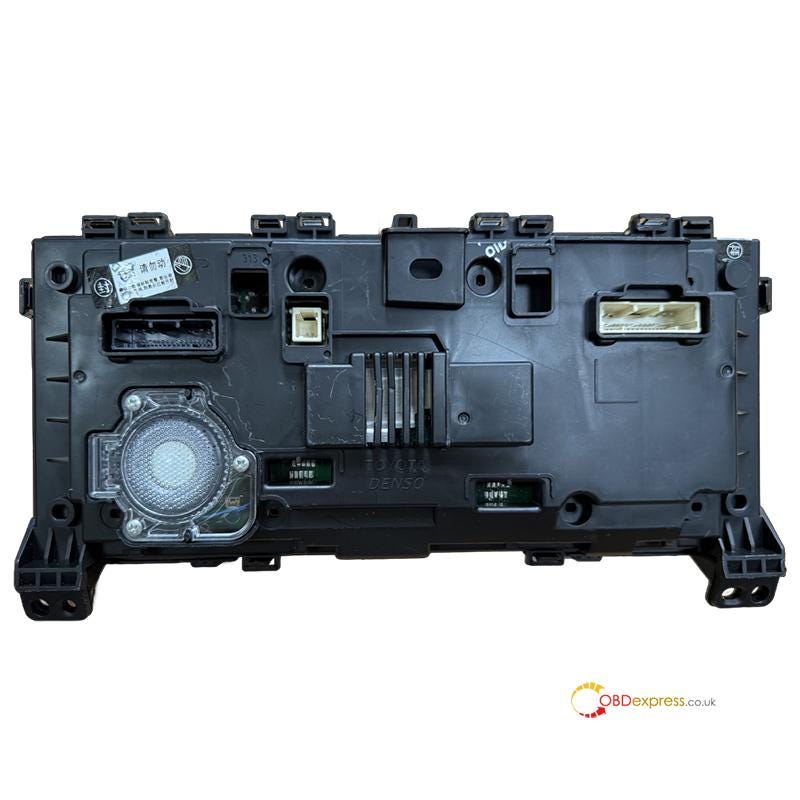
 Toyota vehicles come with various dashboard types, especially when it comes to R7F701401 chips. To address these variations, Yanhua Tech has developed different interface boards for accurate and efficient mileage correction. All interface boards are compatible with Yanhua Mini ACDP or ACDP2, and Module 35, allowing mileage correction on bench without soldering, pin lifting, or capacitor removal.

Choose the correct interface board based on the chip encryption type and dashboard layout to ensure reliable and safe operation.

1.For Toyota R7F701401 encrypted dashboard


How to Choose Yanhua Interface Board for Toyota R7F701401

Operation guide:

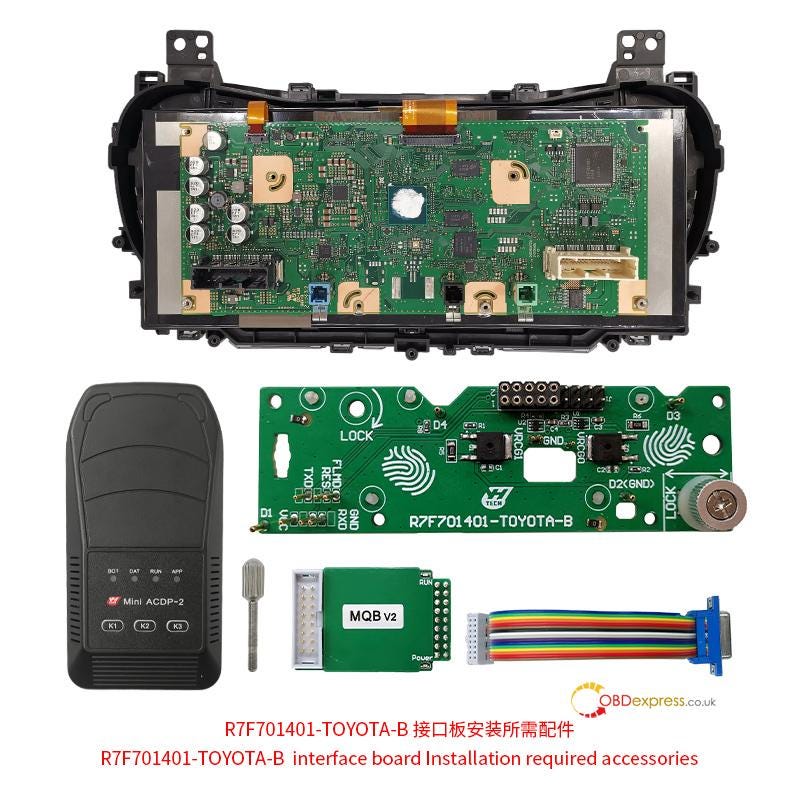
Required Tools:


How to Choose Yanhua Interface Board for Toyota R7F701401

Connection method:

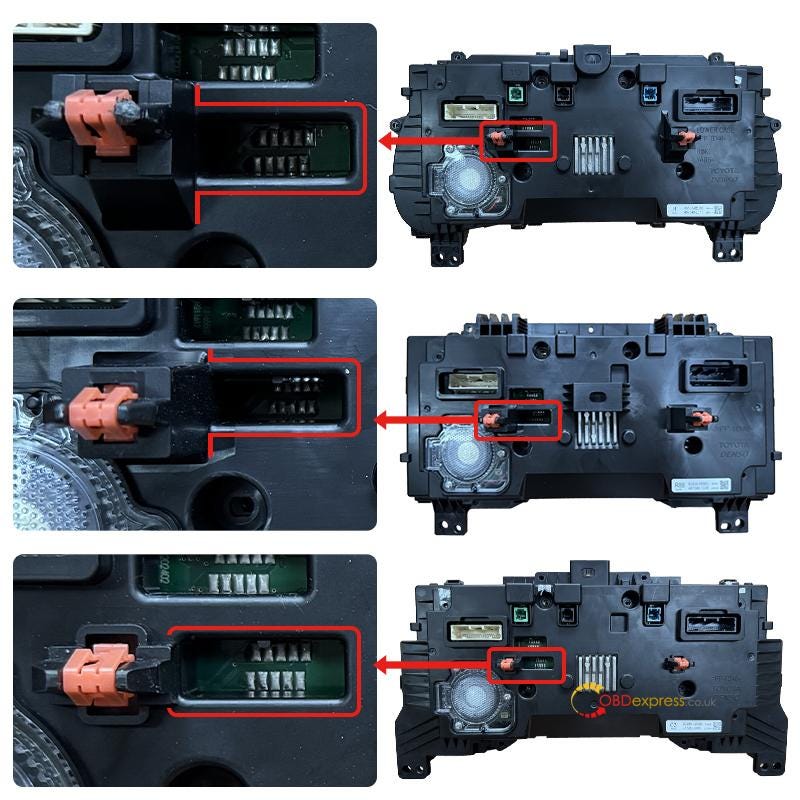
Step 1

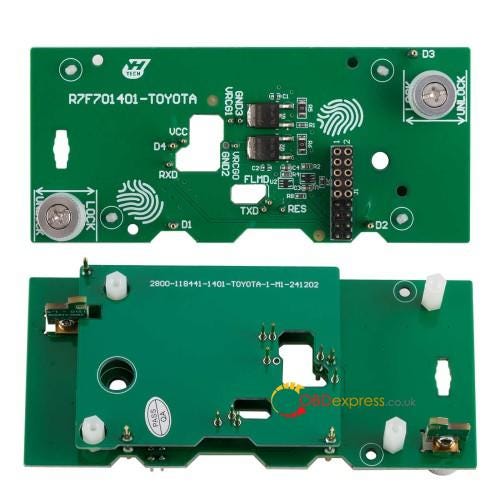
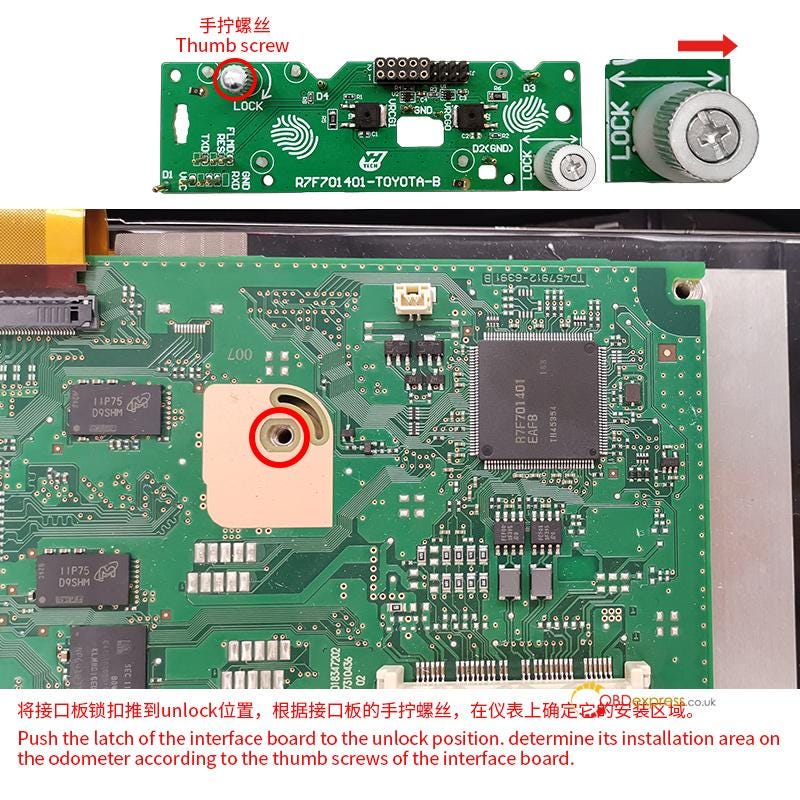
Push the latch of the interface board to the "Unlock" position

Determine its installation area on the odometer according to the thumb screws of the interface board

How to Choose Yanhua Interface Board for Toyota R7F701401

Step 2

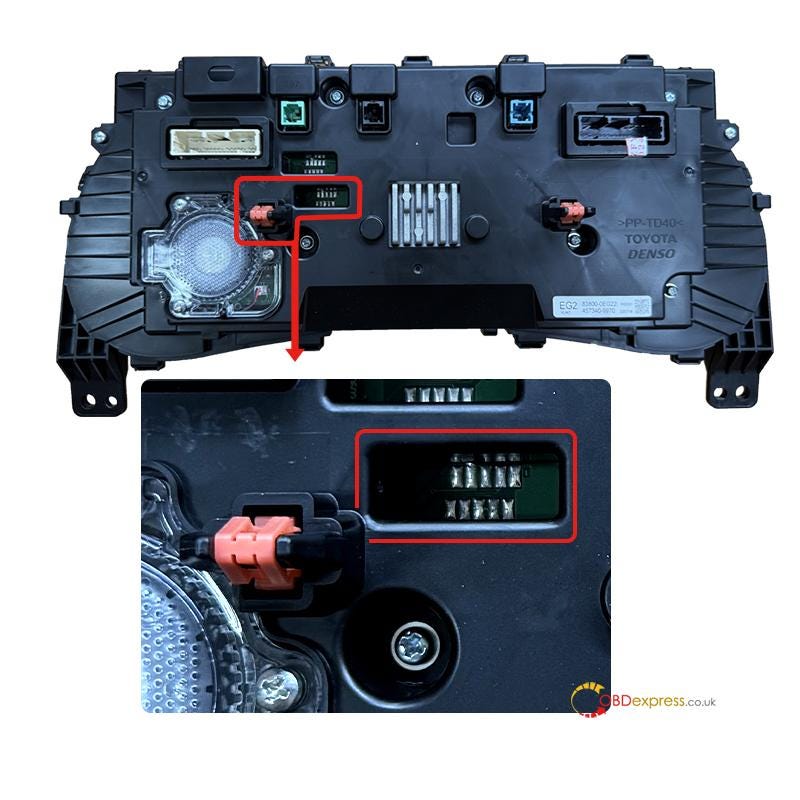
Find the correct precise positioning holes of D1–D4 on the odometer
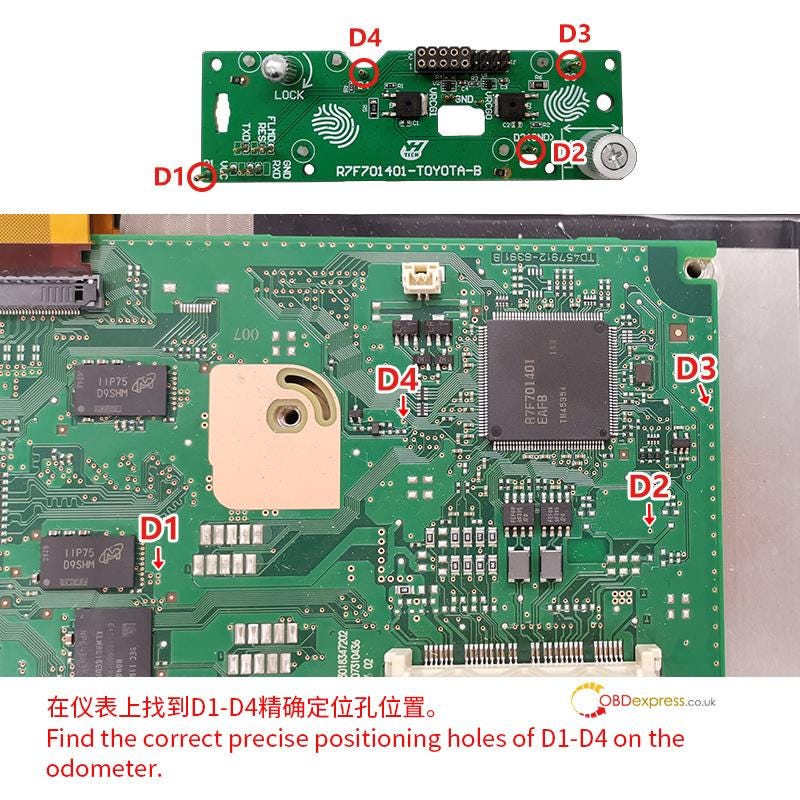

How to Choose Yanhua Interface Board for Toyota R7F701401

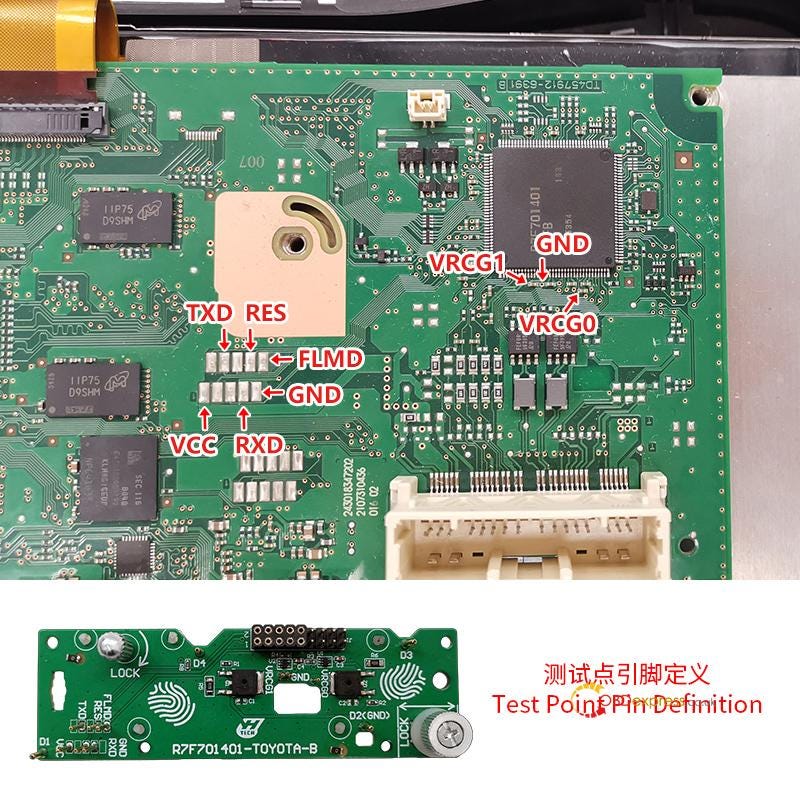
Step 3

Test point pin definition


How to Choose Yanhua Interface Board for Toyota R7F701401

Step 4

Align the thumb screws of the interface board with the corresponding screw holes

Align the positioning pins D1 and D2 with the positioning holes
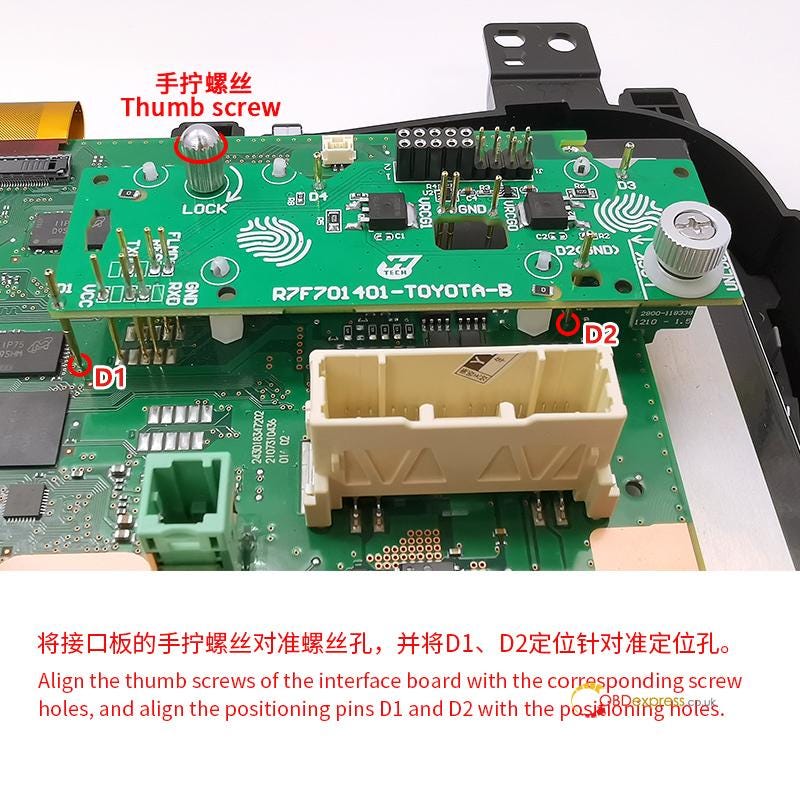

How to Choose Yanhua Interface Board for Toyota R7F701401

Step 5

Press down the interface board

Tighten the screws

Push the PCB lock buckle toward the "Lock" end to secure the interface board
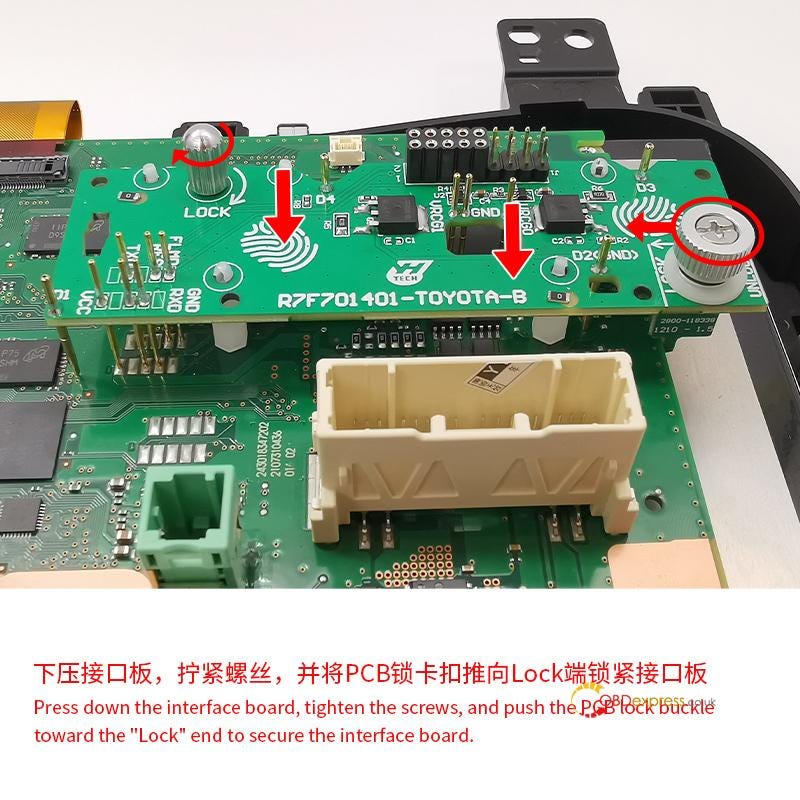

How to Choose Yanhua Interface Board for Toyota R7F701401

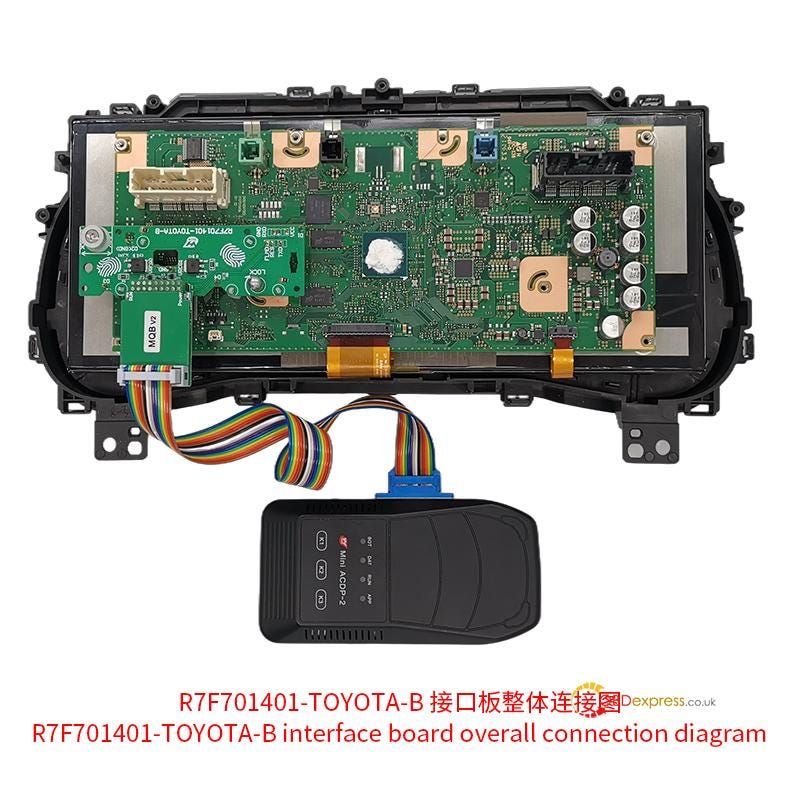
Overall connection diagram:


How to Choose Yanhua Interface Board for Toyota R7F701401

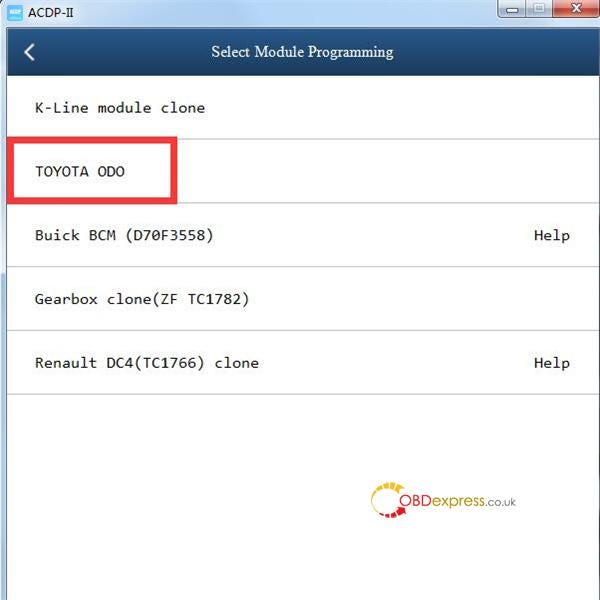
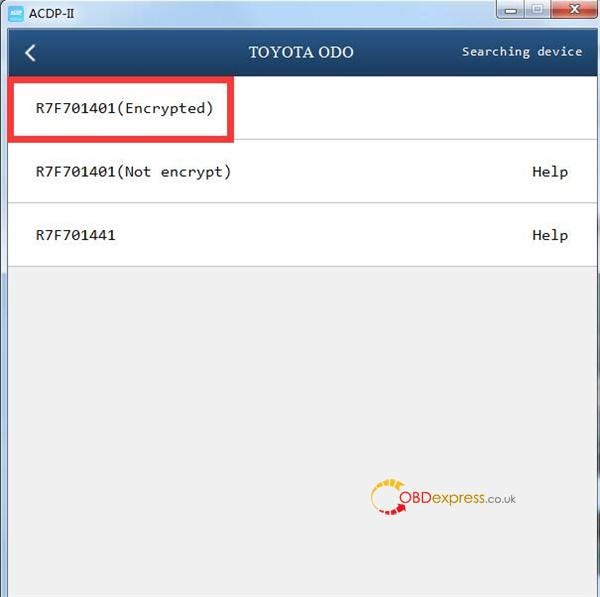
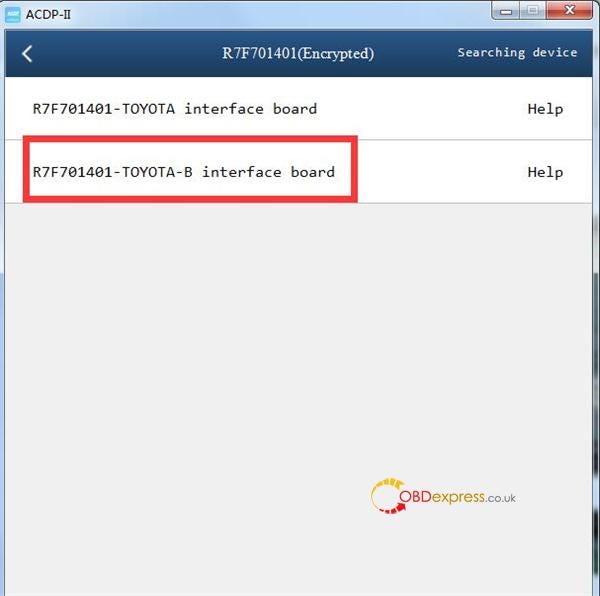
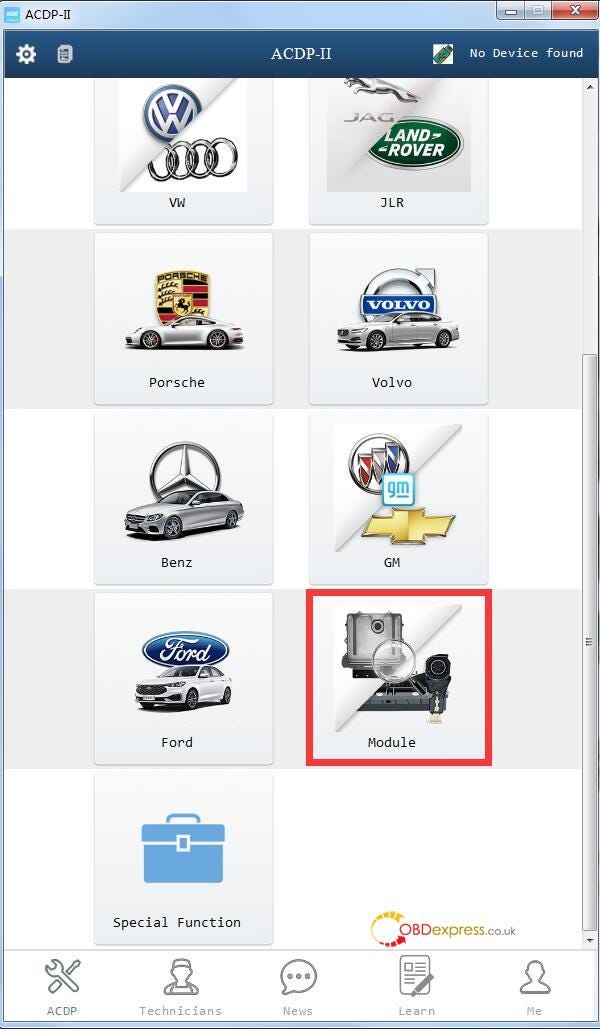
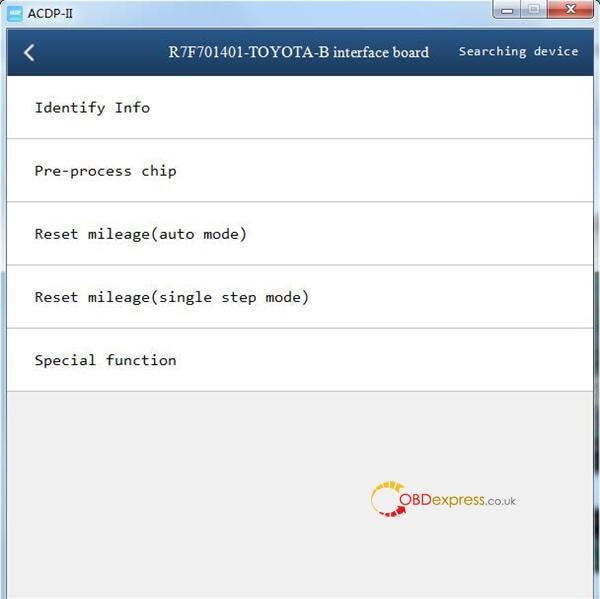
Mini ACDP APP Menu Path:

Module → TOYOTA ODO → R7F701401 (Encrypted) → R7F701401-TOYOTA-B Board

How to Choose Yanhua Interface Board for Toyota R7F701401

Process:

1.Identify Info — Confirm cluster details

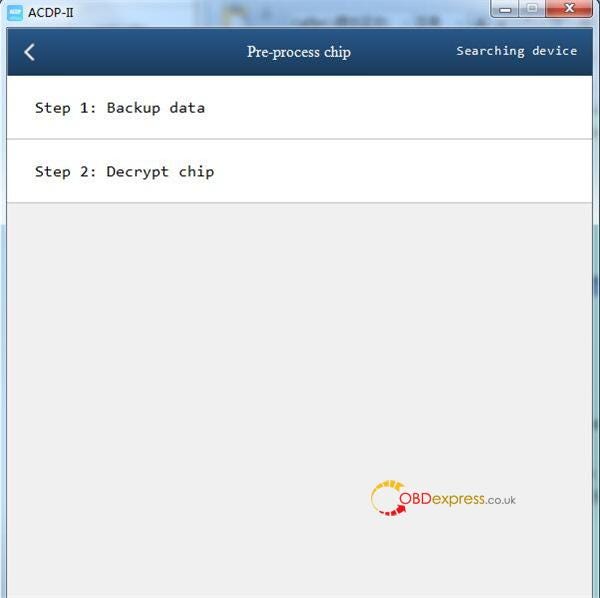
2.Pre-Process Chip

Step 1: Backup original data

Step 2: Decrypt chip

3.Reset Mileage (auto mode)

How to Choose Yanhua Interface Board for Toyota R7F701401

2.For Toyota R7F701401 full LCD meter (encrypted)


How to Choose Yanhua Interface Board for Toyota R7F701401

Operation guide:

http://blog.obdexpress.co.uk/2024/12/18/toyota-r7f714xx-odo-buick-bcm-nec3558-mileage-repair-with-yanhua-acdp2/

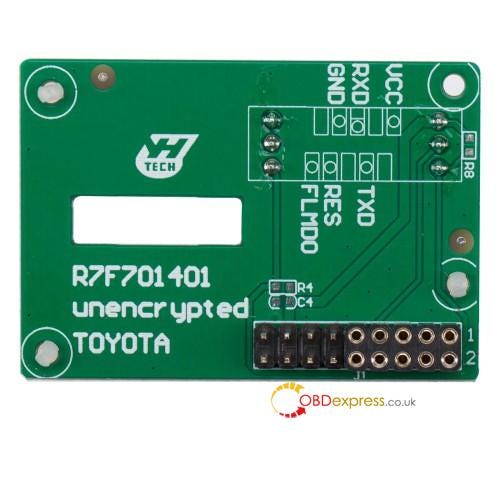
3.For Toyota R7F701401 unencrypted dashboard


How to Choose Yanhua Interface Board for Toyota R7F701401

Operation guide:

http://blog.obdexpress.co.uk/2025/02/25/yanhua-acdp-toyota-r7f701401-unencrypted-mileage-correction/

OBDSTAR X300 Classic G3: AKL Program for VW GEN4 NEC24C64

 Today, we’re going to demonstrate how to use the OBDSTAR VW4-AKL Cable to read data from a VW GEN4 NEC24C64 dashboard with X300 Classic G3. To perform all keys lost programming by bench without removing IC, soldering PCB.

Step1. Backup EEPROM Data

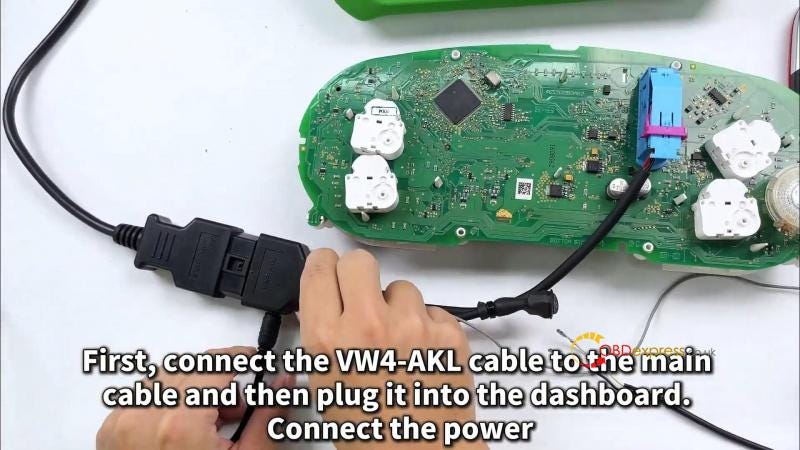
First, connect the VW4-AKL Cable to the main cabe and then plug it into the dashboard. Connect the power.

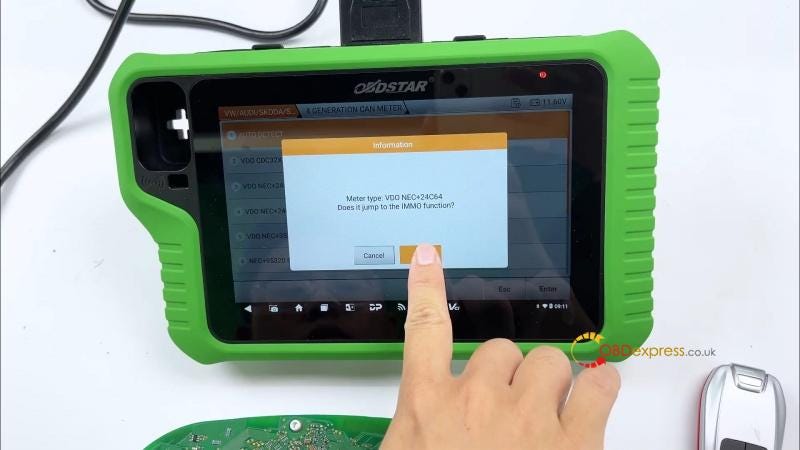
IMMO >> VW/AUDI/SKODA/SEAT >> Latest Version >> Manual Select System >> VW >> 4 GENERATION CAN METER >> AUTO DETECT >> OK

This function is available by connecting the server, please ensure the Internet connection is normal.

All Keys Lost(read IMMO data directly via the VW4-AKL cable) >> OK >> Read eeprom

Tap [Guide] to carefullyl read through the note.

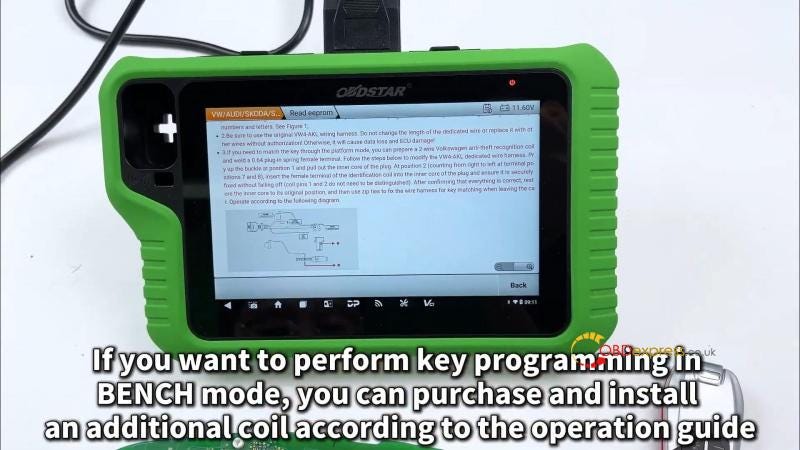
If you want to perform key programming in Bench mode, you can purchase and install an additional coil according to the operation guide.

Now, let’s demonstrate how to install this coil.

  • Turn off the power first.
  • Remove the plug and follow the prompts tot locate pin7 and pin8, inserting them accordingly. Then reset it.
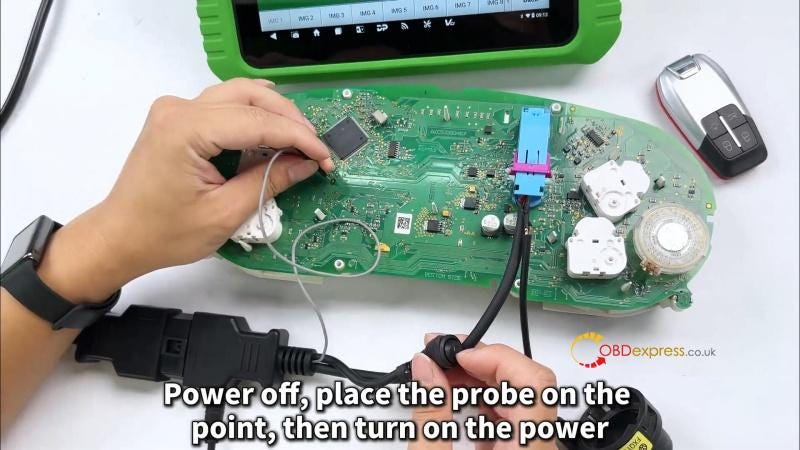
  • Tap [Pinout] to check the wiring diagram, find the image that matches your dashboard type.

If you can not find an exact match, use the first general diagram to measure and identify the correct points yourself. Zoom in on the partial image to find the exact point.

  • Power off, place the probe on the point, then turn on the power.
  • Wait for 6–7 seconds until the dashboard emits a sound, then tap [Enter] to confirm.

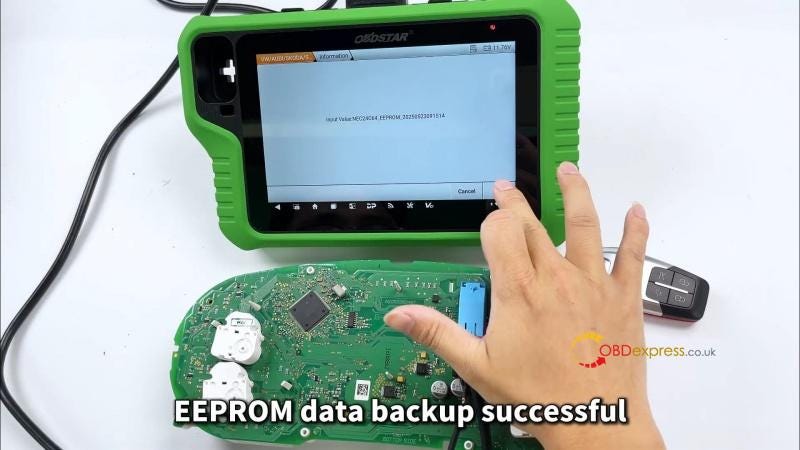
EEPROM data backup is successful.


OBDSTAR X300 Classic G3_AKL Program for VW GEN4 NEC24C64

Step2. Read IMMO Data

Read IMMO Data >> OK

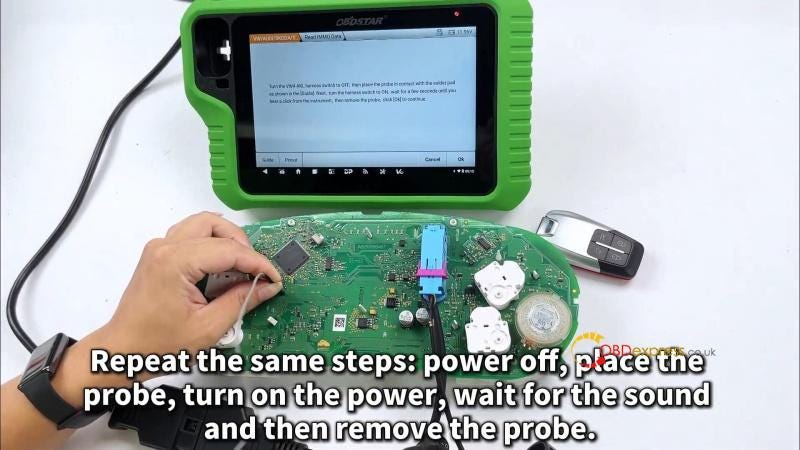
Repeat the same steps: power off, place the probe, turn on the power, wait for the sound and then remove the probe.

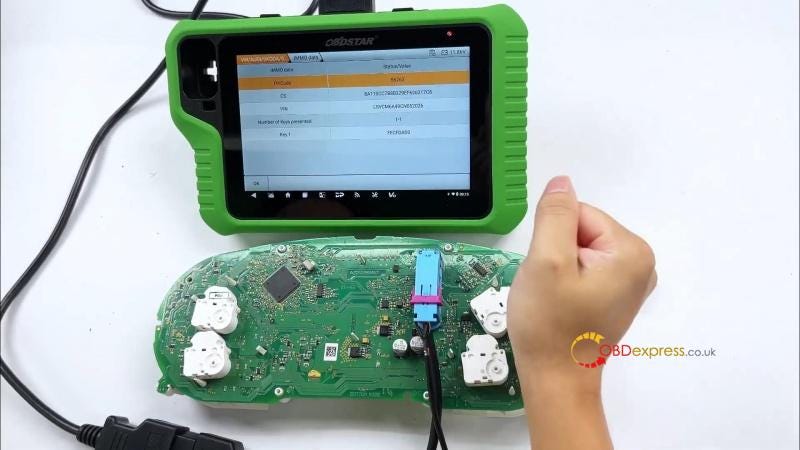
Immo DATA reading is successful.


OBDSTAR X300 Classic G3_AKL Program for VW GEN4 NEC24C64

Step3. Program Key

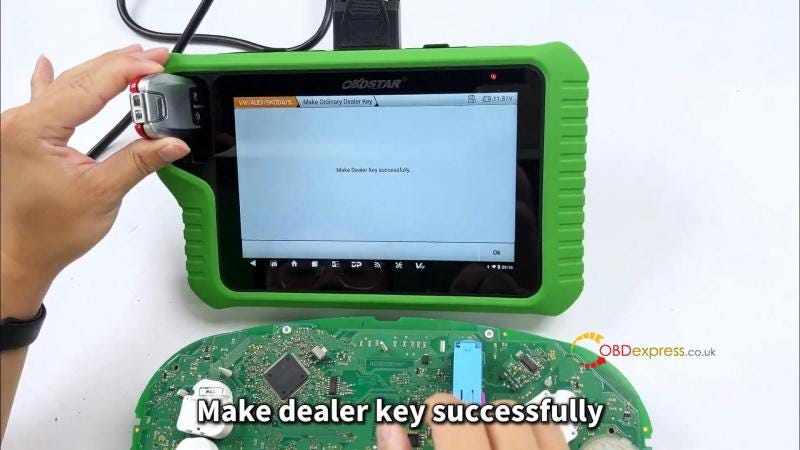
Now, proceed to make a dealer key.

Place the key inside the KEY MASTER G3 induction coil.

Make dealer key successfully.

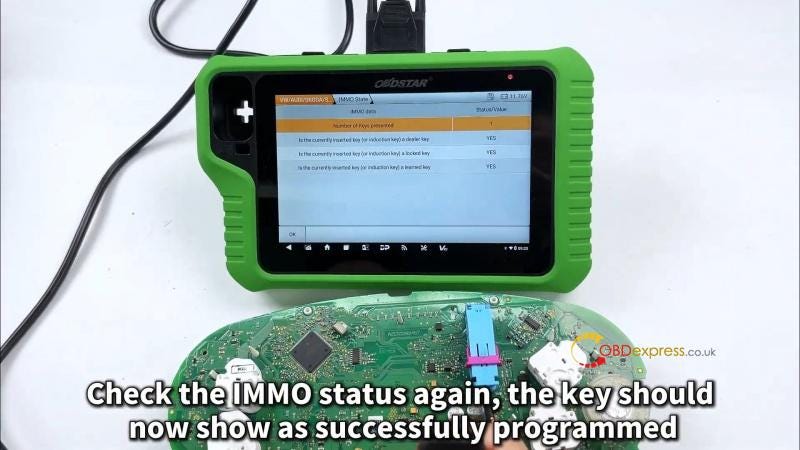
Check the IMMO status.

Currently, the key shows as not programmed. Follow the device prompts step-by-step to program keys.

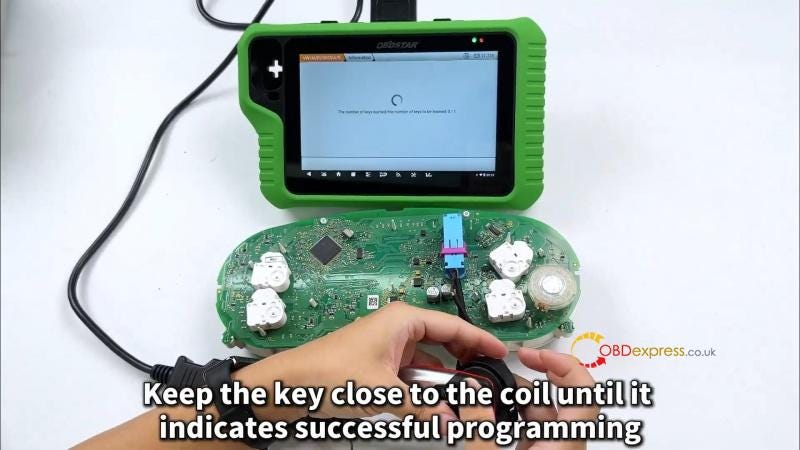
Keep the key close to the coil unitl it indicates successful programming.

Learn complete.

Check the IMMO status again, the key should now show as successfully programmed.

You can now test the key in the vehicle to verify it.


OBDSTAR X300 Classic G3_AKL Program for VW GEN4 NEC24C64

www.obdexpress.co.uk

How to Install PADFLASH Software & Driver (2025 Latest)

 Here shares the latest PADFLASH Software & Driver installation guide, updated on May 28, 2025.

Please follow the step-by-step instructions carefully to ensure proper operation.

System Requirements

Operating System:

  • Windows 7 64-bit (strongly recommended)
  • Windows 10 64-bit (supported)
  • Windows 11 (requires additional configuration)

Hardware:

  • Minimum 4GB RAM
  • Minimum 2.5GHz CPU

Installation Steps

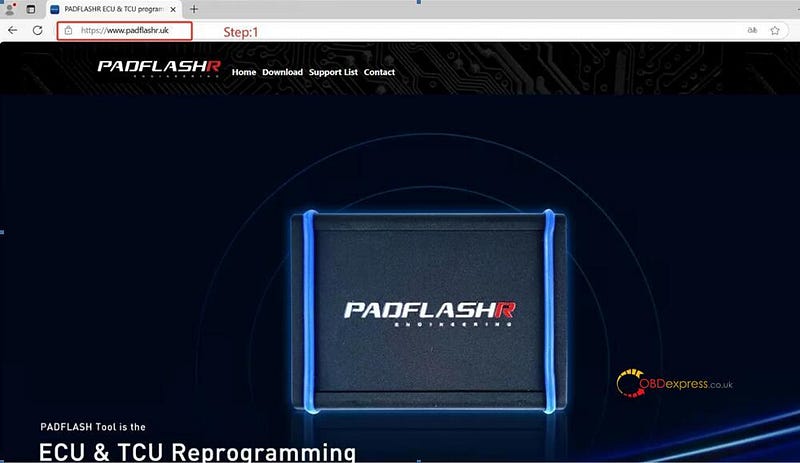
Step 1: Visit the Official Website

  • Go to: https://padflashr.uk
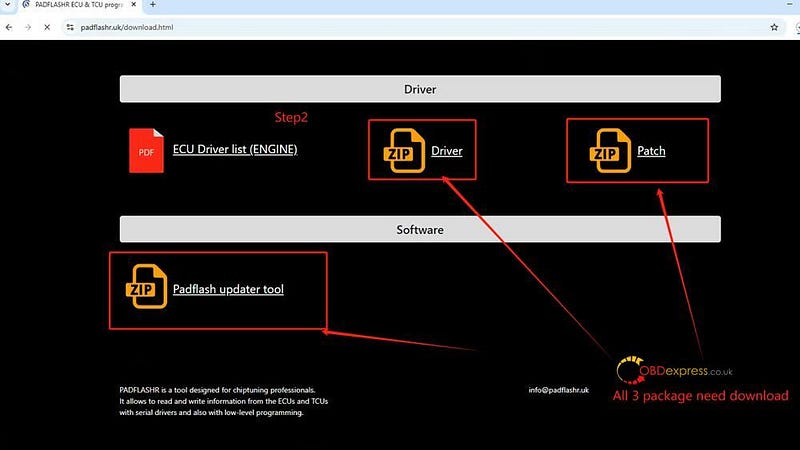
  • Navigate to the Download section and download the required software and drivers.

How to Install PADFLASH Software and Driver

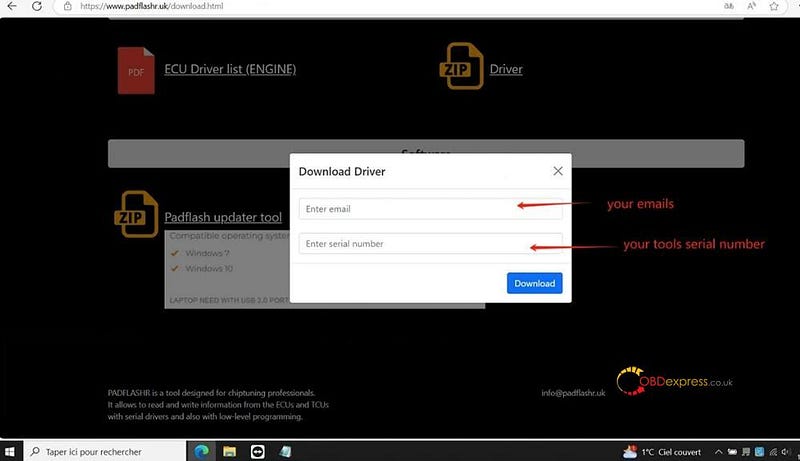
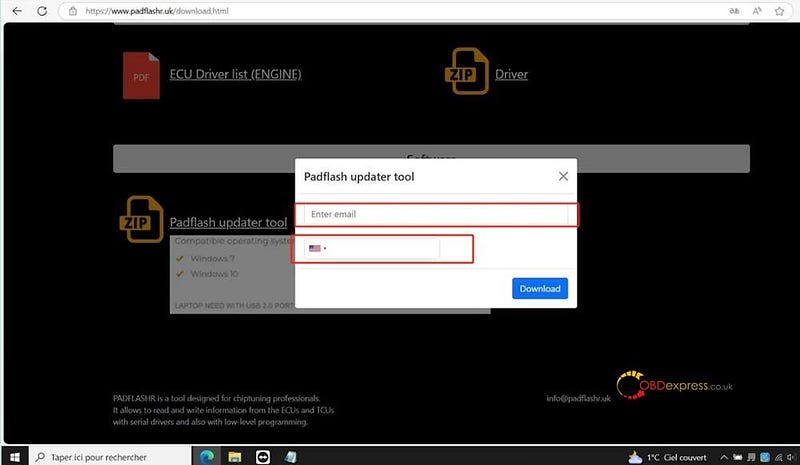
Step 2: Access the Download Page

  • Enter your email address and tool serial number (SN) to access the downloads.

How to Install PADFLASH Software and Driver

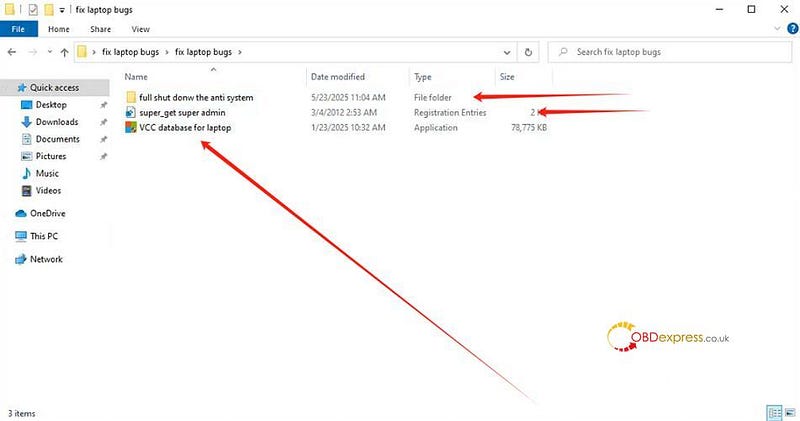
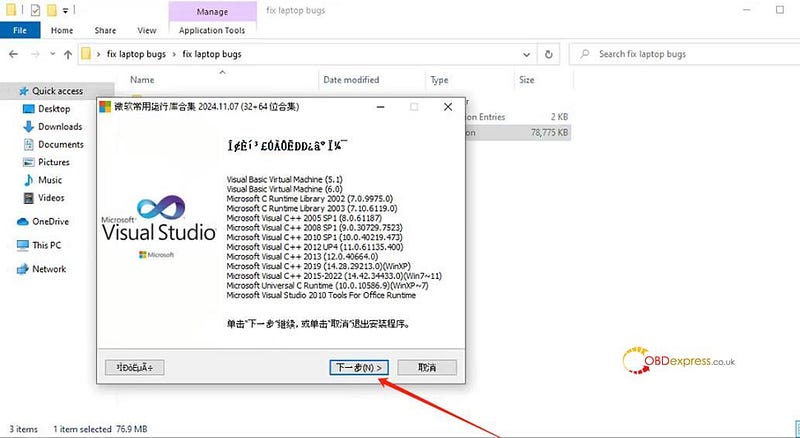
Step 3: Install Patches

  • Run the "PATCH INSTALL"
  • Install the Super Driver using Administrator Mode.
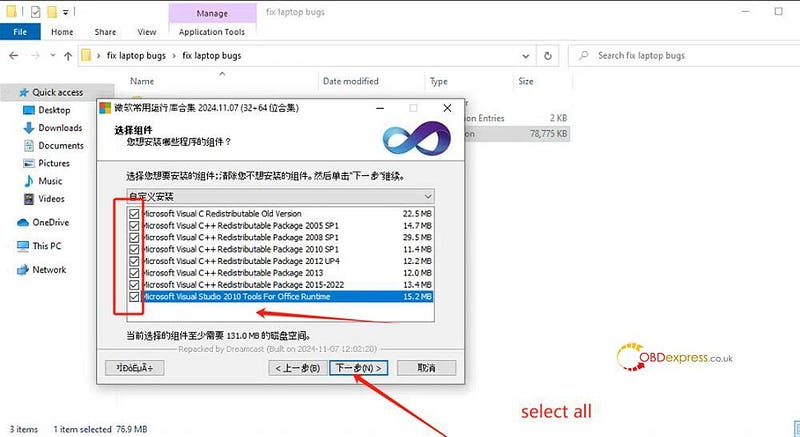
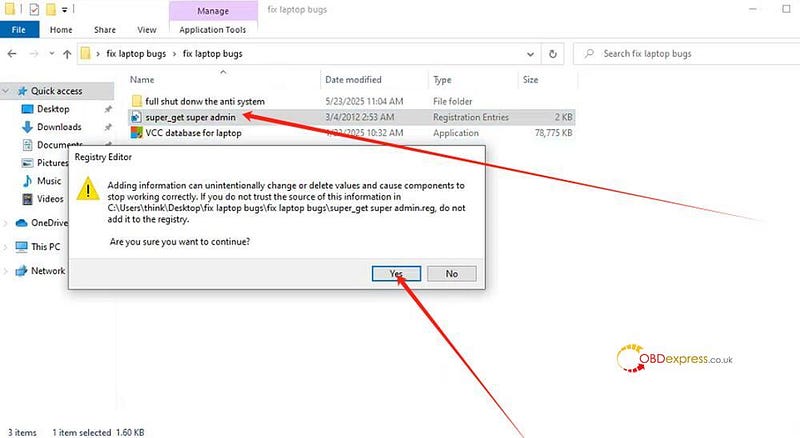
  • Install the Laptop Patch Fix.

How to Install PADFLASH Software and Driver

Important:
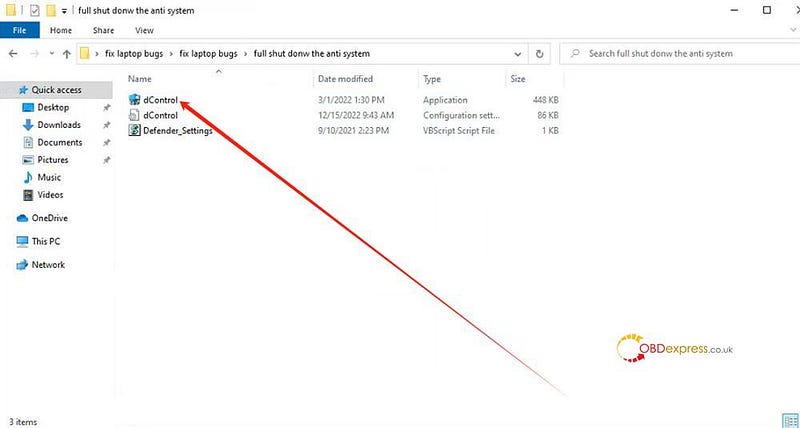
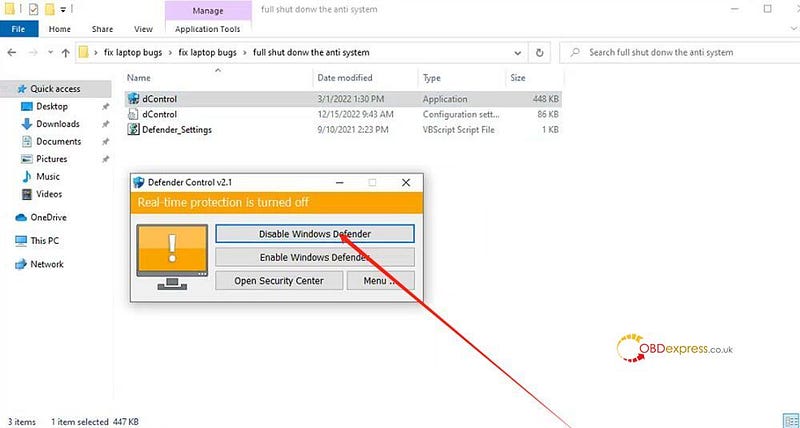
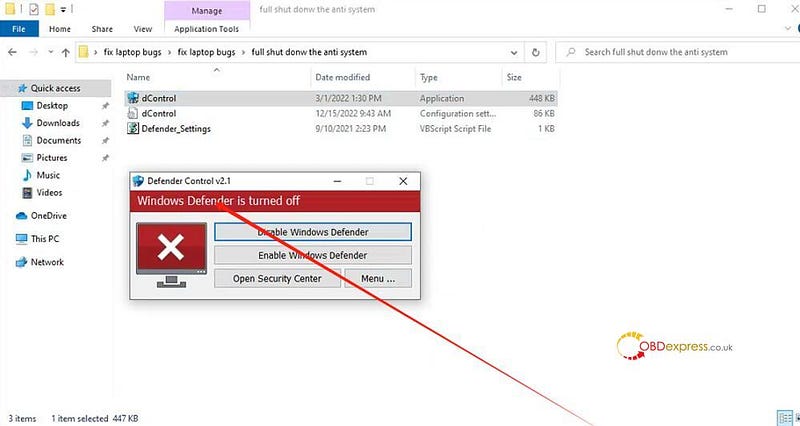
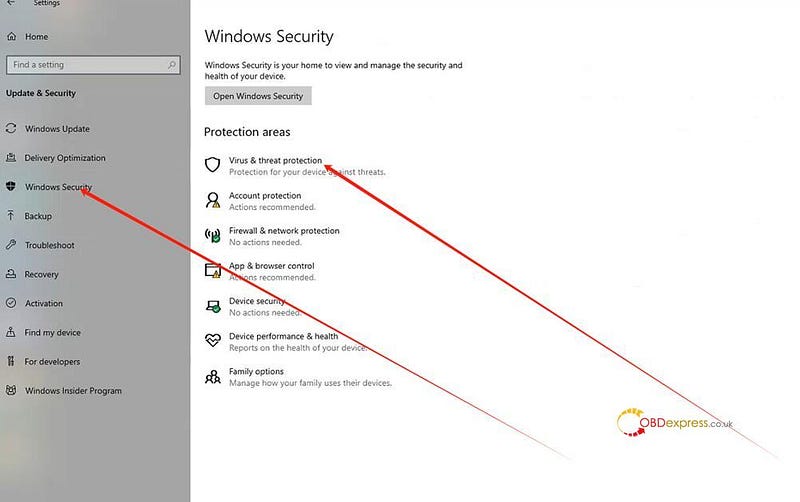
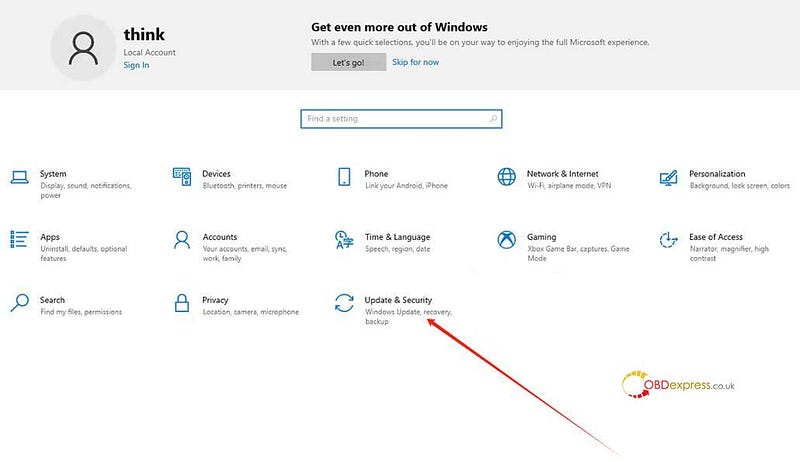
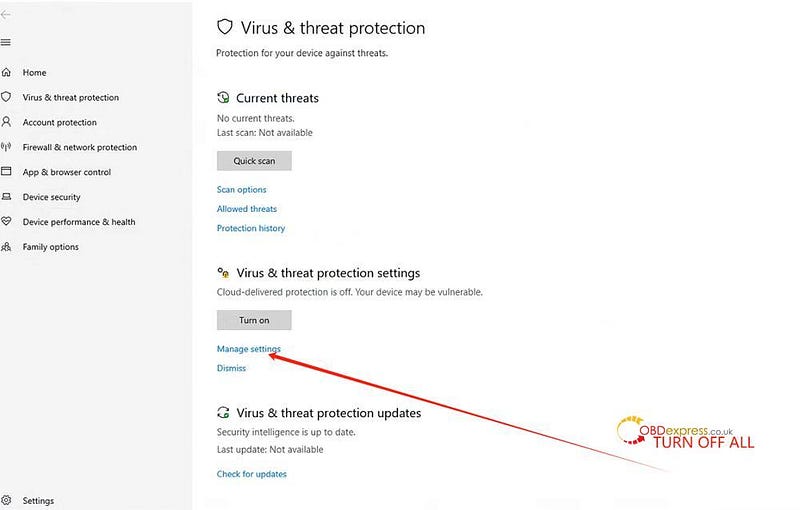
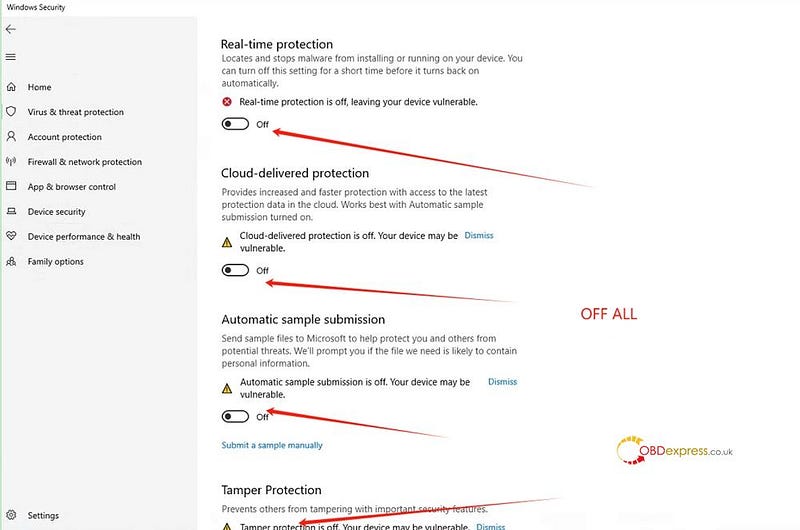
Disable Windows Defender completely:

  • On Windows 7/10/11, turn off Real-time Protection and all related security features.

How to Install PADFLASH Software and Driver

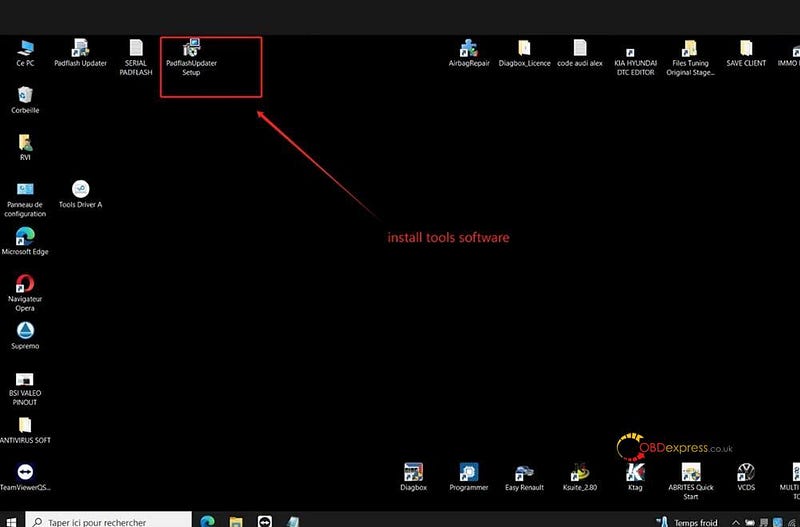
Step 4: Install PADFLASHR Software

  • Run the PADFLASHR software installer.
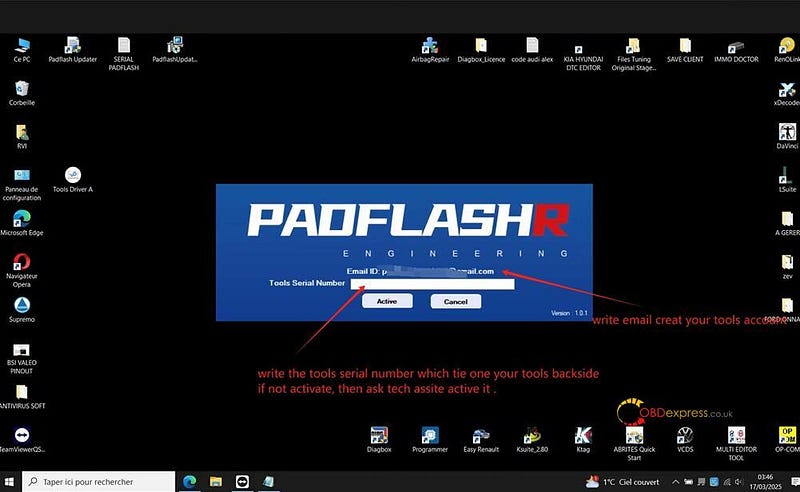
  • Enter your email and tool SN to complete registration.
  • After registration, restart the PADFLASHR Updater.

How to Install PADFLASH Software and Driver

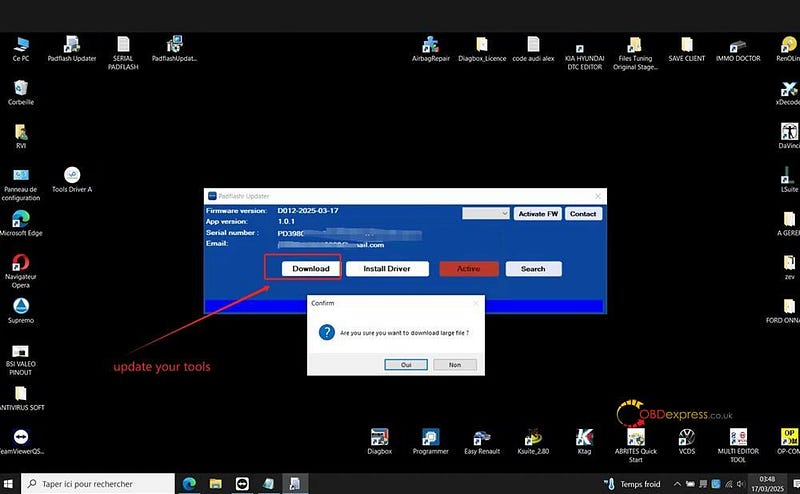
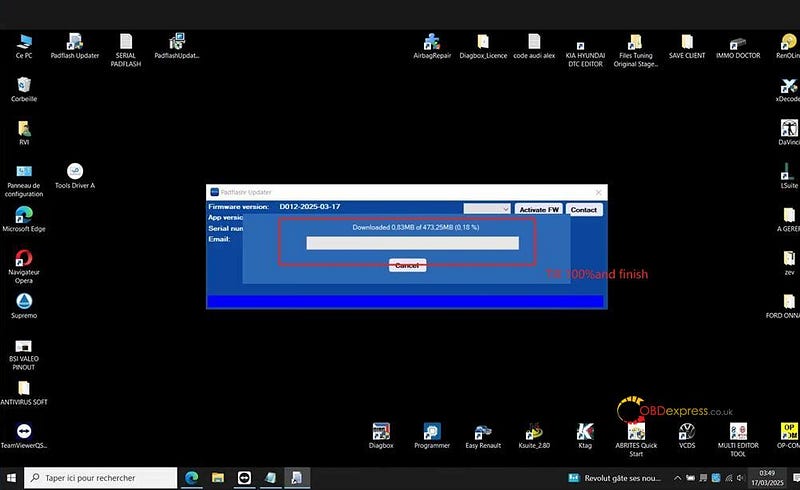
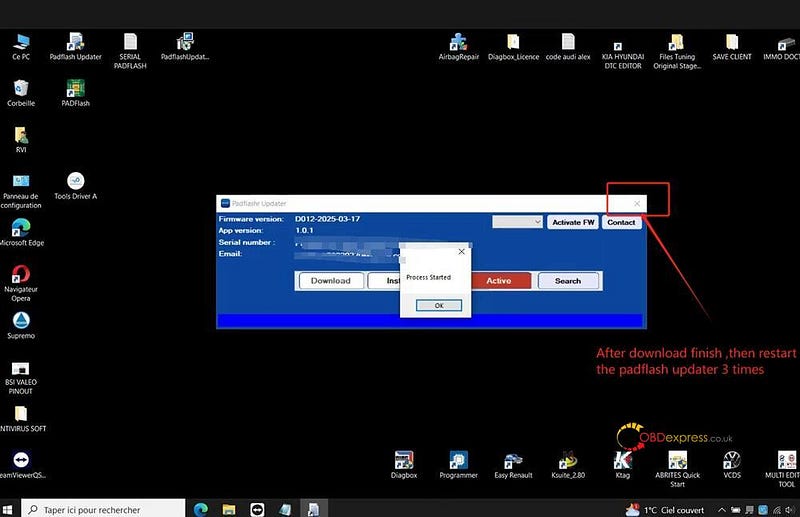
Step 5: Update Software

  • After restarting, the updater will automatically begin downloading update files.
  • Wait until the download is complete.
  • Then restart the updater three times to finalize setup.

How to Install PADFLASH Software and Driver

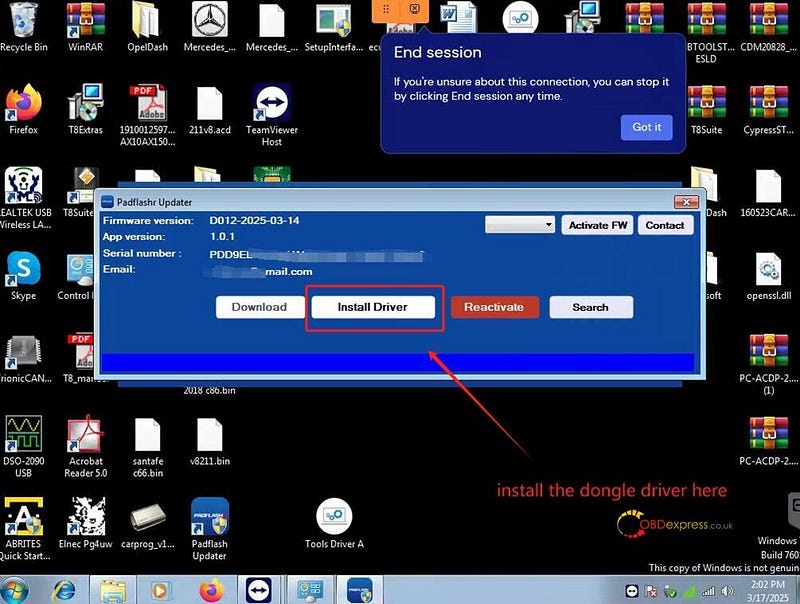
Step 6: Connect and Install Drivers


How to Install PADFLASH Software and Driver
  • Install the dongle driver when prompted.

How to Install PADFLASH Software and Driver
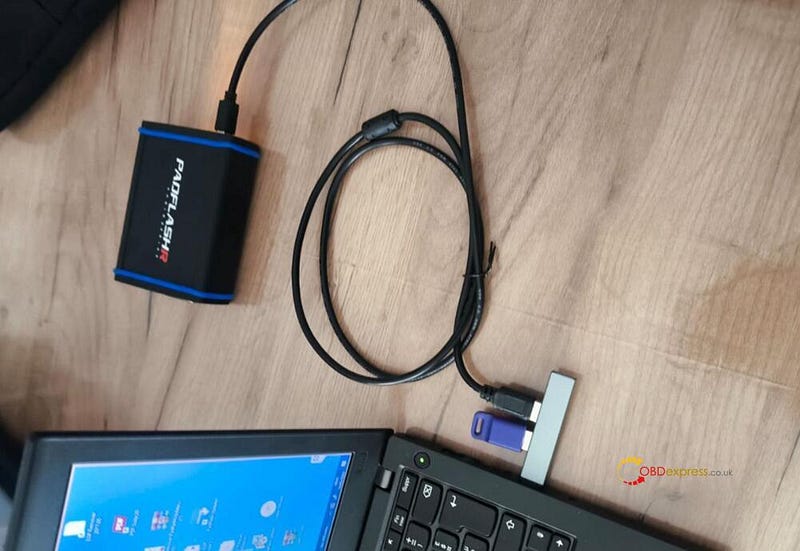
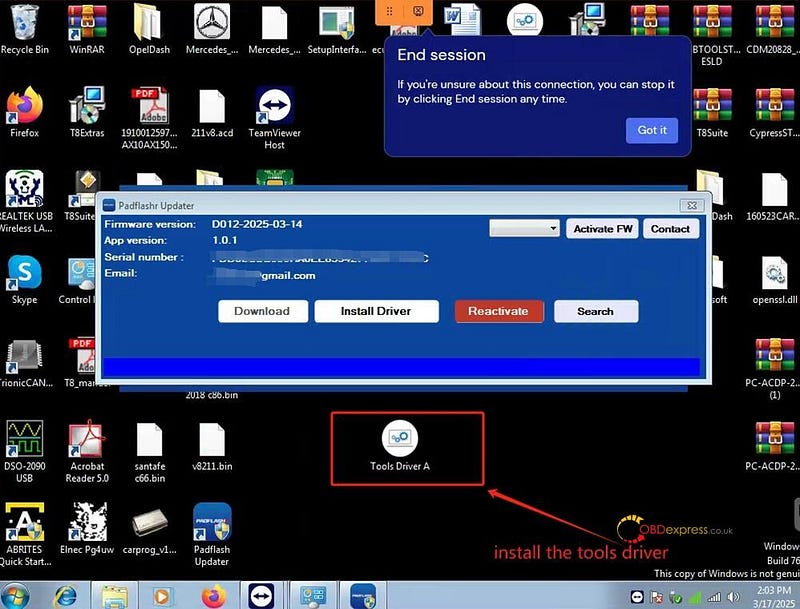
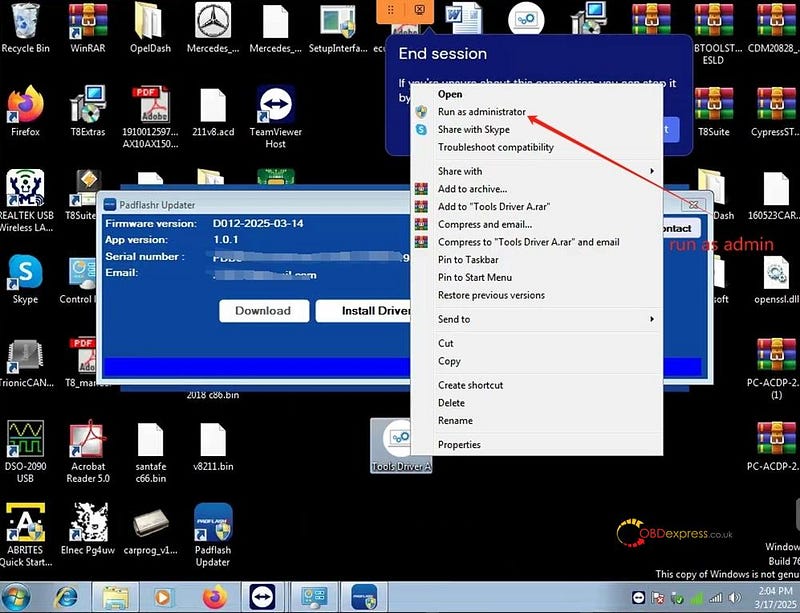
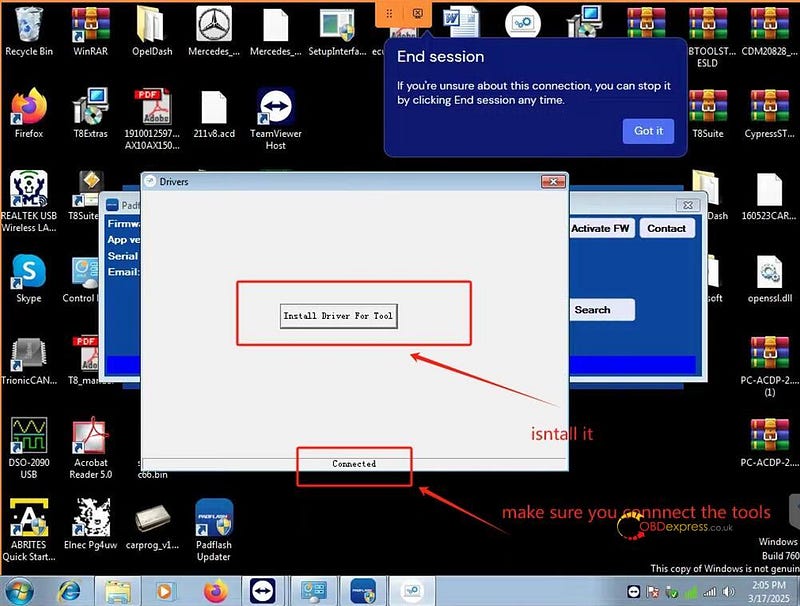
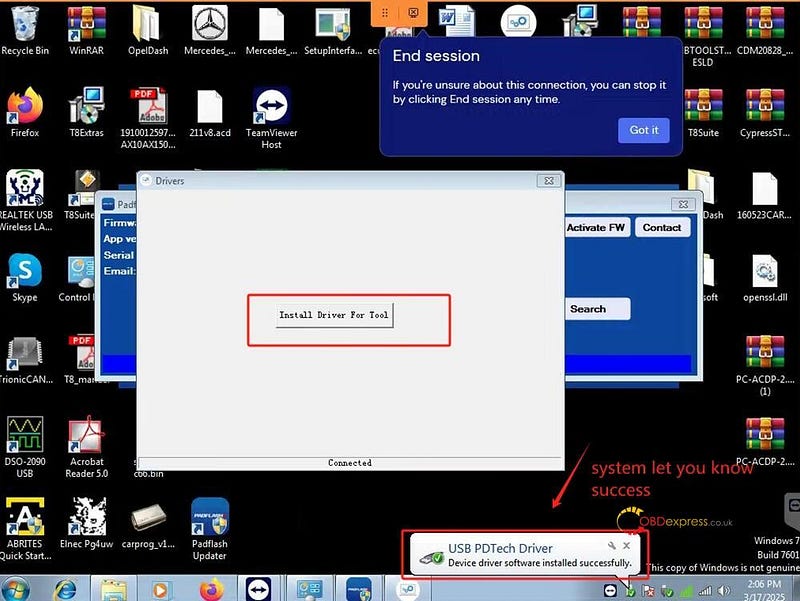
  • Connect the tool and install the tool drivers.

How to Install PADFLASH Software and Driver

Important Setup Note

Ensure PADFLASHR Updater.exe is running.

Navigate to:
C:\Windows\systembin\pdata

Locate PADFlash.exe


How to Install PADFLASH Software and Driver

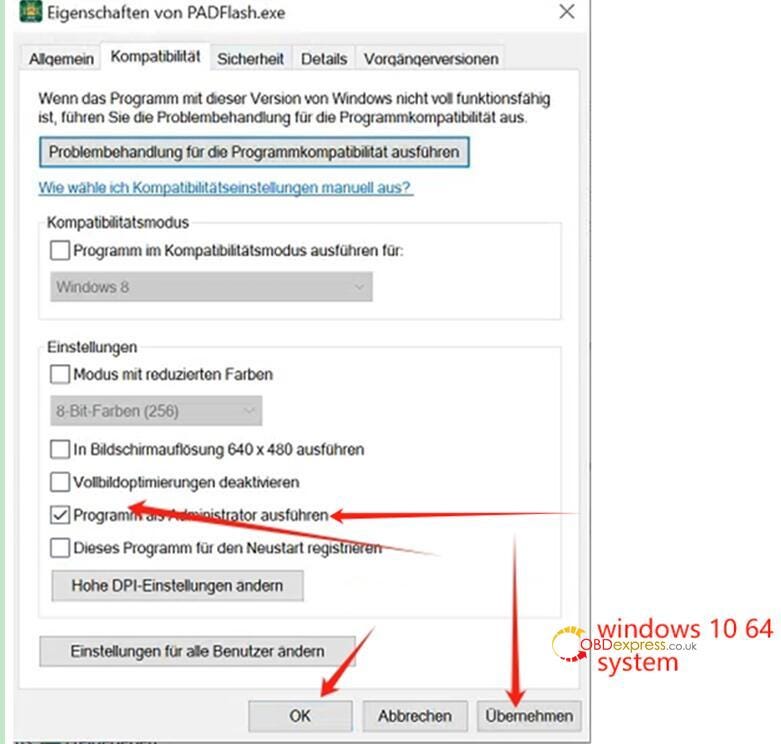
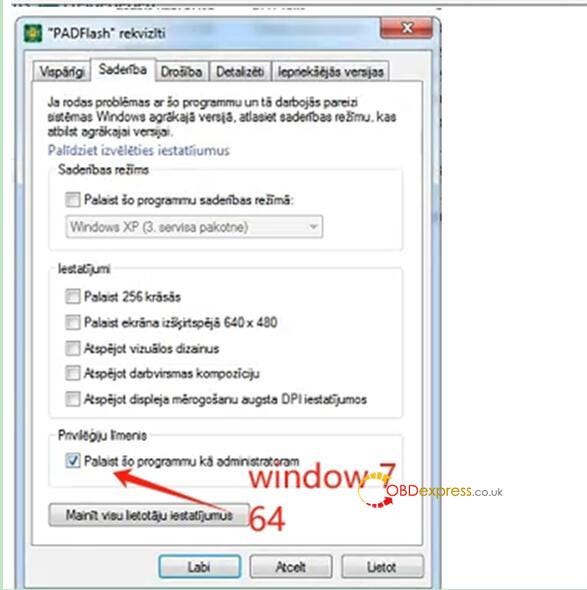
Right-click → Properties → Set to "Run as Administrator".

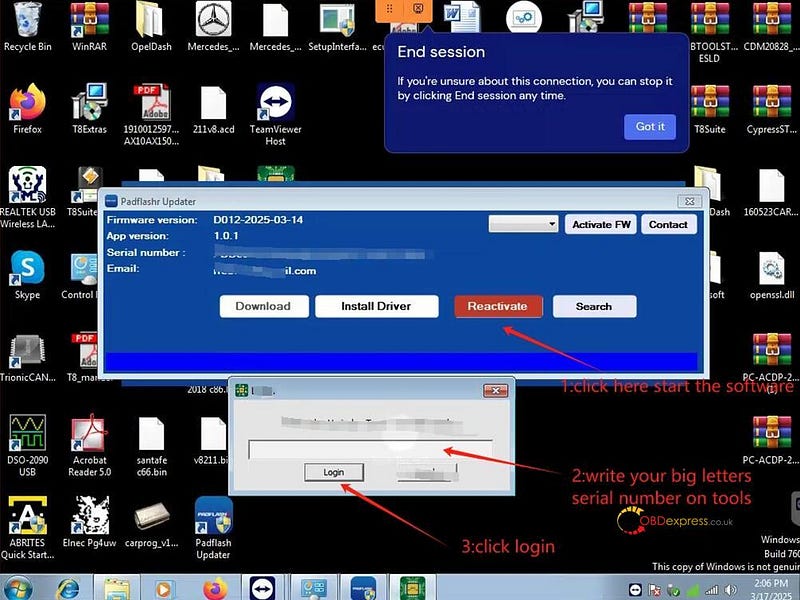
Launch padflash.exe in Admin mode. A prompt will appear requesting your tool Serial Number (in uppercase).

Enter your serial number to log in.


How to Install PADFLASH Software and Driver

Final Activation Steps

  1. Run padflashr updater.exe, then click "Activate".
    (Do not run padflash.exe directly from the desktop.)
  2. When prompted, enter your tool serial number in capital letters.
  3. Once the software opens, click "Activate FW" to apply the firmware license.

Note:
Each time you restart the software, you must click "Activate FW" again to refresh the Padflash tool firmware.


How to Install PADFLASH Software and Driver

Important Notes for Windows 10/11 Users

  • You must disable Windows Defender and Real-Time Protection completely to ensure stable operation.
  • If the tool doesn’t function properly or the software fails to launch, your system may be missing essential patches.
  • In such cases, please contact remote support for assistance with refreshing your Windows system.

www.obdexpress.co.uk

EoneBoss HK003: 6A Full Unlock Support for Hyundai/Kia Keys

 The EoneBoss HK003 has been upgraded with 6A full unlock support for Hyundai/Kia smart keys , giving locksmiths a simpler way to handle ...