Monday, 15 April 2024

Lonsdor KW100 APP Function Operation Instruction

 New product Lonsdor KW100 Key Generation Tool has been launched to pre-order now. As a quick key generator for Toyota & Lexus key adding/all keys lost, today we'll demonstrate how to use the tool with Lonsdor App. Need to work with Lonsdor LT20 Smart Key as well.

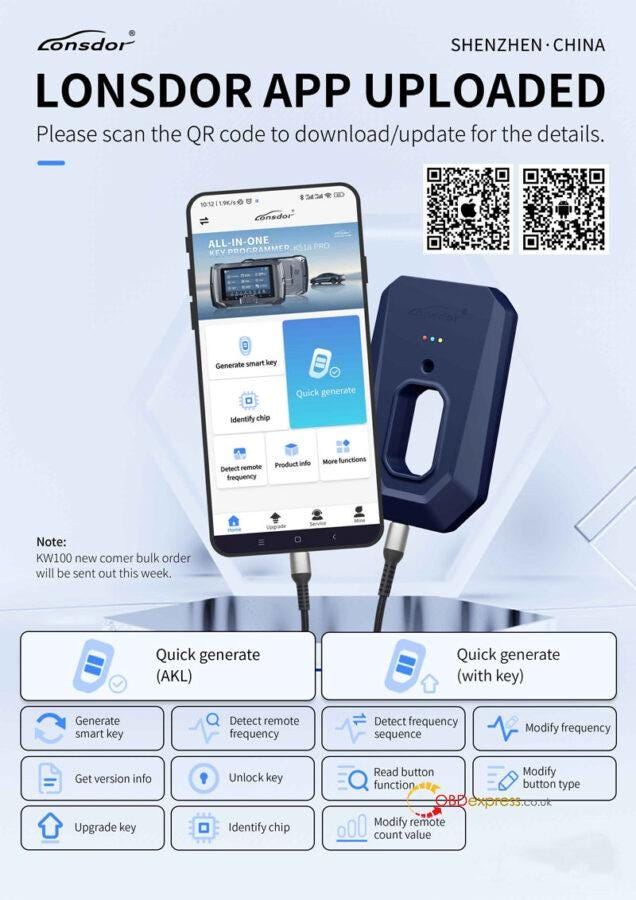
  • First of all, scan the QR code to download Lonsdor app on a smart phone.
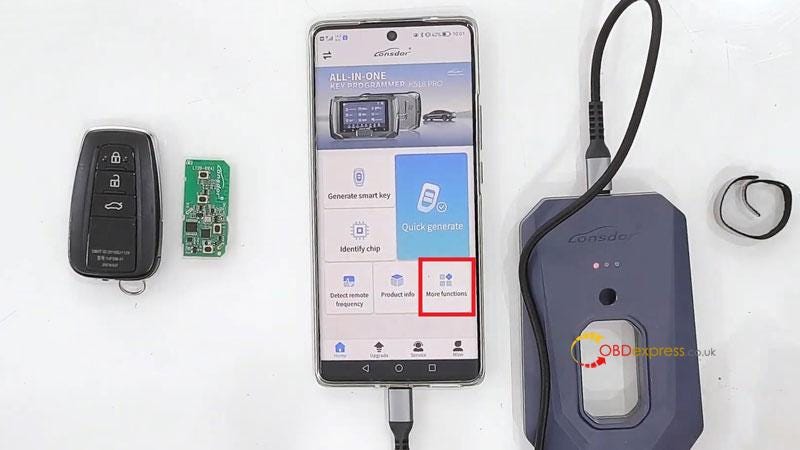
  • Connect Lonsdor KW100 & smart phone via cable, prepare an original key and a Lonsdor LT20 smart key.

Lonsdor KW100 APP Function Operation Instruction

  • Detect Frequency

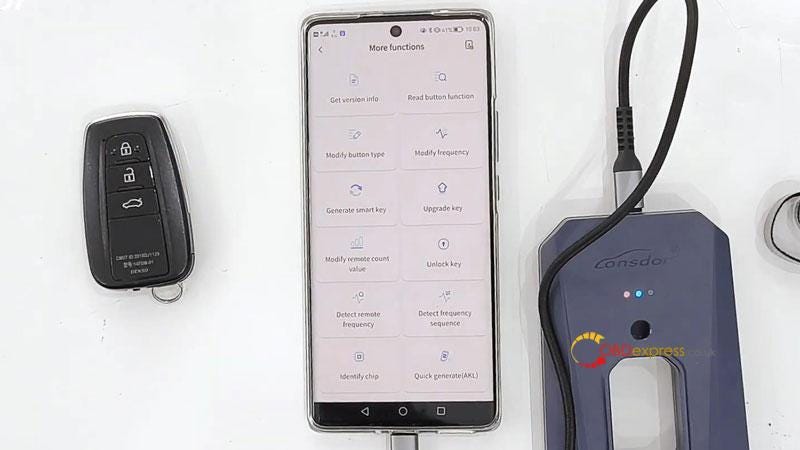
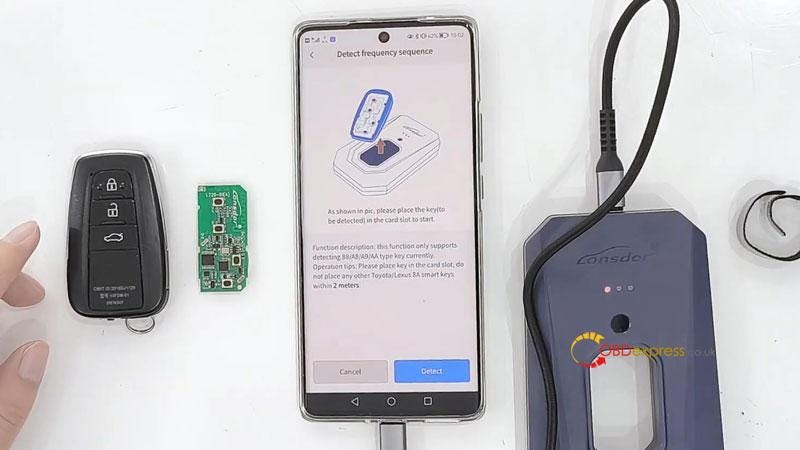
More functions >> Detect frequency sequence >> Detect

*As we known, many cars have dual frequency. This function can offer the correct frequency sequence, so users won't confused about it.

Place the key into the KW100 card slot to start.

Press "Detect".

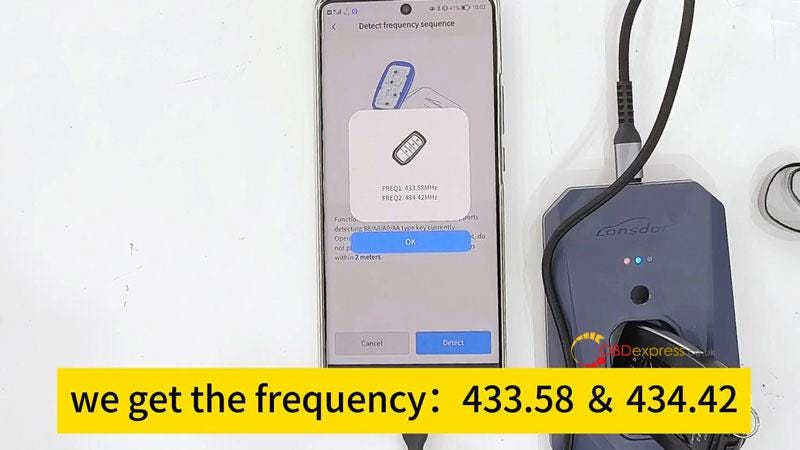
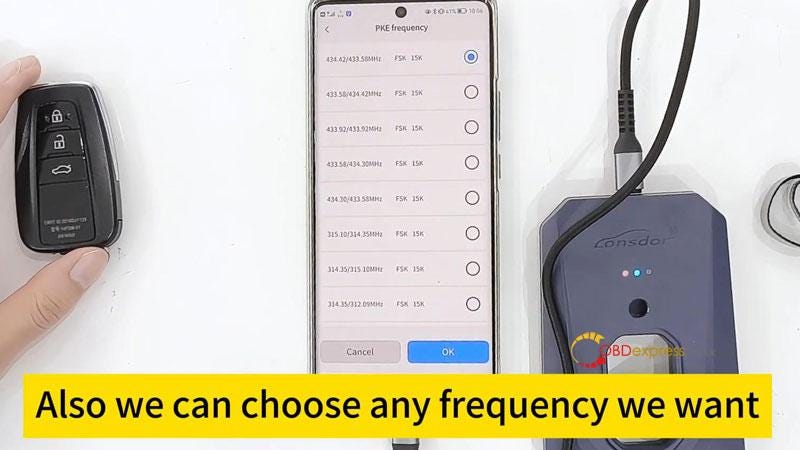
The frequency is 433.58 & 434.42

Lonsdor KW100 APP Function Operation Instruction

Lonsdor KW100 APP Function Operation Instruction

Lonsdor KW100 APP Function Operation Instruction

Lonsdor KW100 APP Function Operation Instruction

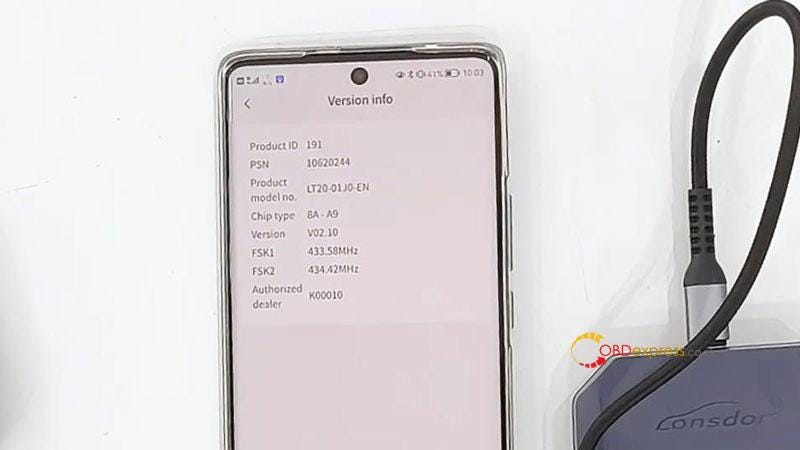
  • Get Version Info

Get version info >> Start

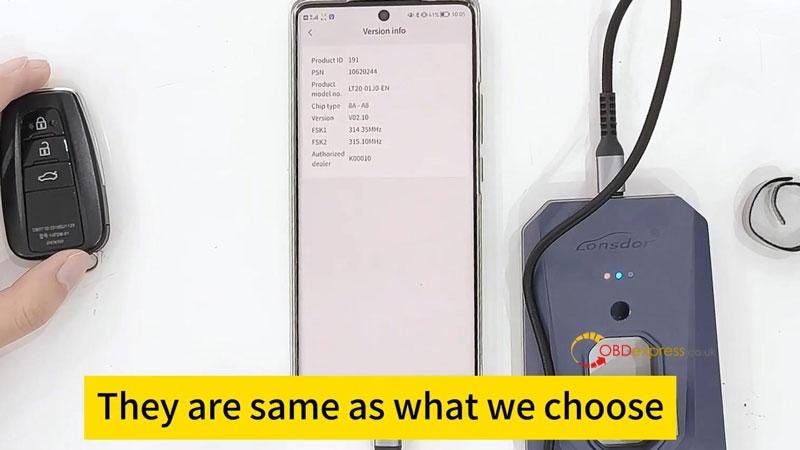
This key is chip type: 8A-A9

Lonsdor KW100 APP Function Operation Instruction

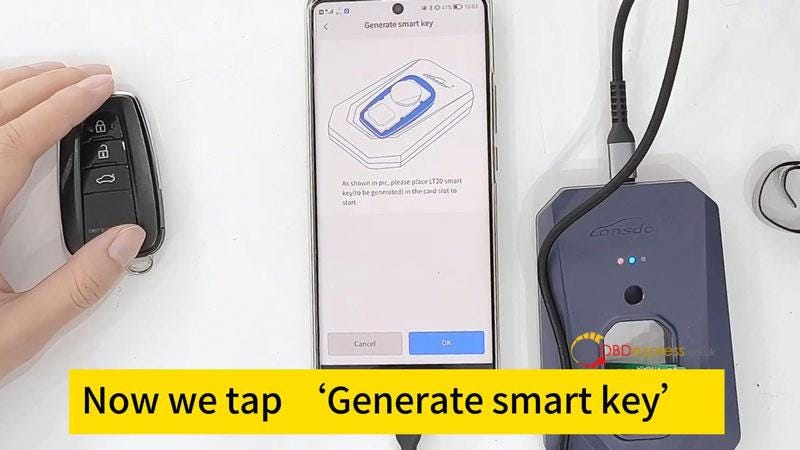
  • Generate Smart Key

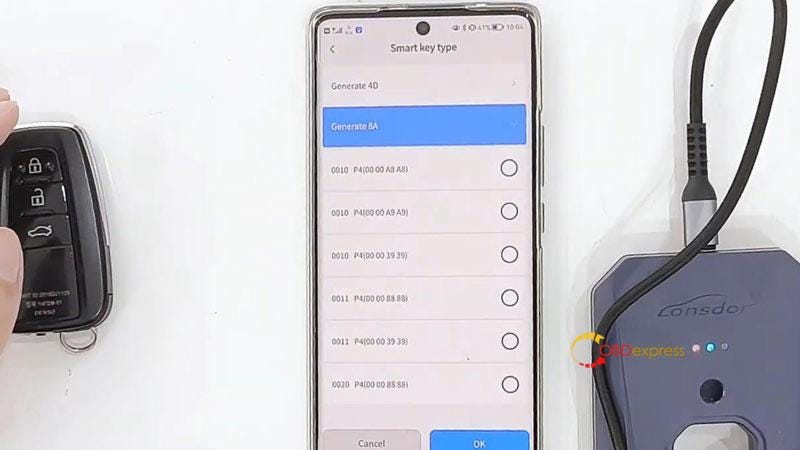
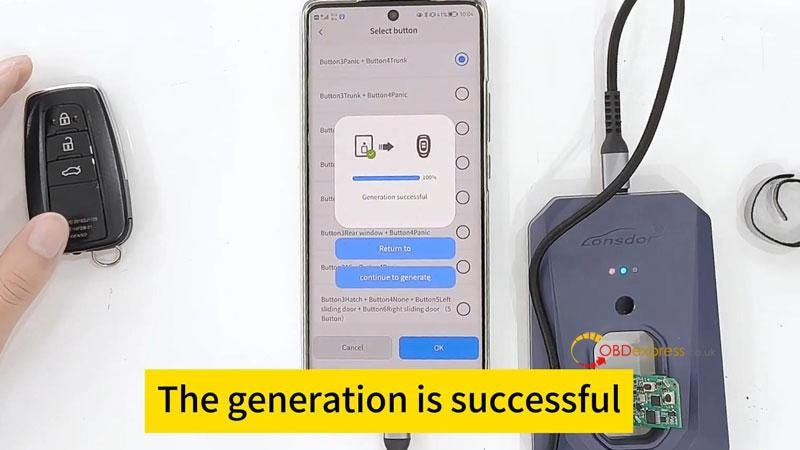
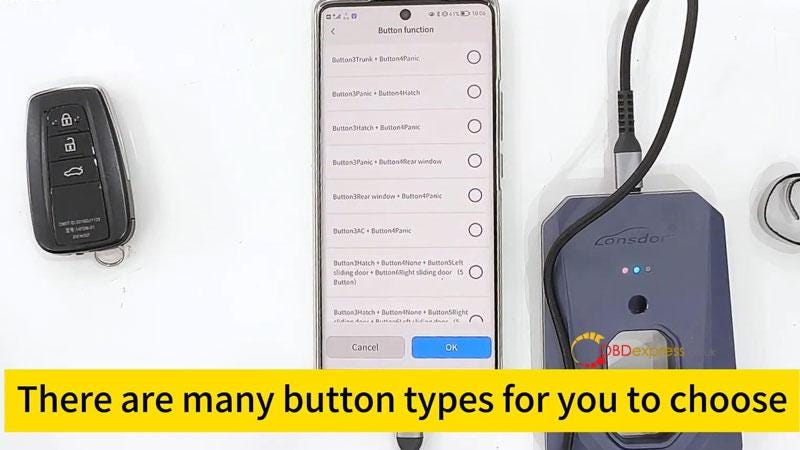
Generate smart key >> OK >> Generate 8A >> 0020 P4(00 00 A9 A8) >> Select button: Button 3 Panic+Button 4 Trunk >> OK

Key generation is successful.

Go back to check chip & frequency, they are same as what we choose.

Lonsdor KW100 APP Function Operation Instruction

Lonsdor KW100 APP Function Operation Instruction

Lonsdor KW100 APP Function Operation Instruction

Lonsdor KW100 APP Function Operation Instruction

  • Modify Button Type & Frequency

We can also modify button type & button frequency in "More functions".

Modify button type >> OK >> Choose button type

Modify frequency >> OK >> Choose frequency

Lonsdor KW100 APP Function Operation Instruction

Lonsdor KW100 APP Function Operation Instruction

www.obdexpress.co.uk

How to Diagnose Cars with OBDSTAR X300 Classic G3?

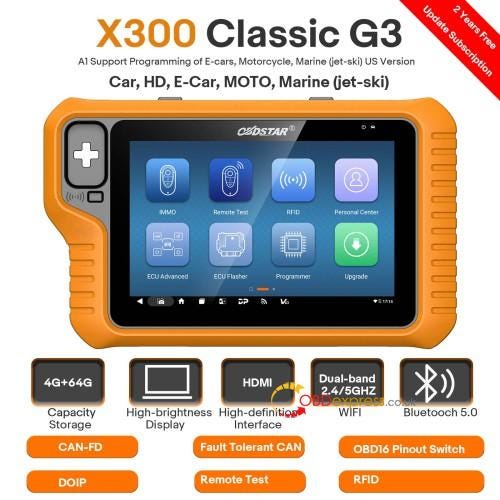
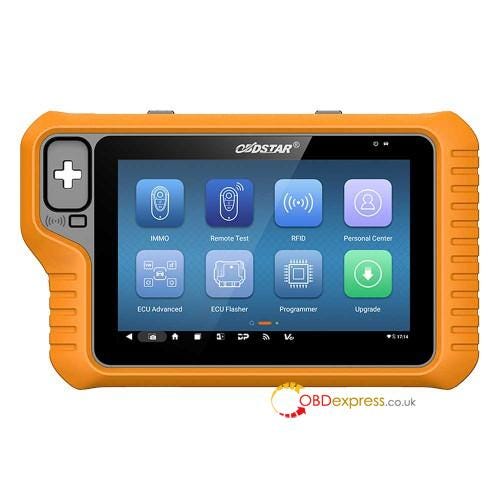
 OBDSTAR X300 Classic G3 (Key Master G3) has the diagnostic program that can establish a data connection with the vehicle ECU through the diagnostic main line, and can read ECU information, view fault codes, check data flow parameters, and perform actuation tests. Diagnostic applications can access multiple ECUs (Electronic Control Units) for vehicle control systems such as engine, transmission, anti-lock braking system (ABS), etc.
How to Diagnose Cars with OBDSTAR X300 Classic G3

How to establish vehicle communication with X300 Classic G3?

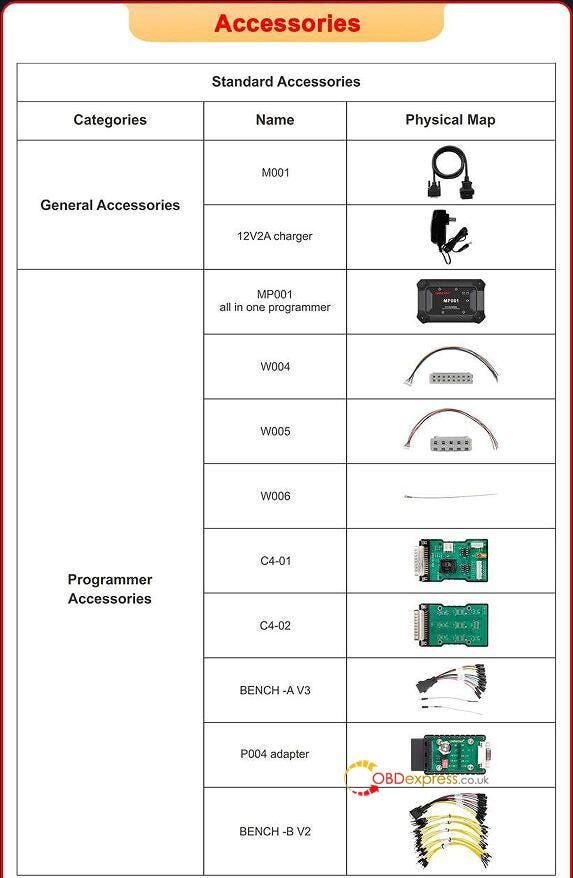
1)Connect the diagnostic main cable (M001) to the vehicle's diagnostic socket for power supply and communication.

*Some functions may require additional adapters or accessories. Please refer to the software operating instructions for detailed procedures.
How to Diagnose Cars with OBDSTAR X300 Classic G3

2) Ready to diagnose and service the vehicle.

How to connect X300 Classic G3 Key Programmer and vehicle?

Depending on the different vehicle configurations, the methods for connecting the intelligent diagnostic equipment and the vehicle diagnostic socket are divided into the following two types:

  • Vehicles compatible with OBD II management system communicate and are poweredwith12V through a standard SAE J1962 diagnostic socket.
  • Vehicles that are not compatible with OBD II management system communicate through a non-standard diagnostic socket and, in some cases, are powered with 12V from a power adapter of smart scanner or the vehicle battery.

1.Connecting to OBD II Vehicle

Connecting to an OBD II vehicle only requires the use of the test main cable, no other connectors are required.

Connection method:

1)Connect the male connector of the main diagnostic cable to the smart scanner and tighten the captive screw.

2)Attach the 16-pin connector of the main test cable to the vehicle diagnostic socket, and for the location of the socket, you can refer to the help data in the diagnostic software.

2.Connecting to Non-OBD II Vehicle

Connecting to a non-OBD II vehicle, you'll need to use a combination of the test mainline and a vehicle-specific adapter. There are two possible connection scenarios for non-OBD II vehicles:

1)The diagnostic interface provides both communication and power.

2)The diagnostic interface can only communicate and requires connection to the power adapter of the intelligent diagnostic scanner or the vehicle battery to obtain power (preferred).

Connection method:

1)Attach the male connector of the main diagnostic cable to the smart scanner, and secure it by tightening the captive screw.

2)Find the vehicle-specific diagnostic connector and link its 16-pin female connector to the male connector of the main test cable.

3)Connect the combined dedicated diagnostic connector to the vehicle's diagnostic socket.

How to solve X300 Classic G3 communicate failure?

If the OBDSTAR intelligent diagnostic tool fails to establish normal communication, the screen will display a prompt message indicating a communication failure, along with corresponding instructions in the relevant section. Possible reasons for this issue include:

1) The ignition is not turned on.

2) The main line is not well connected.

3) Faulty vehicle, data cable, or connector wiring.

4) The battery is exhausted.

5) The vehicle is not equipped with the selected system.

Follow the above reasons to perform the related operations.

How to diagnose vehicle with OBDSTAR X300 Classic G3 Key Programmer?

Main steps:

Connect the diagnostic scanner to the vehicle via the test main line >> Register (see Personal

Center section for details)>> Log in (see Personal Center section for details)>> Download/Upgrade diagnostic software >> Select functions and models>> Execute the diagnosis >> Complete diagnostics and exit.

Kindly notice:

Before exiting or closing the diagnostic application program, it's essential to exit the diagnostic operation interface and terminate all communication between the OBDSTAR G3 Key Programmer and the vehicle.

Interrupting communication can potentially damage the vehicle's ECU. Therefore, ensure that the test main cable remains well connected to both the smart device and the vehicle throughout the diagnostic communication process.

Additionally, make sure to exit all diagnostic communication before disconnecting the diagnosis main line or turning off the device.

Learn more:


www.obdexpress.co.uk
Thursday, 11 April 2024

How to Set Up OBDSTAR X300 Classic G3?

 This post comes with the user guide of OBDSTAR X300 Classic G3 (Key Master G3).

How to Set Up OBDSTAR X300 Classic G3

Main content:

  • How to set screen lock?
  • How to manage application?
  • How to set languages?
  • How to set keyboards?
  • How to set date & time?
  • How to restore factory settings?
  • How to check the storage status?

Part I

How to set screen lock?

You can set the screen lock pattern so that when the screen of X300 Classic G3 is locked, the screen unlock pattern needs to be drawn correctly before it can be unlocked.

Step 1: Starting from the desktop, select Settings>> Security.

Step 2: There are four settings for screen lock: None, Swipe, Pattern, PIN, and Password.

If you choose pattern, you have to follow the on-screen instructions step by step to set your screen lock pattern.

PART II

How to manage application?

Step 1: Select Settings >> Apps & notifications >> SEEALL 15 APPS

Step 2: Select the application you would like to manage.

The common operations include OPEN, DISABLE, FORCE STOP, UNINSTALL (not available for some apps), Notifications, Permissions, Mobile data & Wi-Fi, and Storage & cache.

PART III

How to set languages?

Step 1: Select Settings>> System>> Languages & input >> Languages

Step 2: If the language you need is not listed, select [Add a language]. After selecting the desired language, the list will automatically refresh, and your chosen language will appear.

Step 3: Press and hold the desired language, then drag it to the top. The language at the top will be set as the system language.

PART IV

How to set keyboards?

The X300 Classic G3 Key Programmer provides multiple input methods, and apart from on-screen keyboard, you can connect a physical keyboard to the device.

PART V

How to set date & time?

OBDSTAR X300 Classic G3 is preset to use network-provided time.

Note: If the "Use network-provided time" setting is enabled, you will be unable to set date, time and time zone.

Step 1: Select Settings>> System>> Date & time

Step 2: Switch off the "Use network-provided time", then set Date, Time and Time zone respectively. Remember to tap [OK] to save your settings.

Step 3: You can also set the time display format to use locale default and use 24-hour format.

Switch on the Use 24-hour format (blue button) means using a format such as 13:00;

Switch off the Use 24-hour format (grey button) means using a format like 1:00PM.

PART VI

How to restore factory settings?

Restoring factory settings deletes all data, including downloaded applications, and restores X300 Classic G3 key programmer to its factory state.

NOTE: Be sure to back up important data on your X300 Classic G3 before restoring factory settings.

Step 1: Select Settings>> System>> Reset Options>> Erase all data (factory reset)

Step 2: Reset this OBDSTAR device according to on-screen instructions.

PART VII

How to check the storage status?

Select the Settings>> Storage to check the storage status of the device.

The content downloaded via the browser will be saved in the local download directory.

Learn more:

OBDSTAR X300 Classic G3 User Guide

OBDSTAR X300 Classic G3 Register, Update and Transfer Files Guide


www.obdexpress.co.uk
Yanhua ACDP Module 33 MQB-80 Thumb Screw-Fastened Installation Tutorial

 This is a tutorial on how to install Yanhua ACDP Module 33 MQB-80 thumb screw-fastened interface board. Require to be used with Mini ACDP 2 together.

Read also:

Yanhua ACDP Module 33 MQB-87 Lock Fastening Board Installation Tutorial

Installation Steps

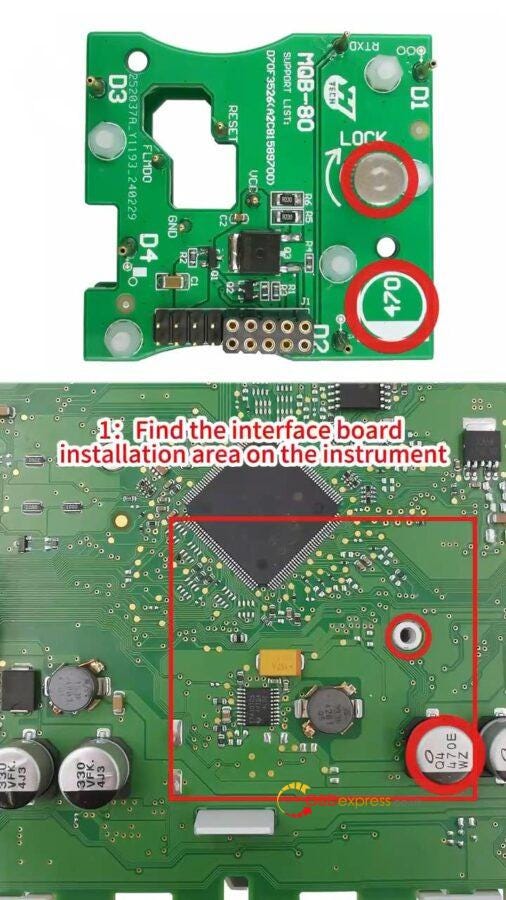
  • Find the installation area according to the visual positioning mark on the Module 33 interface board.
    1. Yanhua ACDP Module 33 MQB-80 Thumb Screw-Fastened Installation Tutorial

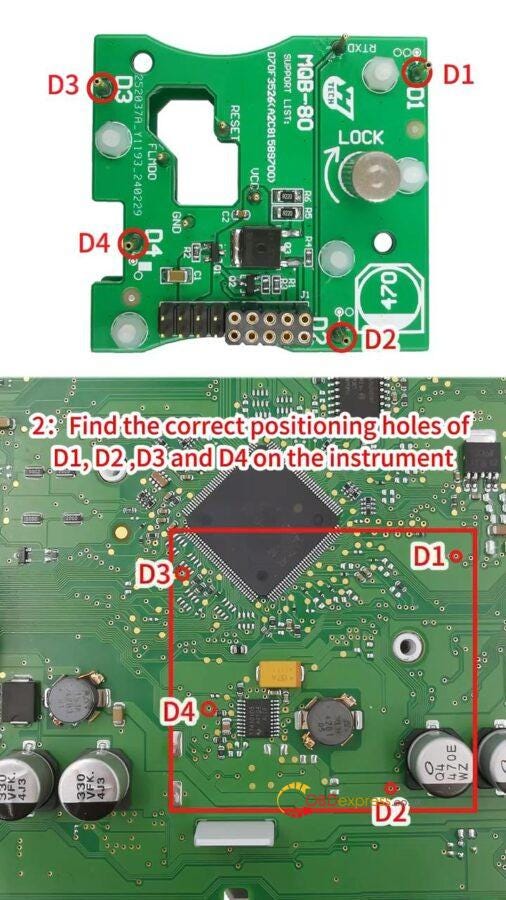
    2. Find the correct positioning holes of D1, D2, D3 and D4 on the instrument.
      1. Yanhua ACDP Module 33 MQB-80 Thumb Screw-Fastened Installation Tutorial

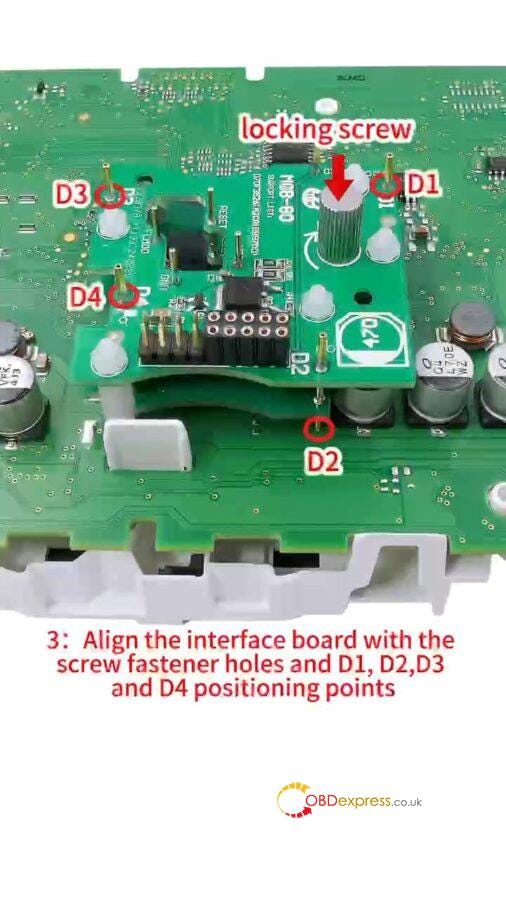
      2. Align the interface board with the screw fastener holes and D1, D2, D3 and D4 positioning points.
        1. Yanhua ACDP Module 33 MQB-80 Thumb Screw-Fastened Installation Tutorial

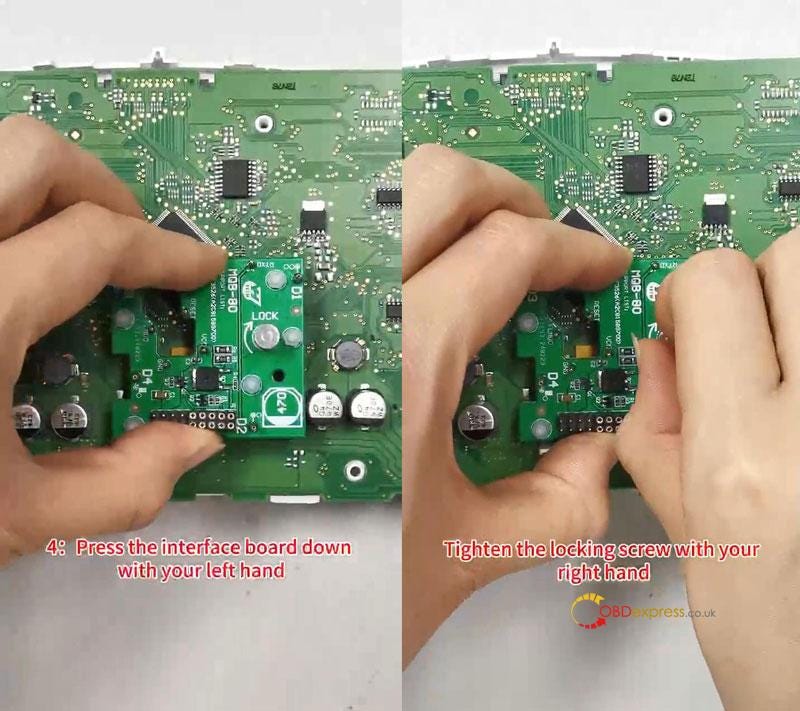
        2. Press the interface board down with your left hand, tighten the locking screw with right hand.
          1. Yanhua ACDP Module 33 MQB-80 Thumb Screw-Fastened Installation Tutorial

          2. Confirm again that the interface board are completely aligned with the D1, D2, D3 and D4 positioning holes of the instrument.
            1. The installation is done.

              www.obdexpress.co.uk
              Two Methods to Register and Activate Lonsdor K518 Pro

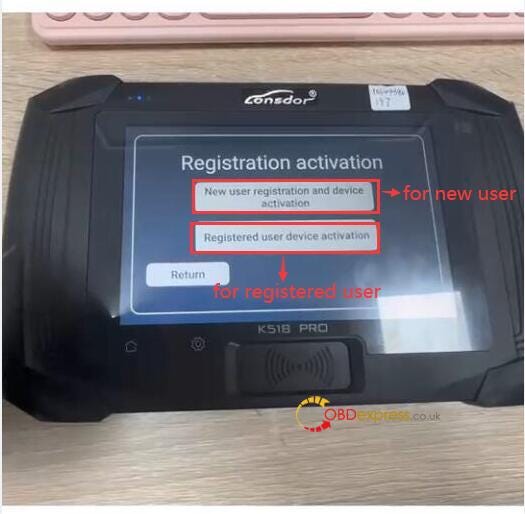
               There are two methods for registering and activating the Lonsdor K518 Pro key programmer: one for new users and the other for registered users.

              Method 1: For New Users

              If you are a new user and using the K518 Pro for the first time, please follow the steps below to register and activate the device:

              1.Power on the device, ensure that the WIFI is set up and connected properly, then proceed with the registration and activation process.

              2.Select "New user registration and device activation"

              Two Methods to Register and Activate Lonsdor K518 Pro

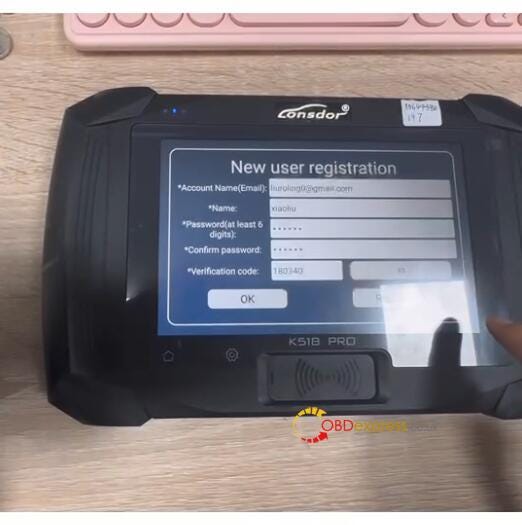
              3.Enter your username, password, and account name (email) to receive a verification code. Enter the code and submit the registration.

              Two Methods to Register and Activate Lonsdor K518 Pro

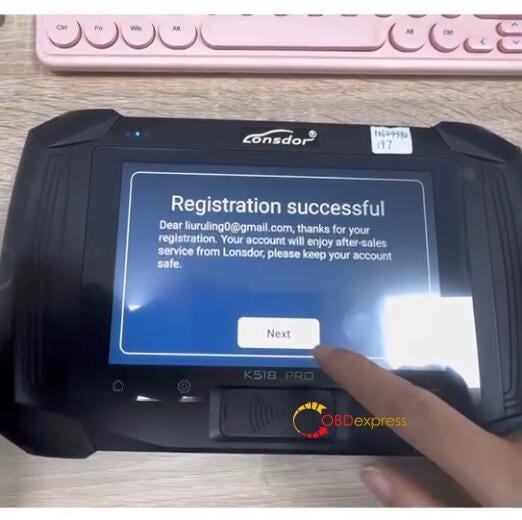
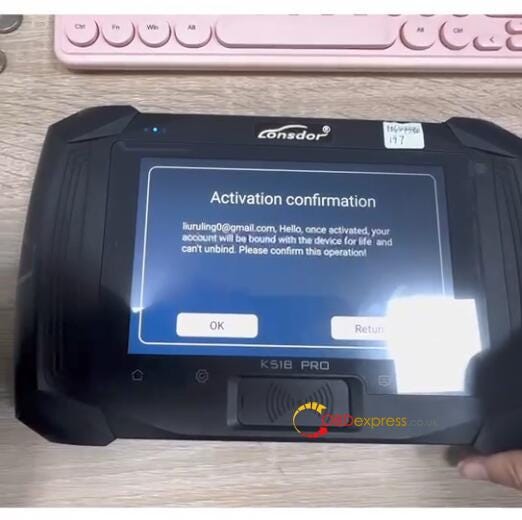
              4.Once the new account is successfully registered, proceed to activate the device.

              Two Methods to Register and Activate Lonsdor K518 Pro

              Two Methods to Register and Activate Lonsdor K518 Pro

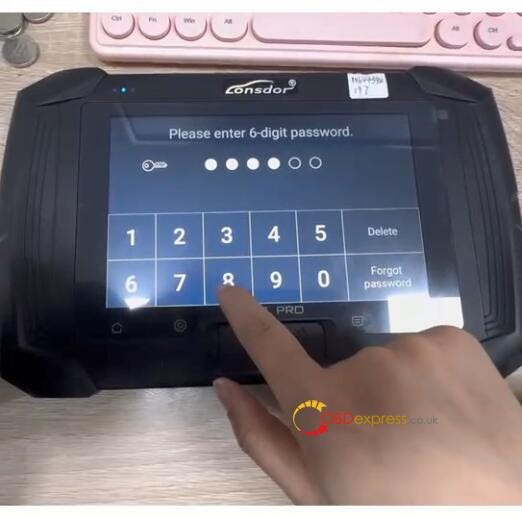
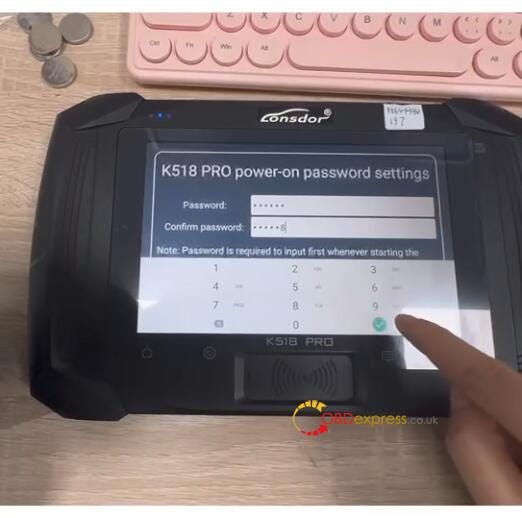
              5.Set up the device's power-on password.

              Two Methods to Register and Activate Lonsdor K518 Pro

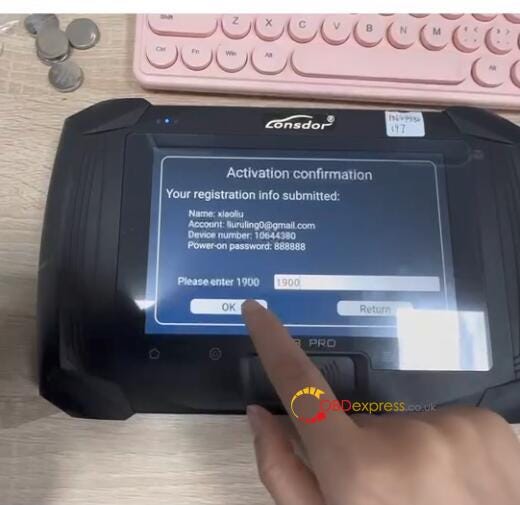
              6.Submit the information and apply to bind the user to the device.

              Two Methods to Register and Activate Lonsdor K518 Pro

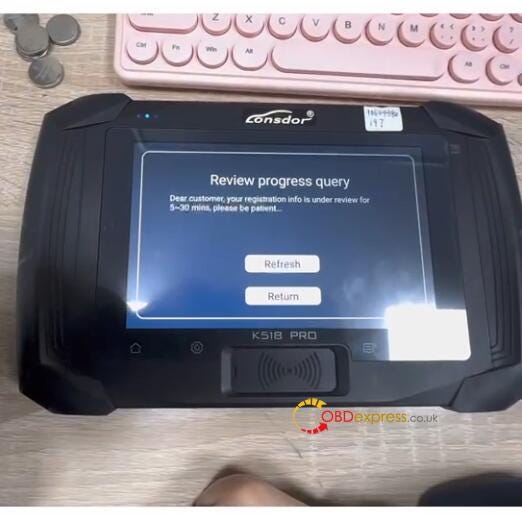
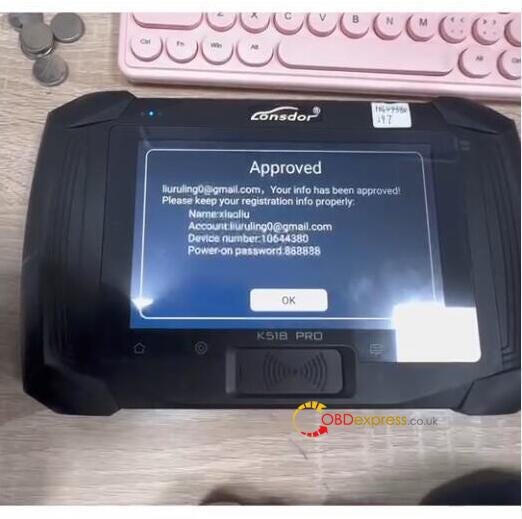
              7.After verification by the server, the registration process will be successful.

              Two Methods to Register and Activate Lonsdor K518 Pro

              Two Methods to Register and Activate Lonsdor K518 Pro

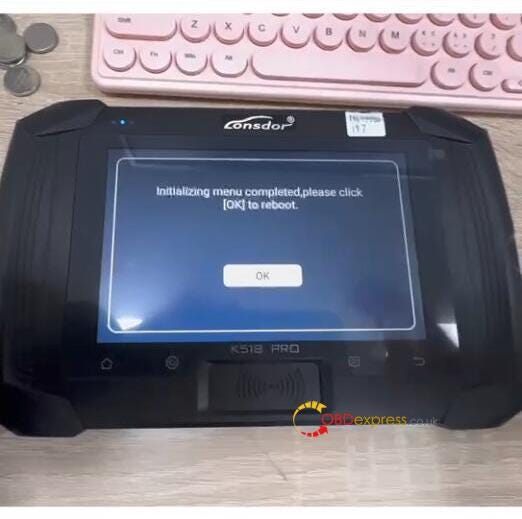
              8.Initialize the menu.

              Two Methods to Register and Activate Lonsdor K518 Pro

              9.Reboot the K518Pro, input the power-on password, and access the device system to use it normally.

              Two Methods to Register and Activate Lonsdor K518 Pro

              Method 2: For Registered Users

              1.Power on the Lonsdor K518 Pro device and ensure that the WIFI is set up and connected properly. Then proceed to the registration and activation process.

              2.Select "Registered user device activation"

              3.Enter the registered account name (email) to receive a verification code. Enter the code and submit the login.

              4.Once the account login is successful, set up the device's power-on password.

              5.Submit the information and apply to bind the user to the device.

              6.After verification by the server, the registration process will be successful.

              7.Initialize the menu.

              8.Reboot the K518 Pro tablet, input the power-on password, and access the device system. The device will be ready for normal use.

              Please note:

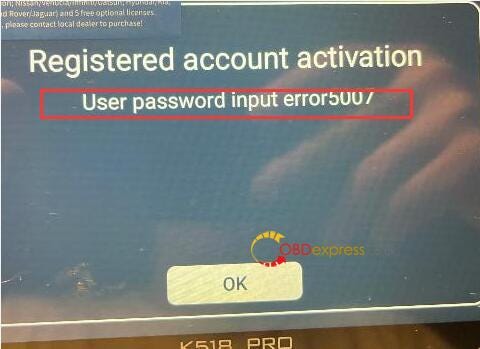
              Ensure that you follow each step accurately to complete the registration and activation process successfully. Otherwise, it may appear registration and activation error like "User password input error 5007".

              Two Methods to Register and Activate Lonsdor K518 Pro

              The registration and activation method described above also applies to Lonsdor K518 Pro FCV Key Programmer.

              www.obdexpress.co.uk
              Yanhua ACDP Module 33 MQB-87 Lock Fastening Board Installation Tutorial

               This is a tutorial on how to install Yanhua ACDP Module 33 MQB-87 lock fastening interface board. Need to work with Mini ACDP 2 basic module for data reading and writing.

              Installation Steps

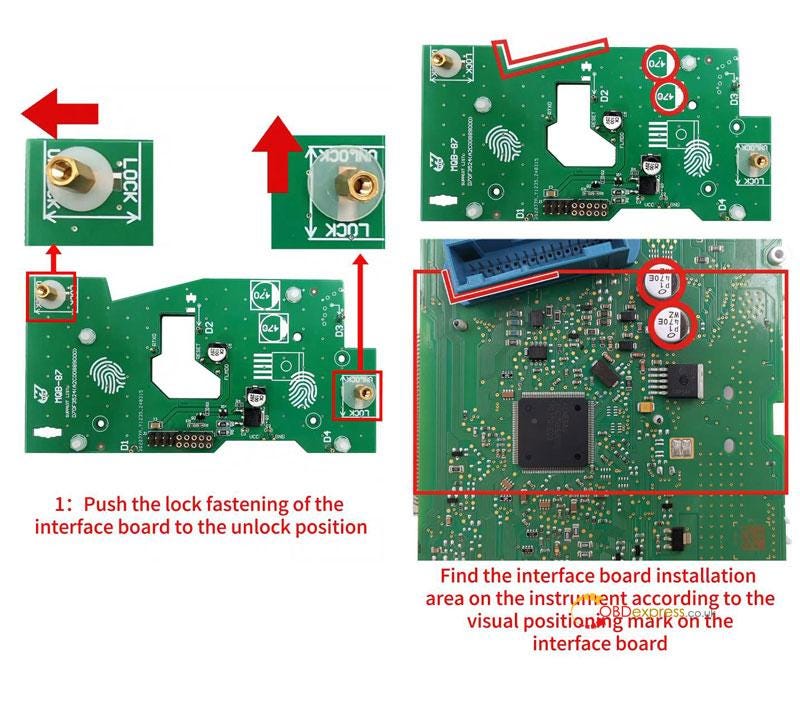
            2. Push the lock fastening of the interface board to the unlock position.
              1. Find the installation area according to the visual positioning mark on the interface board.

                Yanhua ACDP Module 33 MQB-87 Lock Fastening Board Installation Tutorial

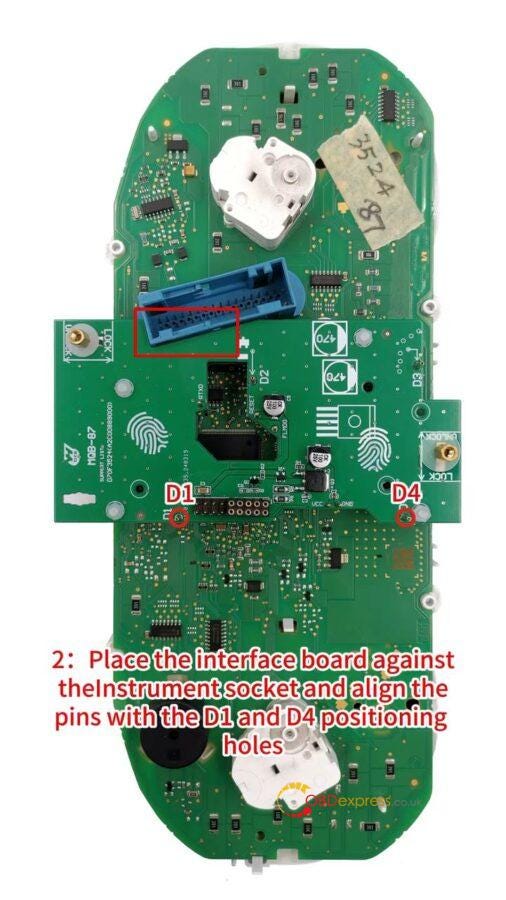
              2. Place the interface board against the instrument socket.
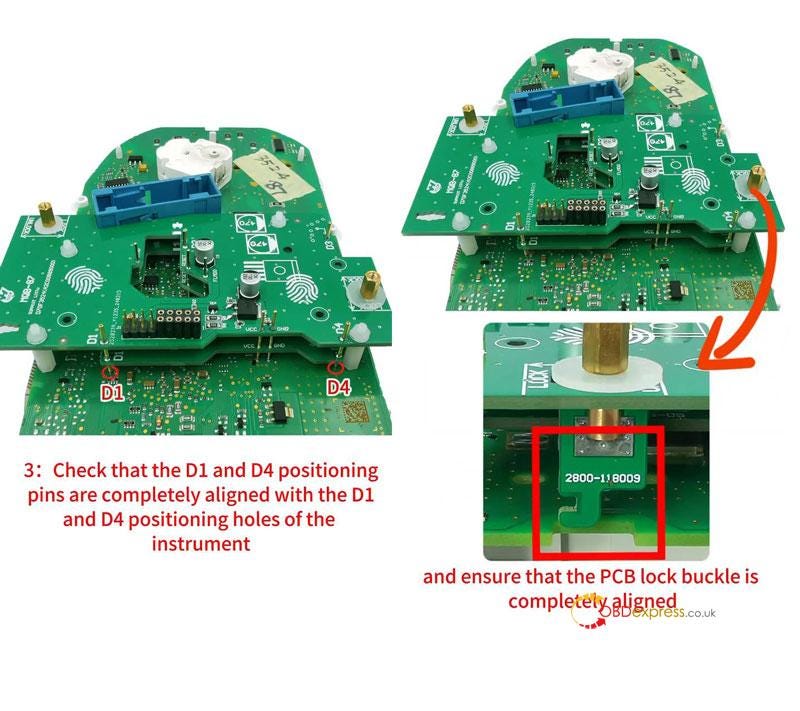
                1. Align the pins with the D1 & D4 positioning holes.

                  Yanhua ACDP Module 33 MQB-87 Lock Fastening Board Installation Tutorial

                2. Check the D1 & D4 positioning pins are completely aligned with the positioning holes of the instrument.
                  1. Ensure that the PCB lock buckle is completely aligned.

                    Yanhua ACDP Module 33 MQB-87 Lock Fastening Board Installation Tutorial

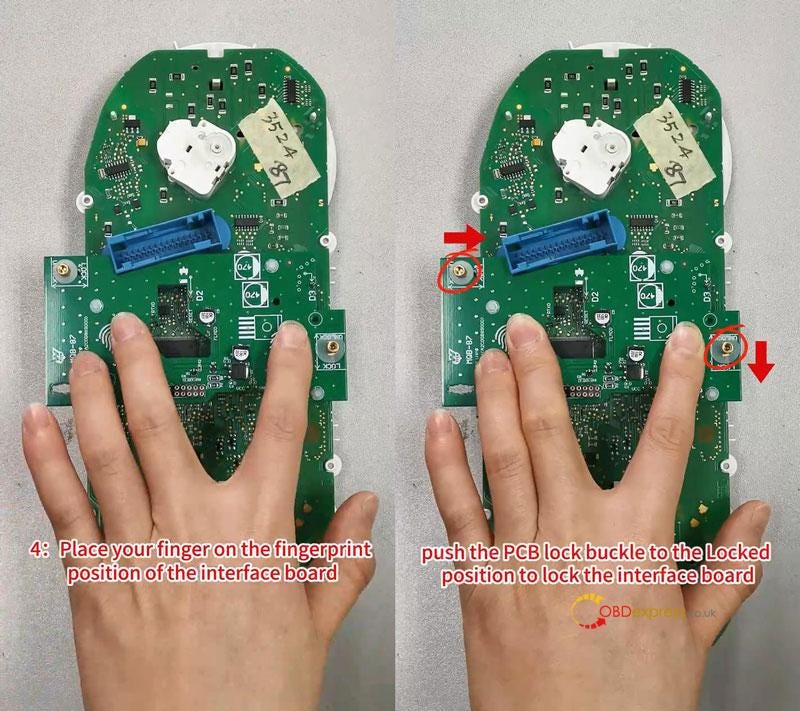
                  2. Place your finger on the fingerprint position of the interface board.
                    1. Press down on the interface board.

                      Push the PCB lock buckle to lock the interface board.

                      Yanhua ACDP Module 33 MQB-87 Lock Fastening Board Installation Tutorial

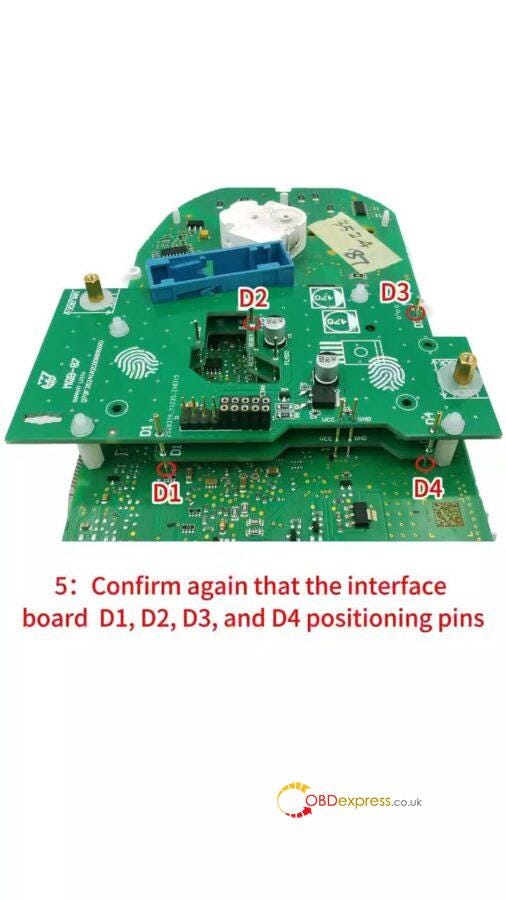
                    2. Confirm again that the interface board D1, D2, D3 and D4 positioning pins are completely aligned with the positioning holes of the instrument.
                      1. Done.

                        Yanhua ACDP Module 33 MQB-87 Lock Fastening Board Installation Tutorial

                        Yanhua MQB Interface Board has the advantages of compact size, precise pin positioning and easy installation. Its pin connection is firm, stable and safe, not easy to loosen.

                        www.obdexpress.co.uk
                        OBDSTAR X300 Classic G3 Register, Update and Transfer Files Guide

                         In our previous article, we outlined the features of OBDSTAR X300 Classic G3 and highlighted its distinctions from the X300 DP Plus (click here to review). Today, we are excited to provide you with a comprehensive guide on registering, updating, and transferring ES File.

                        OBDSTAR X300 Classic G3 Guide

                        PART ONE

                        How to register X300 Classic G3?

                        Go to [Personal Center] in the DP menu where is used for checking personal account information, token information, etc.

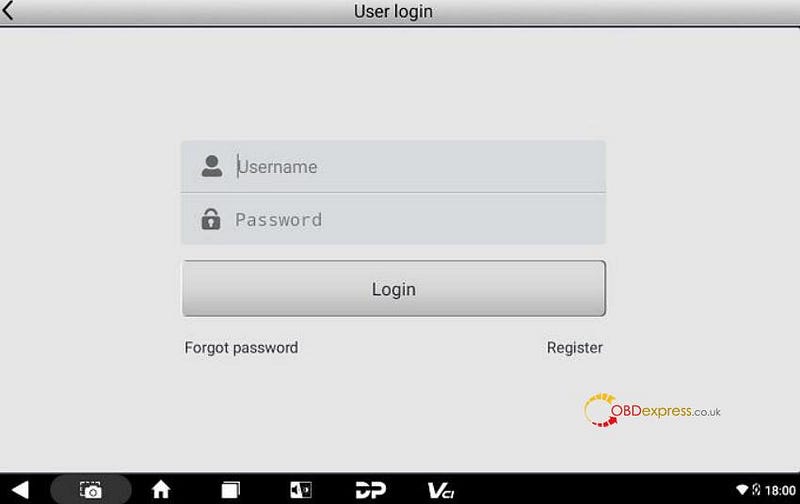
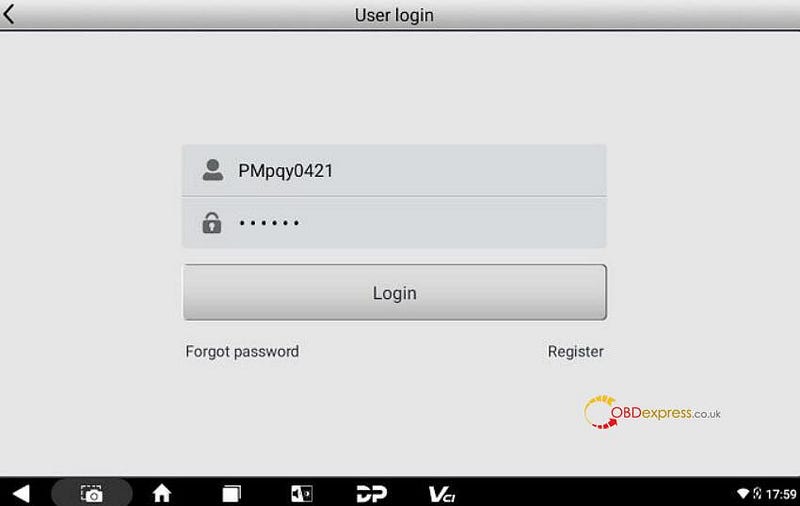
                        The login interface will be shown below.

                        OBDSTAR X300 Classic G3 Guide

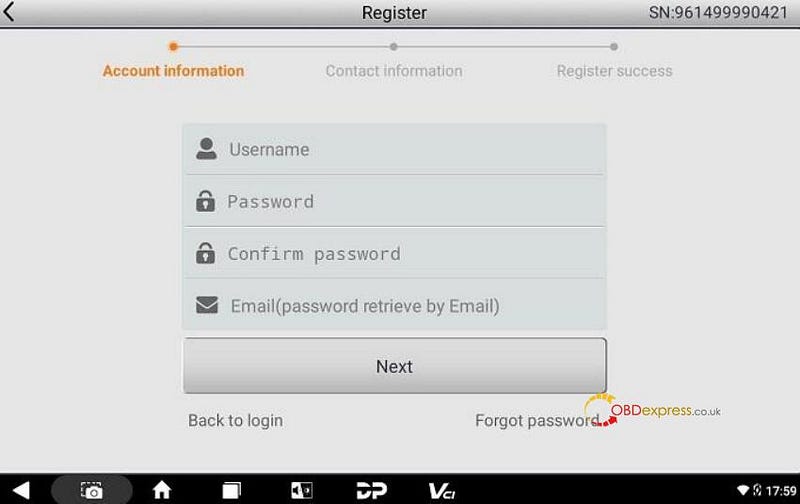
                        • If you are a new user, select the [Register] button in the lower right corner and proceed to the user registration interface.

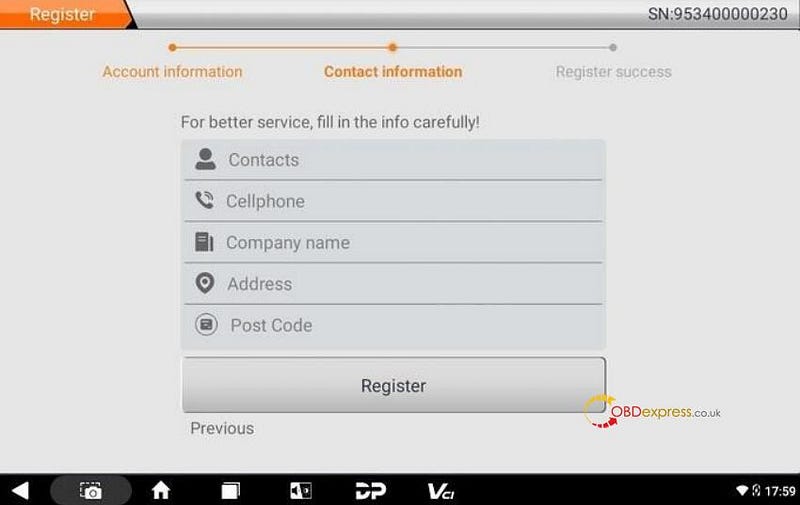
                        Fill in the account information (user name+ password+ email address), and contact information (contacts+ cellphone+ company name+ address+ post code)

                        OBDSTAR X300 Classic G3 Guide

                        OBDSTAR X300 Classic G3 Guide

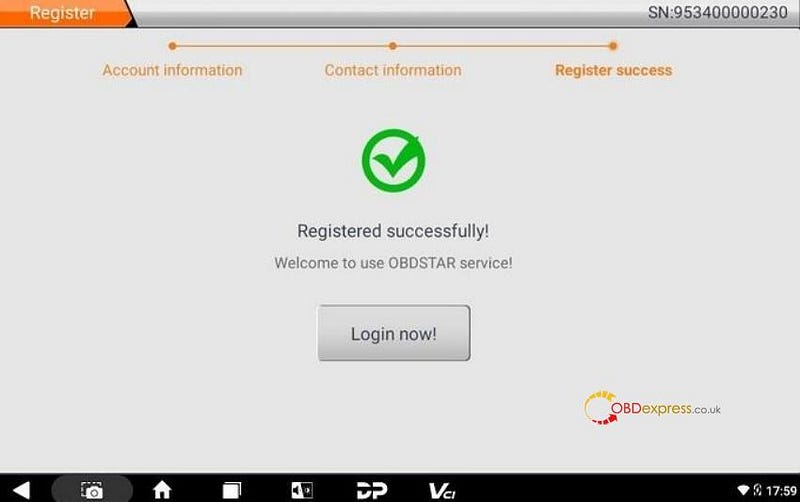
                        It will prompt you "Registered successfully!" once you complete the above operation required.

                        Tap [Login now!]

                        OBDSTAR X300 Classic G3 Guide

                        • If you have already registered as a member, directly fill in your account number and password, and then tap [Login].

                        OBDSTAR X300 Classic G3 Guide

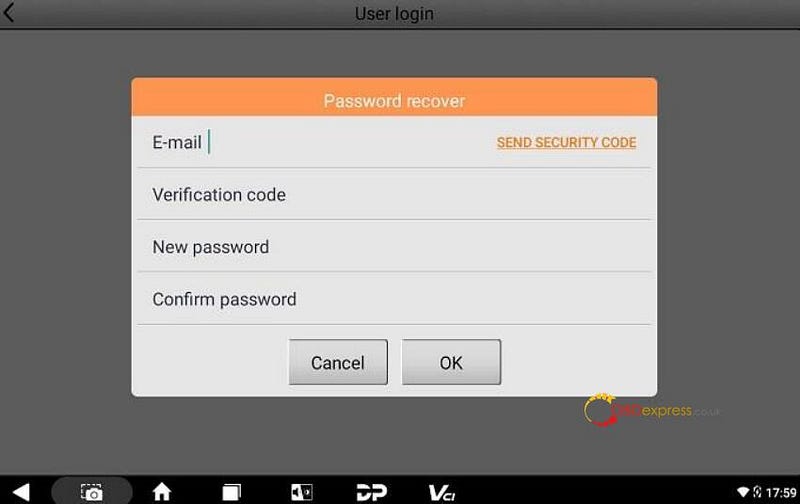
                        • If you forget your password, please select [Forgot password] and fill in the necessary information in the Password Recover popup window, then you will be able to log in with your new password.

                        OBDSTAR X300 Classic G3 Guide

                        PART TWO

                        How to update X300 Classic G3?

                        In this [Upgrade] function, users have the ability to download the basic data for diagnosis, vehicle diagnostic software, data packages, and more.

                        1.Login your account and select [Upgrade] function

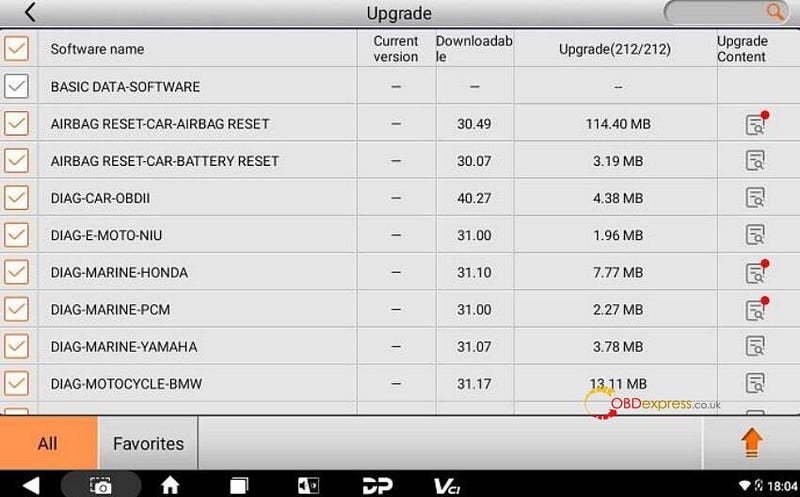
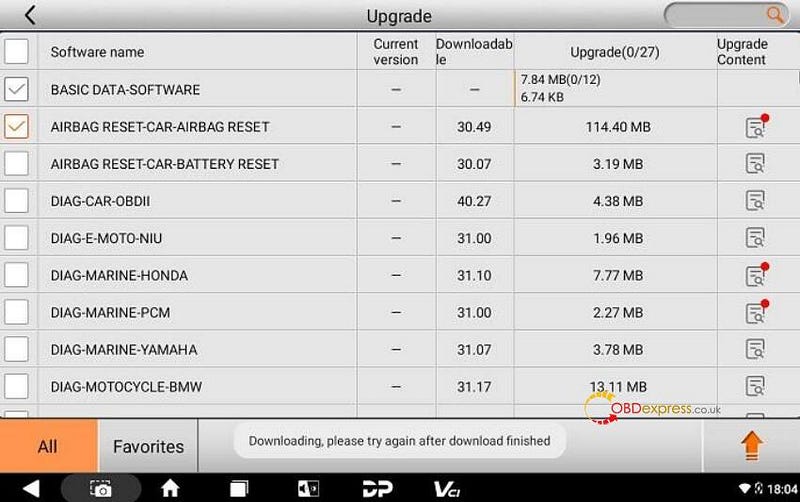
                        After opening the upgrade main page, you can see all upgradable software. All items are checked to upgrade by default.

                        • To cancel any software, simply tap the orange check box next to the corresponding software. Gray check boxes marked with a tick indicate software that must be upgraded and cannot be canceled.
                        • If you wish to upgrade all or specific software from your Favorites (a collection of frequently used software you've added to Favorites), navigate to the lower left corner and tap the [Favorites] button. Then, select and check the relevant software. Once you've made your selection, tap the upgrade button in the lower right corner to initiate the process.
                        • Additionally, to quickly locate your desired software within the lengthy upgrade list, utilize the search box located in the upper right corner. Simply enter keywords or letters to search for your target software efficiently.

                        OBDSTAR X300 Classic G3 Guide

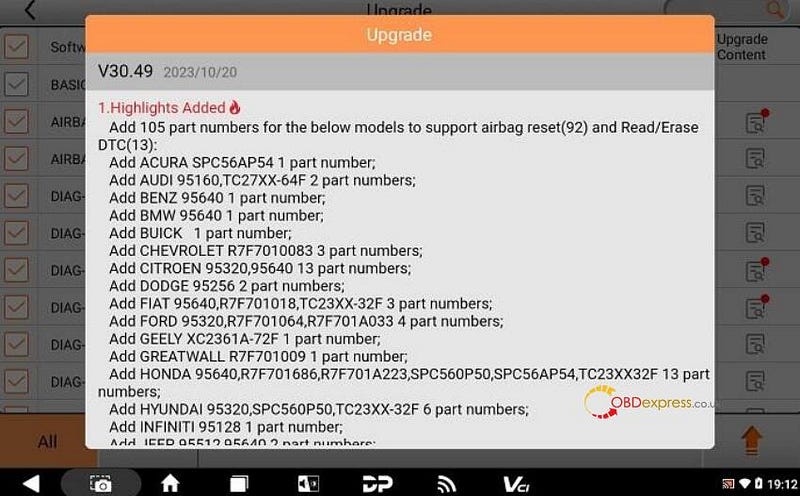
                        2) The final column displayed on the main page of the Upgrade section is dedicated to showcasing the upgrade content. Simply tap the icon button corresponding to the relevant software to explore the latest additions and improvements included in the current software version. (Refer to the example below for clarification).

                        OBDSTAR X300 Classic G3 Guide

                        3) If you tap the upgrade button in the lower right corner again during the progress of the upgrade, the lower part of the screen will prompt "Downloading. Please try again after download finished." And the upgraded software will display a green dot indicating completed downloads.

                        OBDSTAR X300 Classic G3 Guide

                        PART THREE

                        How to transfer files with OBDSTAR X300 Classic G3?

                        X300 Classic G3 key programmer has [ES File Explorer] application that you can manage the on-device files and send files to a computer via a U drive.

                        1) Insert the USB flash drive into the USB port of the G3 scanner.

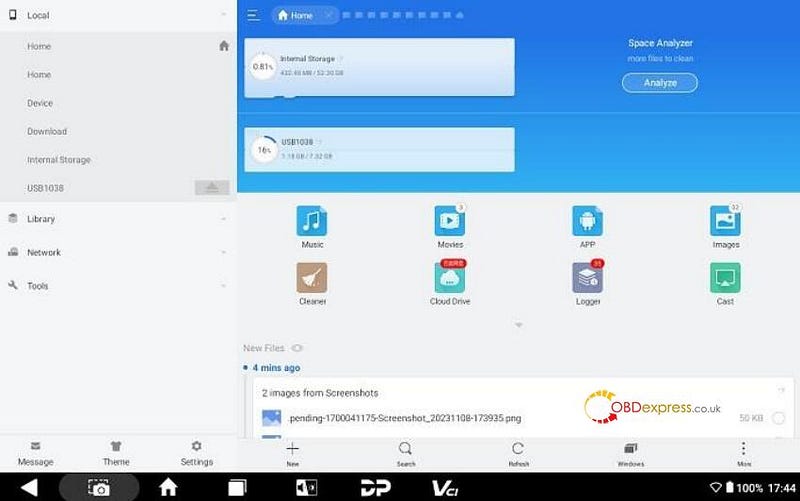
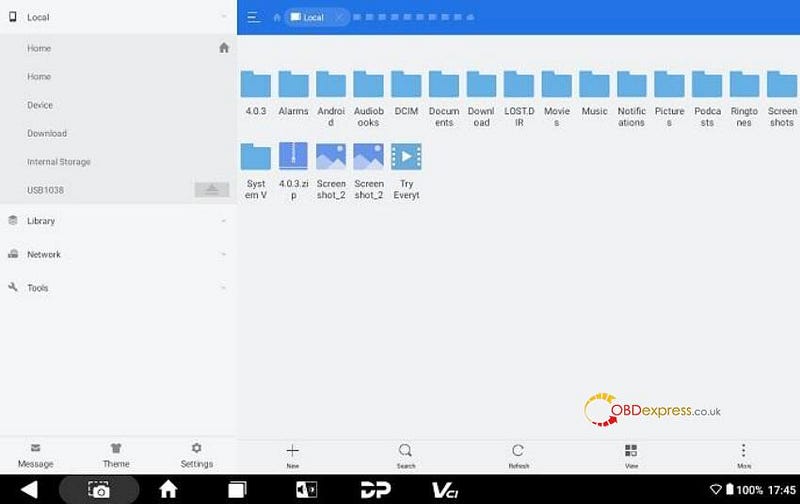
                        2) Expand the hidden menu at the bottom of the desktop, and select [ES File Explorer] to open it. In the left side menu, select [Local] > [Home]. The block under the Internal Storage block is for the USB storage. See below:

                        OBDSTAR X300 Classic G3 Guide

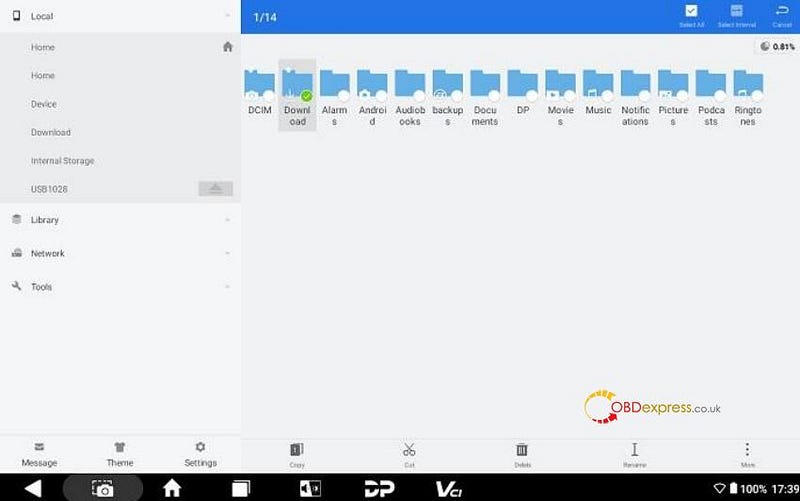
                        3) Open [Internal Storage], select any folder (or open the folder to select files) and hold. A blank circle will appear under each file, and function buttons such as copy, cut, delete, and rename will appear on the bottom right. Select the folder (or file) you would like to transfer, the circle under the selected folder will be marked with a tick and turn green, then tap [Copy].

                        OBDSTAR X300 Classic G3 Guide

                        4) Return the Home tab, and select the storage for the USB you've inserted.

                        OBDSTAR X300 Classic G3 Guide

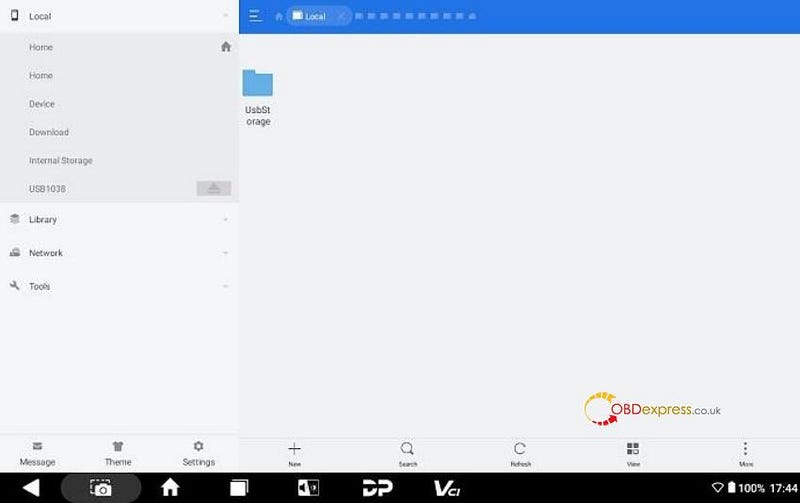
                        5) Open the [USB Storage] folder and all folders in your USB drive will be displayed. Paste the copied folder (or file) to the desired location.

                        OBDSTAR X300 Classic G3 Guide

                        6) After everything is done, just pull out the USB flash drive.

                        For more instructions about OBDSTAR X300 Classic G3 Key Programmer, please download OBDSTAR X300 G3 User Manual

                        www.obdexpress.co.uk
                        CGDI BD006 Manual: Battery, Cranking, Charging & Voltage Tests

                         The CGDI BD006 Car Battery Tester uses conductance testing technology to quickly measure a starting battery’s cold-cranking capability a...