This is a tutorial on how to install Yanhua ACDP Module 33 MQB-80 thumb screw-fastened interface
board. Require to be used with Mini ACDP 2 together.
Read also:
Yanhua ACDP Module 33 MQB-87 Lock Fastening Board Installation
Tutorial
Installation Steps
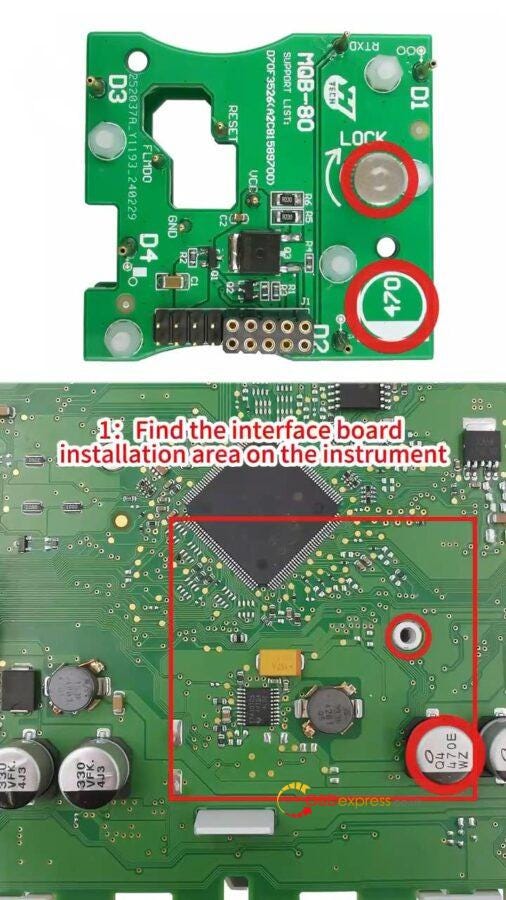
Find the installation area according to the visual positioning mark on the
Module 33 interface board.
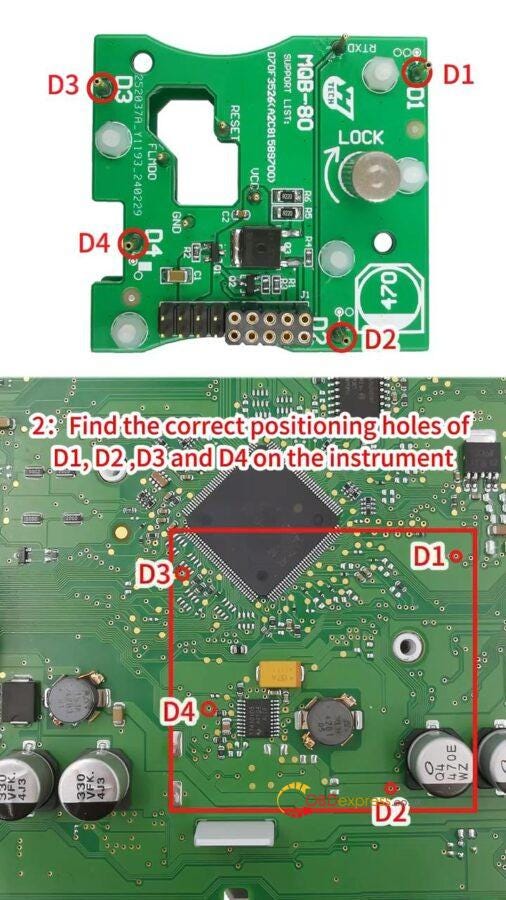
Find the correct positioning holes of D1, D2, D3 and D4 on the
instrument.
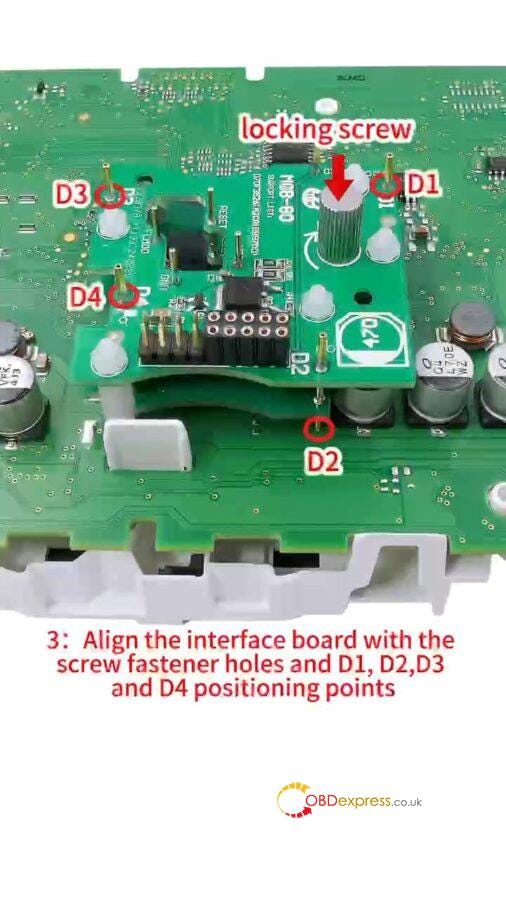
Align the interface board with the screw fastener holes and D1, D2, D3 and
D4 positioning points.
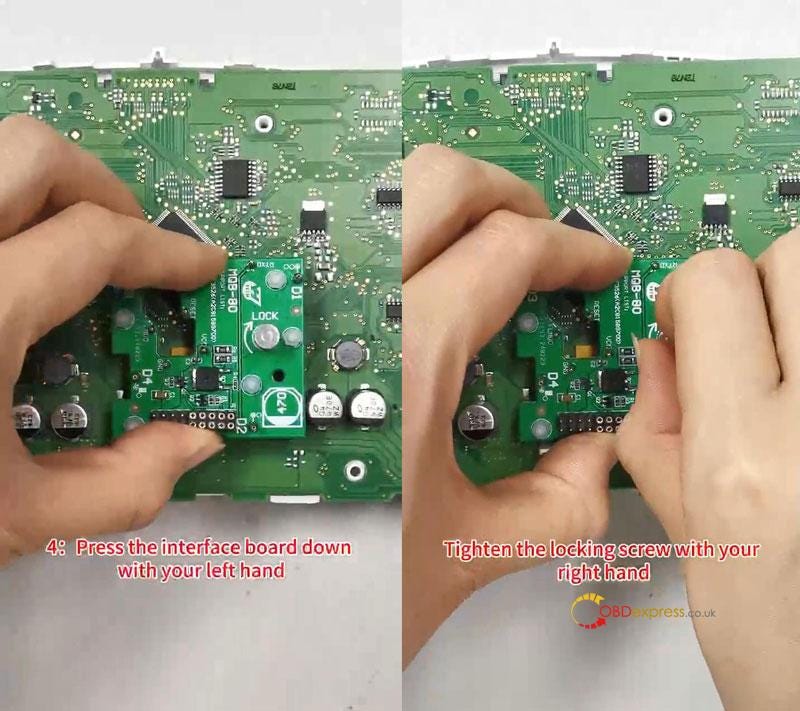
Press the interface board down with your left hand, tighten the locking
screw with right hand.
Confirm again that the interface board are completely aligned with the D1,
D2, D3 and D4 positioning holes of the instrument.
The installation is done.
www.obdexpress.co.uk


No comments:
Post a Comment