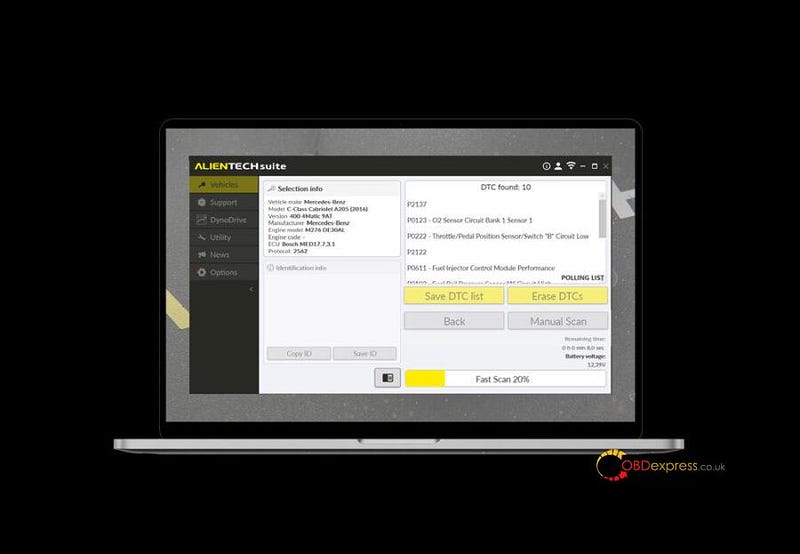
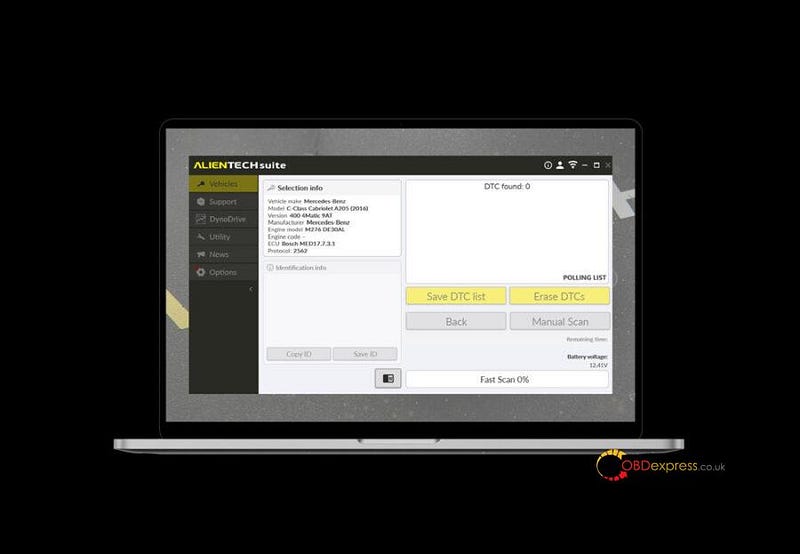
A new feature upgrade is now available on the Alientech-branded reprogramming tool. The new “DTC” feature of ALIENTECH KESS3 allows you to view and reset DTCs in a car or motorcycle.
Through the EOBD connection of KESS3, Alientech Suite retrieves the list of (SAE — Society Automotive Engineers) error codes recorded during vehicle operation, helping mechanics and mechatronics easily identify potential faults and damages.
What are the key points of the new DTC function?
• Detecting and interpreting error
codes
• Resetting error codes
• Pre- and post-tuning diagnostics
•
Special functions
Detection and Interpretation of DTCs
When connected to the control unit, KESS3 obtains the stored error codes.
Via the KESS3’s OBD connection, Alientech Suite reports the list of error codes (SAE — Society of Automotive Engineers) recorded during vehicle operation, helping mechanics and mechatronics engineers to easily identify any faults.
Resetting DTCs
After identifying the codes, it is possible to reset them, thereby eliminating warning lights and anomalies on the dashboard.
Clearing the fault is essential for ensuring the proper functioning of the vehicle. After performing mechanical repairs, this KESS3 feature allows for a DTC reset, ensuring comprehensive service.

Pre-Tuning and Post-Tuning Diagnostics Assessment of risks and feasibility of modifications.
This feature allows you to preview and interpret error codes to prevent faults or malfunctions in the vehicle. Additionally, the same process can be performed after modifying the engine parameters with KESS3. In this case, the DTC feature helps identify any error codes that could appear after the tuning phase.
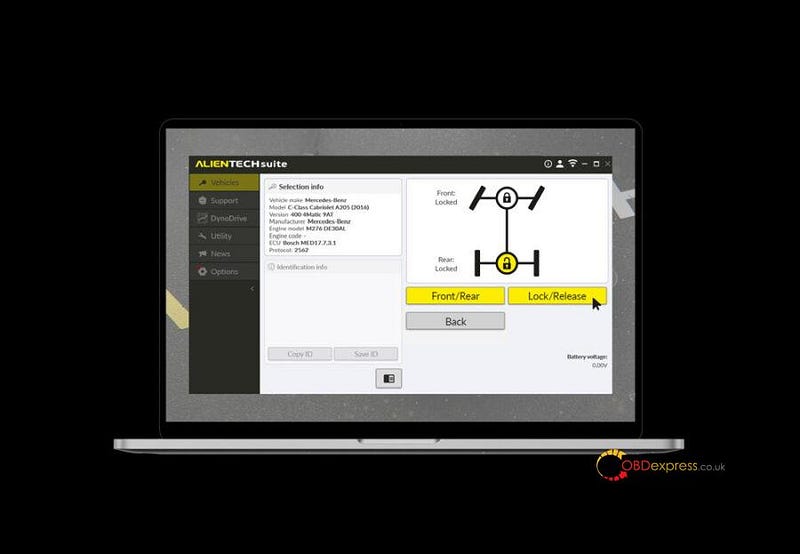
Special Functions
Special functions dedicated to specific vehicle models.
Some special functions such as steering alignment, differential lock/unlock, or resizing of wheel dimensions are available for some vehicle models. These specific functions are included in the “DTC” feature package and expand the range of modification and customization interventions.