This is a tutorial on how to use Yanhua Mini ACDP 2 + Module 33 to install MQB-82 lock fastening interface board.
Read also
Yanhua ACDP Module 33 MQB-80 Thumb Screw-Fastened Installation Tutorial
Installation Steps
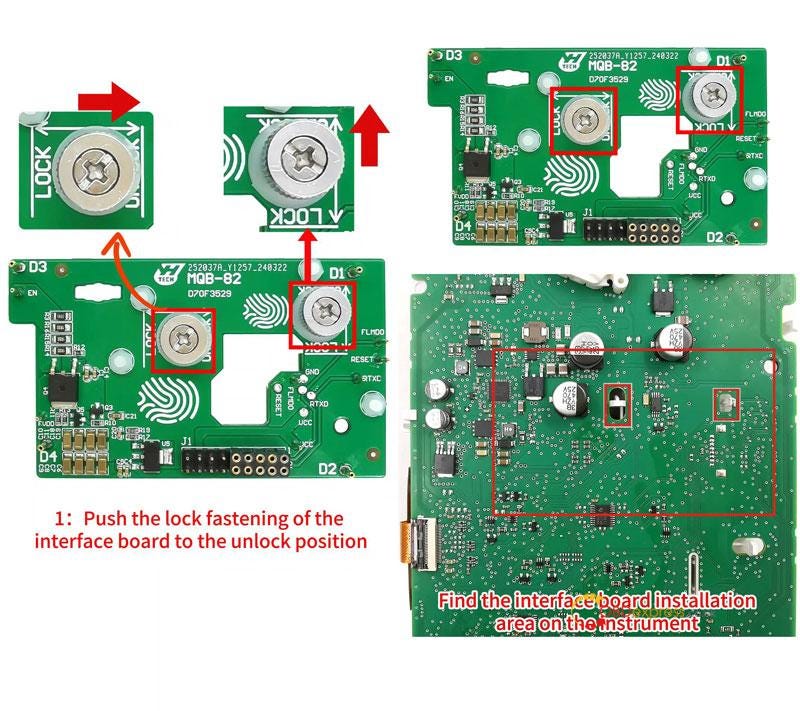
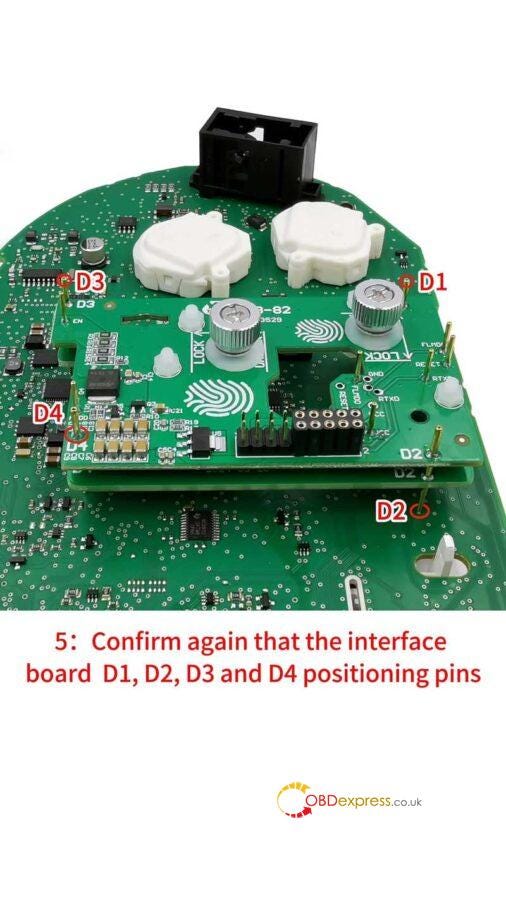
- Push the lock fastening of the interface board to the unlock position. Find the installation area according to the visual positioning mark.
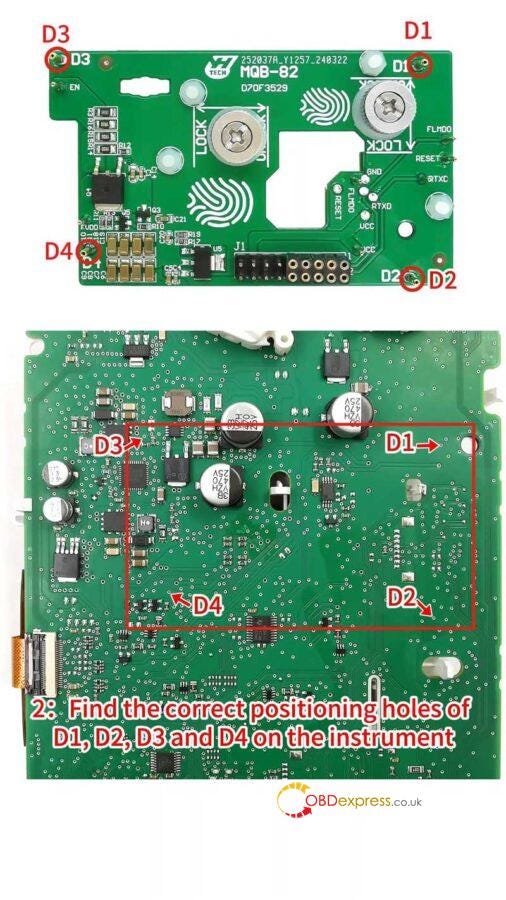
- Find the correct positioning holes of D1, D2, D3 and D4 on the instrument.
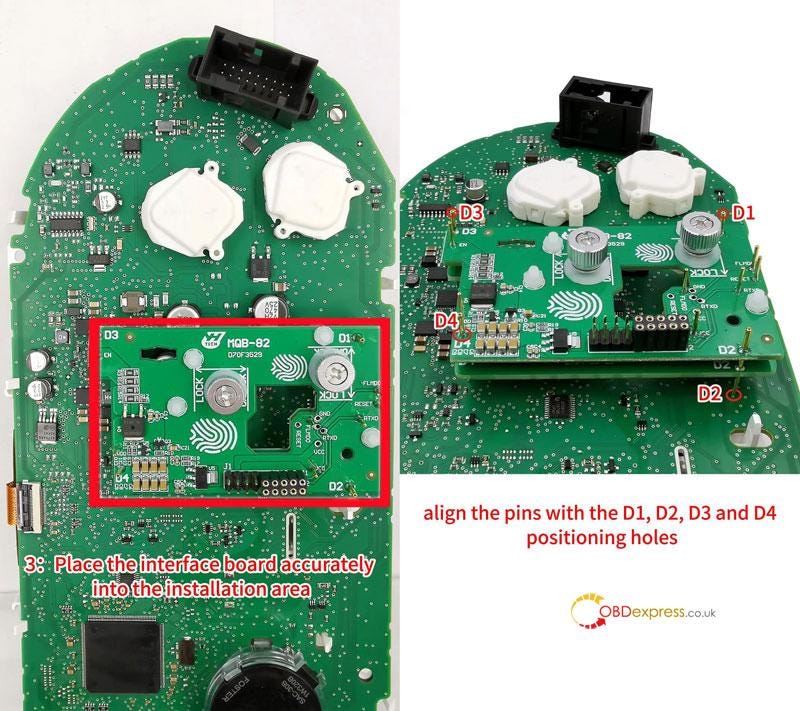
- Place the interface board accurately into the installation area, align the pins with the D1, D2, D3 and D4 positioning holes.
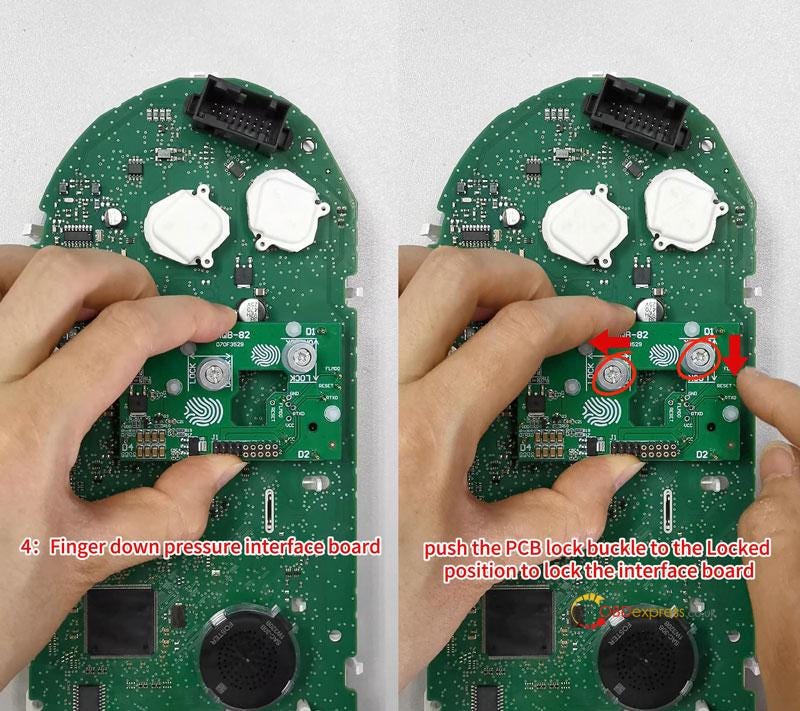
- Finger down pressure interface board, push the PCB lock buckle to the locked position to lock the interface board.
- Confirm again that the interface board are completely aligned with the D1, D2, D3 and D4 positioning holes of the instrument.
Completed.


No comments:
Post a Comment