Wednesday, 24 July 2024

How to Install Yanhua Volvo 2023-2024 CEM Interface Board?

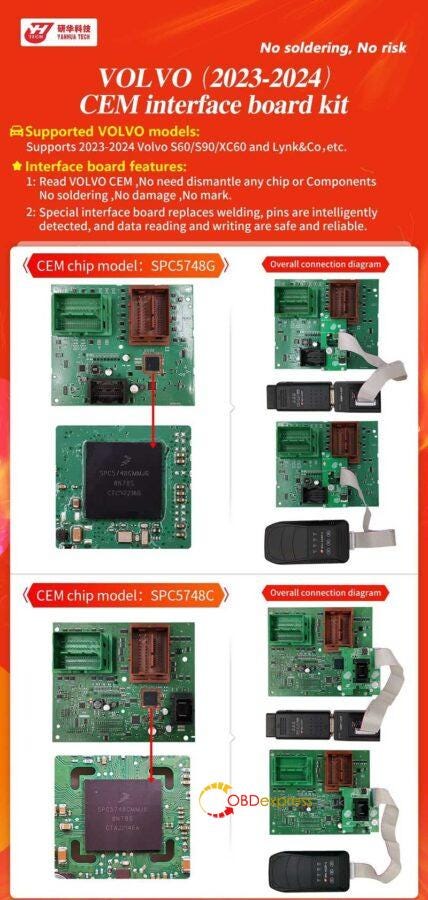
 YANHUA Volvo CEM Interface Board supports to read 2023–2024 Volvo S60/S90/XC60 and Lynk&Co without soldering. No need to dismantle any chip or components, no damage, no mark. Only need to activate the ACDP A303 License, then work with Yanhua Mini ACDP 2/ Mini ACDP-1 together.

How to Install Yanhua Volvo 2023–2024 CEM Interface Board

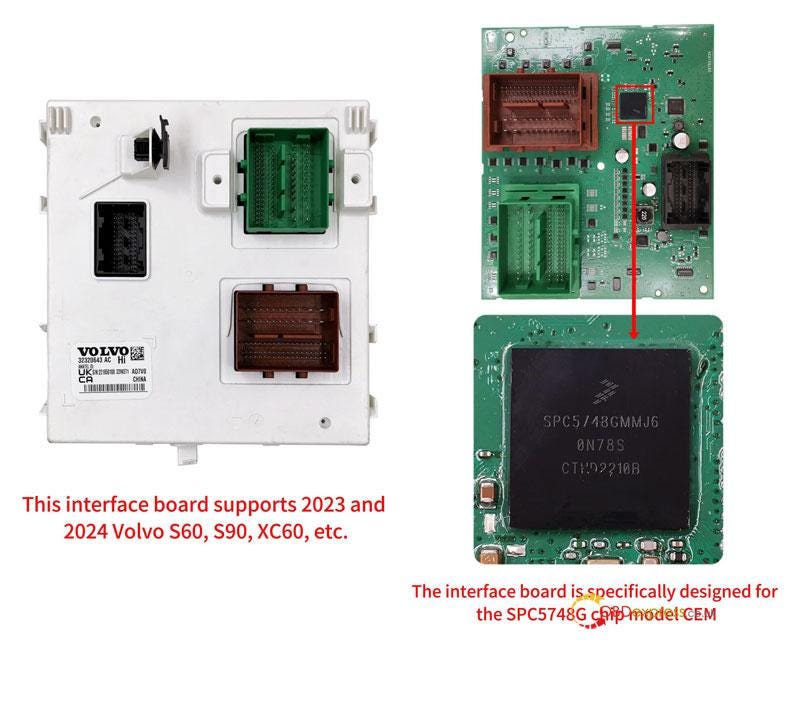
For 2023–2024 Volvo S60/S90/XC60 Installation

This interface board is specifically designed for the SPC5748G chip model CEM.

How to Install Yanhua Volvo 2023–2024 CEM Interface Board
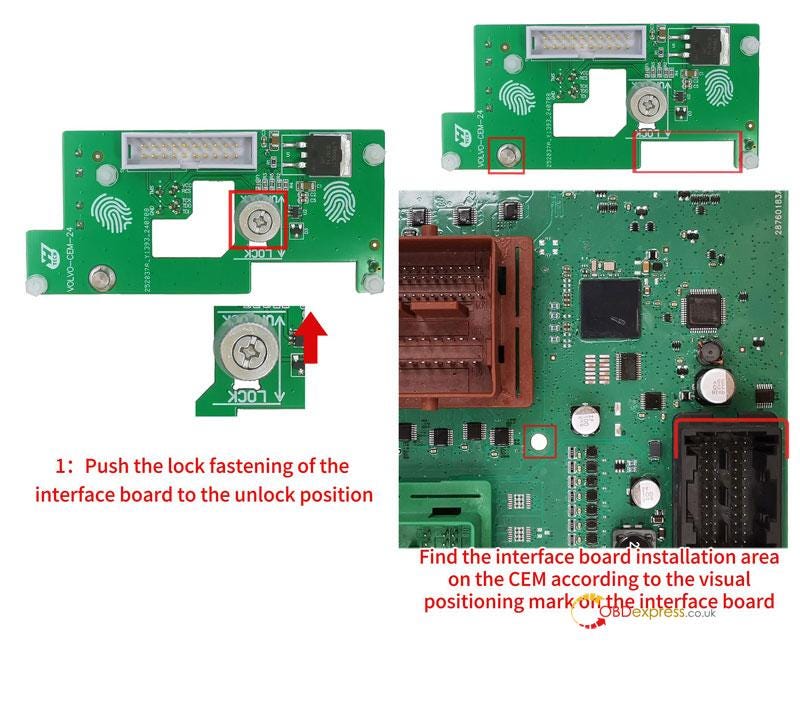
  1. Push the lock fastening to the unlock position. Find the installation area on CEM according to the visual positioning mark on the interface board.
How to Install Yanhua Volvo 2023–2024 CEM Interface Board
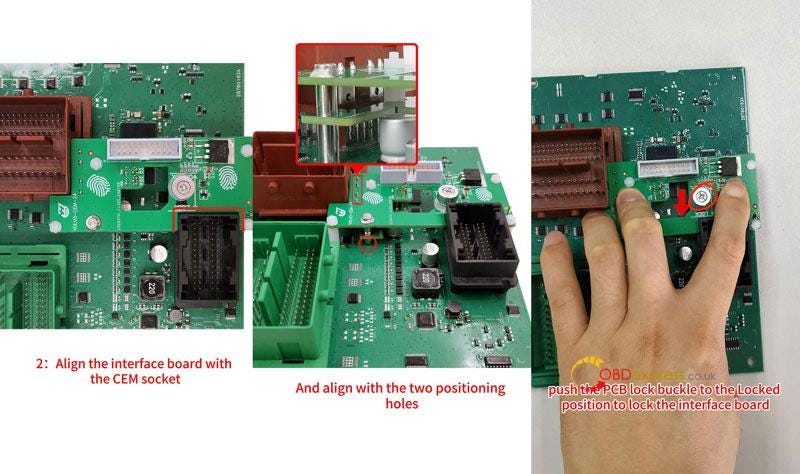
  1. Align the interface board with the CEM socket and the 2 positioning holes.
  2. Press the interface board downward with fingers, push the PCB lock buckle to lock the interface board.
How to Install Yanhua Volvo 2023–2024 CEM Interface Board

Completed.

For 2023–2024 Volvo Lynk & Co 01/03/09 Installation

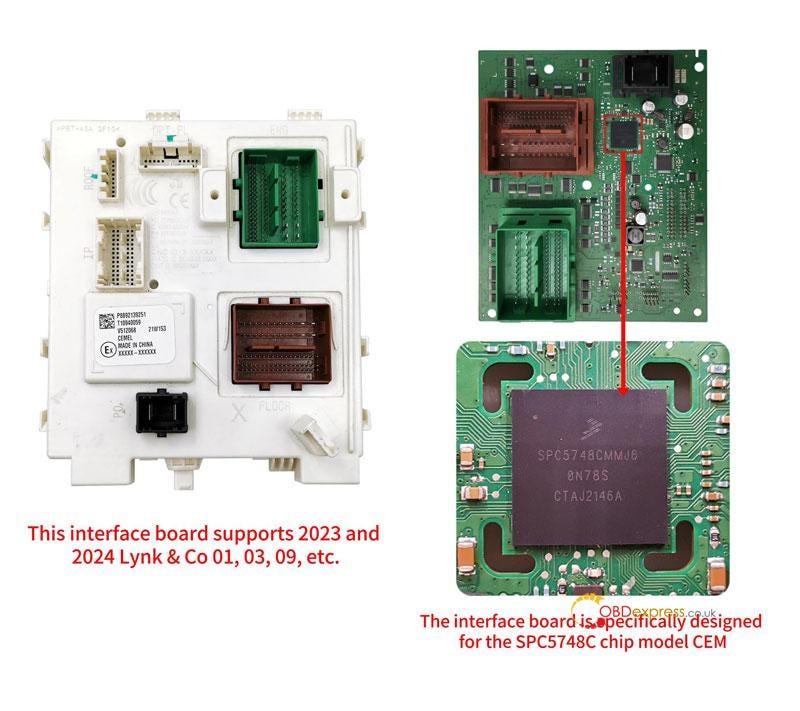
This interface board is specifically designed for the SPC5748C chip model CEM.

How to Install Yanhua Volvo 2023–2024 CEM Interface Board
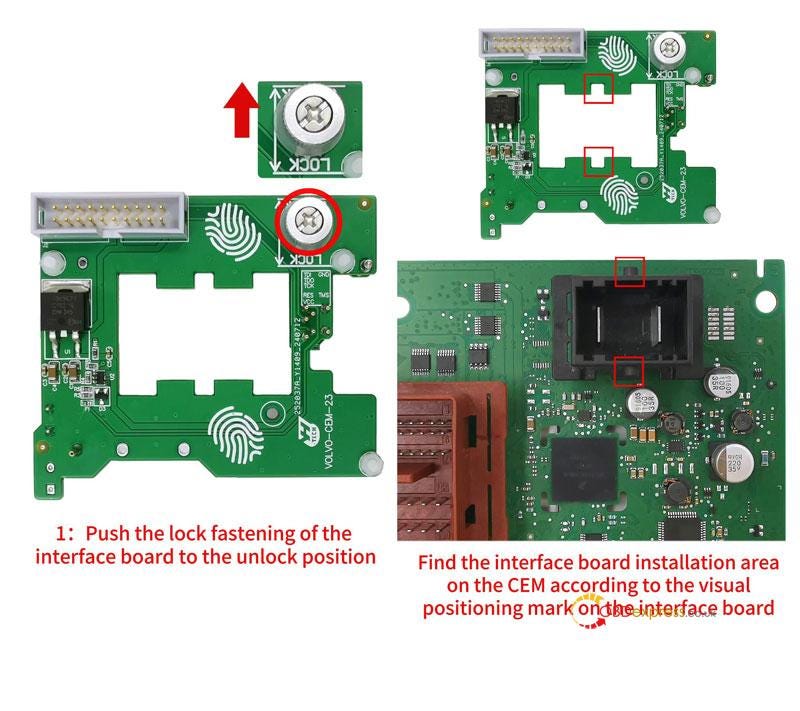
  1. Push the lock fastening to the unlock position. Find the installation area on CEM according to the visual positioning mark on the interface board.
How to Install Yanhua Volvo 2023–2024 CEM Interface Board
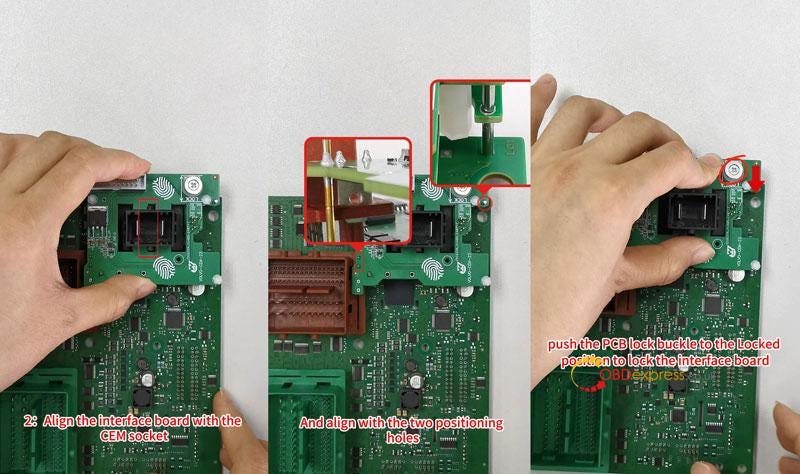
  1. Align the interface board with the CEM socket and the 2 positioning holes.
  2. Press the interface board downward with fingers, push the PCB lock buckle to lock the interface board.
How to Install Yanhua Volvo 2023–2024 CEM Interface Board

Completed.

ACDP Volvo(2023-) CEM Interface Board has replaced welding to intelligently detect pins, which makes the data reading and writing are safe and reliable.

www.obdexpress.co.uk

CGDI K2 Black Screen and Not Show Charging Solution

 Customer problem:

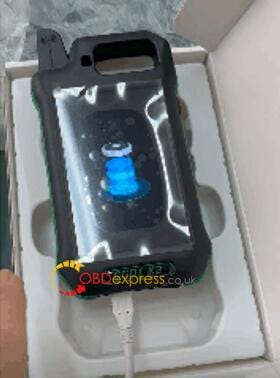
I received the CGDI K2 recently. There was no power in it. When I tried to charge, it only showed a black screen and didn’t show charging. After charging for about 10 minutes, it showed the charging status. Is it normal?


CGDI K2 Black Screen and Not Show Charging Solution

OBDEXPRESS.co.uk explained as follows:

It’s normal for the new CGDI K2 Smart Key Tool. It will boot successfully after charging for 10 minutes.

If the device has a little power, you can see it will show the charging status immediately when you are charging.

www.obdexpress.co.uk

Friday, 19 July 2024

Autel KM100 Program 2022 Kia Carnival Smart Key by OBD

 Autel MaxiIM KM100 is able to add 2022 Kia Carnival smart key by OBD. Need to get pincode from the third-party and prepare the original key for ready.

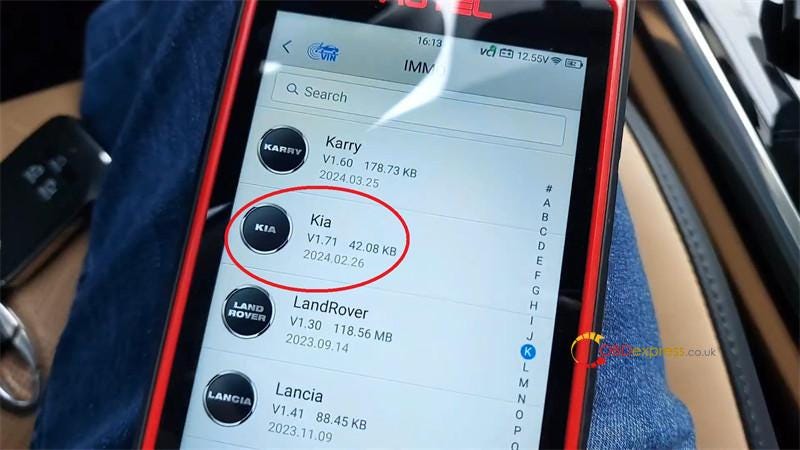
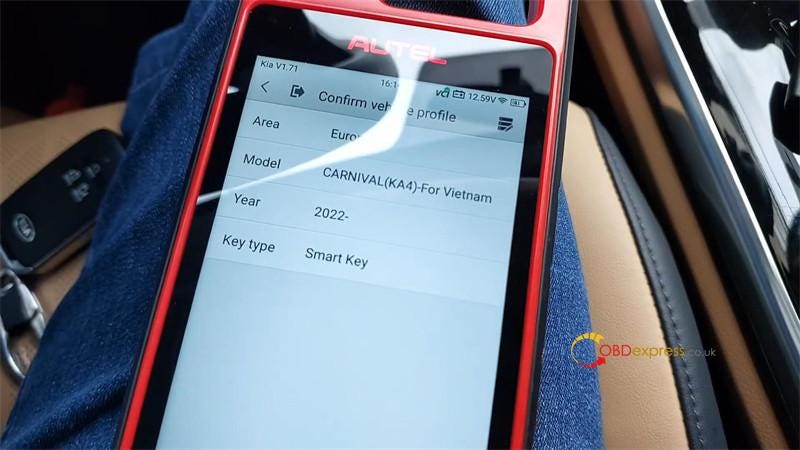
IMMO >> Kia >> Manual selection >> Europe >> CARNIVAL(KA4) >> 2022- >> Smart key >> Yes >> Hot function >> Smart key learning(guided) >> Start

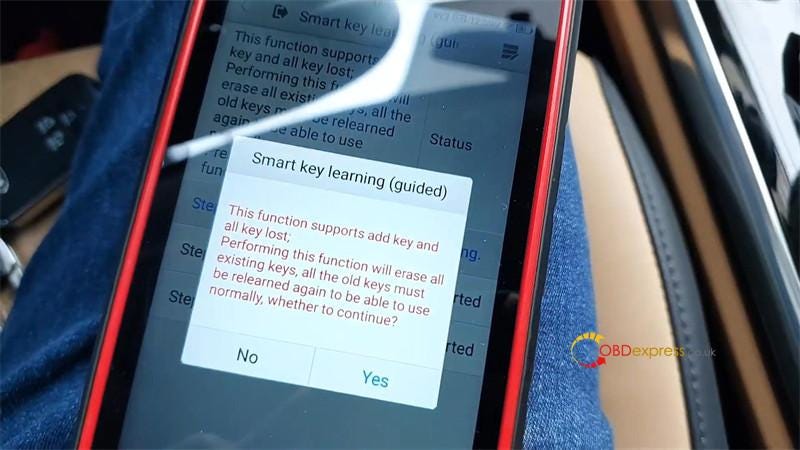
This function supports add key and all key lost;

Performing this function will erase all existing keys, all the old keys must be relearned again to be able to use normally, press "Yes" to continue.
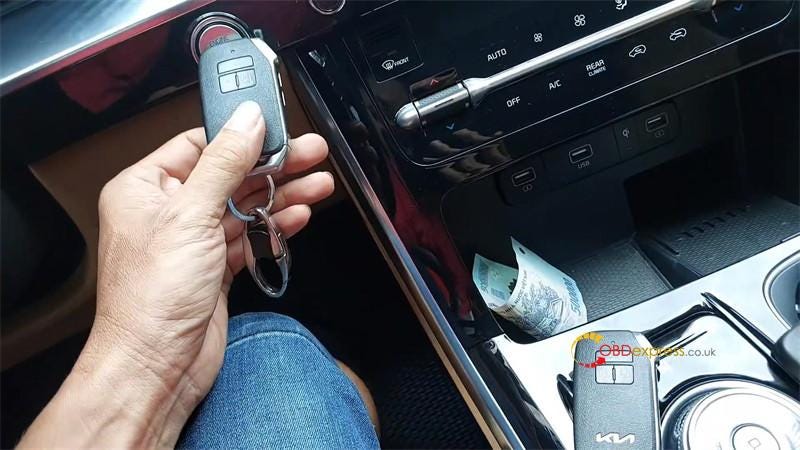
Turn the ignition off. (Note: the instrument screen is black)
Open and then close the driver door once!

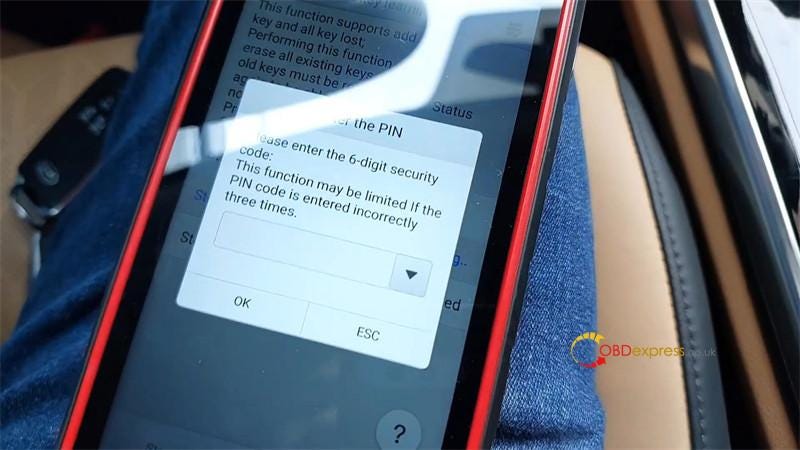
Please enter & confirm the 6-digit security code: 419522


Autel KM100 Program 2022 Kia Carnival Smart Key by OBD

Confirm if the key sensing area of the vehicle is the ignition switch.

Note:

For a small number of vehicle models, the key sensing area is not the ignition switch, but may be another position such as the cup holder.

Press "Yes".

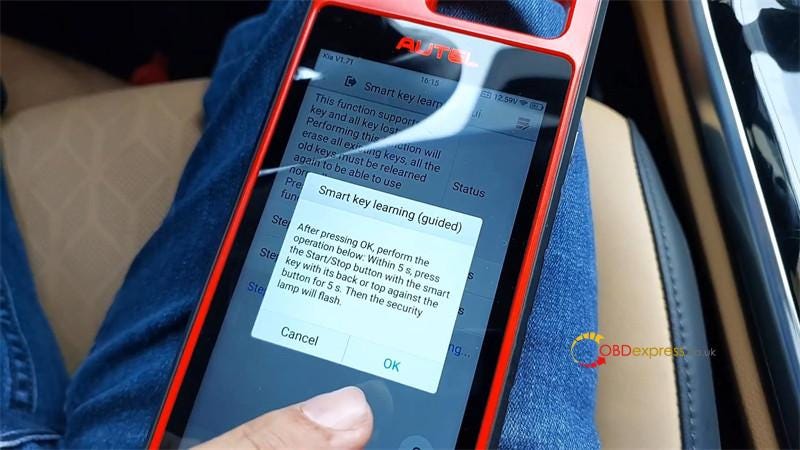
After pressing OK, perform the operation below:

Within 5s, press the Start/Stop button with the smart key with its back or top against the button for 5s. Then the security lamp will flash.

Press OK.

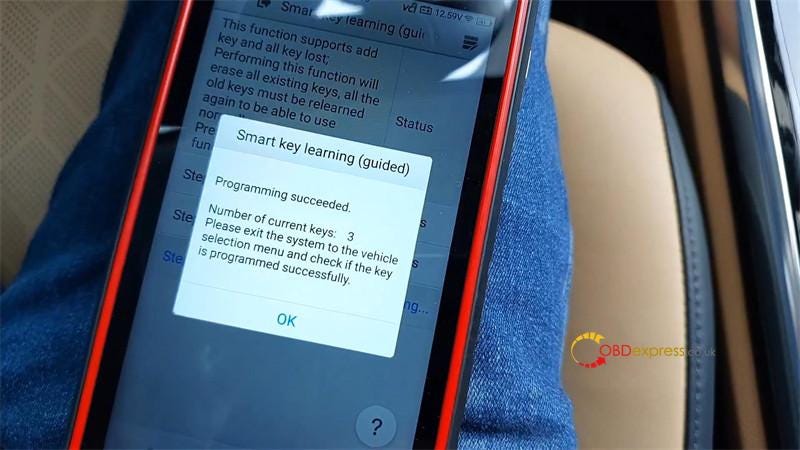
Programming succeeded.

Press Yes to program next key. Just repeat the operation.

Autel KM100 says number of current keys: 3

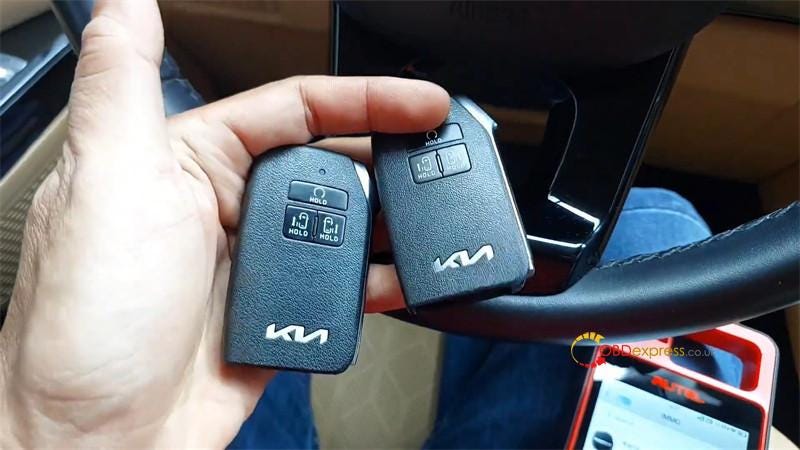
Let’s test the new keys. All can work.

Done.


Autel KM100 Program 2022 Kia Carnival Smart Key by OBD

www.obdexpress.co.uk

Nissan CVT TCU253 R5F72539 TCM Clone by OBDSTAR G3/ DC706

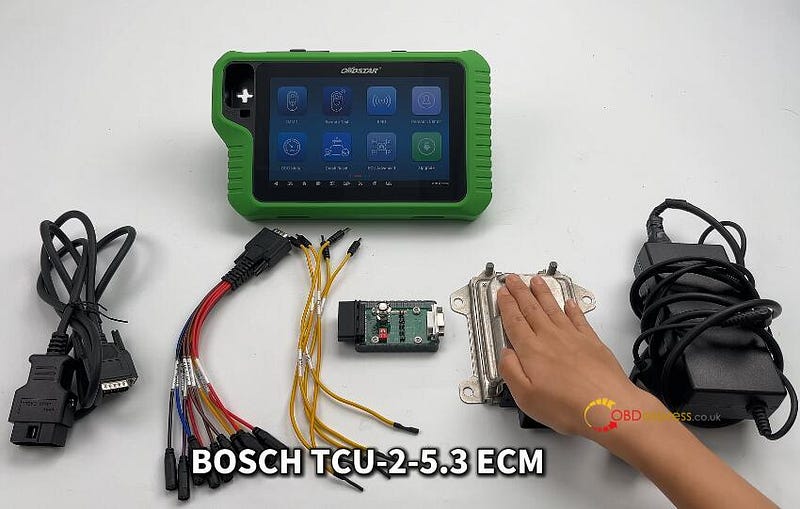
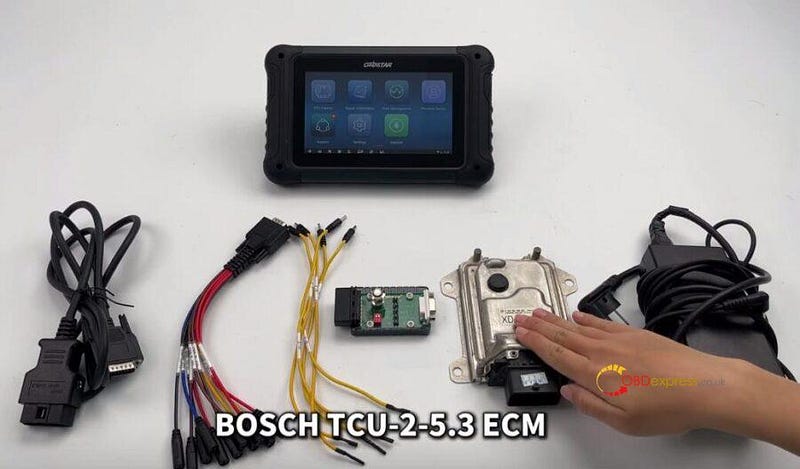
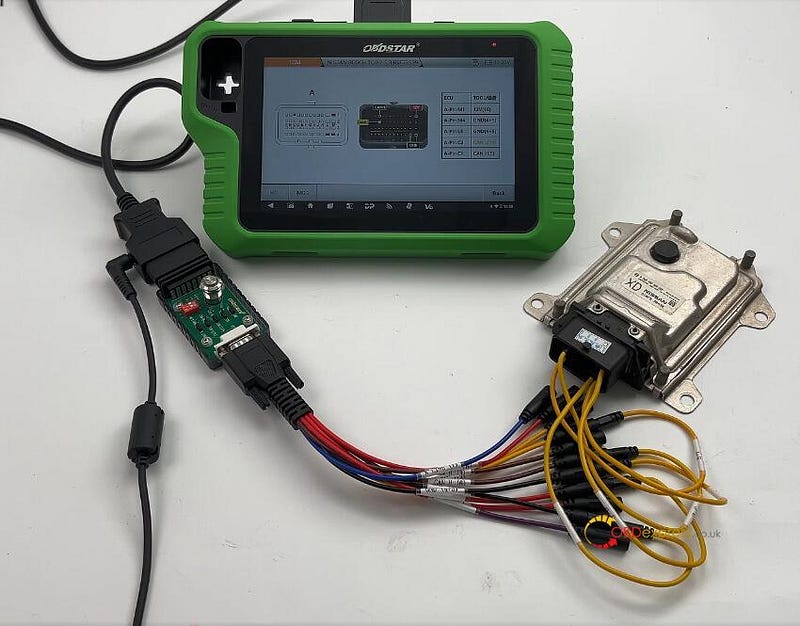
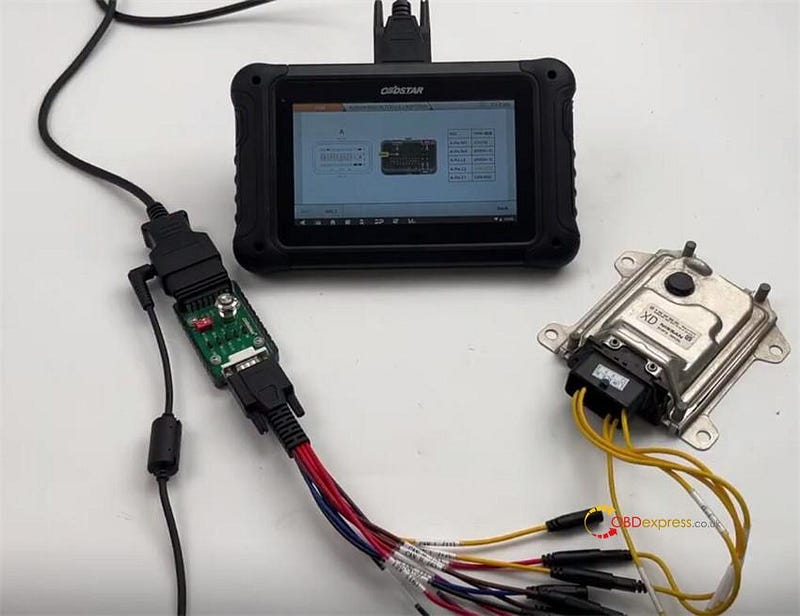
 OBDSTAR X300 Classic G3 Key Programmer and DC706 ECU Tool can read and write Nissan Bosch CVT TCU253 R5F72539 TCM data by Bench and P004 mode. They have the same wiring diagram, and require OBDSTAR P004 Adapter and ECU Clone Jumper to connect device and Nissan TCM.


Nissan CVT TCU253 R5F72539 TCM Clone by OBDSTAR G3, DC706

To perform the TCM reading and writing function successfully, please ensure the network connection is normal and 12V power supply is connected well during the operation, and follow the wiring diagram to connect OBDSTAR tool and TCM properly.

When using X300 Classic G3, need to activate ECU Clone License.

Menu function path:

Select ECU Flasher>> TCM>> TCM software (V30.31 or above)>> NISSAN BOSCH TCU-2–5–3 R5F72539

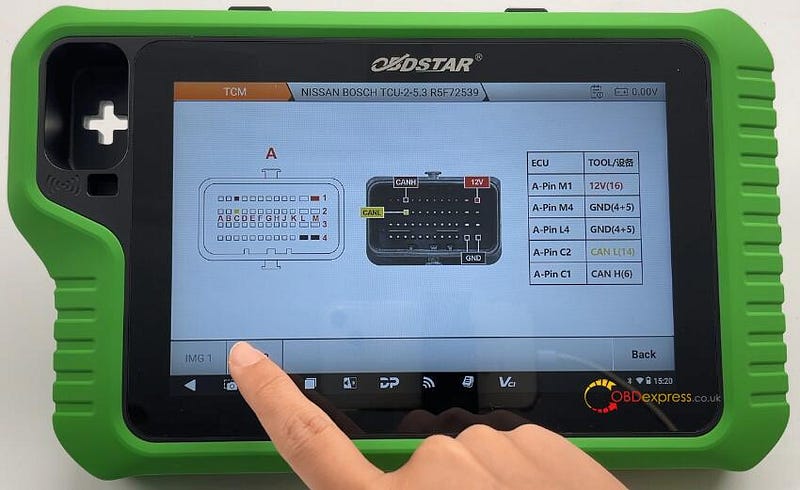
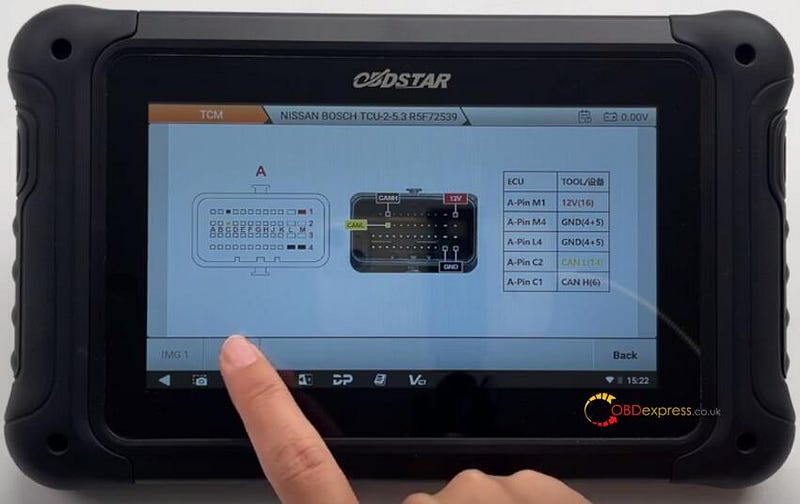
Wiring diagram:

ECUTOOLA-Pin M112V (16)A-Pin M4GND (4+5)A-Pin L4GND (4+5)A-Pin C2CAN L (14)A-Pin C1CAN H (6)


Nissan CVT TCU253 R5F72539 TCM Clone by OBDSTAR G3, DC706

Connect OBDSTAR G3/DC706 and Nissan TCM correctly


Nissan CVT TCU253 R5F72539 TCM Clone by OBDSTAR G3, DC706

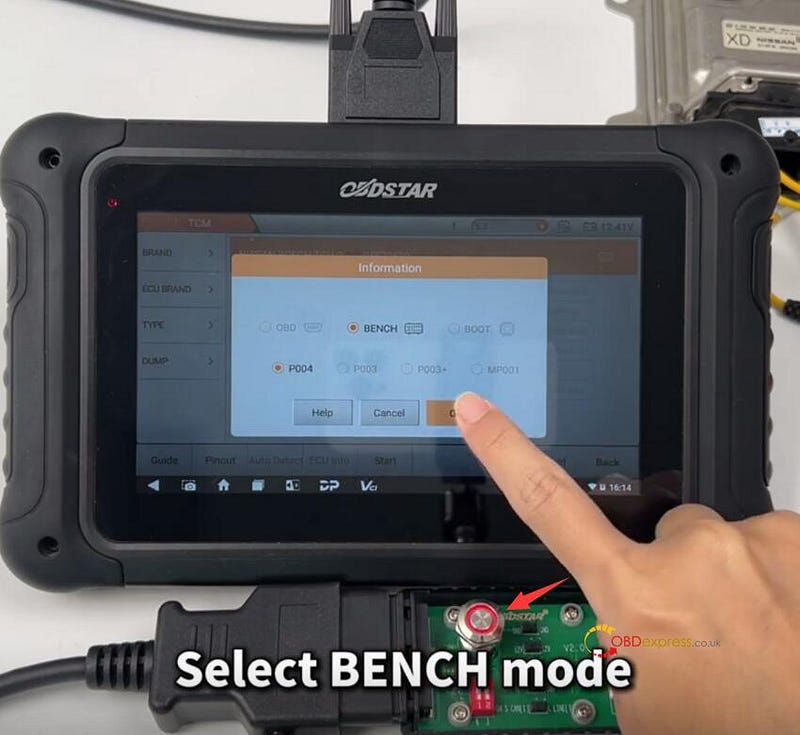
After connection, turn on the switch button on OBDSTAR P004 Adapter, and select BENCH and P004


Nissan CVT TCU253 R5F72539 TCM Clone by OBDSTAR G3, DC706

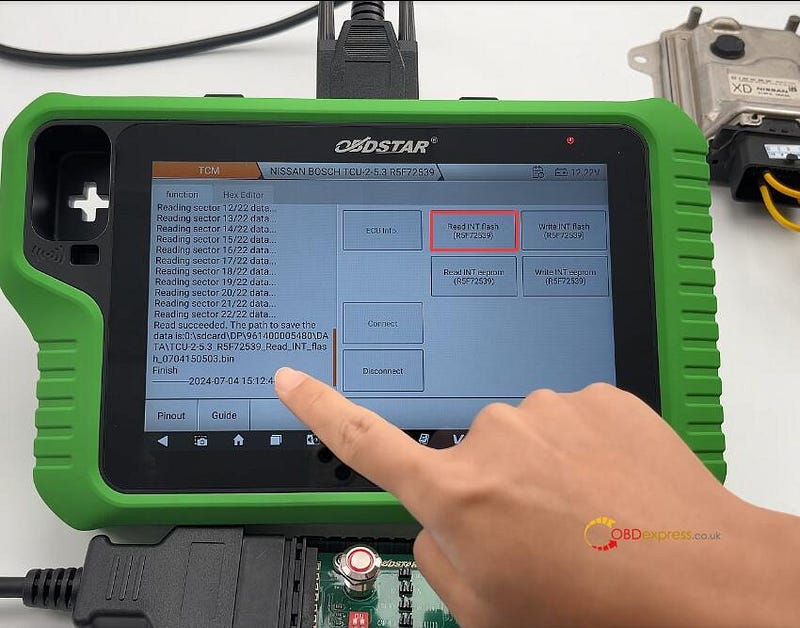
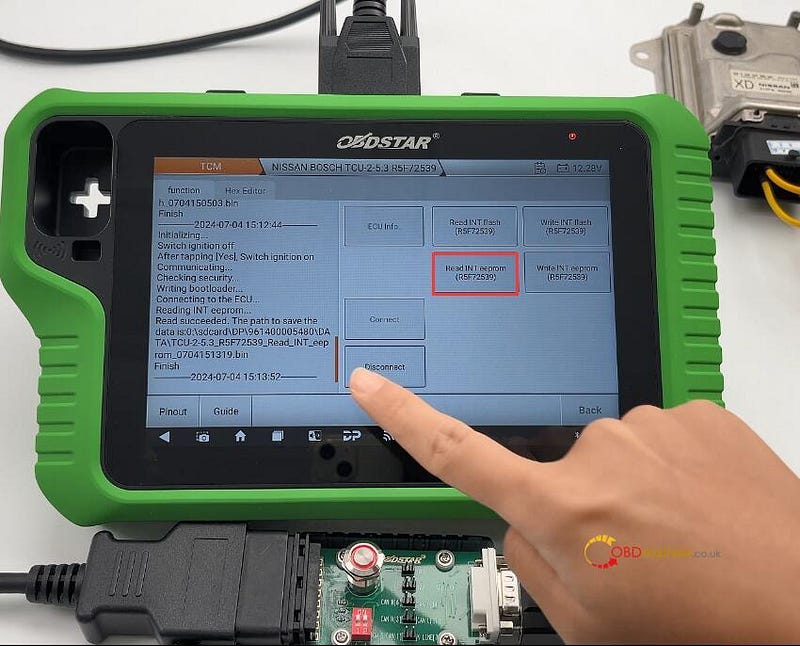
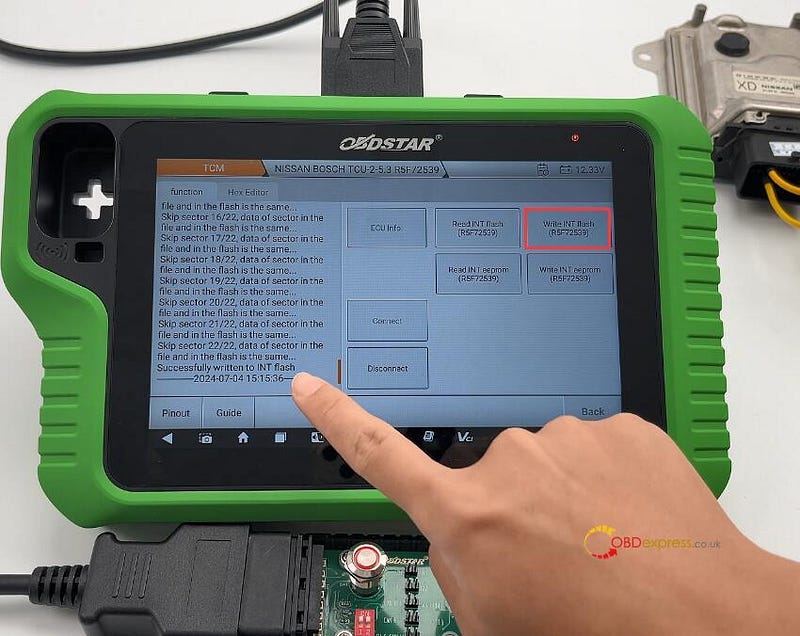
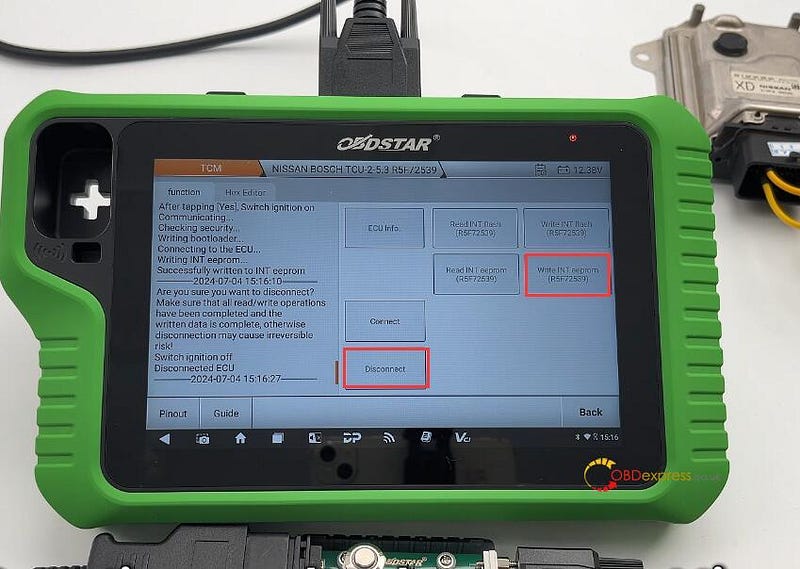
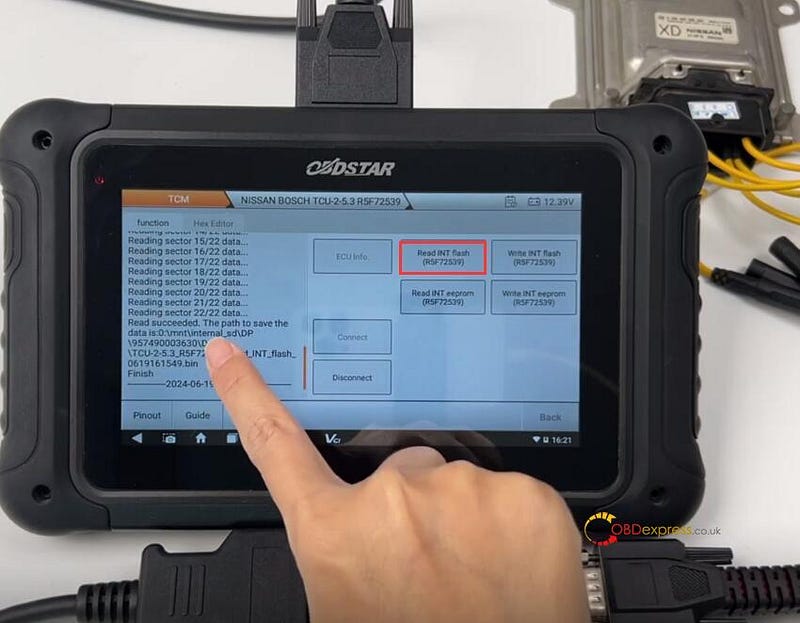
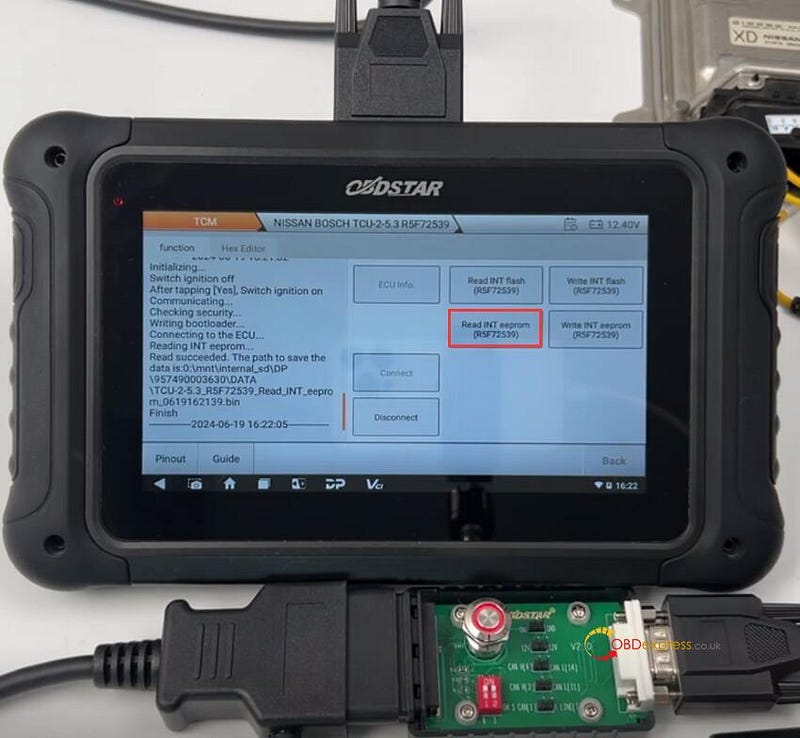
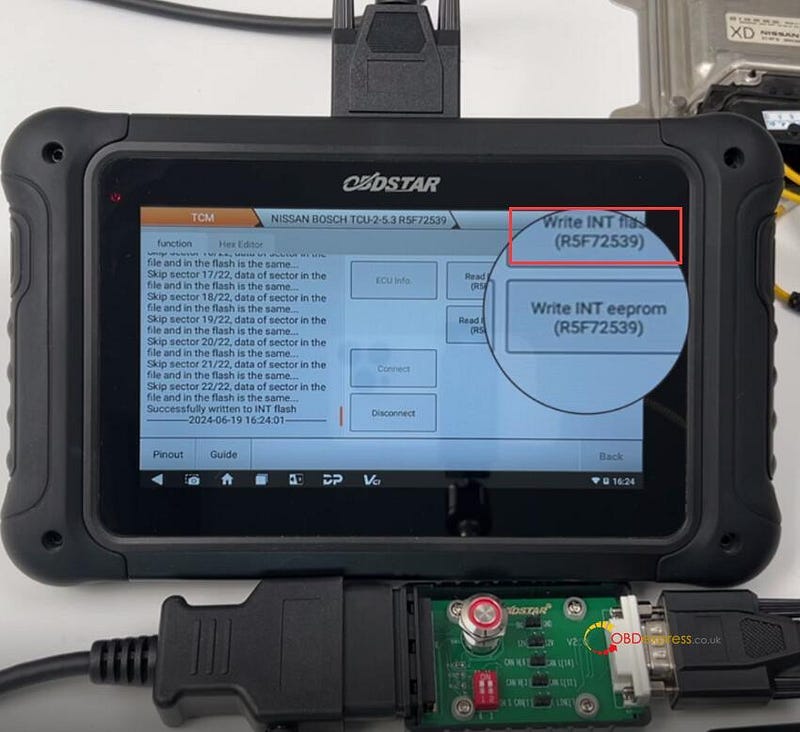
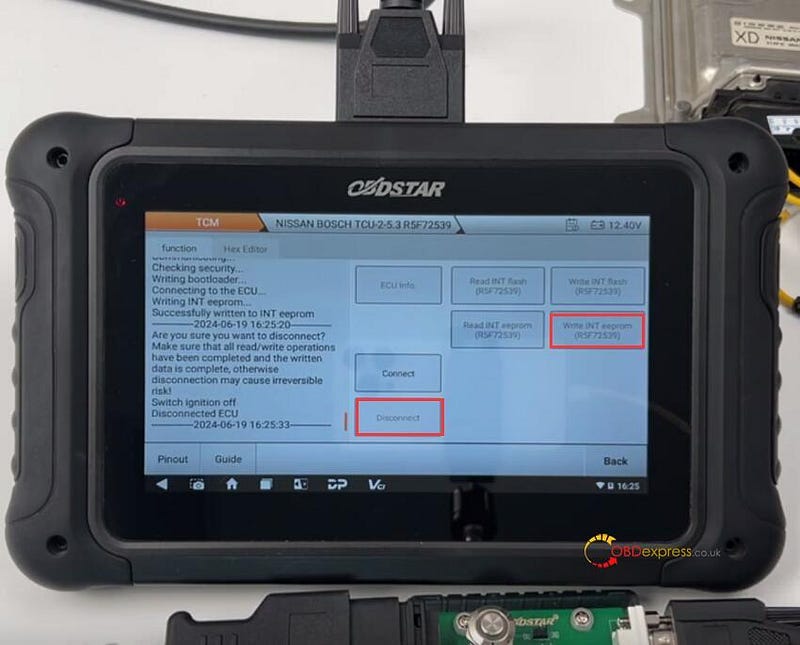
Start to connect ECU, read INT Flash & INT EEPROM (R5F72539), and write the original data into the new Nissan TCM.

Disconnect the ECU after writing.

Note: During the operation, follow the on-screen prompts to turn off or turn on P004 Adapter switch button.

OBDSTAR X300 Classic G3 clone Nissan TCU253 R5F72539:


Nissan CVT TCU253 R5F72539 TCM Clone by OBDSTAR G3, DC706

OBDSTAR DC706 clone Nissan TCU253 R5F72539:


Nissan CVT TCU253 R5F72539 TCM Clone by OBDSTAR G3, DC706

www.obdexpress.co.uk

OBDSTAR X300 Classic G3/ DC706 Clone BENZ CPC2.4 ECM

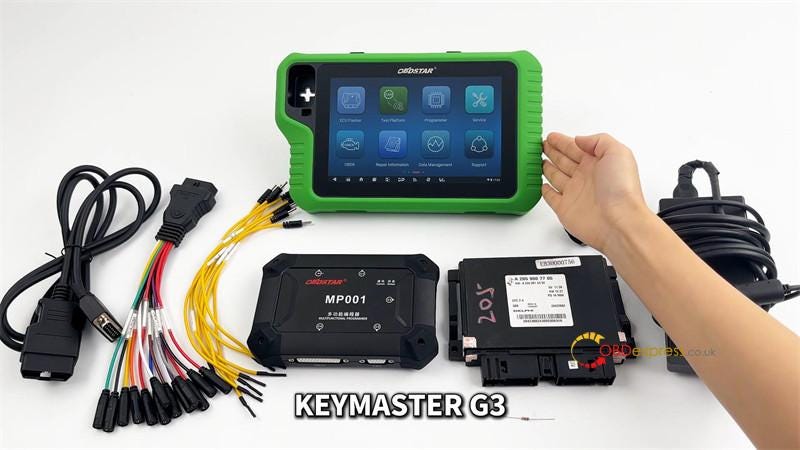
 This is a tutorial on how to clone Mercedes-Benz CPC2.4 ECM with OBDSTAR tool by bench. Here we’ll use the OBDSTAR X300 Classic G3 & DC706 as demonstration, the operation are the same.

Required Tools

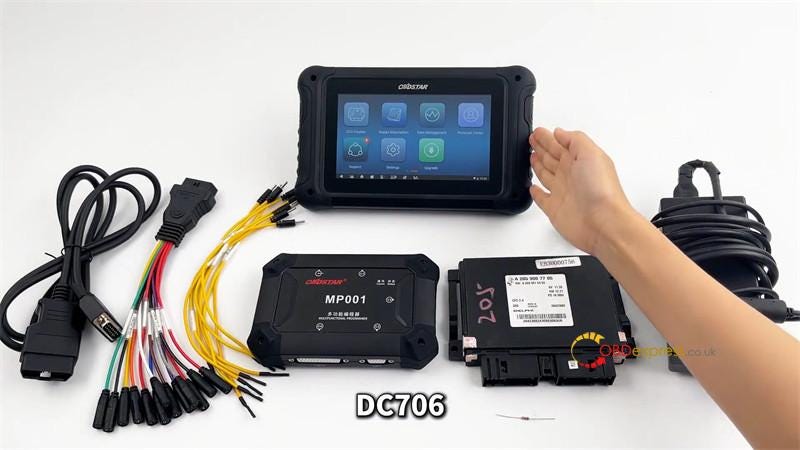
OBDSTAR DC706/ Key Master G3

Main Cable

BENCH -A V3 Clone Jumper

MP001 Programmer

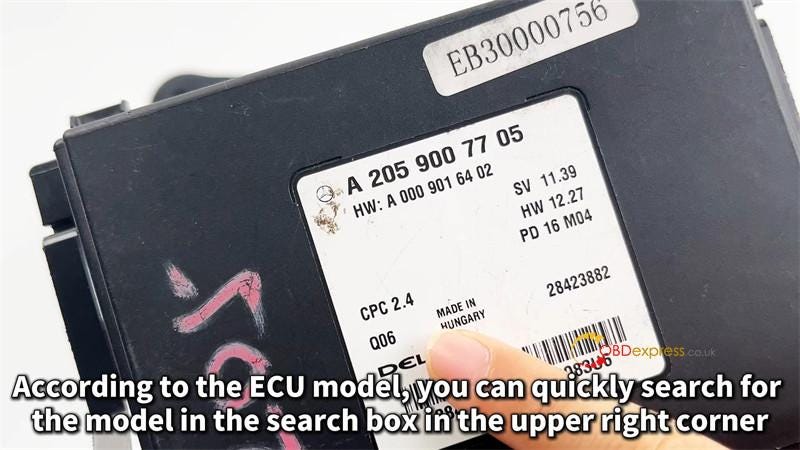
BENZ CPC2.4 ECM

12V 5A Power Supply(DC)

120Ω Resistor


OBDSTAR X300 Classic G3, DC706 Clone BENZ CPC2.4 ECM

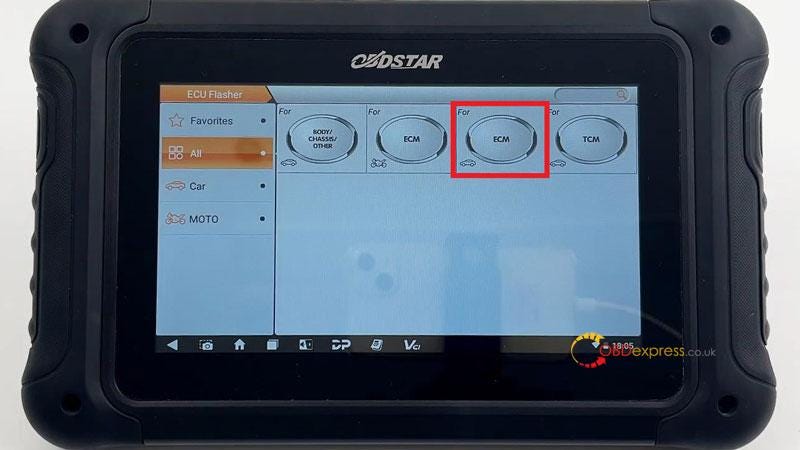
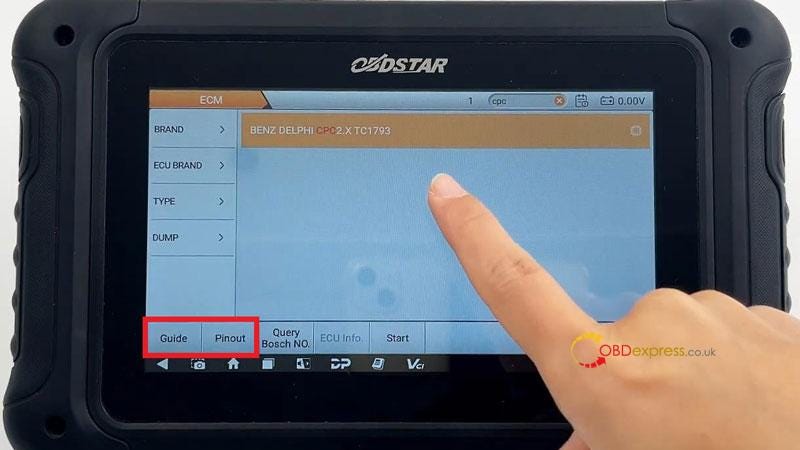
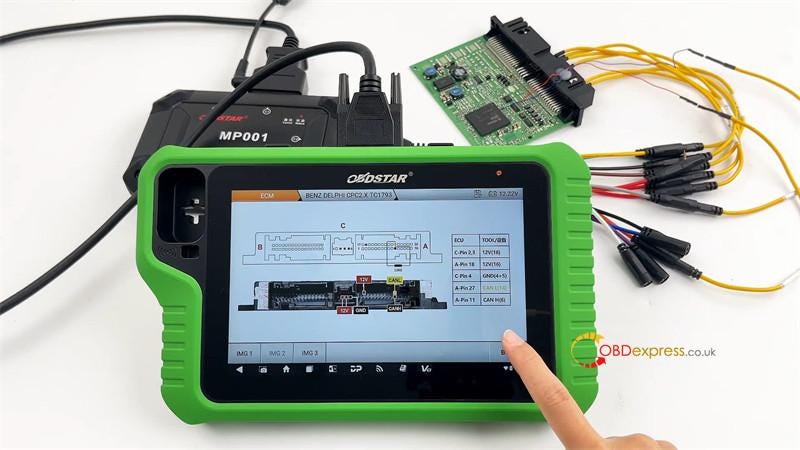
ECU Flasher >> ECM >> Latest version >> BENZ DELPHI CPC2.X TC1793 >> Guide/Pinout


OBDSTAR X300 Classic G3, DC706 Clone BENZ CPC2.4 ECM

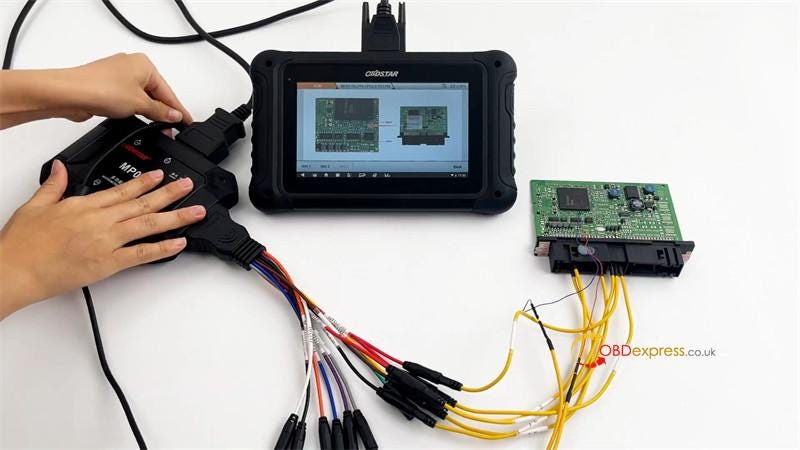
Follow the wiring diagram to connect all devices.

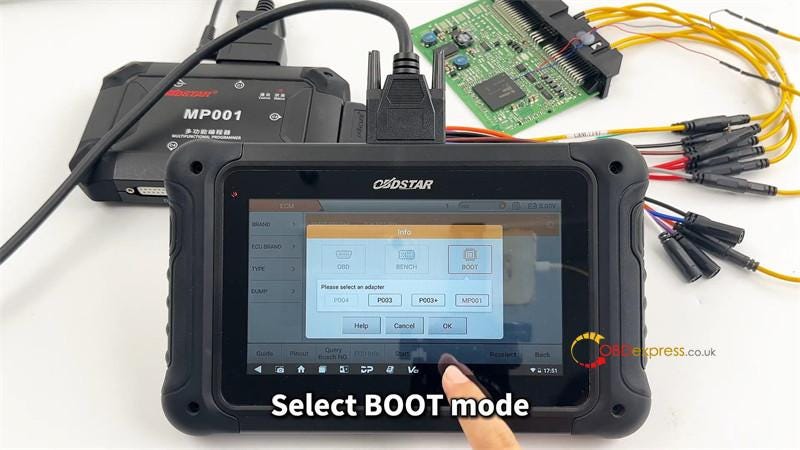
Select "BOOT" mode, press "OK".

This function is available by connecting the server, please ensure the Internet connection is normal.

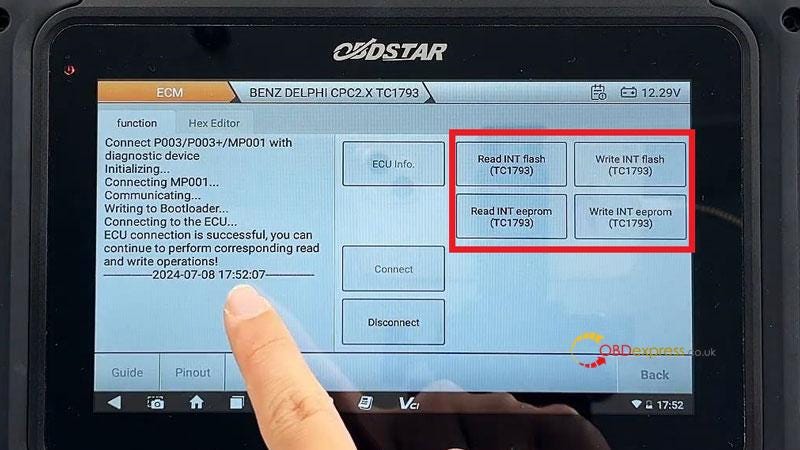
Connect >> OK

Now we can read & write INT flash or eeprom(TC1793) as required.


OBDSTAR X300 Classic G3, DC706 Clone BENZ CPC2.4 ECM

www.obdexpress.co.uk

Monday, 15 July 2024

Hyundai Santa FE 2021 MB91 Mileage Correction with CGDI CG100X

 Is it possible to correct mileage on Hyundai Santa FE 2021 MB91 with MB91F061BS chip by CG100X?

The answer is Yes.

CGDI CG100X is one of the best tools for the Hyundai/Kia MB91 cluster which does not corrupt the car. It has the wiring diagram in the software. Just follow it to connect the device and Hyundai correctly, and make sure the 12V DC is connected to CG100X as well.

Run CG100X software

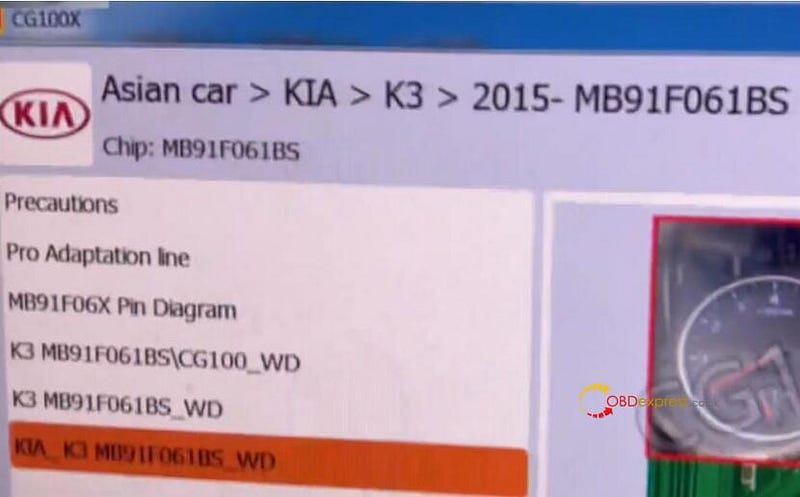
Select Dashboard>> Asian Car>> KIA>> K3>> 2015_ MB91F061BS


Hyundai Santa FE 2021 MB91 Mileage Correction with CGDI CG100X

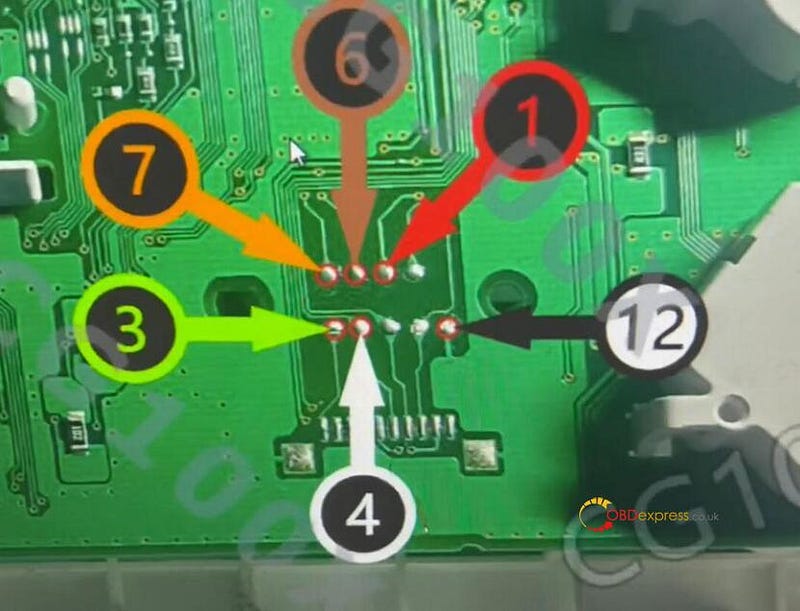
Check the soldering points (1 3, 4, 6, 7, and 12) carefully


Hyundai Santa FE 2021 MB91 Mileage Correction with CGDI CG100X

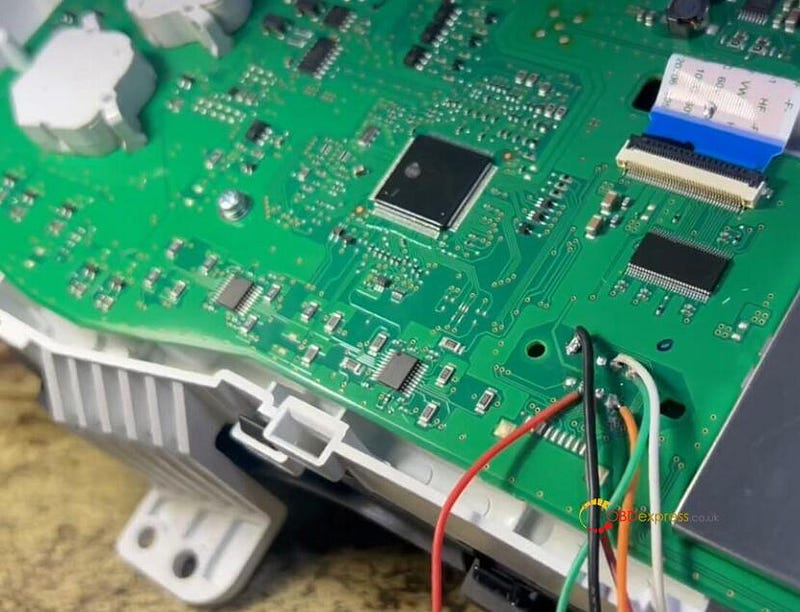
Connect CGDI CG100X Programmer and Hyundai dashboard according to the diagram, and connect the 12V power supply


Hyundai Santa FE 2021 MB91 Mileage Correction with CGDI CG100X

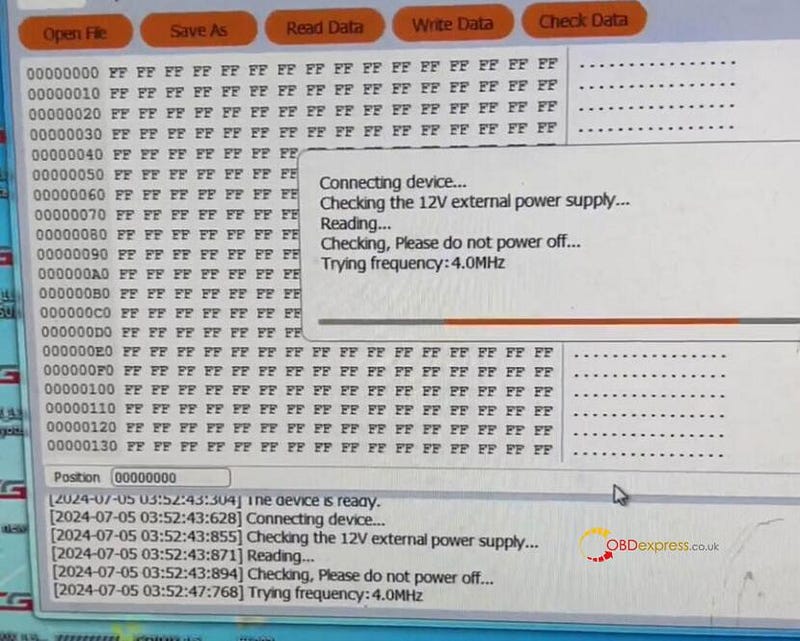
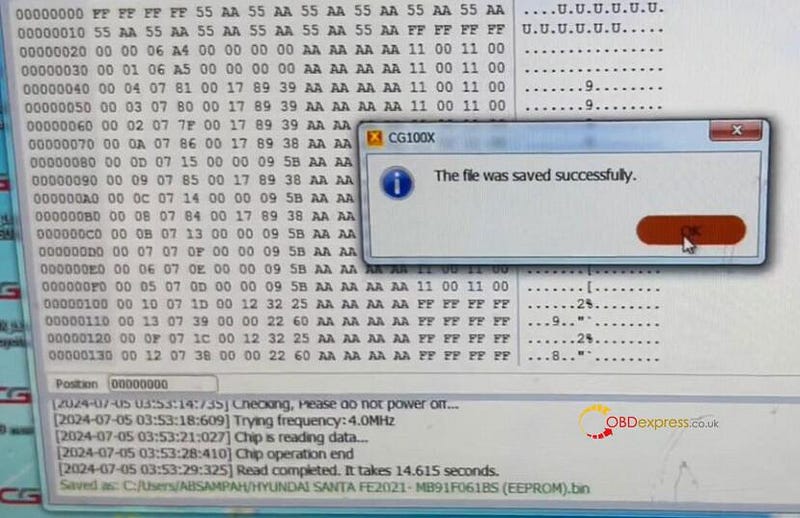
First, read the chip and save EEPROM data


Hyundai Santa FE 2021 MB91 Mileage Correction with CGDI CG100X

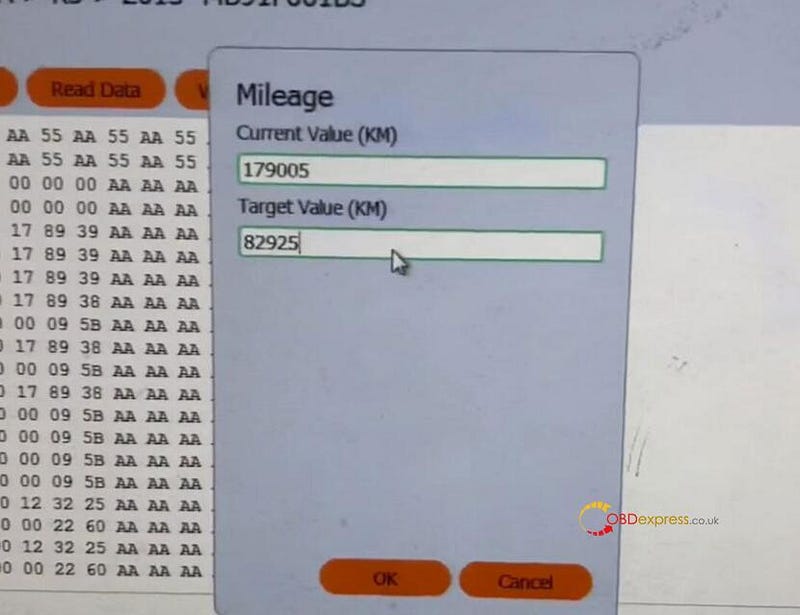
Next, detect the original mileage (i.e.179005 km)

Then, input the new mileage you want to change (If it displays in miles, you have to convert miles to km)


Hyundai Santa FE 2021 MB91 Mileage Correction with CGDI CG100X

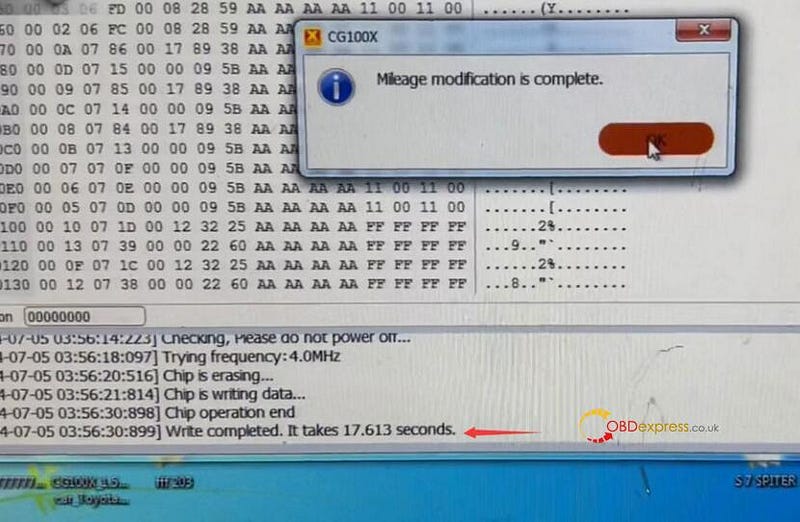
Start to write the chip, and wait a moment until the mileage modification is complete


Hyundai Santa FE 2021 MB91 Mileage Correction with CGDI CG100X

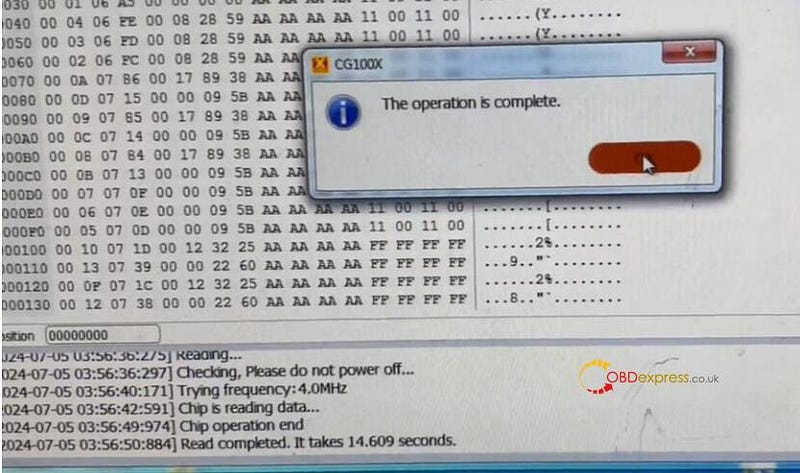
Finally, read mileage and save new mileage data


Hyundai Santa FE 2021 MB91 Mileage Correction with CGDI CG100X

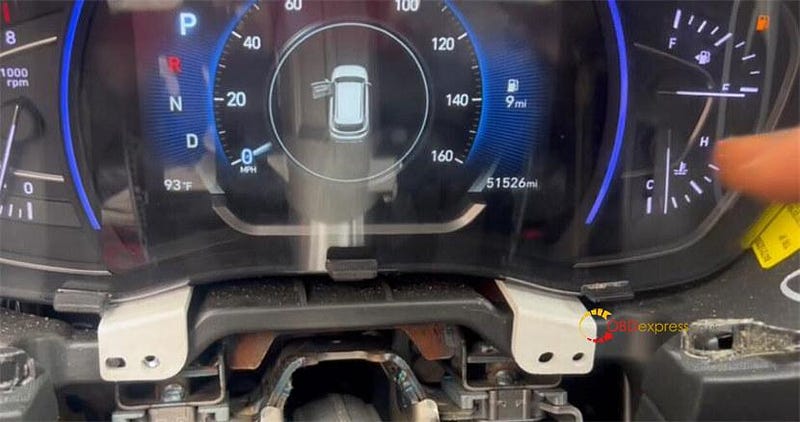
Check if the new mileage on the dashboard is the same as the modification.


Hyundai Santa FE 2021 MB91 Mileage Correction with CGDI CG100X

That’s the whole process to do the Hyundai Santa FE 2021 MB91 mileage correction by CGDI CG100X.

www.obdexpress.co.uk


[Solution]YH35XX Programmer Adjust Mileage: display 999999 and red dot

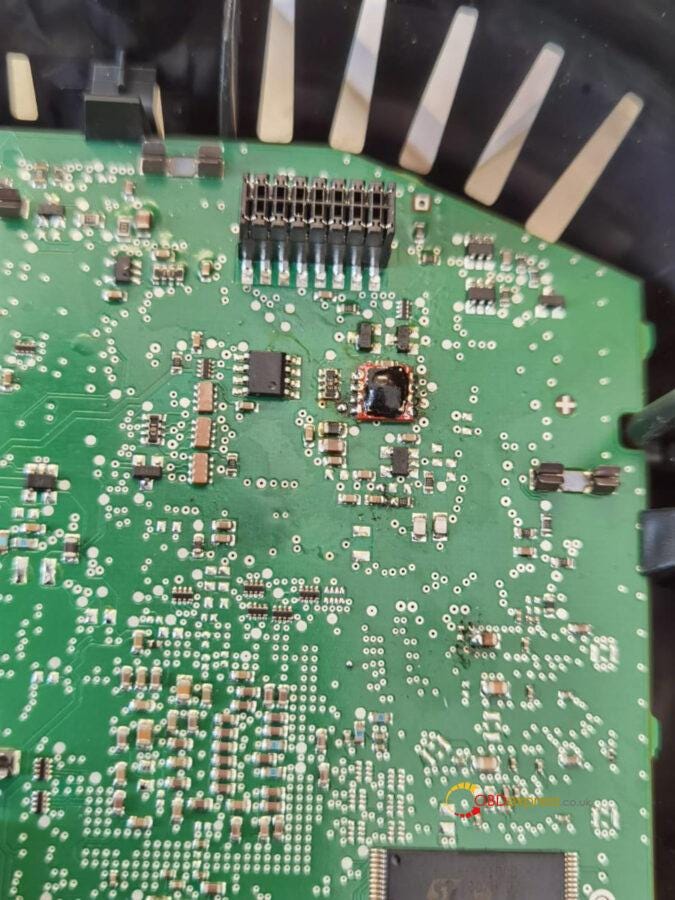
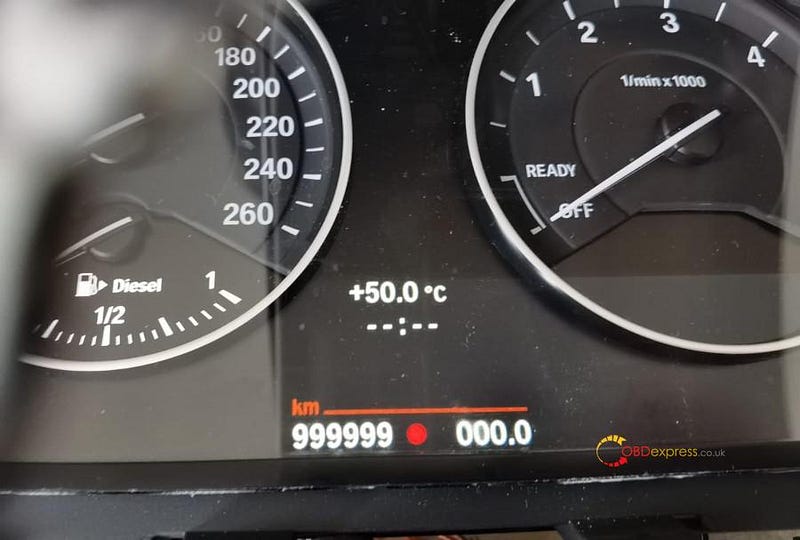
 Use YH35XX Programmer to adjust the mileage, the chip type is 35160WT. But the instrument panel shows 999999 and a red dot, what is wrong?


YH35XX Programmer Adjust Mileage display 999999 and red dot

Solution:

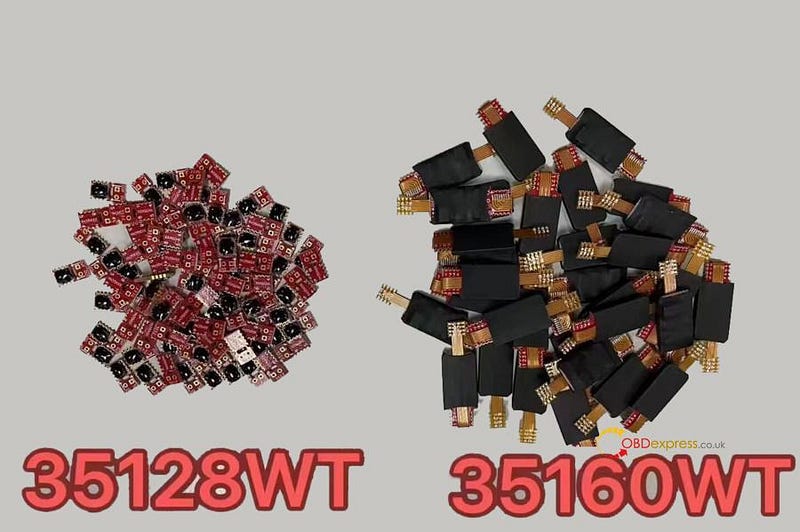
The original car chip is 35160WT. After using the small analog chip, the instrument panel shows 99999. It is judged that the voltage of the 8th pin of the 35160WT chip pin is 5V, causing the small analog chip to overheat and burn. So a large analog chip is required to support it.

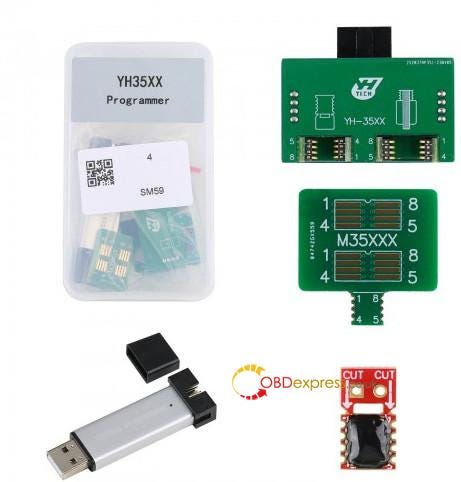
In the picture below, the left side is the small analog chip you use, and the right side is the large analog chip. Although the large analog chip is shown in the picture as suitable for 35160WT, it is actually a compatible model that can support 35128WT and 35160WT.


YH35XX Programmer Adjust Mileage display 999999 and red dot

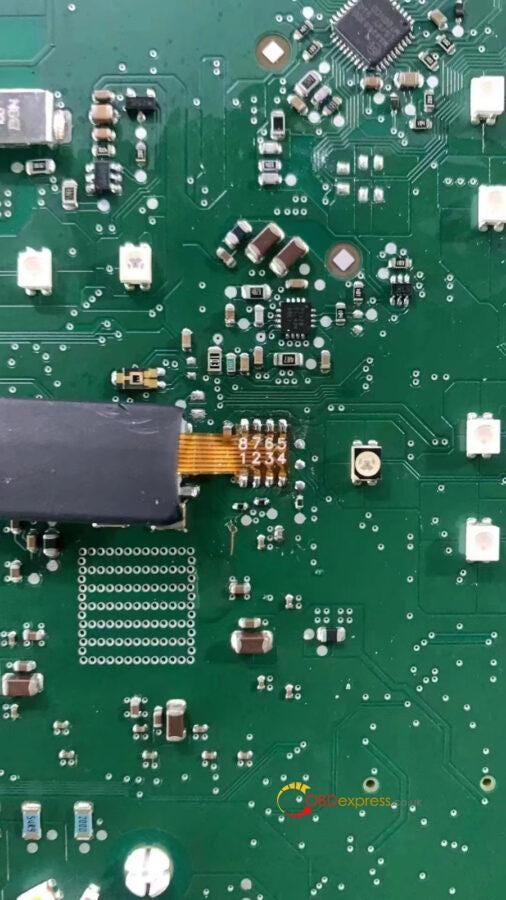
Attachment: Schematic diagram of the welding of the 8-pin chip.


YH35XX Programmer Adjust Mileage display 999999 and red dot

www.obdexpress.co.uk

How to Unlock Ford BOSCH MD1CP006 with OBDSTAR ECU Master via Boot?

 This guide covers the procedure for unlocking, reading, and writing locked Bosch MD1 CP006 engine control units found on Ford F-250 and F-...