Friday, 3 September 2021

Mercedes-Benz ESL Damage Reasons and Solutions

 The damage to the ESL/ELV should be the easiest way to trigger Benz failures. In a case that the ESL is damaged, it usually requires to replace it by a new ESL module or ELV simulator.


Possible reasons to cause ESL damage:

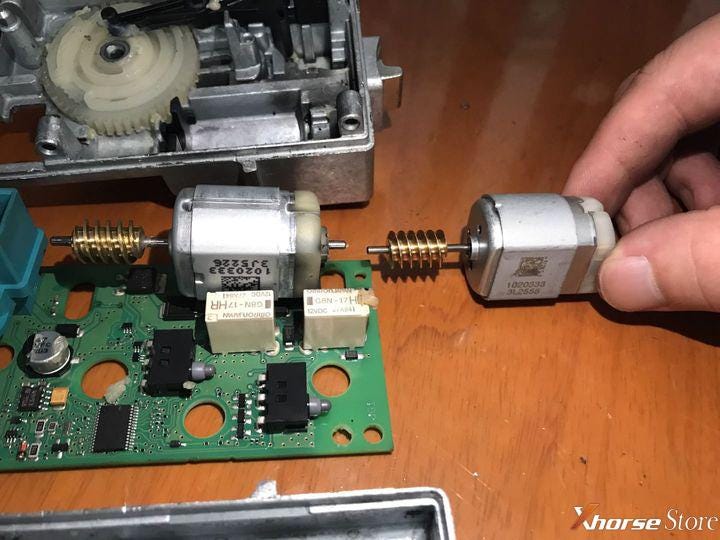
1)The electric motor is damaged

In most cases it’s the aging electric motor that cannot push the bolt to unlock without enough torque force.
Xhorse: ESL lock damage analysis and solutions

2)The internal chip is locked

Rarely it happens: the chip is locked. Actually it’s not damaged but some data errors happen.
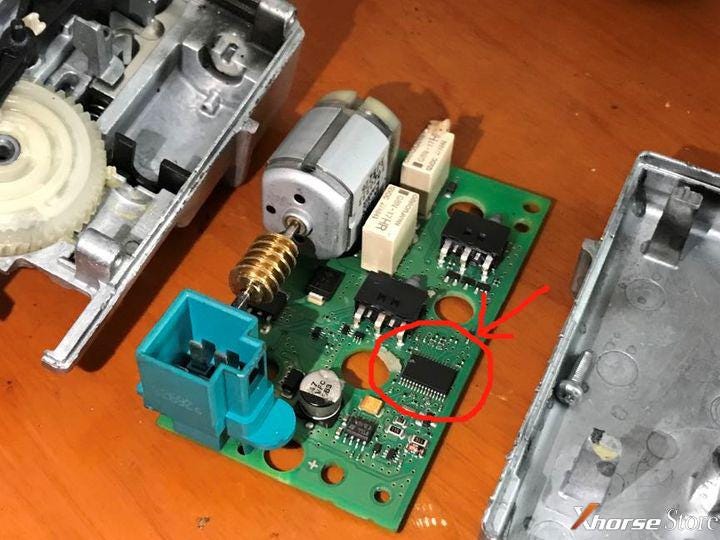
Xhorse: ESL lock damage analysis and solutions


Solutions:

1.An emergency solution is to hit the lower part of the steering column for making the electric motor restore the bolt. If done, drive to repair shops immediately.


2.In the case that the electric motor is damaged we just need to replace it. Besides, the new improved electric motor is more durable. However, the problem is the high cost of a brand new ESL module (In some areas it costs about $2,000).


3.When the chip is locked, we need to desolder the chip, repair it by professional tools and rematch it. Only professional locksmiths can do the job by themselves.


4.Replacing ESL by an ELV simulator could be an easier way. There is no mechanical components  that may lock the steering wheel any more, but still signals fed back to the vehicle to unlock the steering wheel.


The ways to match an ESL or an ELV simulator by Xhorse VVDI MB on bench (same procedures):

1)Complete connections on bench as the diagrams and instruction.

2)Get the password through “Password Calculation” as the prompts.

For online calculation, it costs 1 token each time.

3)Read EIS data.

Press

EIS Tools>>Read EIS data

Paste the password on “Key Pass”, then

Press “Save EIS data” to save the file.
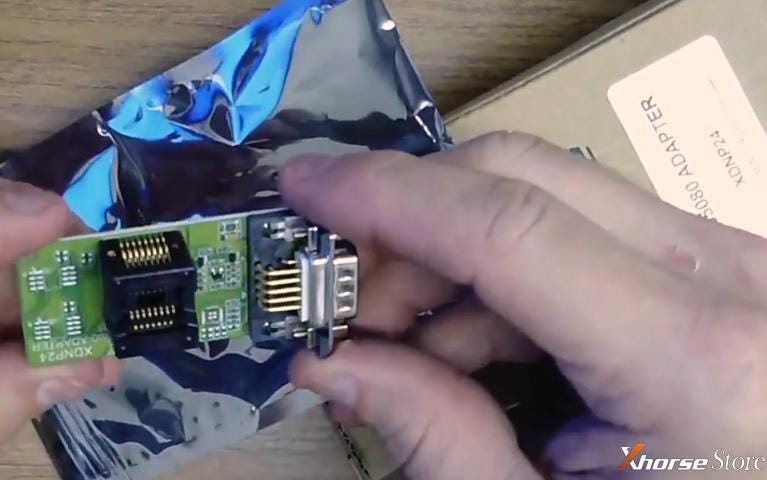
Xhorse: ESL lock damage analysis and solutions

4)Press

ESL Tools>>Read ESL data>>Load VVDI-MB EIS data

Check “Auto clear TP and personalized”.

Click “Write” to finish the procedures.
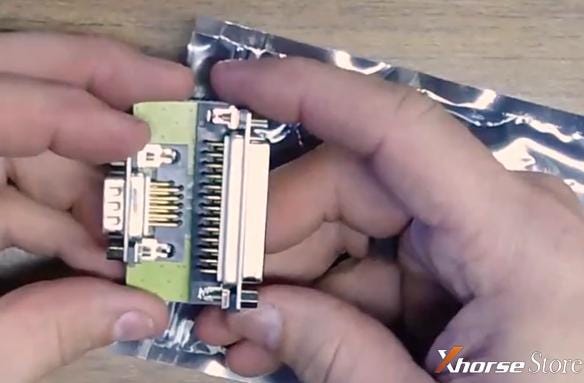
Xhorse: ESL lock damage analysis and solutions

Done!

This is what may cause Benz ESL damage and how to solve it.


Technical support by: www.xhorsestore.co.uk

Monday, 30 August 2021

How to Set Xhorse Smart Key Box for Nissan Versa 2014?

 Xhorse Smart Key Box is aiming to help users achieve a non-remote driving experience. By installing the tool into your car, your smartphone is able to work as an independent car key. Here we’re going to show you from remote programming to installing an Xhorse smart key box for a Nissan Versa 2014.


Part 1.Remote programming

Connect Xhorse VVDI Mini OBD Tool to the vehicle, and

Connect Xhorse VVDI Key Tool Max to VVDI Mini OBD.

Press

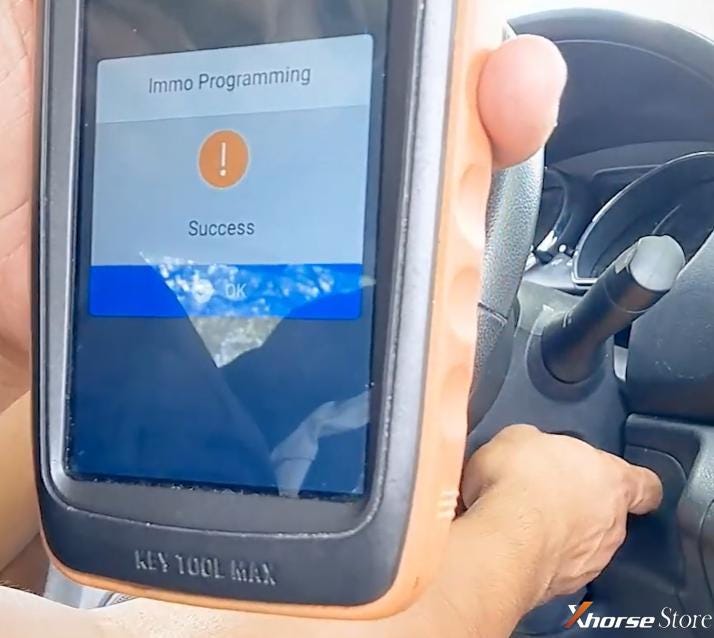
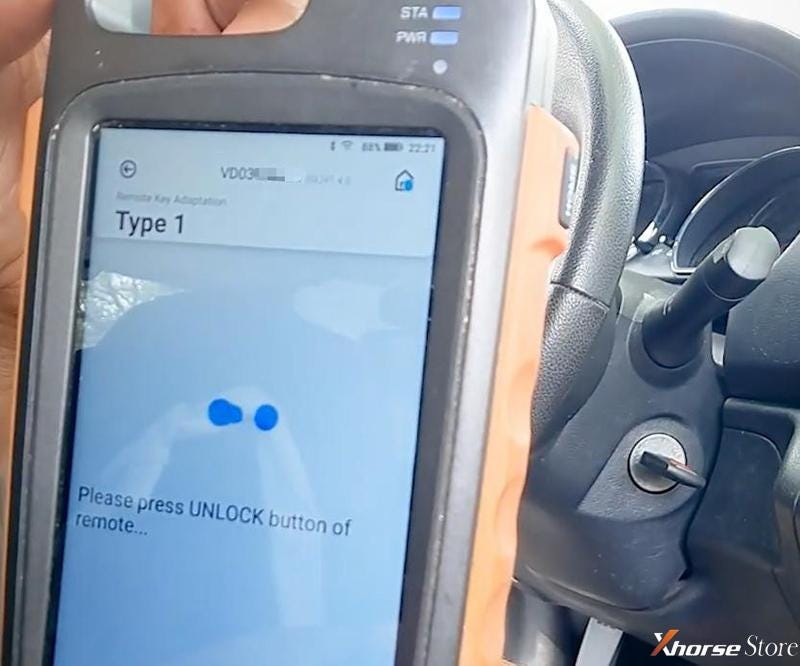
Immo Programming>>Nissan>>Select from system>>Remote Key Adaptation>>Type 1>>Start execution>>Program remote

Then follow the prompt to program a new remote.

Xhorse Smart Key Box installation example: Nissan Versa

Xhorse Smart Key Box installation example: Nissan Versa

Part 2.Xhorse smart key box setup

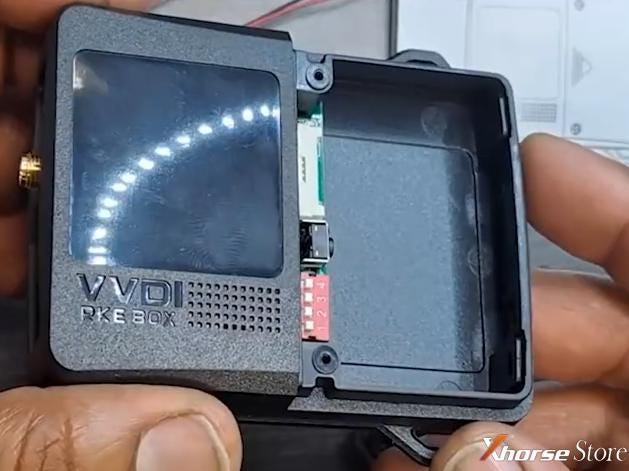
Remove screws and open up the smart key box.

Xhorse Smart Key Box installation example: Nissan Versa

Then remove the outer shell to get the PCB.

Xhorse Smart Key Box installation example: Nissan Versa

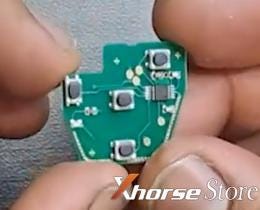
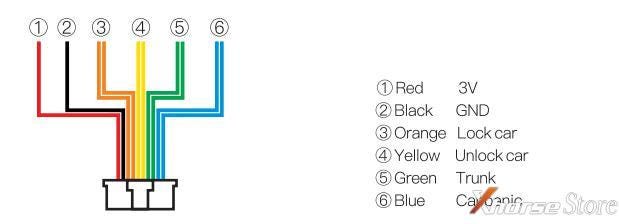
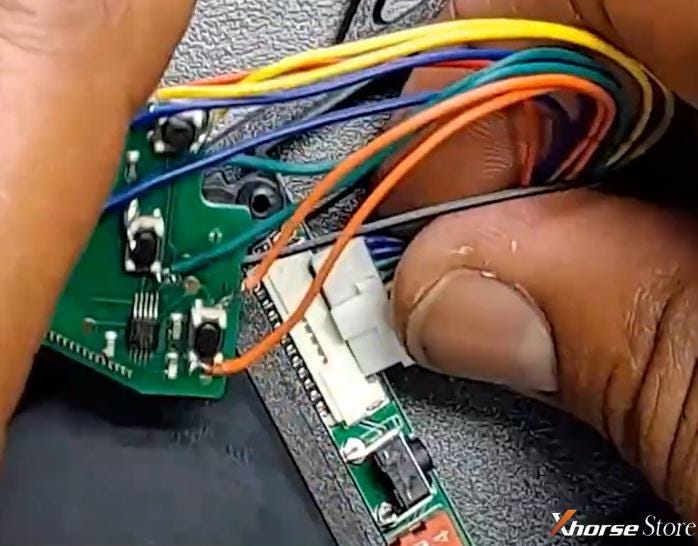
Take out the 10-wire rainbow connector and make sure the wires are soldered to the correct points.

Xhorse Smart Key Box installation example: Nissan Versa


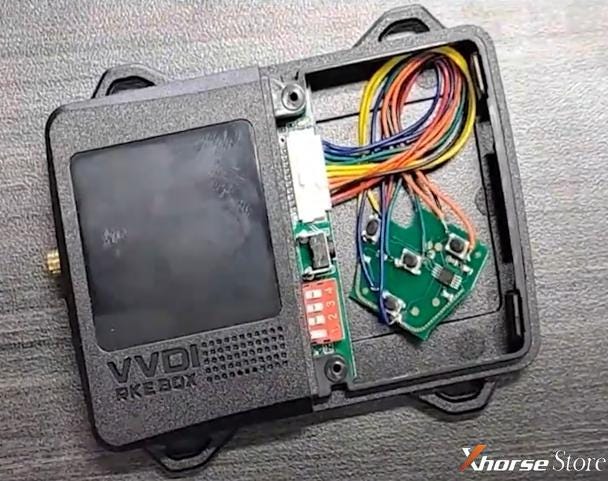
Then insert the connector into the smart key box board.

Xhorse Smart Key Box installation example: Nissan Versa

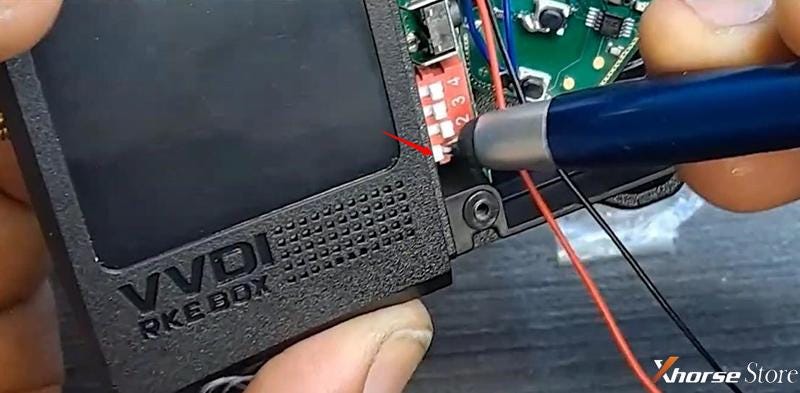
Go ahead and set dip switch 1 to “ON”.

Xhorse Smart Key Box installation example: Nissan Versa

Xhorse Smart Key Box installation example: Nissan Versa

Part 3.Xhorse smart key box installation

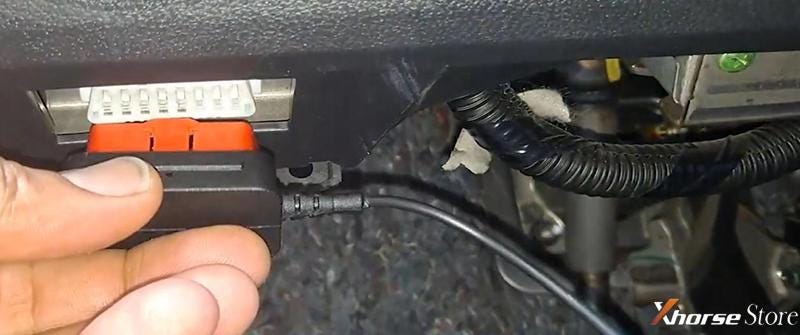
Inset power supply cable to the OBD port.

Xhorse Smart Key Box installation example: Nissan Versa

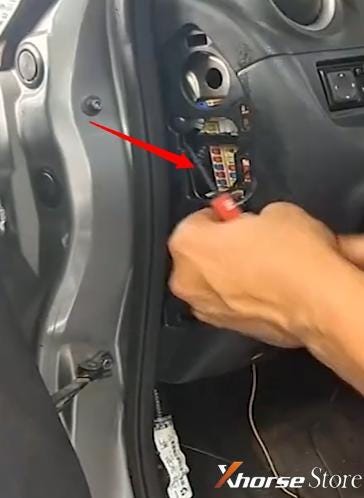
Take out the RF antenna to install on or under driver dashboard.

Xhorse Smart Key Box installation example: Nissan Versa


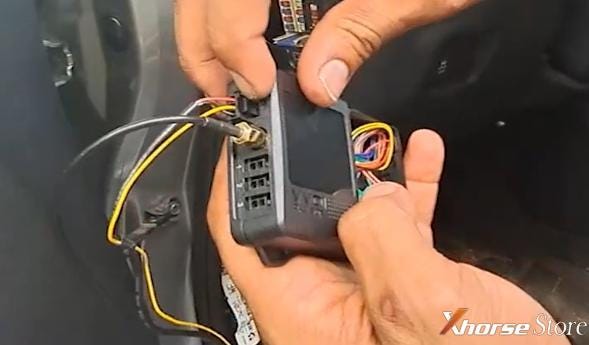
Connect RF antenna and OBD power supply cable to the rear of the smart key box.

Xhorse Smart Key Box installation example: Nissan Versa

Part 4.Xhorse smart key box and app setting

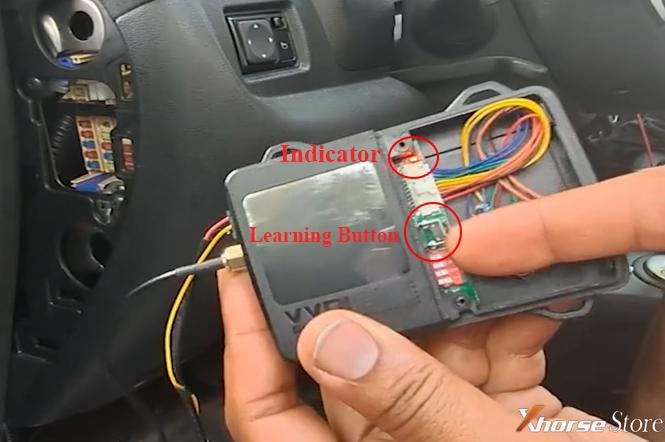
Press and hold the learning button until 3 seconds of beep and the indicator lighting on, which means the learning process has begun.

Xhorse Smart Key Box installation example: Nissan Versa

Then open up the Xhorse SmartKey app.

Press the “Connect the car” button, turn on Bluetooth and select your smart key box.

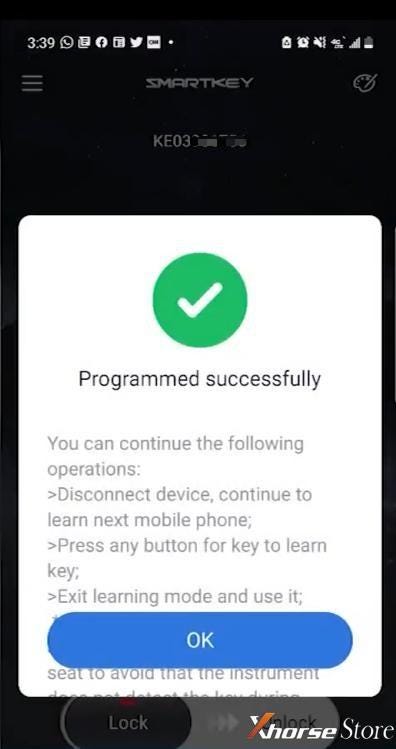
Programmed successfully.

Xhorse Smart Key Box installation example: Nissan Versa


Then you can exit the process, or the smart key box can save and connect to six remotes or phones at a time except the original remote.

End the learning process by holding the button again until 3 seconds of beep and the indicator off.


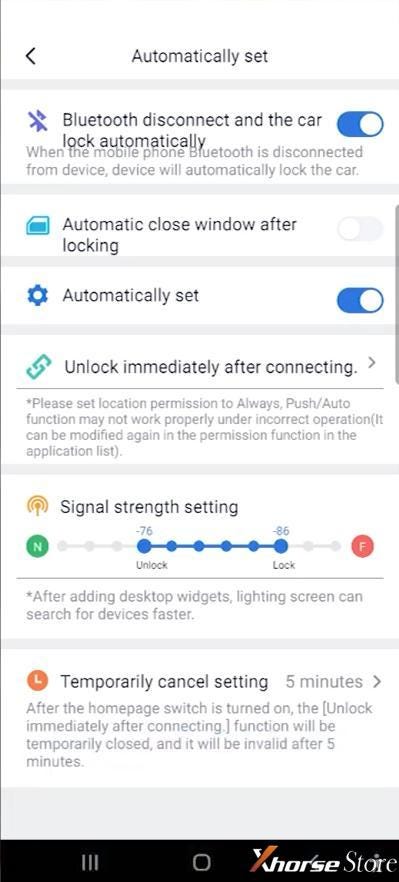
Besides, you can adjust the settings.

Select “Automatically set” and turn Bluetooth to automatic set, or adjust the signal strength as you like.

Xhorse Smart Key Box installation example: Nissan Versa


Done! Simple and nice!

That’s the Xhorse SmartKey Box that makes you unlock the car by your phone.


Technical support by:

www.xhorsestore.co.uk
Review: Which is Better, Xhorse VVDI2 or Xhorse Key Tool Plus?

 Here we collect some customer reviews on the Xhorse VVDI2 and Xhorse VVDI Key Tool Plus. Hope this will help you decide which is better for you.

Xhorse Key Tool Plus

Review 1:

Either can extract vehicle data by calculation for MQB car, or via any other source for immo data calculations. If you have other high-end programmers, buy VVDI2; if you don’t have any, buy VVDI Key Tool Plus.


Review 2:

Xhorse VVDI Key Tool Plus is the better purchase now, everyone has moved to tablet tools. It still needs more updates to be able to cover everything it replaces, but they have been updating it like crazy. I'm fairly happy with it. Xhorse is going to throw supports at Key Tool Plus, and all in 1 tablet is what there all is going. 100% buy KTP, and it saves money in long the run.


Review 3:

Functions are different, hard to say which is better. Xhorse VVDI Key Tool Plus is a key tool, so it emphasizes key matching. While VVDI series like VVDI2, VVDI Prog may have specialized functions like coding, refreshing etc. that the tablet may not support. I would rather say which better suits you.


Comment content comes from: www.xhorsestore.co.uk
How to Read BMW CAS3+ by Xhorse VVDI MINI Prog& Solder-free Adapter?

 Here we’ve got a brand new, just released Xhorse Solder-free adapters set. So we’re going to show you how to read the BMW CAS3+ using the new Xhorse VVDI MINI Prog and the CAS3+ adapter.


Tools:

Xhorse VVDI MINI Prog

Xhorse BMW CAS3+ adapter (XDNP11)


Normally you would have one of the EEPROM heads attached, so take it off first.

Open Xhorse app on the phone.

Select

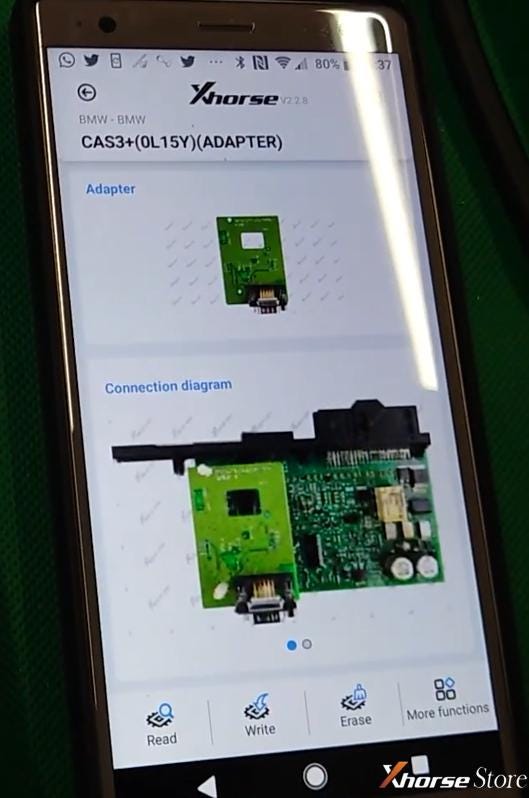
Immo>>BMW>>BMW>>CAS3+(0L15Y)(ADAPTER)

Here it has the required adapter and connection diagram.

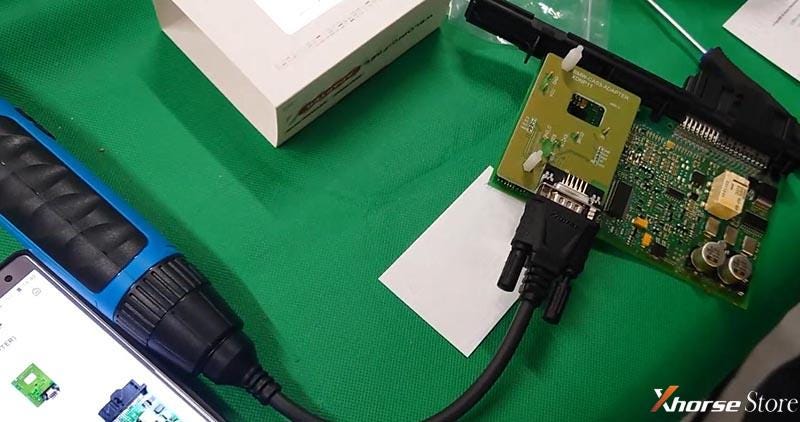
Xhorse Solder-free Adapter usage example: Read BMW CAS3+

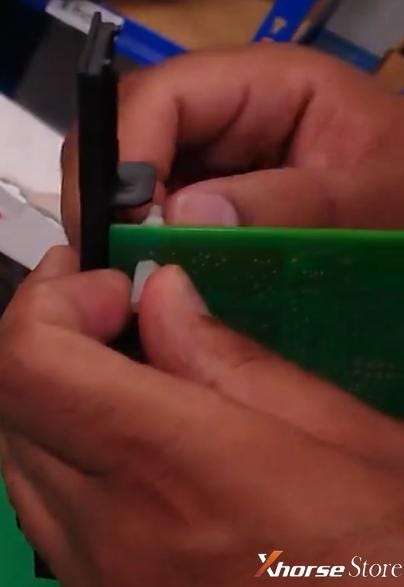
As the diagram, put screws and nuts on the circuit board.

Xhorse Solder-free Adapter usage example: Read BMW CAS3+

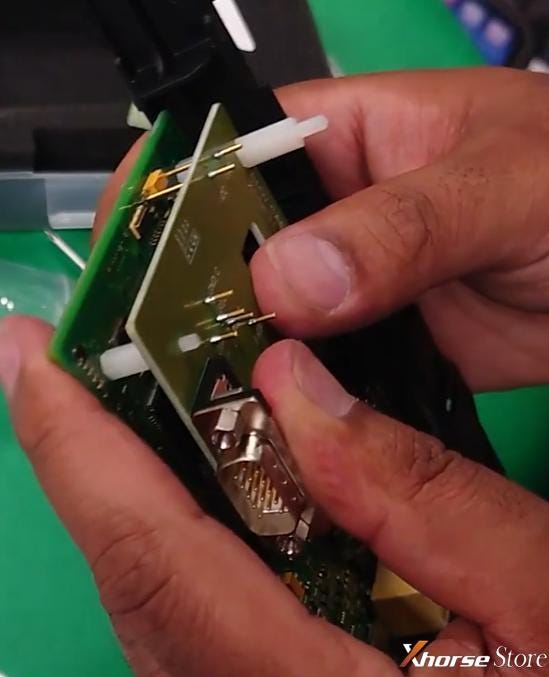
Set and fasten the adapter on the the top.

Xhorse Solder-free Adapter usage example: Read BMW CAS3+

Connect Xhorse VVDI MINI Prog to the adapter.

Xhorse Solder-free Adapter usage example: Read BMW CAS3+

On Xhorse app, press

Read>>EEPROM>>Start operation

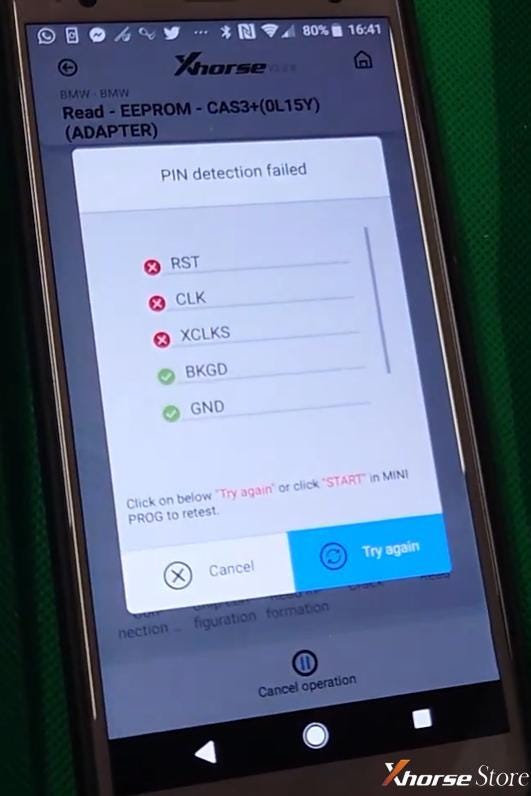
During connecting, it shows “PIN detection failed”.

Some pins are not connected and it marks them out.

Xhorse Solder-free Adapter usage example: Read BMW CAS3+

So connect the adapter again to make sure every pin is connected.

Then press “Try again”.

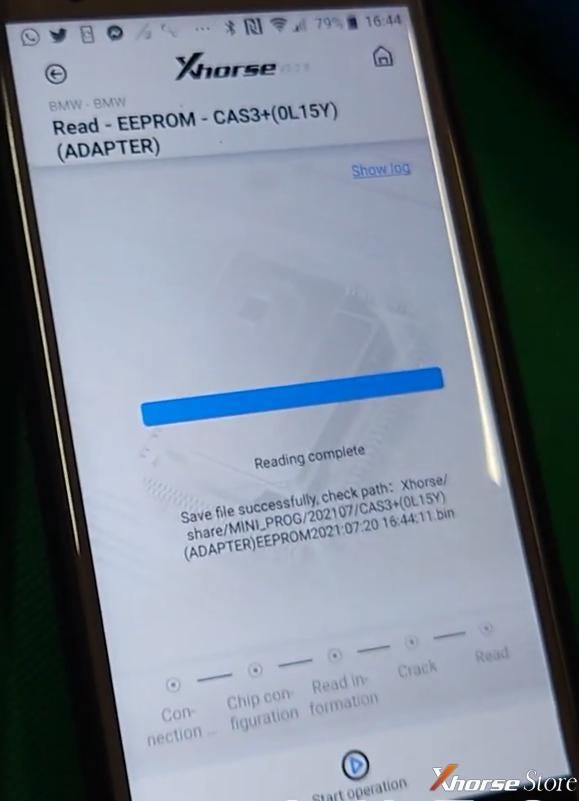
Reading success, save the file.

Xhorse Solder-free Adapter usage example: Read BMW CAS3+

Back to Homepage,
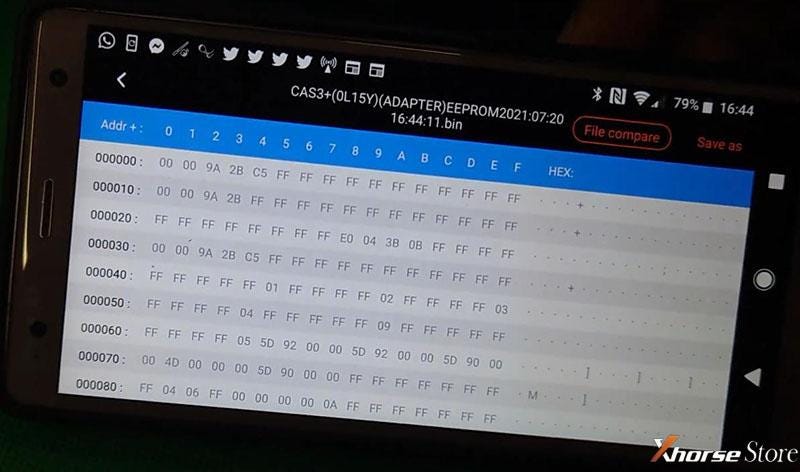
Select “File management” to verify we’ve got some data.

Select “Local file” and choose the file we just saved.

Xhorse Solder-free Adapter usage example: Read BMW CAS3+

It’s not full, but we’ve got some data and that has read successfully.

This is how we use Xhorse VVDI MINI Prog to read BMW CAS3+ with Xhorse Solder-free BMW CAS3+ adapter.

Done!We made it.


Technical support by: Xhorse store

Thursday, 26 August 2021

Solve Xhorse VVDI Key Tool Plus "Device No Response"

 This morning two customers met two similar problems, that is, Xhorse VVDI Key Tool Plus won’t response to any choice they select.

One cannot get response from the eight functions on Homepage like Transponder, Immo Programming or Remote Program etc., even things like Settings, Update or Special Function won’t response to any click. Besides, he shut all backstage apps and open to try again, but nothing changed.

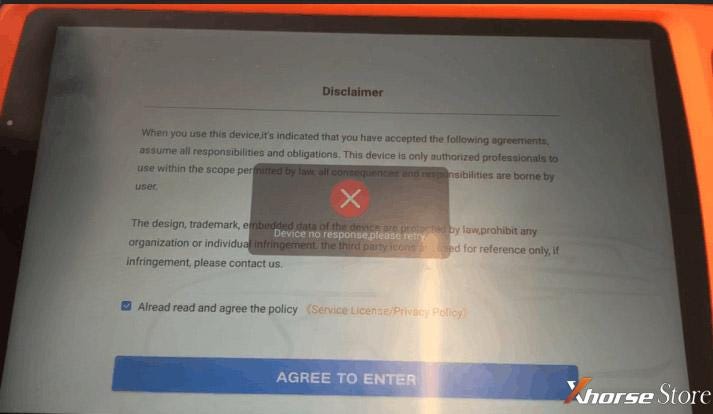
Another customer’s issues is that VVDI Key Tool Plus displayed “Device no response, please retry” after he opened the device and clicked on “AGREE TO ENTER”. There is no way into Homepage but a smell of burning.

Xhorse VVDI Key Tool Plus error solution: Device No Response

The ways to solve these issues are the same, so here our engineer gives the solution.


Solution:

Restore the factory settings and re-update.

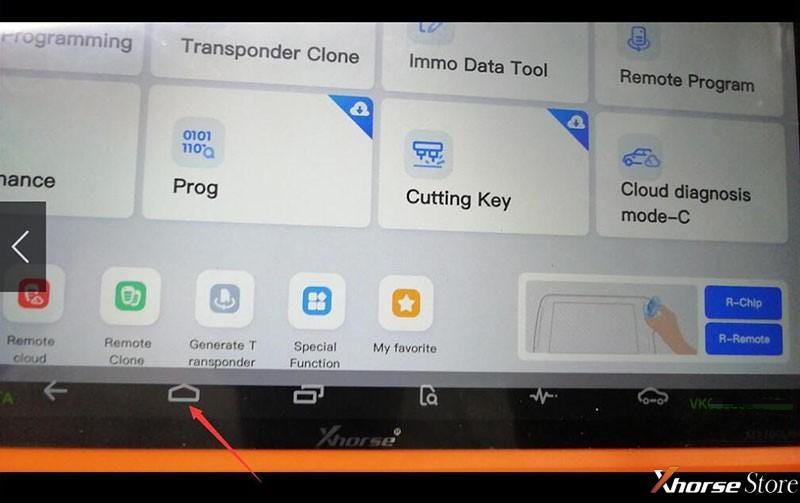
1)Scroll to call up the bottom toolbar and click the icon beside Return Key

Xhorse VVDI Key Tool Plus error solution: Device No Response

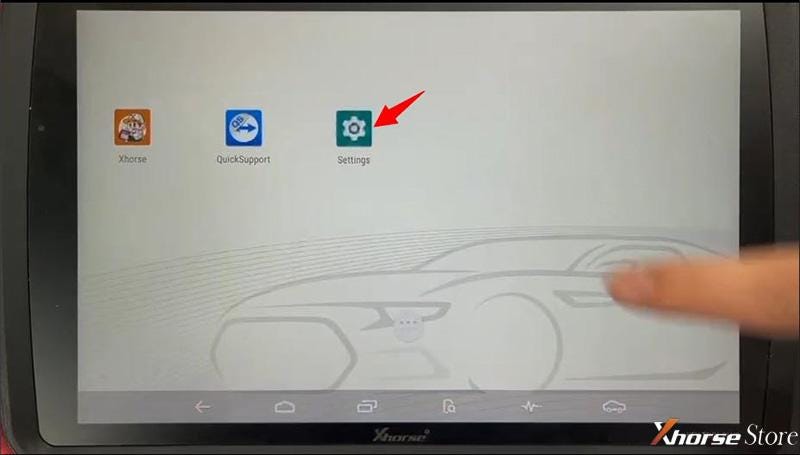
2)Press “Settings”

Xhorse VVDI Key Tool Plus error solution: Device No Response

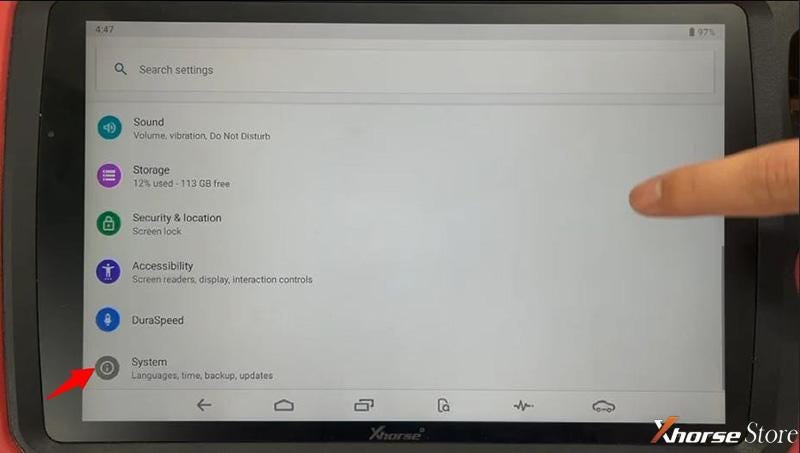
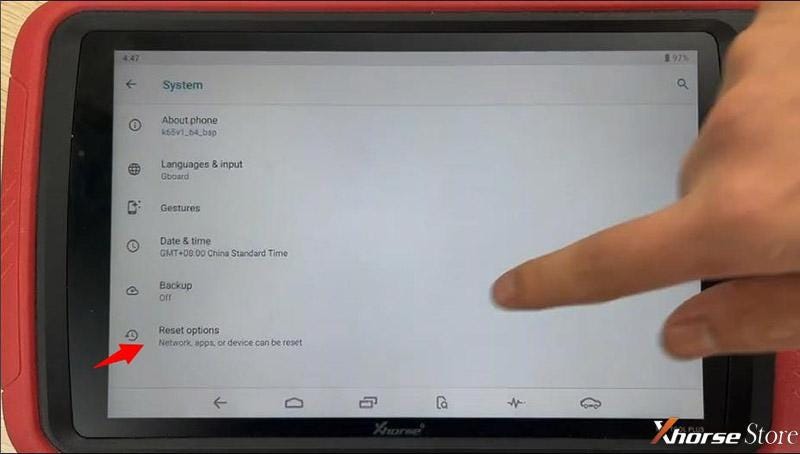
3)Press “System”

Xhorse VVDI Key Tool Plus error solution: Device No Response

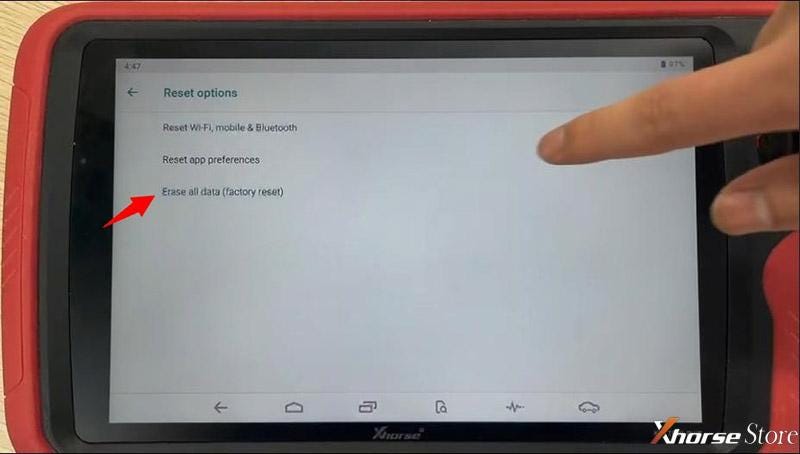
4)Press “Advanced” and then “Reset options”

Xhorse VVDI Key Tool Plus error solution: Device No Response


5)Press “Erase all data(factory reset)”

Xhorse VVDI Key Tool Plus error solution: Device No Response


6)If the above steps don’t work, use different WIFI or hotspot to try again.

Done!

Technical support by: Xhorse store

Xhorse VVDI Key Tool Max AKL Programming Guide: Toyota Hilux Revo

 This is a demo on how to use Xhorse VVDI Key Tool Max and Xhorse VVDI Mini OBD for Toyota Hilux Revo 2017 AKL with Xhorse Toyota 8A adapter.


Tools:

Xhorse VVDI Key Tool Max

Xhorse VVDI Mini OBD

Xhorse Toyota 8A adapter

Xhorse VVDI Super Chip


Connections:

Before the operations, view the diagrams on Xhorse VVDI Key Tool Max carefully.

1)disconnect the positive pole of the car battery to protect the connector and avoid short circuits.

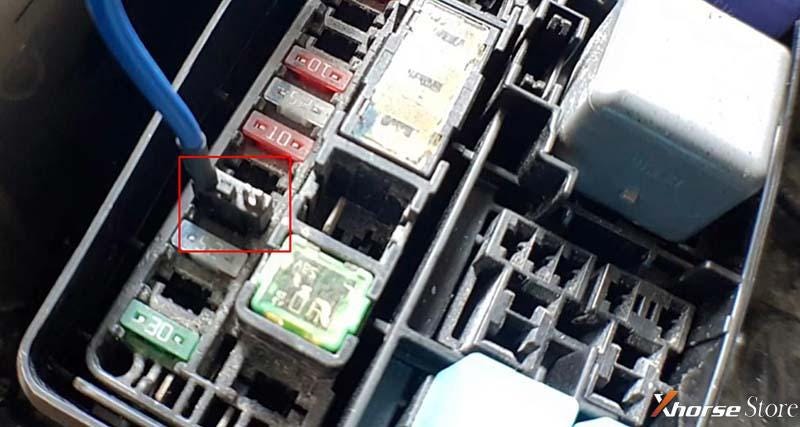
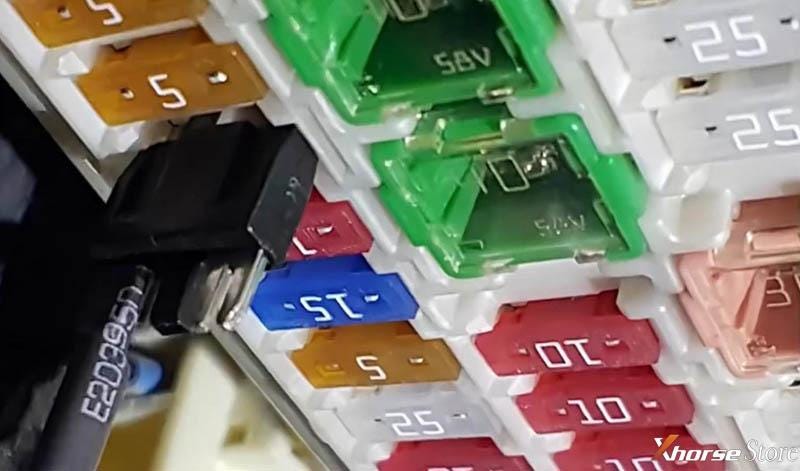
2)Unplug 10A ECU No.2 then connect J3 No.1 blue cable.

Toyota Hilux Revo AKL Programming — Xhorse tool

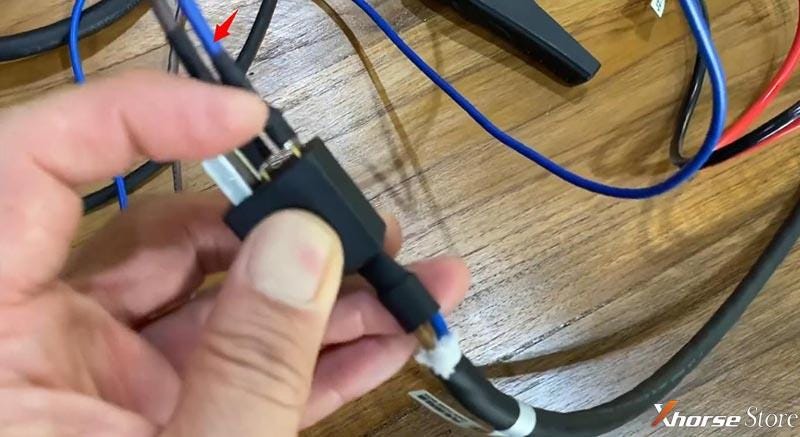
3)Connect blue cable to J3 cable No.1.

Toyota Hilux Revo AKL Programming — Xhorse tool

4)Unplug 5A IG2 No.3 then connect brown cable No2 J3 plug.

The fuse box is under storage rack on the passenger side.

Toyota Hilux Revo AKL Programming — Xhorse tool

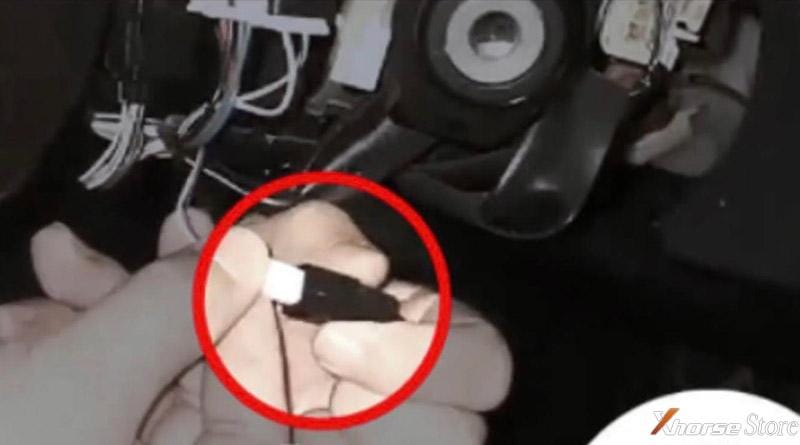
5)Unplug the lock plug then connect ELV cable J5 lock plug.

Toyota Hilux Revo AKL Programming — Xhorse tool

6)Connect J4 to OBDII port.

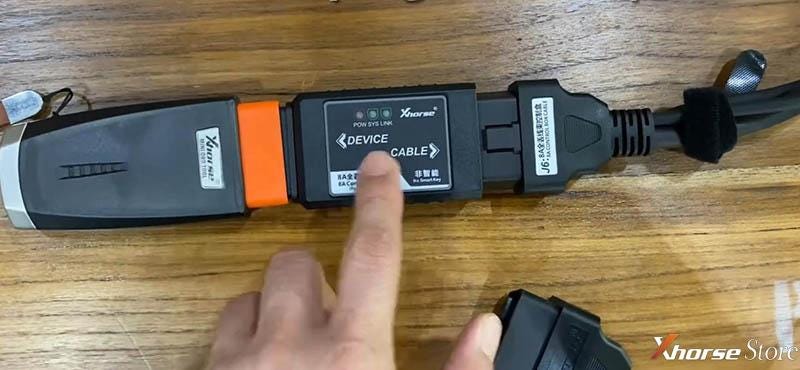
7)Connect J6 lock plug and Xhorse VVDI Mini OBD by Xhorse Toyota 8A adapter.

Toyota Hilux Revo AKL Programming — Xhorse tool

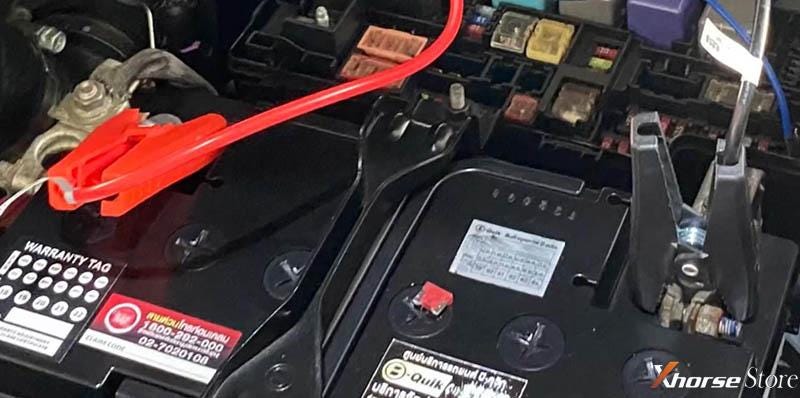
8)Supply 12V by connecting J1 to battery pole B positive and J2 to battery pole B negative.

Toyota Hilux Revo AKL Programming — Xhorse tool

Operations:

After connections, let’s do it.

Enter “IMMO” and choose the specific model.

Watch and follow the prompts carefully.

Toyota Hilux Revo AKL Programming — Xhorse tool

Toyota Hilux Revo AKL Programming — Xhorse tool

Toyota Hilux Revo AKL Programming — Xhorse tool

Insert a Xhorse VVDI super chip and then press “Master key 1” to continue.

Generation success.

Restore all the connections.

Use the master key to turn on the car. Here security light go off.

Toyota Hilux Revo AKL Programming — Xhorse tool

Then start the engine.

All working!

This is how we use Xhorse VVDI Key Tool Max and Xhorse VVDI Mini OBD for Toyota Hilux Revo 2017 AKL with Xhorse Toyota 8A adapter.

Complete!Nice work.

Technical support by: Xhorse Store

Wednesday, 25 August 2021

Xhorse BOSH ECU Adapter BMW ISN Reading Review

 Today I want to show the case, Xhorse VVDI Prog with the Xhorse BOSH adapter.

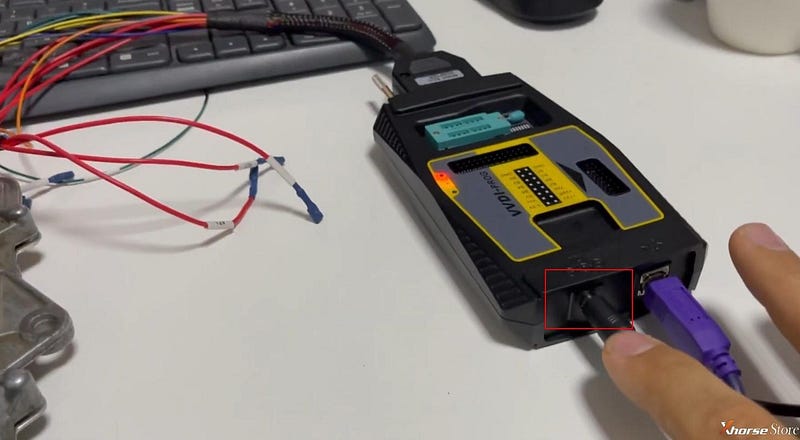
The adapter is quite expensive, many have questions about what it is for and why it’s so expensive. This adapter allows you to connect control modules on bench, Bosch ECU for various vehicles. That adapter is not just some kind of adapter, that is, the conclusions of the wires are a complex device. Each adapter has its own unique serial number, each adapter has its own firmware and there is a microprocessor inside, so it is quite expensive in the program.

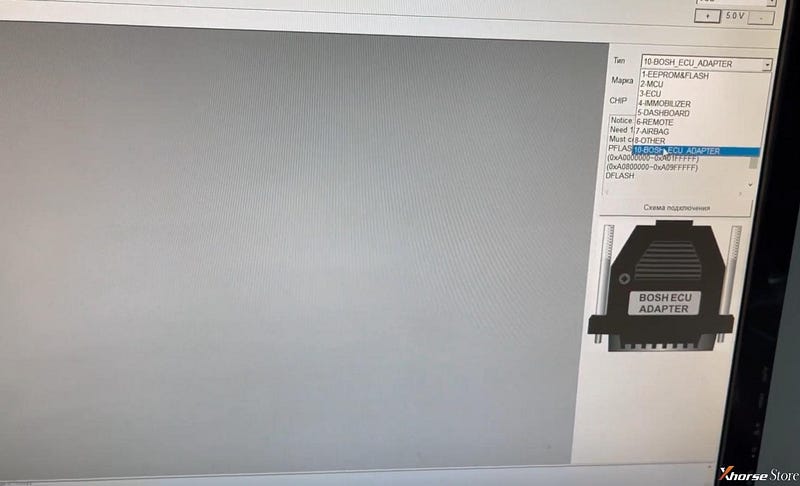
Things are here and the tab for working with this adapter is here.

Xhorse BOSH ECU Adapter

Xhorse BOSH ECU Adapter

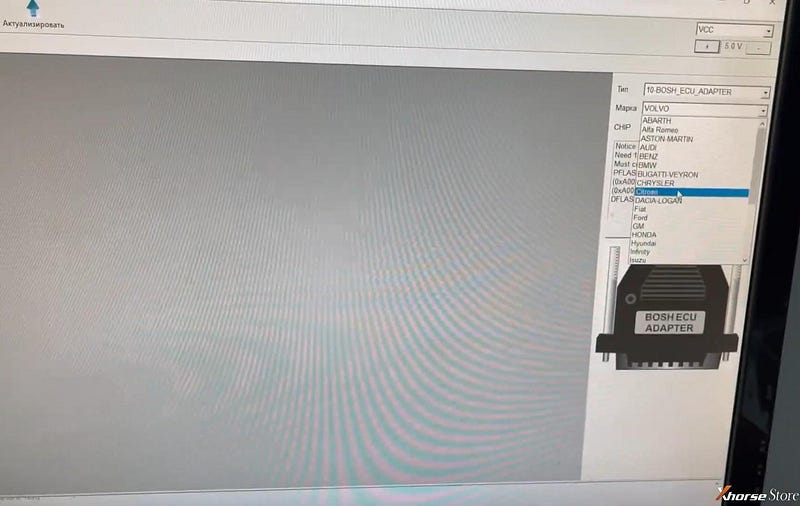
In a separate tenth paragraph is this adapter. The copyrighted car list is constantly expanding. I think that maybe some noticed that before the list was much smaller.

Xhorse BOSH ECU Adapter

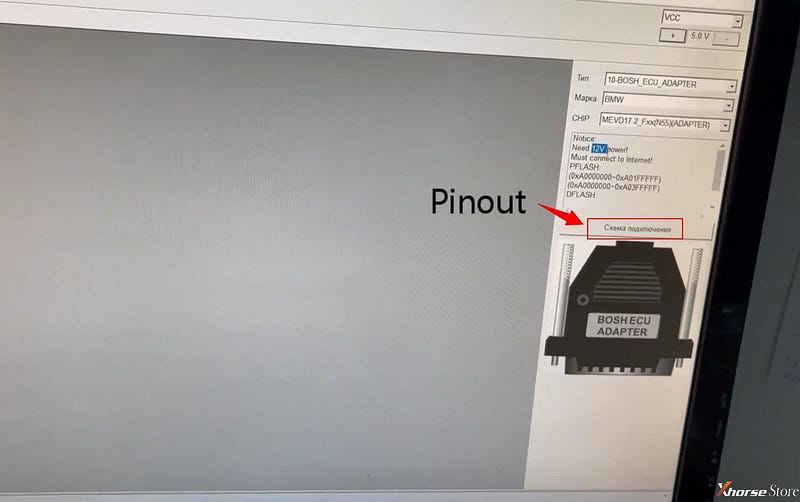
Now there are more and more different control units and today we will try on the BMW control module, N55. Accordingly, here we choose BMW, then select our control module, N55. Here it is a note that you need to connect a 12V power supply and you must have an internet connection.

Xhorse BOSH ECU Adapter


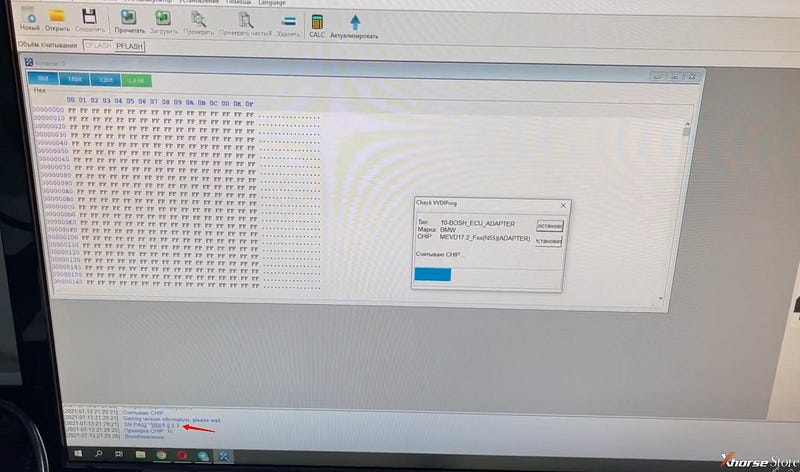
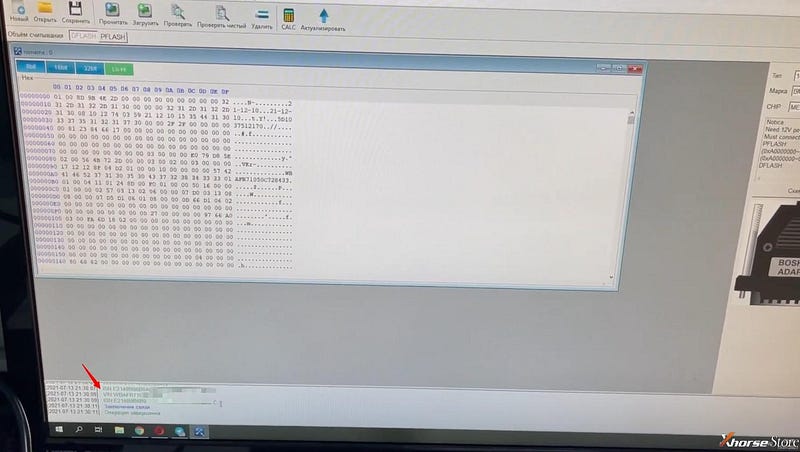
We have it all, therefore we press “Read”. The program checked that there is a 12V power supply, and now the Xhorse BOSH ECU adapter is being checked. Here is the serial number, just the same as the one on the tab of this adapter, and firmware 0 0 3.

Xhorse BOSH ECU Adapter

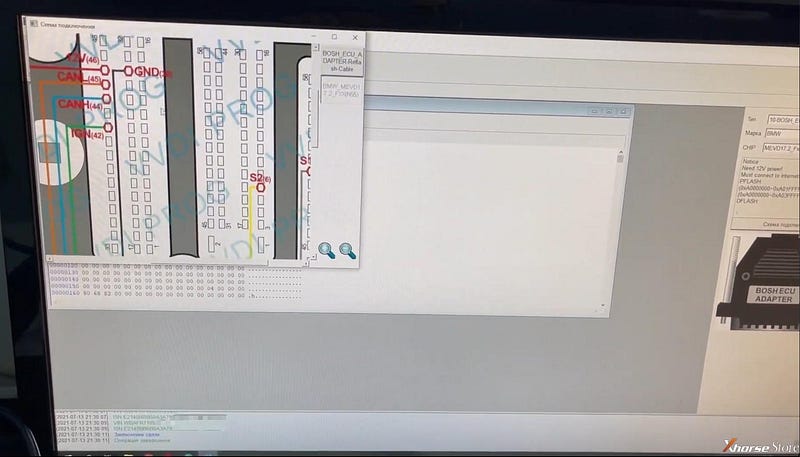
There are still connections with the control unit. I note that the retrieval is not required, that is, I connected everything according to the diagram. The diagram is on the right side of the program, so you don’t need to look for additionally.

Xhorse BOSH ECU Adapter

It all works quickly enough and with this adapter we subtracted wine world and an ISN number and a VIN number.

Xhorse BOSH ECU Adapter

We can use these numbers for, for example, making keys. Accordingly, this will not work without this adapter. So the necessary functions are worth the cost of the adapter. And that’s how I said there is a diagram, here is just a pinout with the adapter. Here you can enlarge it all, watching everything is simple. It’s clear and I connected everything on this.

Xhorse BOSH ECU Adapter

Done!


Technical support by: Xhorse Store UK

Hyundai & Kia Key Tool: Eoneboss HK001 vs. HK002 vs. HK003

  Eoneboss HK001 , HK002 , and HK003 mainly differ in supported smart-key types, key operations, and wired vs. wire-free workflow. HK001 i...