Wednesday, 17 May 2023

How to Clone Ford DPS6 Gearbox with Launch X431 IMMO Tool?

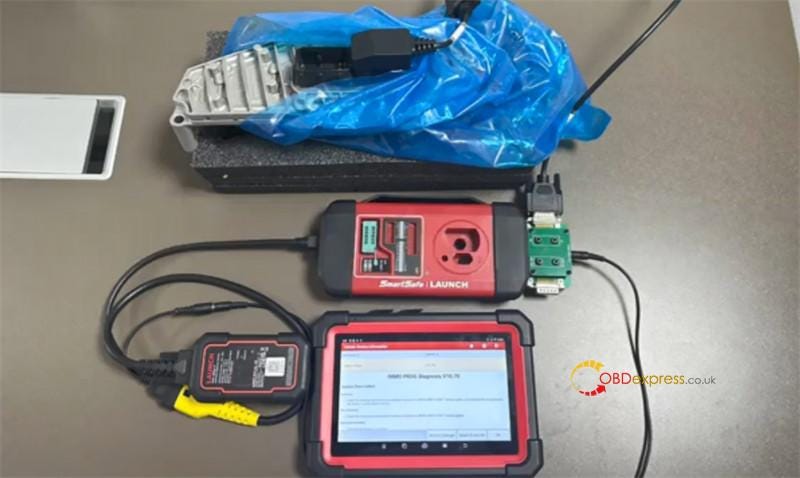
 Both Launch X431 IMMO Elite and X431 IMMO Plus can work with DBSCar VII Connector and X-Prog3 to clone Ford DPS6 gearbox. The main difference between two Immobilizer programming tools is that IMMO Plus supports ECU coding and advanced system diagnosis.

Preparation:

X431 IMMO Elite device (X431 IMMO Elite or X431 IMMO Plus)

DBScar VII VCI Connector

Launch X-PROG 3 immobilizer programmer kit

Other cables and adaptors in device package

Original and new Ford DPS6 gearbox
Launch X431 IMMO Tool Clone Ford DPS6 Gearbox

Main steps:

  • View Wiring Diagram
  • Connect
  • Backup EEPROM Data
  • Backup FLASH Data
  • Restore EEPROM Data
  • Restore FLASH Data
  • Disconnect

Turn on X431 IMMO Tablet and enter IMMO Prog function

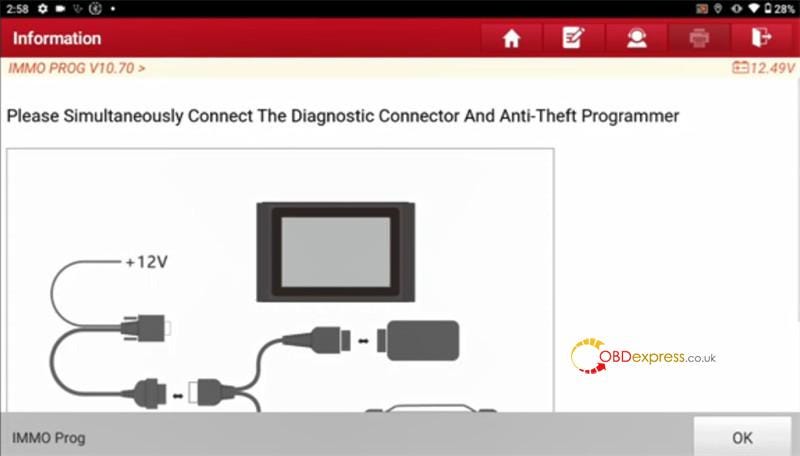
Connect Launch X431 IMMO Plus or IMMO Elite programmer and DBScar VII VCI Connector simultaneously
Launch X431 IMMO Tool Clone Ford DPS6 Gearbox

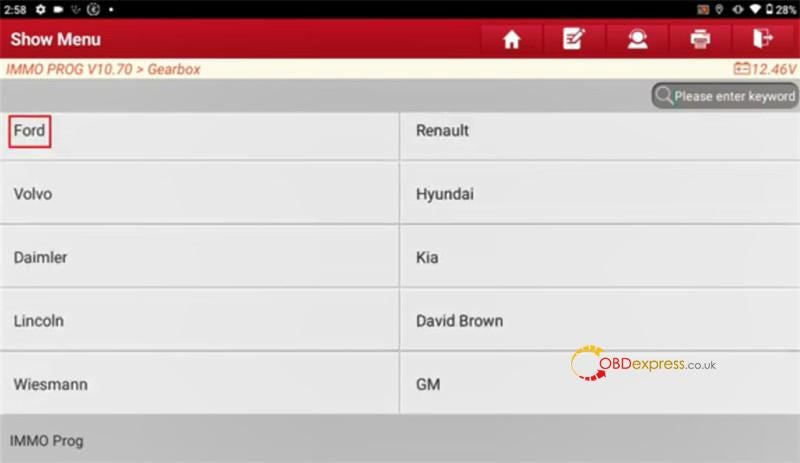
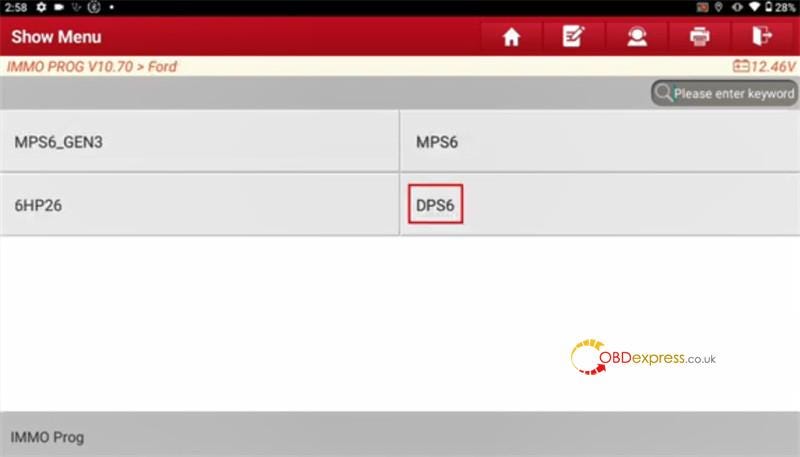
Select Gearbox>> Ford>> DPS6

Launch X431 IMMO Tool Clone Ford DPS6 Gearbox

Launch X431 IMMO Tool Clone Ford DPS6 Gearbox

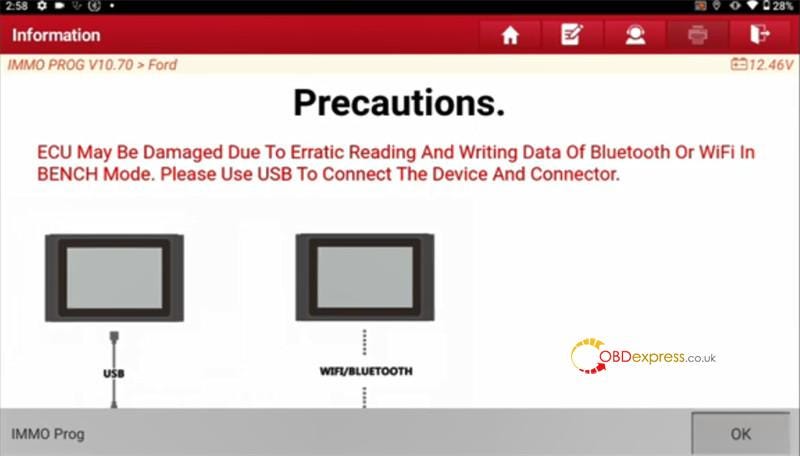
ECU may be damaged due to erratic reading and writing data of Bluetooth or WiFi in bench mode. Please use USB to connect the device and connector.
Launch X431 IMMO Tool Clone Ford DPS6 Gearbox

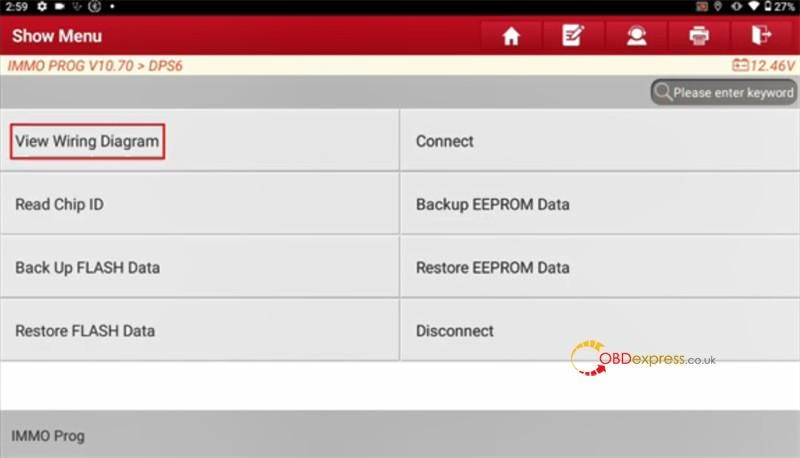
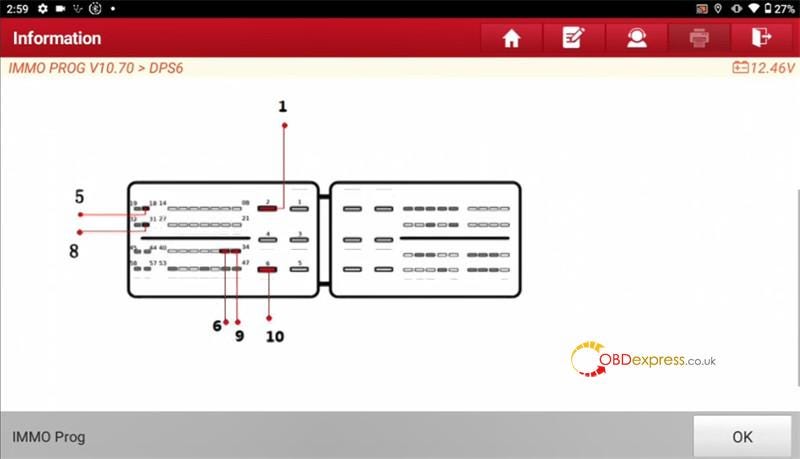
Step 1: View Wiring Diagram

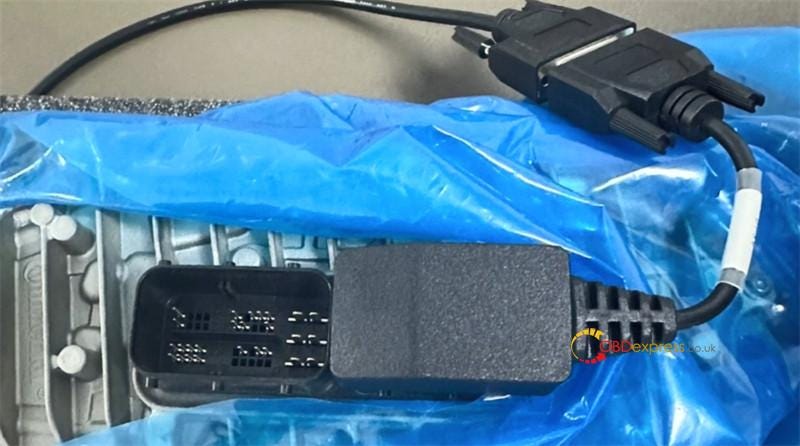
Click "View wiring diagram", and follow the instruction to connect the original gearbox and X431 IMMO Elite/Plus and power the device on.
Launch X431 IMMO Tool Clone Ford DPS6 Gearbox

Launch X431 IMMO Tool Clone Ford DPS6 Gearbox

Launch X431 IMMO Tool Clone Ford DPS6 Gearbox

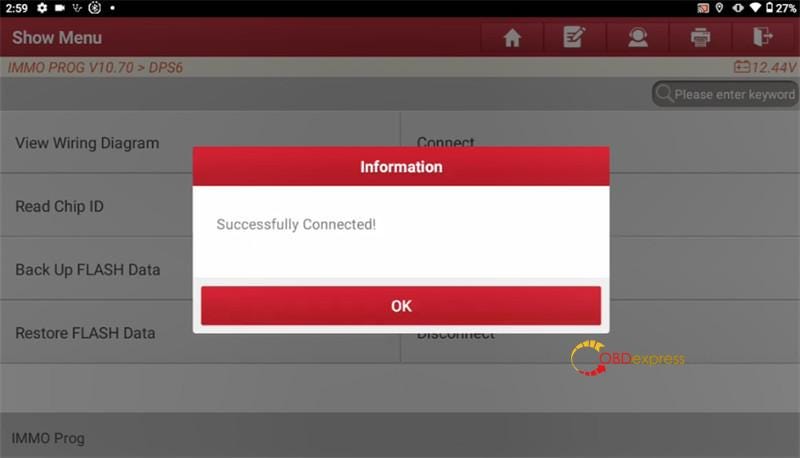
Step 2: Connect

Click "Connect" and wait the connection is successful.
Launch X431 IMMO Tool Clone Ford DPS6 Gearbox

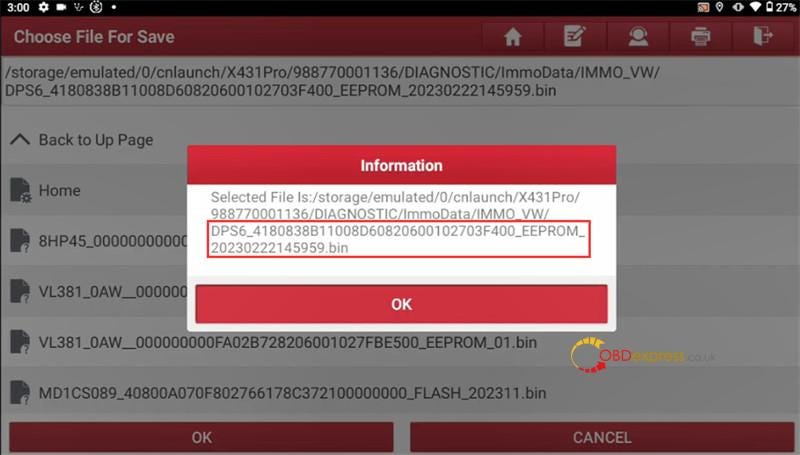
Step 3: Backup EEPROM Data

Click "Backup EEPROM data" to read the original EEPROM data and then save it with a new filename
Launch X431 IMMO Tool Clone Ford DPS6 Gearbox

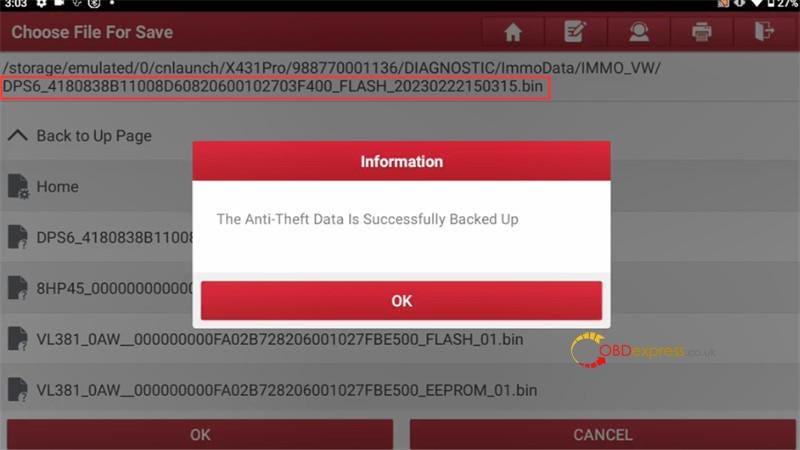
Step 4: Backup FLASH Data

Click "Backup FLASH data" to read the original FLASH data and then save it with a new filename

The anti-theft data is successfully backed up.
Launch X431 IMMO Tool Clone Ford DPS6 Gearbox

Disconnect Launch X431 IMMO device and the original DPS6 gearbox, and connect to new gearbox

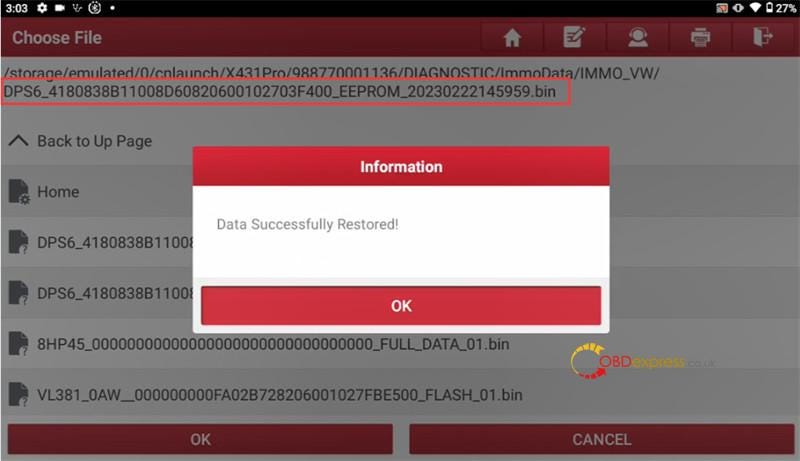
Step 5: Restore EEPROM Data

Click "Restore EEPROM Data" to write the original eeprom data to the new gearbox, restore data successfully.
Launch X431 IMMO Tool Clone Ford DPS6 Gearbox

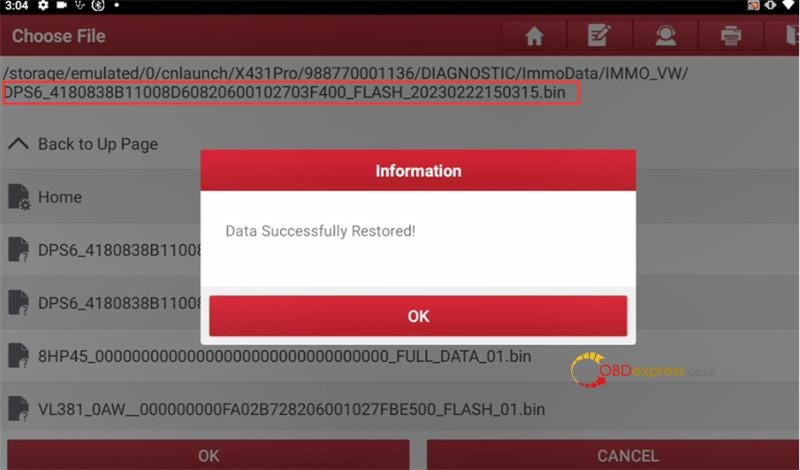
Step 6: Restore FLASH Data

Click "Restore FLASH Data" to write the original flash data to the new gearbox, restore data successfully.
Launch X431 IMMO Tool Clone Ford DPS6 Gearbox

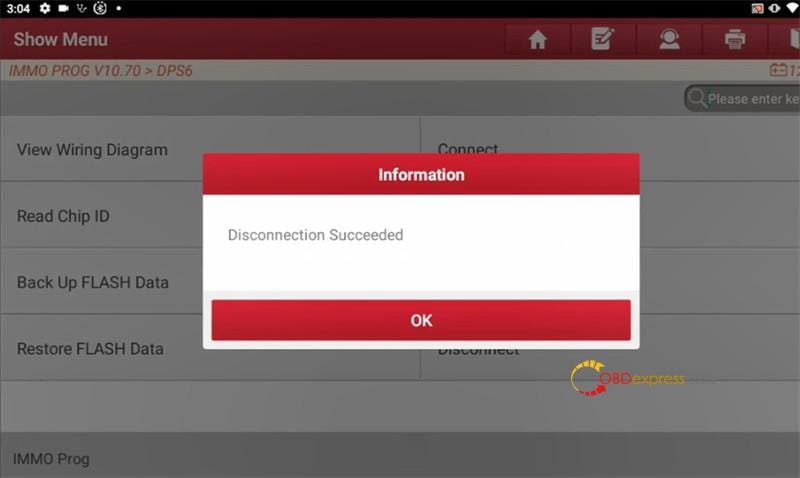
Step 7: Disconnect

After all above procedures are completed, click "Disconnect"
Launch X431 IMMO Tool Clone Ford DPS6 Gearbox

Done!

Read also:

Launch X431 IMMO Elite Manual: Key IMMO & Programming Guide

Launch X431 IMMO Elite Clone VW/Audi MQB DQ200(0AM)

Launch X431 IMMO Elite Program VW 4th All Keys Lost

Launch X431 IMMO Elite FAQ

Launch X431 IMMO Elite User Guide: Register, Update and Retrieve Login Password

2018-2023 Maserati Ghibli Oil Light Reset by Obdstar X200 Pro2

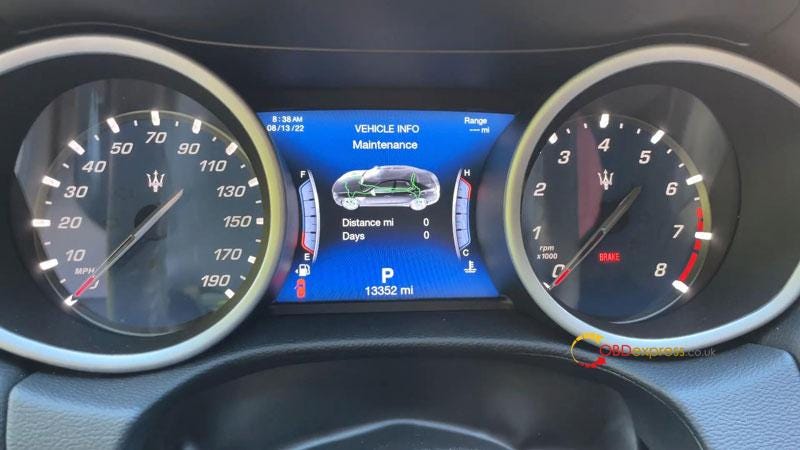
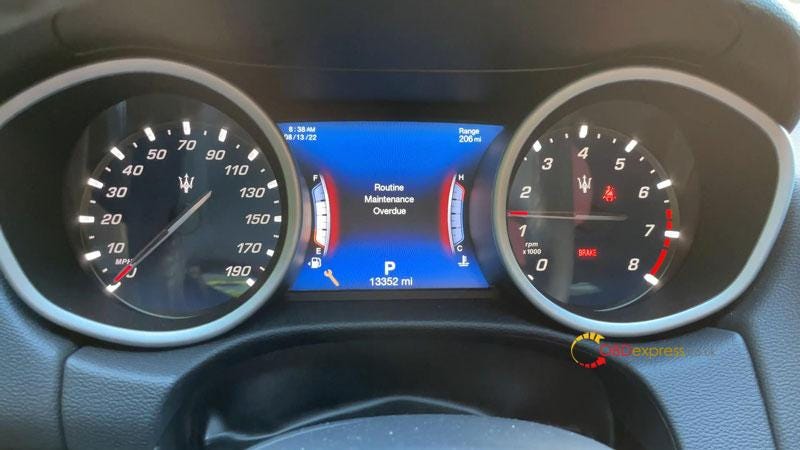
 Today I'm going to show how to reset the oil service light on 2018–2023 Maserati Ghibli. You may notice my maintenance is 0 days left & 0 miles, which means I need to reset the light now. Also, you'll find the screen shows "Routine Maintenance Overdue". To reset this light, I will need a tool — Obdstar X200 Pro2.

2018–2023 Maserati Ghibli Oil Light Reset by Obdstar X200 Pro2

2018–2023 Maserati Ghibli Oil Light Reset by Obdstar X200 Pro2

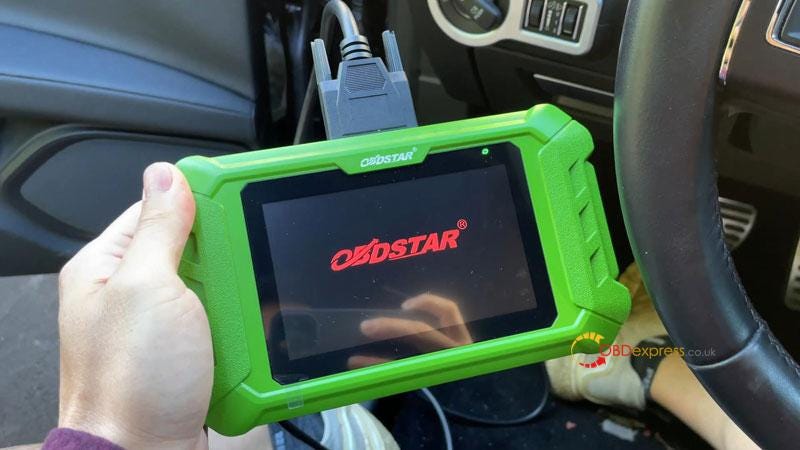
Plug the Obdstar connector into OBD.

Once that's plugged in the OBD, the Obdstar device will turn on. If it doesn't turn on, press the power button.

Turn ignition on without putting your foot on the brake.

Make sure Obdstar Oil Reset Tool is connected to the Internet.

2018–2023 Maserati Ghibli Oil Light Reset by Obdstar X200 Pro2

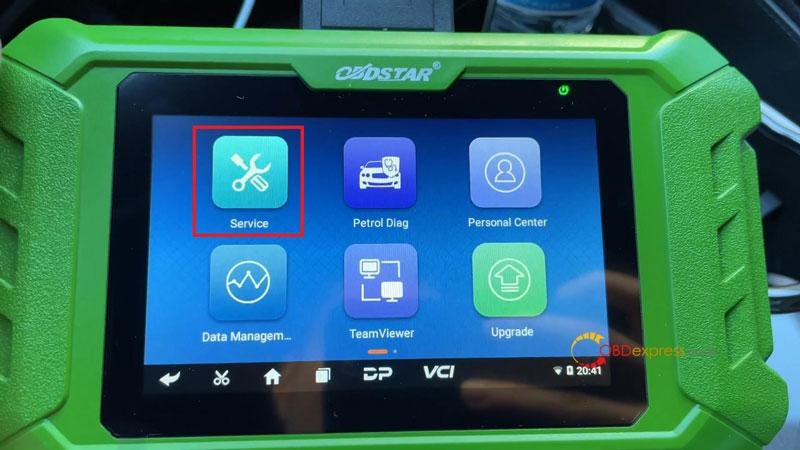
* If you don't see "Service" app, connect to Internet & upgrade.

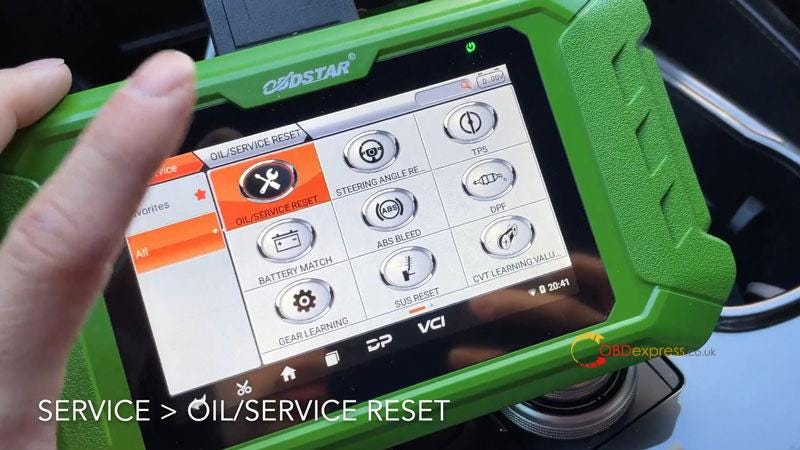
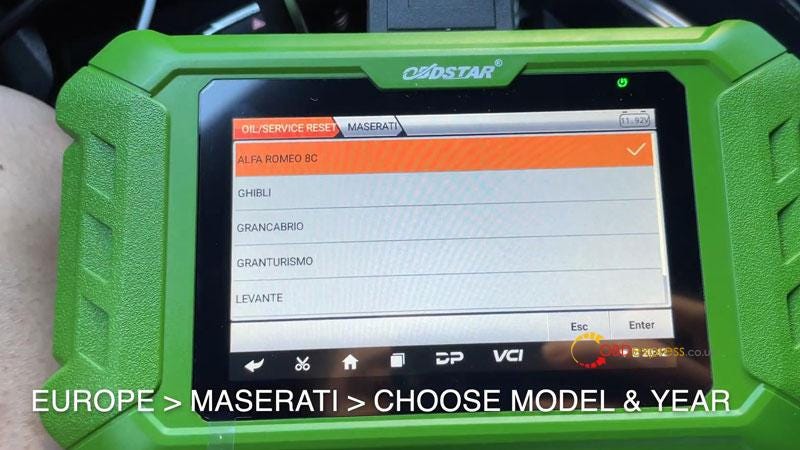
Service >> Oil/ Service Reset >> Latest Version >> Europe >> Maserati >> Ghibli >> 2018–2020 >> IPC

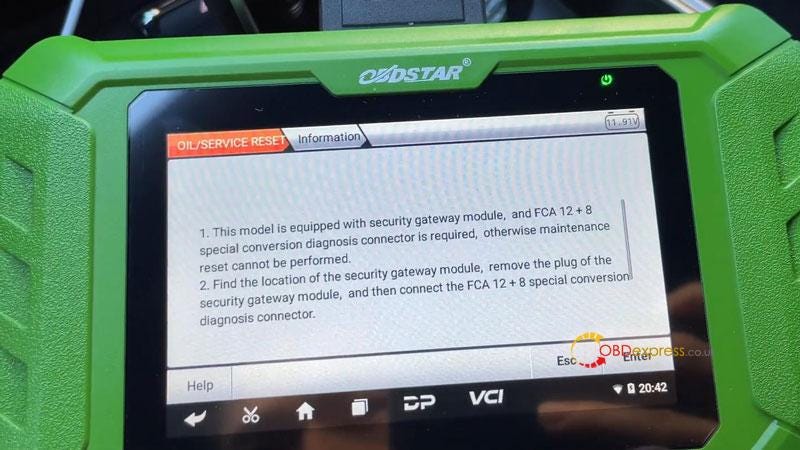
  • This model is equipped with security gateway module, and FCA 12+8 Special Conversion Diagnosis Connector is required. Otherwise maintenance reset cannot be performed.
  • Find the location of the security gateway module, remove the plug of the security gateway module, and then connect the FCA 12+8 special conversion diagnosis connector.
    1. 2018–2023 Maserati Ghibli Oil Light Reset by Obdstar X200 Pro2

      2018–2023 Maserati Ghibli Oil Light Reset by Obdstar X200 Pro2

      2018–2023 Maserati Ghibli Oil Light Reset by Obdstar X200 Pro2

      2018–2023 Maserati Ghibli Oil Light Reset by Obdstar X200 Pro2

      Please switch on the ignition, and switch off the engine!

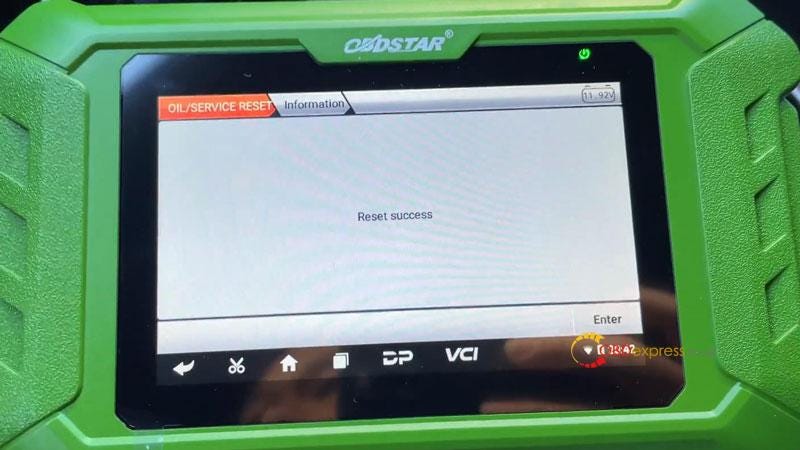
      Reset success.

      Go ahead to start the car.

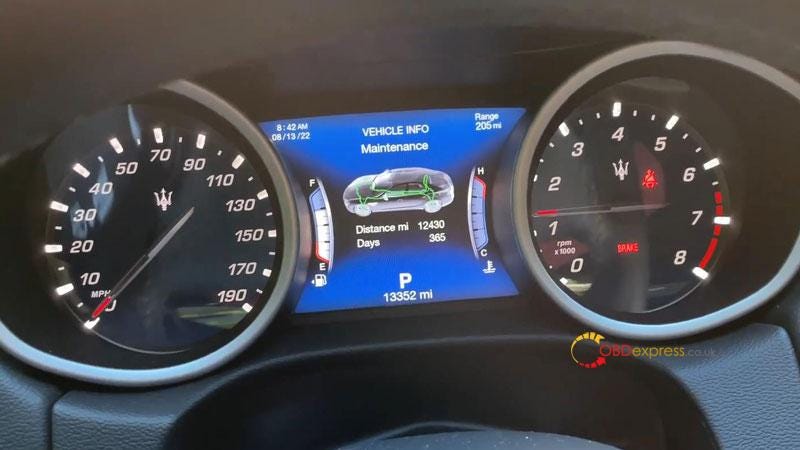
      The service warning has gone. And the days and distance were changed.

      Perfect done.

      2018–2023 Maserati Ghibli Oil Light Reset by Obdstar X200 Pro2

      2018–2023 Maserati Ghibli Oil Light Reset by Obdstar X200 Pro2

      2018–2023 Maserati Ghibli Oil Light Reset by Obdstar X200 Pro2

      www.obdexpress.co.uk

      Thursday, 11 May 2023

      How to Solder/ Desolder 2018+ JLR KVM with Yanhua JLR KVM Soldering Toolkit?

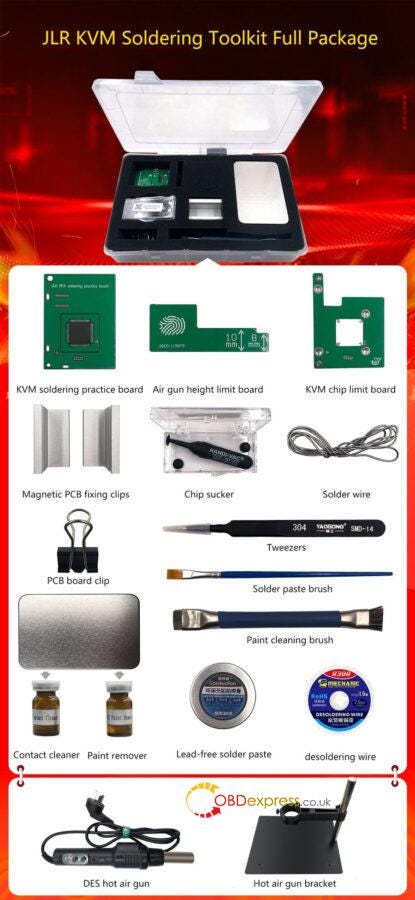
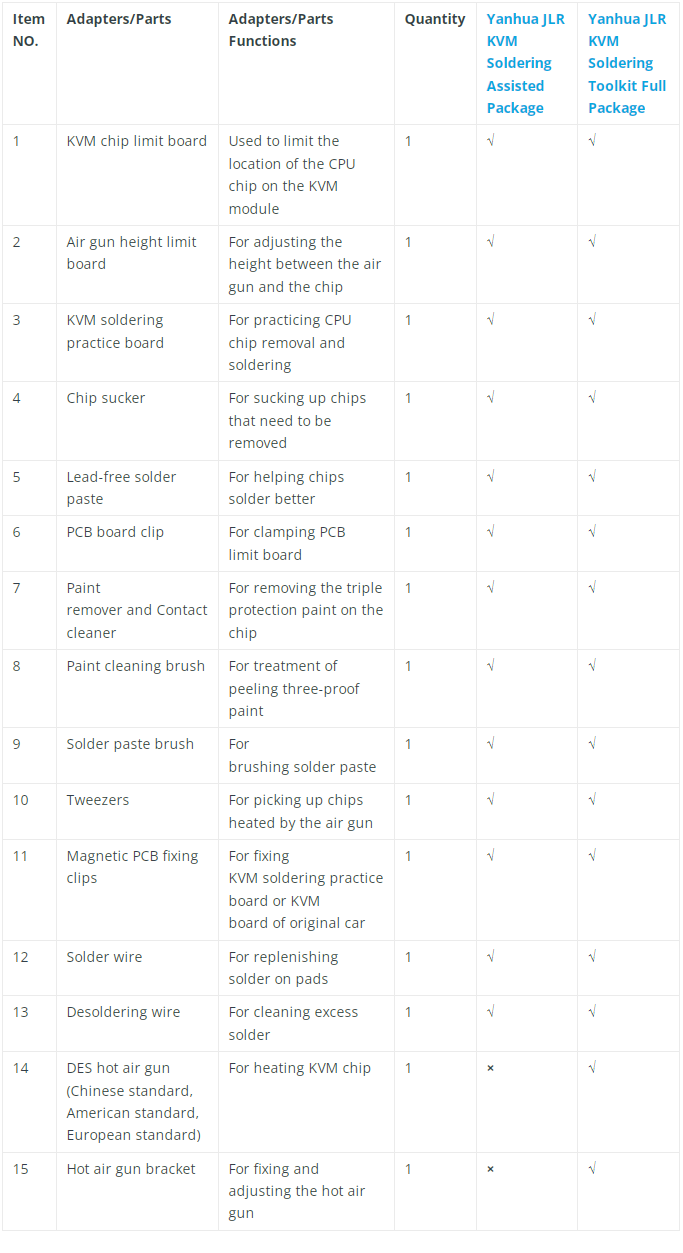
       Yanhua JLR KVM Soldering Toolkit is specially designed for customers to solder and desolder 2018+ Jaguar Land Rover KVM (RFA module) MCU processor chips easier and faster. There are two kinds of toolkits available at obdexpress.co.uk. The main difference is the full package has DES hot air gun and Hot air gun bracket. You can choose any one according to your own need.

      Solder or Desolder 2018+ JLR KVM with Yanhua JLR KVM Soldering Toolkit


      Yanhua JLR KVM Soldering Toolkit Comparison Table:


      Solder or Desolder 2018+ JLR KVM with Yanhua JLR KVM Soldering Toolkit


      As the JLR KVM Soldering Toolkit Full Package has more tools, the price is more expensive. It's 333 euro with 15 items, and another package is 210 euro with 13 items.

      How to use Yanhua JLR KVM Soldering Toolkit to desolder/solder 2018+ JLR KVM?

      Toolkits used: Yanhua JLR KVM Soldering Toolkit Full Package

      1.Remove 2018+ JLR KVM chip

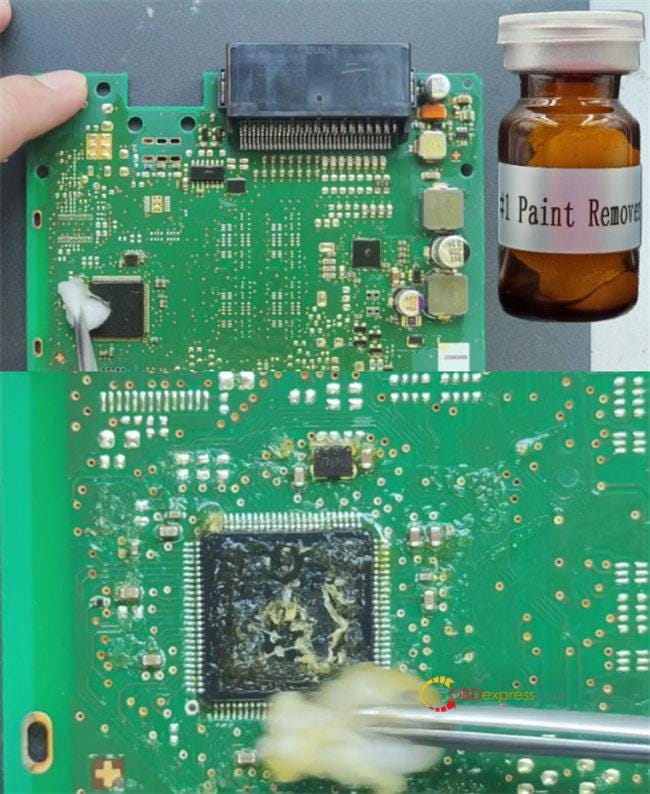
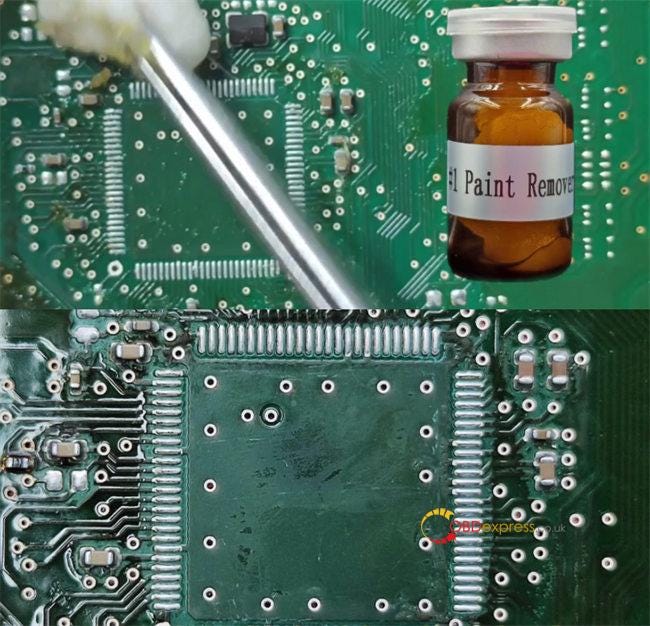
      Apply Yanhua paint remover to the top of the chip and the pins

      After 30 seconds, you will see the protective paint start to peel off

      Apply the paint remover to the pin area

      After about 90s, you can start cleaning the chip with cotton.


      Solder or Desolder 2018+ JLR KVM with Yanhua JLR KVM Soldering Toolkit


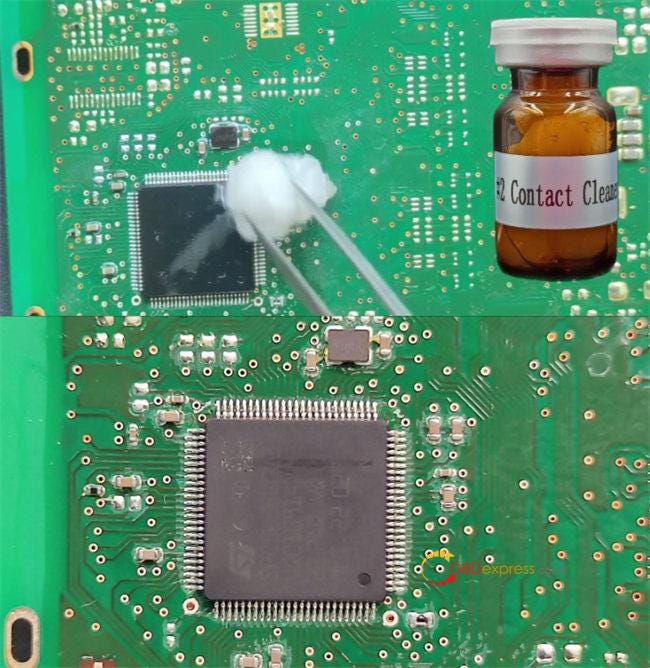
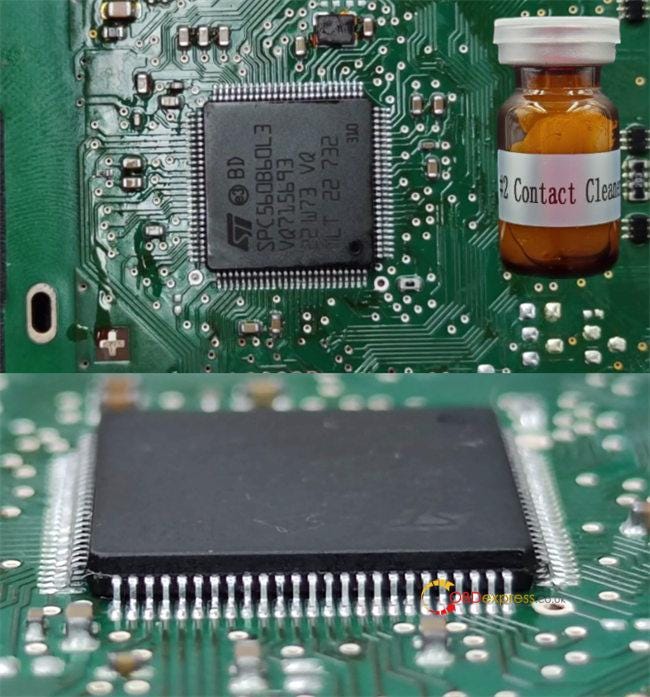
      Then clean the board with the Contact cleaner to avoid corrosion of the board by paint remover
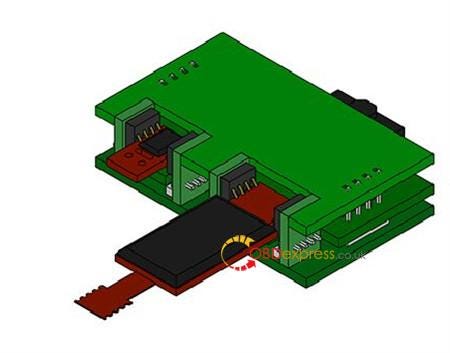
      This is the effect after paint removal and cleaning.


      Solder or Desolder 2018+ JLR KVM with Yanhua JLR KVM Soldering Toolkit


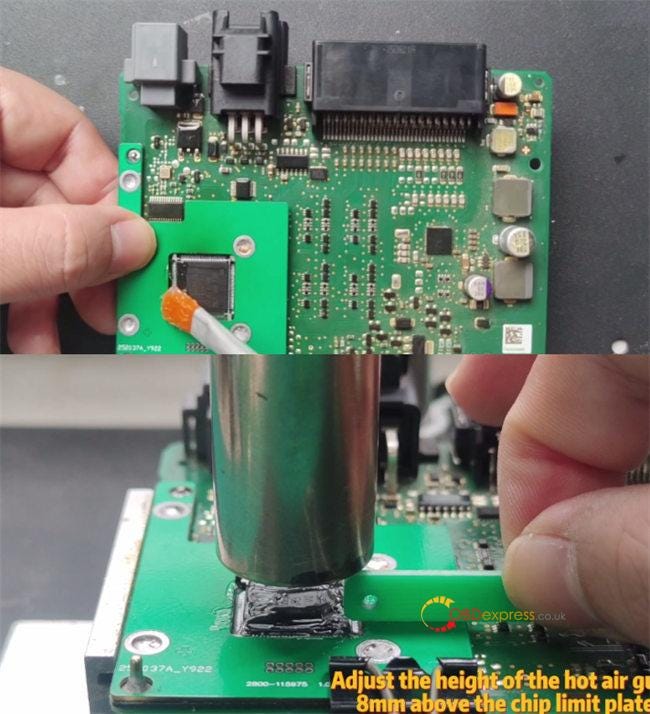
      Install the KVM chip limit board

      Apply Solder paste to the chip pins

      Use the temperature and the airflow adjustable Hot air gun to desolder chip

      Use PCB board clip to secure the chip limit plate

      Use the Air gun height limit board to adjust the of height of the hot air gun, 8m above the chip limit board


      Solder or Desolder 2018+ JLR KVM with Yanhua JLR KVM Soldering Toolkit


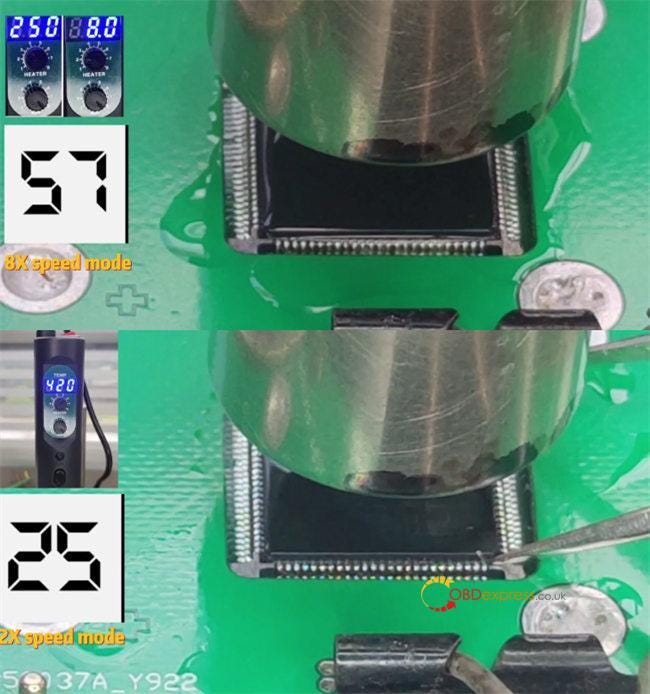
      Adjust the air volume to 8 gear

      Adjust the preheating temperature to 250℃

      Start the Hot air gun, keep the temperature at 250℃, preheat for 90 seconds

      After 90 seconds, raise the temperature to 420℃, and heat for 25 seconds


      Solder or Desolder 2018+ JLR KVM with Yanhua JLR KVM Soldering Toolkit


      At this point, use Tweezers to hold one corner of the chip. When the chip is loose, and clip up the chip.

      About 25 seconds, the chip is close, remove the Air gun and clip up the chip.

      Clean the bottom and pins of the chip with Yanhua paint remover

      Then clean the board with the Contact cleaner to avoid corrosion of the board by paint remover

      There is the original plate solder on the pad, please check whether there is short circuit between the board.


      Solder or Desolder 2018+ JLR KVM with Yanhua JLR KVM Soldering Toolkit


      Video guide:

      https://youtu.be/AjZyT21saWg

      2.Solder 2018+ JLR KVM chip

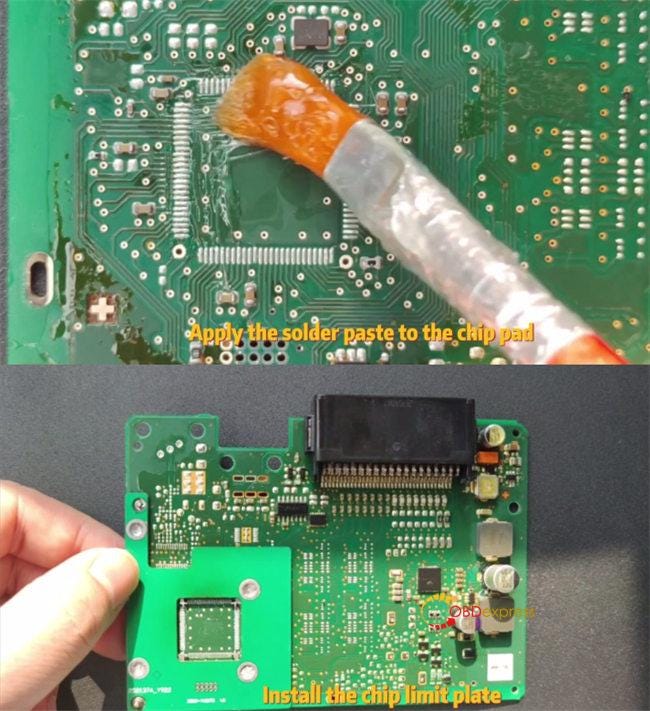
      Apply the Solder paste to the chip pad

      Install the KVM chip limit board


      Solder or Desolder 2018+ JLR KVM with Yanhua JLR KVM Soldering Toolkit


      Use Clamp to secure the chip limit plate

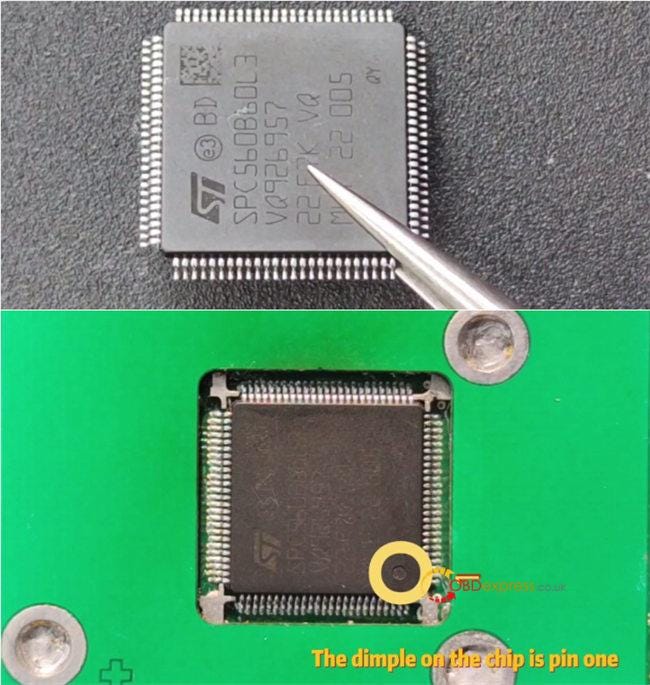
      Use Yanhua proprietary chips, Yanhua has added solder for the chip pin before delivery

      Gently place the chip into the Chip limit plate

      Please note the chip pin direction

      The dimple on the chip is pin1


      Solder or Desolder 2018+ JLR KVM with Yanhua JLR KVM Soldering Toolkit


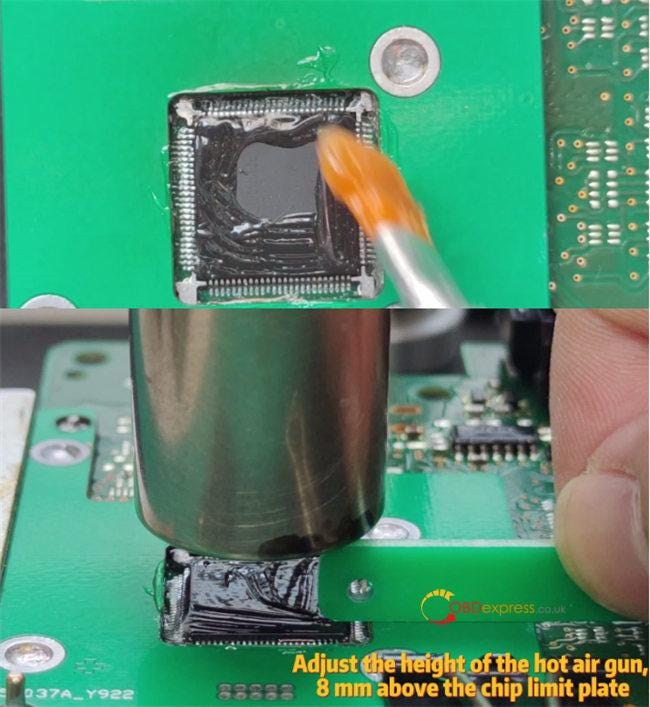
      Apply Solder paste to the chip pins and the top of the chip

      Check that the chips are placed correctly

      Use the temperature and the air volume adjustable Hot air gun to below and solder chip

      Use the Air gun height limit board to adjust the of height of the hot air gun, 8m above the chip limit plate


      Solder or Desolder 2018+ JLR KVM with Yanhua JLR KVM Soldering Toolkit


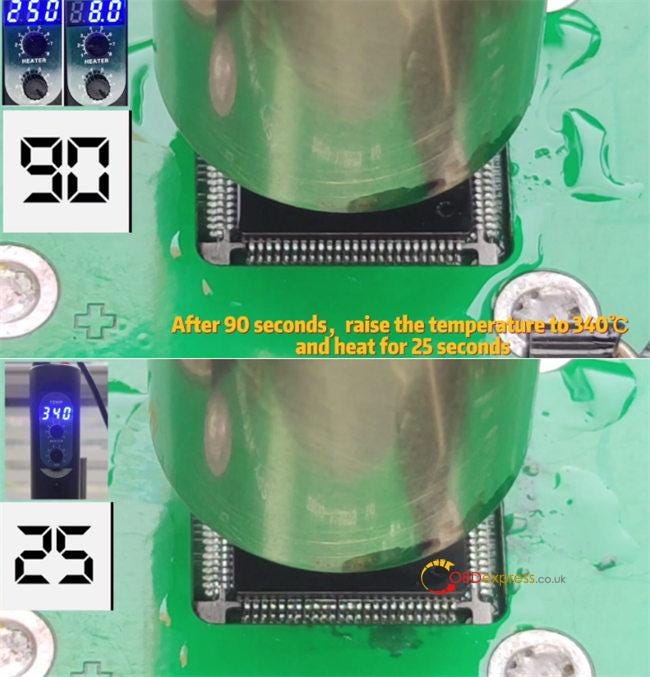
      Adjust the air volume to 8 gear

      Adjust the preheating temperature to 250℃°

      Start the hot air gun, keep the temperature at 250℃, preheat for 90 seconds

      After 90 seconds, raise the temperature to 340℃, and heat for 25 seconds


      Solder or Desolder 2018+ JLR KVM with Yanhua JLR KVM Soldering Toolkit


      About 25 seconds, please shut down and remove the air gun

      Use the Contact cleaner to clean the solder paste on the chip

      This is final result after welding and cleaning.


      Solder or Desolder 2018+ JLR KVM with Yanhua JLR KVM Soldering Toolkit


      Video guide:

      https://youtu.be/5_QH4CojmTQ

      Yanhua JLR KVM Soldering Assisted Package without DES hot air gun and bracket (€210 + free shipping):

      https://www.obdexpress.co.uk/wholesale/yanhua-jlr-kvm-soldering-assisted-package.html

      Yanhua JLR KVM Soldering Toolkit Full Package with DES hot air gun and bracket (€333 + free shipping):

      https://www.obdexpress.co.uk/wholesale/yanhua-jlr-kvm-soldering-toolkit-full-package.html

      www.obdexpress.co.uk


      XTOOL D8 Mercedes C Class W204 Mileage Correction in 35s

       XTOOL D8 Scan Tool is able to do Mercedes-Benz C class mileage correction in 35 seconds by OBD. This vehicle had only done 80,000 miles but the cluster had died. So I bought a new cluster to do mileage adjustment with the tool. Following I'm gonna show how to do.

      XTOOL D8 Mercedes C Class W204 Mileage Correction

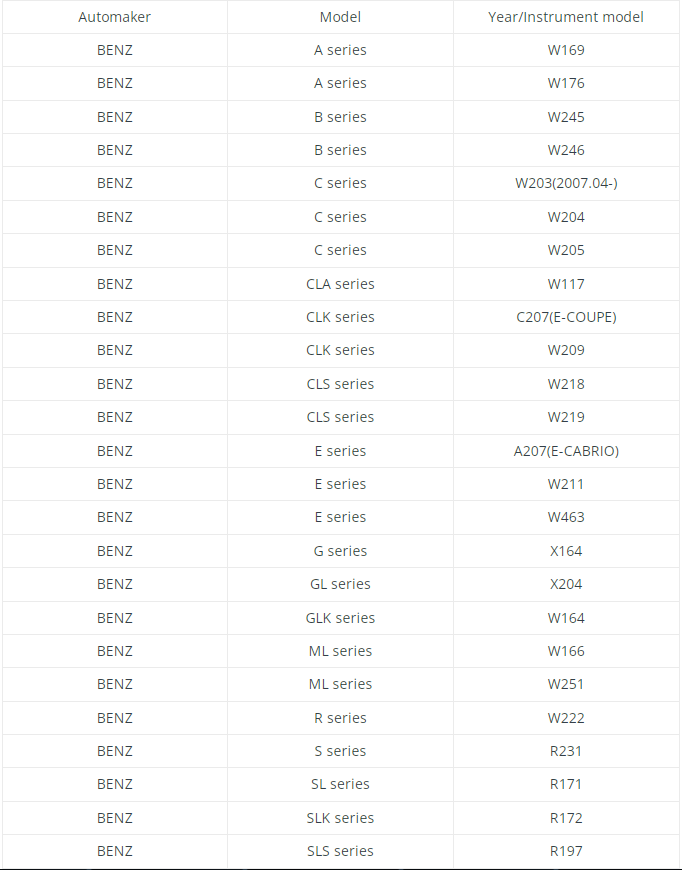
      Xtool D8 Mercedes-Benz Odometer Correction List

      XTOOL D8 Mercedes C Class W204 Mileage Correction

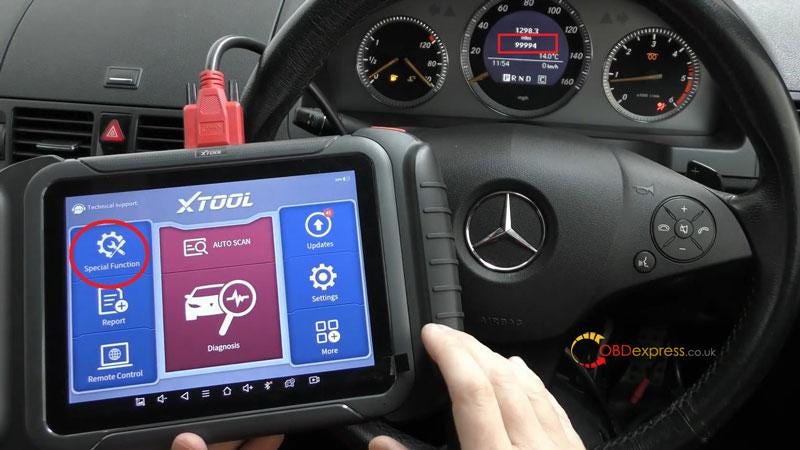
      Plug XTOOL D8 diagnostic cable into OBD,

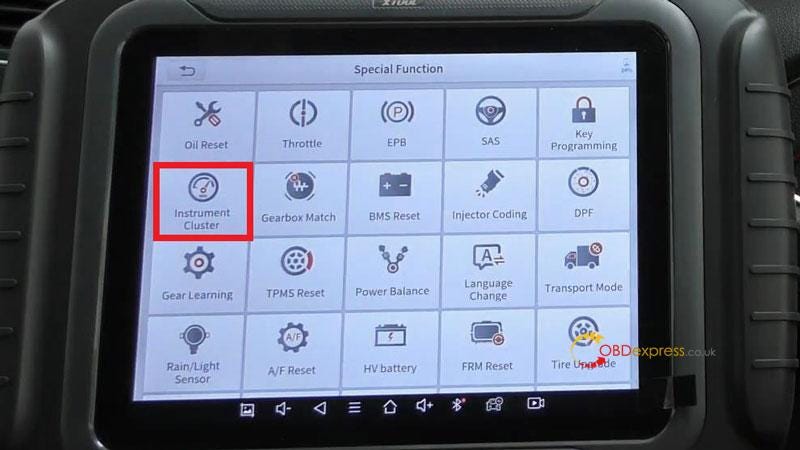
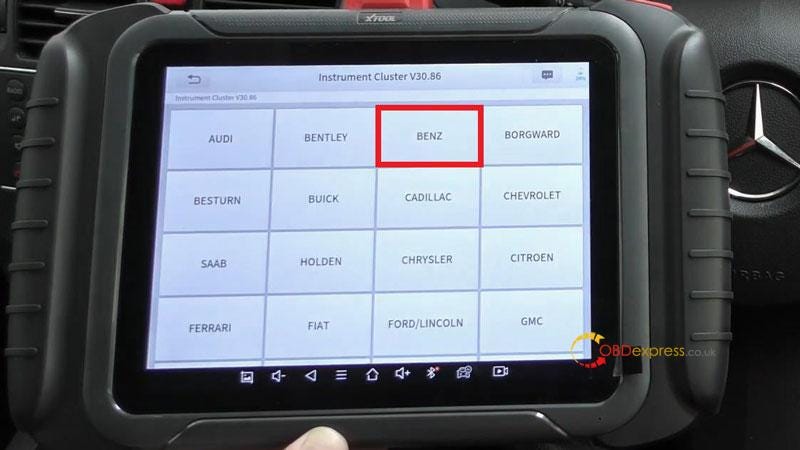
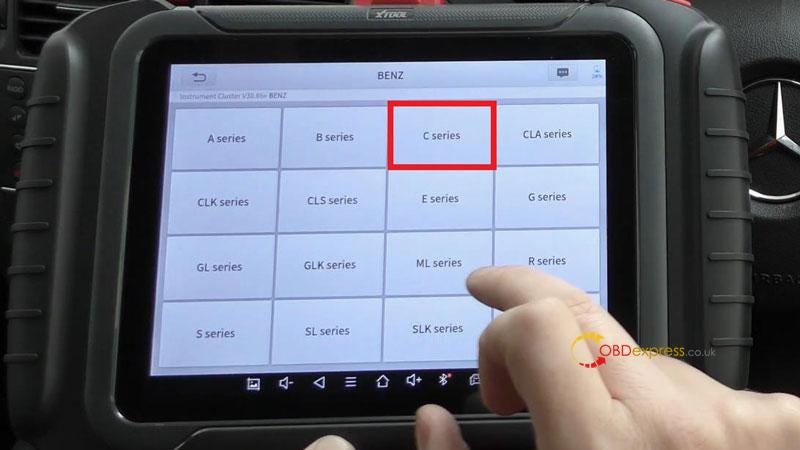
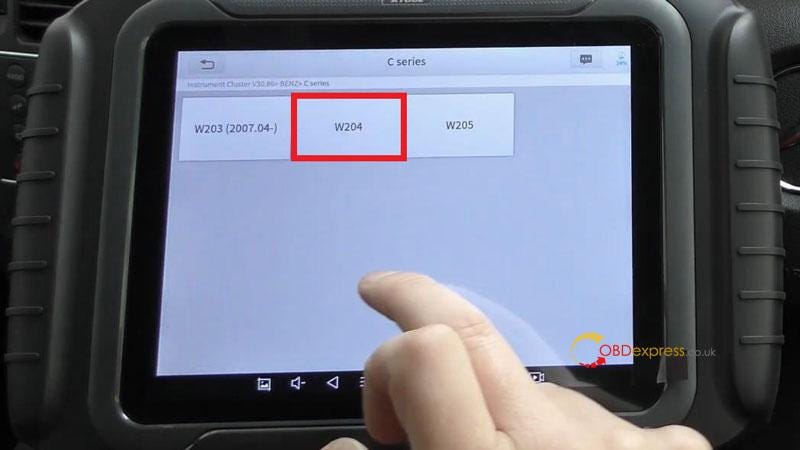
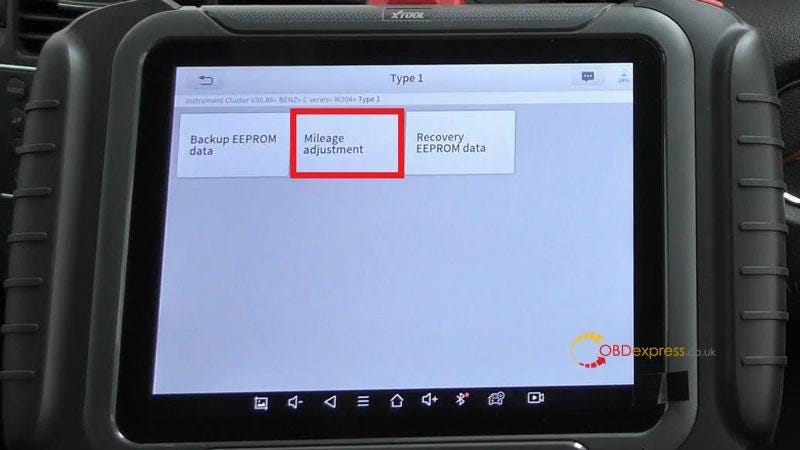
      Special function >> Instrument Cluster >> Accept >> Instrument Cluster >> Benz >> C series >> W204 >> Type 1

      Please switch ignition on, but don't start the engine.

      Warning: Please increase mileage cautiously, a filter will be required to reduce it!

      OK >> Mileage adjustment

      XTOOL D8 Mercedes C Class W204 Mileage Correction

      XTOOL D8 Mercedes C Class W204 Mileage Correction

      XTOOL D8 Mercedes C Class W204 Mileage Correction

      XTOOL D8 Mercedes C Class W204 Mileage Correction

      XTOOL D8 Mercedes C Class W204 Mileage Correction

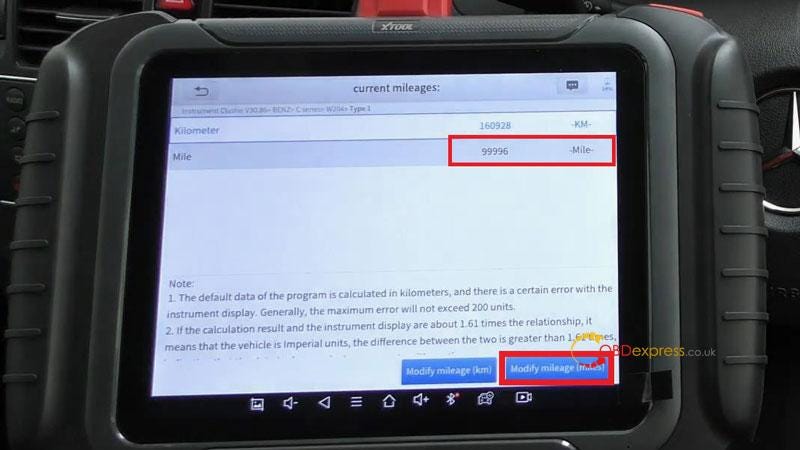
      The mileage is currently showing 99,996 miles on the tool, but it says 99,994 on the board. So there's a little discrepancy, but never mind, let's go ahead.

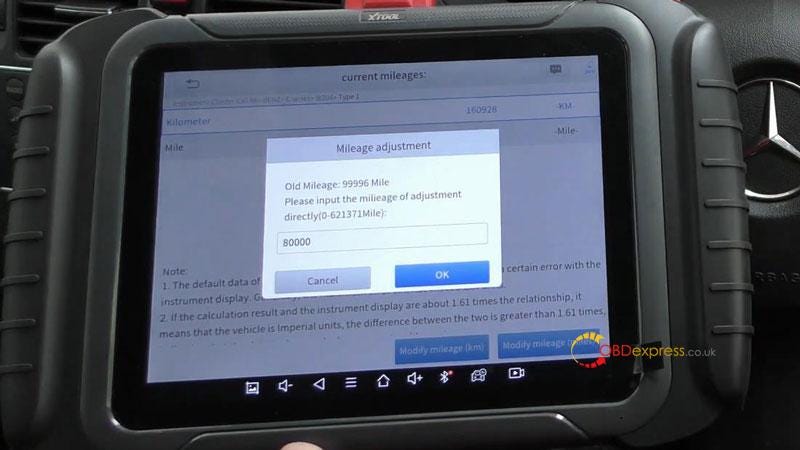
      Modify mileage(miles) >> Input the new mileage of adjustment: 80,000 miles

      If we go modify in miles to 80,000 miles, it might come out a little bit short like 79,998 or 79,999. Click "Yes" to confirm.

      XTOOL D8 Mercedes C Class W204 Mileage Correction

      XTOOL D8 Mercedes C Class W204 Mileage Correction

      Just wait for communicating…

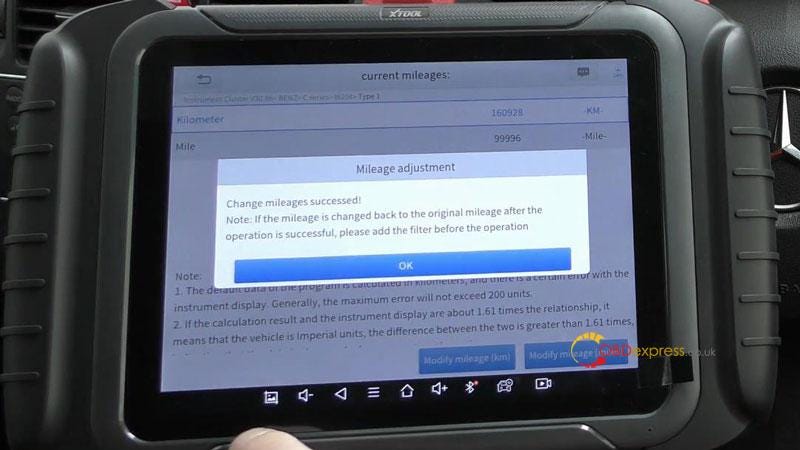
      Change mileage successed!

      Note: If the mileage is changed back to the original mileage after the operation is successful, please add the filter before the operation.

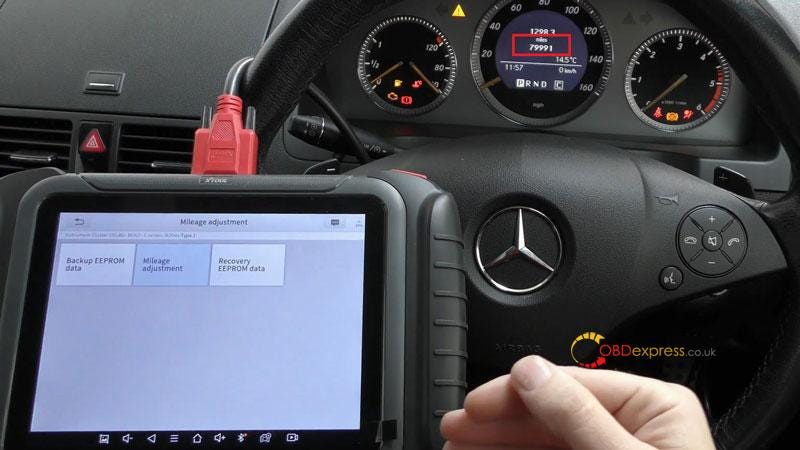
      As we can see, the mileage on dashboard now has changed to be 79,991 mileages. It's a little short but does not matter. You could also play around with it a few times until you got the exact mileage.

      XTOOL D8 Mercedes C Class W204 Mileage Correction

      XTOOL D8 Mercedes C Class W204 Mileage Correction

      www.obdexpress.co.uk

      How to Install YH35XX Chip Clip for 35128WT Read and Write?

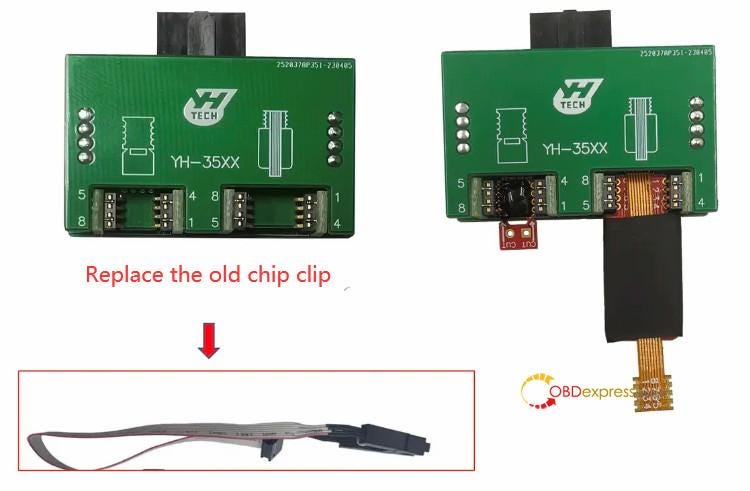
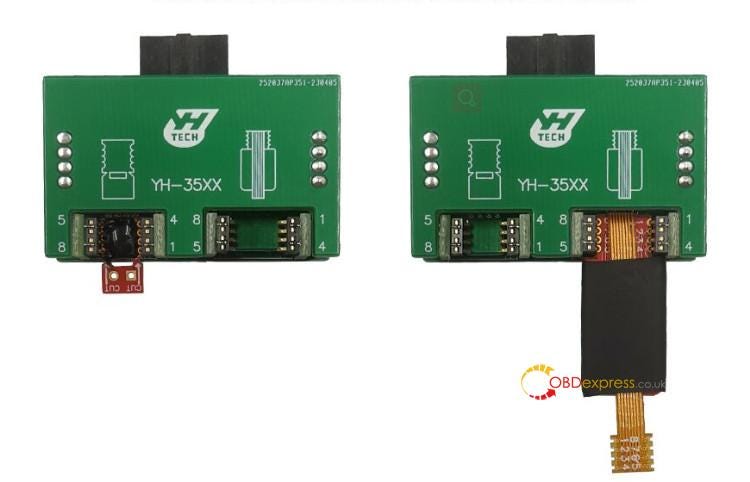
       Yanhua YH35XX Programmer & Simulator for 35128WT Read and Write has been upgraded. The programmer is the same, and the old chip clip is replaced by the new YH35XX chip clip. The prices are the same, but it's easier and more stable to install the chip, and faster to read the chip as well.

      Install YH35XX Chip Clip for 35128WT Read and Write

      Simple guide to install YH35XX Chip Clip:

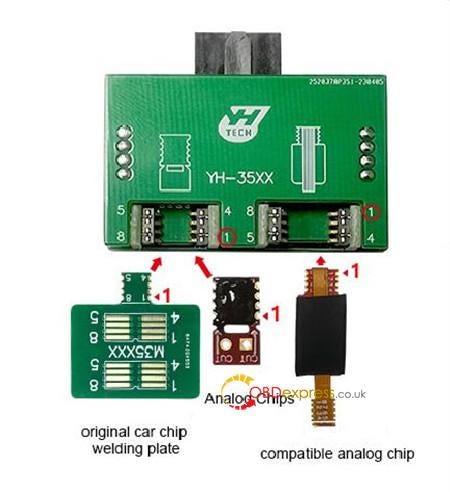
      Step 1: Confirm the position and pin definition of the original car chip welding plate, analog chip, compatible analog chip and YH35XX chip clip before installation

      Install YH35XX Chip Clip for 35128WT Read and Write

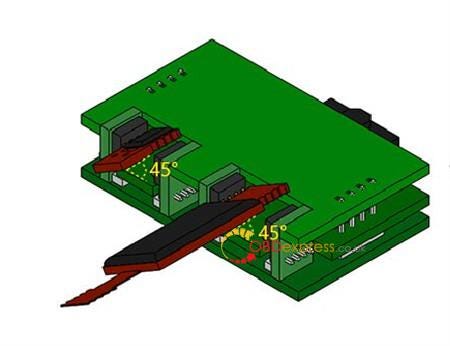
      Step 2: Title the original car chip welding plate, analog chip or compatible analog chip at an angle of 45°and install it into the corresponding YH35XX chip clip from top to bottom

      Install YH35XX Chip Clip for 35128WT Read and Write

      Step 3: Confirm that the original car chip welding plate, analog chip or compatible analog chip is firmly installed

      Install YH35XX Chip Clip for 35128WT Read and Write

      Here is the overall installation effect.

      Install YH35XX Chip Clip for 35128WT Read and Write

      How to read and write 35128WT with YH35XX Chip Clip?

      It covers F classis odometer with 35128WT EEPROM, and G classis VDO odometer.

      The operation guide is easy. No risk! No red dot on odometer.

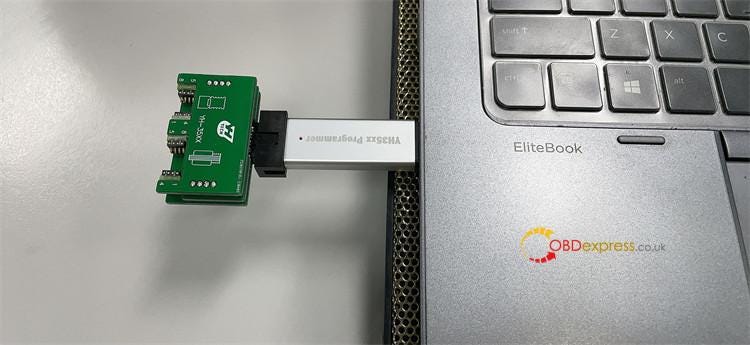
      Connect the YH35XX Chip Clip and YH35XX programmer, and connect into the computer

      Install YH35XX Chip Clip for 35128WT Read and Write

      Then the independent software inside can be run directly

      For more details, please refer to YH35XX programmer + Simulator User manual.

      If you are interested in new upgrade Yanhua YH35XX Programmer + Simulator, don't hesitate to order one.

      https://www.obdexpress.co.uk/wholesale/yanhua-yh35xx-programmer-simulator-35128wt.html

      EoneBoss HK003: 6A Full Unlock Support for Hyundai/Kia Keys

       The EoneBoss HK003 has been upgraded with 6A full unlock support for Hyundai/Kia smart keys , giving locksmiths a simpler way to handle ...