Tuesday, 27 March 2018

How to keep GM GDS2 - NEVER expires


Found a way to keep GM GDS2 for longer than 30 days after downloading it.

So I found a way to keep GDS2 indefinitely…or as long as you own your computer. First of all I’m not sure if this works for the 3 day subscription but I don’t see why not. So after you download GDS2 in Tis2web, to keep the license going there is a program(free) called ‘runasdate’, there is a 64 bit version and a 32 bit version. Use the 32 bit version. If you need help setting it up I can screen shot how I set mine up, although it’s incredibly easy. Enjoy and thanks and rep would be appreciated if you found this useful
P.S. Don’t let this leak to GM so they don’t close this loophole. Also, ignore the 30 days countdown in GDS2 once you set it up, it’ll count all the way down to 0 days but still work beyond that!

Easy way from obdexpress.co.uk:
You can change the time of your GDS2 installation and it will continue to work

Look here: GDS2 works perfect
GDS2 works perfect 1

GDS2 works perfect 2

GDS2 works perfect 3

GDS2 works perfect 4

GDS2 works perfect 5

GDS2 works perfect 6

GDS2 works perfect 7

GDS2 works perfect 9

 GDS2 works perfect 10

GDS2 works perfect 11

GDS2 works perfect 12

GDS2 works perfect 13

 GDS2 works perfect 14


www.mbstartool.com

Sunday, 25 March 2018

VXDIAG NANO VCX GM on GDS2, Tech2Win, TIS200: Good & Bad

I’d like to chip in with some words of VXDIAG VCX NANO GM model- the good, the bad and the ugly.
First off, its the 2014 vets and later that will use the GDS 2 software.
On the 2013 and older vets, they use the Tech II, and TIS2000 software instead.
So being that this the C6 forum, lets just focus on the C6 corvette and the GM VXDIAG VCX NANO.
Out the gate the VXDIAG VCX NANO is a cloned copy of the MDI to a degree (not the much faster MDI 2). This means that as it using Tech2 win emulator software to work with the MDI software since the MDI software does not pick the NANO up natively instead.
Now the bad,
As for the only thing that you can't do with the Tech2win emulator software, is can not do any perimeter changes to ECM (it can still be read, but no changes made to the ECM programming). The BCM and the rest of the other modules, not a problem getting access and changes to them.
So let really get down to the meat of it, and since you can get BCM and the other module change access, getting deep into the BCM to deactivate F55 is not a problem as well as changing out the RPO codes on the BCM as well. also, all the special features needed like ABS pump cycle , relearn for radio, fob programming and such for the other not ECM module, just like a tech II and clone as well.
Now the ugly, since again, you need to use TIS2000 to flash such items like firmware, and some cases, ECM programming as well, here is the glitch, since not only does the NANO not come with a working copy of TIS2000, not sure it will work with as well.
Here is the reason why I think this. When you first start the tech2win emulator software, you will get a pop up screen first select if you are using a MDI or MDI2 , then a second screw will pop up to select the NANO device. Once the NANO has been selected, the tech2win emulator sofware sees and uses the the NANO as a MDI device. When I tried to use my copy of TIS2000 to drive threw the NANO, did not get the pop up screens to select the NANO device and was unable to connect the NANO to Tis2000.
Note, have Tis2000 on my win 10 64 bit machine, and was not able to get Tech2win emulator software to work with that machine (will not give me the device pop up screen to select the NANO after Tech2win starts). Instead, I have to install the Tech2win software on a win 7 32 bit machine to get it to work and do testing and not a VM copy of TiS200 on it isntead.
So the fact that the NANO GM device does not come with Gm TIS2000, Not really sure if it going to work with Tis2000 to start with.
Again, maybe its my win 10 64 bit machine, but when opened TIS2000, it looking for an actual Tech II, and which does not giving me the option of selecting the the NANO device as well. Hence the two screens that pop up to select the device are part of Tech2win emulator software, so when you open up Tis2000, it not opening up that software to being with. Hence the reason that I beleive is the NANO is going to work with TIS200, then someone is going to have to crack that software as well to work with the NANO device.
So, for someone that will wrench on the C6 ,and needs a Tech II for anything else than changing ecm peramiters or flashing in firmware, the NANO with it Tech2win emulateur software is very good tool for that (if you have a machine that it will load on, since again, will not work on my win 10 64 bit machine). But, and here is the huge one, unless Vxdiag has a way for Tis2000 to select the NANO to work with Tis2000 (again, was not getting the pop up screens to select the device to work with the NANO), then don't see if working with TIS2000 instead.
So, do I think the NANO and the software you get with it as good as than the Tech II clone, No. The tech II clone come with level access to do ECM peramiter changes, and also a working cracked copy of TIS2000 as well. Hence with saved firmware files for your car, you can reflash modules at will.
So the niche for the NANO GMis really for someone that the dealer may gouge for say a radio relearn, adding in a XM channel to a radio, having to delete F55 module, and the other items that a Tech II comes in handy for, as well the needed information to pull up codes in say the BCM. It also a good tool to pull modules information and testing when you are wrenching on the car as well
If you need to do the extra step and get into the ECM parameter changes or even have to reflash firmware, then you really need a hand held Tech II or clone and its TIS2000 software that comes with it instead.
Now to touch on Gds2 software since it does come with it, and will be handy for other GM cars that you may have as well. Hence what GM car models/years that you use a tech2 win/ Tech 2 with Tis2000 as the pass through or gds2 software instead, the below link has a good chart.gm-tech2-tool-vehicles-support-list

Sunday, 18 March 2018

How to install Tech 2 TIS2000 on VMware or Windows XP

A lot of info I found over at SaabCentral but it is just a giant thread to read through although a lot of the info is on the first page. And a lot doesn’t apply since it’s geared towards Saab (even the 9-7x doesn’t apply, it’s under GM).
So you have a Tech2 scan tool but a lot of the things you would like to do is locked out because you don’t have access to the computer software to allow you to do it. Things like updating PCM’s and modules and anything security related are locked out. If you bought one of the Tech2 clone, it probably came with a CD with the Tis2000 software. If you install it and try to use it, it says that it can’t find the USB security dongle or something like that. That’s because only dealers have those or a clone of one wasn’t included.
First of all, this is old software. It was discontinued in 2008 by GM which means that it works only for vehicles up to model year 2007. It will have PCM and module updates included. For example, I was able to update all of the modules and PCM in my 2006 9-7x even though it had only been a year or two since production and issue of this software. It will also allow you to reprogram a module that you are replacing.
The Tech2 communicates with the computer using a serial port on the computer running Windows XP SP3. This can be a problem if you only have newer computers. Best and easiest scenario is to use an older laptop computer that has a serial port running windows XP. In my setup, I used an old IBM T40 laptop, which is fairly decent processor wise, installed a fresh copy of Windows XP SP3 and used a docking station with it that has a serial port. Laptops that have actual serial ports built in are probably so old that they are too slow or have age and reliability issues. Another solution would be to get a USB to serial port adapter and specify the proper COM port number during the install of Tis2000.
Another possible solution would be to use a virtual environment on a host computer. VMWare is free to use and it has been done from what I read but could be a fairly involved process because of the serial port issue, especially when using a USB to serial adapter. The challenge of communicating from the virtual environment through the real computer’s hardware ports can make it difficult but can be done. I’m not going to discuss this type of installation but the basic software installation and use will be the same. If anyone gets a virtual install working, please post it up.
In some detail, this is what I did. Keep in mind that you should have some computer knowledge and know how to install Windows.
1. Installed a fresh copy of Windows XP SP3. I didn’t bother with updating anything else as far as security updates to Windows or install a virus scan because this computer will never be connected to the Internet or used for anything else.
2. Installed ALL the required drivers until there were no more yellow check marks in Device Manager. I failed to do this at first and caused a lot of headaches later, including a BSOD during software installation.
3. If you’re using a USB to serial adapter, plug it in now and set it up. Go into Device Manager and make note of the COM port used by the adapter.
3. Install the Tis2000 software from the CD included with the Tech2. During the install, it will ask you to specify the COM port. If you have a serial port on the computer, it’s probably COM 1 or use the one from the USB adapter.
4. Before you can use Tis2000 with your Tech2, you have to make it “think” that there is a dongle connected that authorizes it. You can download the crack below. Follow the read me file for instructions on how to use it.
That’s it. More threads will come explaining how to do stuff with it but this will get you going.
And if you need them:
TIS2000 Software with Dongle (this is what i’m using)
When you click on the links, they will bring you to 4Shared, click on “Free Download”, a little window will pop up asking to log in using either a social media account or sign up for an account. Sign up with an email and password and then create a name. After that, you will be brought back to the download page and the 60 second timer will count down, after which the download will start.
Warning: In Tis2000, whatever you do, DO NOT USE THE “SOFTWARE DOWNLOAD” BUTTON! This will retrograde the card in your Tech2 to an old version from 2008.
If you want a tested version to use with relief:

SRC:

Thursday, 15 March 2018

MPPS V21 PSG16 Opel Zafira 2.2: Confirmed!

Have luck with PSG16 read and write by MPPS V21 cable.


read, write PSG16 connecting cables can
Opel Zafira 2.2
mpps-v21-car-opel-zafira-22-dti-model-year-2003(1)
cables line can green, white sheathed, must be stripped
strand of cables next to battery
green cable can-h
white cable can-l
blue wire to green wire
orange cable to white cable
red to battery cable +
black to battery-
MPPS-V21-cable-pinout(1)
put contact and read
put contact and write
MPPS V21 clone is reading PSG16 Opel Zafira 2.2

mpps-v21-psg16-1 mpps-v21-psg16-2 mpps-v21-psg16-3 mpps-v21-psg16-4 mpps-v21-psg16-5 mpps-v21-psg16-6 mpps-v21-psg16-7

Easy task. MPPS V21 and PSG16 Opel Zafira 2.2: Done!

2016 VAUX-COM & Opcom Firmware 1.64: Confirmed!

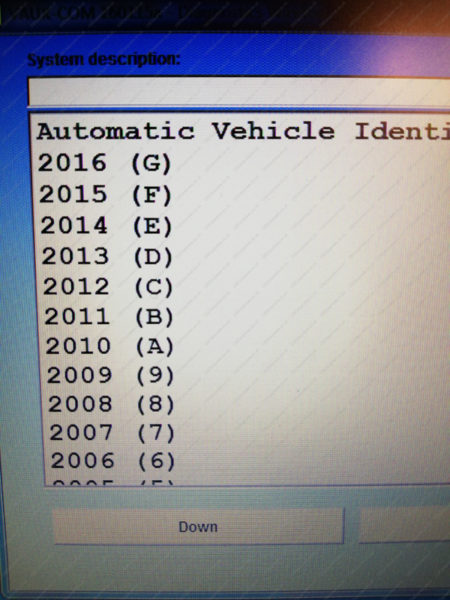
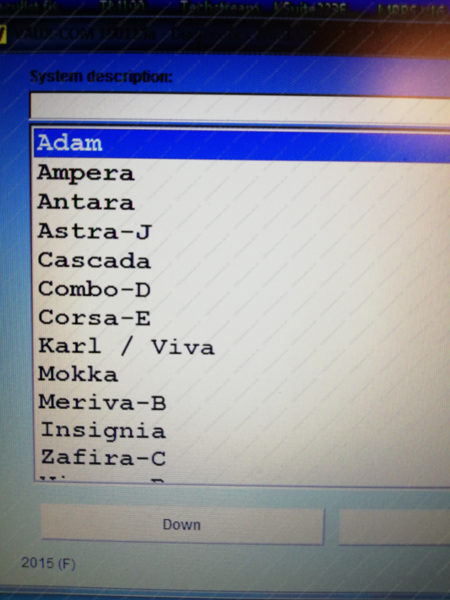
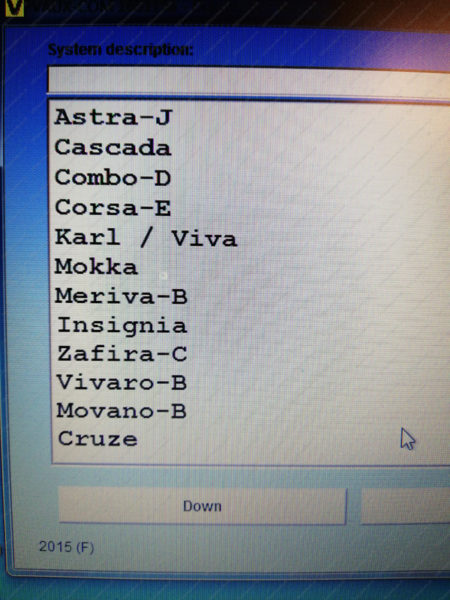
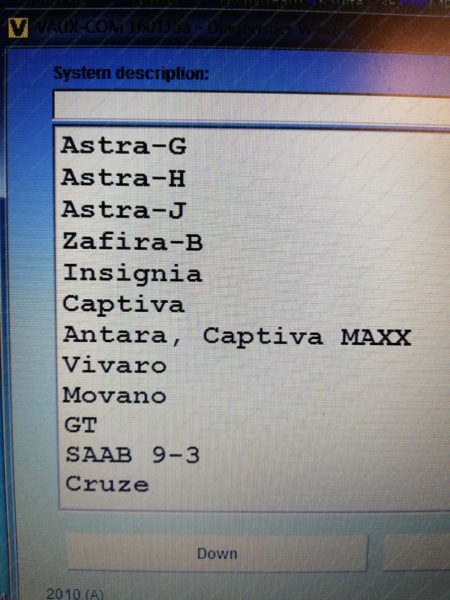
Hello bro, i found important information when did search on MH forum. Someone made update Opcom 2016 pro version !!!! share it again here. Hope it helps

Look here..
 Opcom-2016-CAR-LIST-1
dav
 Opcom-2016-CAR-LIST-2
dav
 Opcom-2016-CAR-LIST-3
dav
 Opcom-2016-CAR-LIST-4
dav
 Opcom-2016-CAR-LIST-5
dav

Cars up to 2016. Corsa E, Mokka, Karl, Adam, etc.
Languages: English and German!!!

Firmware 1.64 and it work just with real pic18f458 OP COM
do not tested with fake pic18f458 (pcb V6.0)
opcom-firmware-16 opcom-firmware-164-real-pc(1)
Good version, working perfect on pcb with Mikrochip processor.
Real year 2016 full version
Tested on cars

Note: all above is shared via http://mhhauto.com/Thread-opcom-2016-version-update
You can go there for more details

Note: In reality, not only Opcom 1.64 but firmware 1.59/1.65/1.70/1.95 comes with the real chip.
Look here: OP-COM with real pic18f458:

Opcom Firmware V1.95
Opcom Firmware V1.65

Tuesday, 13 March 2018

How to solve Consult 3 Plus reprogramming option was disabled (Gray)

Topic: Nissan Consult 3 Plus reprogramming option was disabled (Gray)

Trouble: I tried to reprogram the ABS module for a 2009 Nissan Murano but reprogramming option was disabled (Gray). any body knows how to activate it? I’m using Nissan Consult 3 plus from the site http://www.obdexpress.co.uk/wholesale/nissan-consult-3-plus-nissan-consult-3.html i confirm this tool can be used for reprogramming, but not know how to

Reply: you need to edit the file DiagnoticTool.ini to enable reprogramming and also IMMO. Or if you have money to waste buy the reprogramming card and the NATS card. Add the following line to the DiagnosticTool.ini file
[mode]
debug_mode=TRUE
debug_mode_vehicle-battery=TRUE
[vehicles]
tab_index=0
also make sure system management access_mode is set to 1. That should give you full access. That's not to say that it will work if you do not have the correct calibration file in the reprogramming folder on the C drive.

good luck

Feedback: Thanks it worked


http://www.mbstartool.com

Monday, 12 March 2018

Auro OtoSys IM100 2004-2007 Chrysler Key Learning Function

This manual introduces how to conduct 2004-2007 Chrysler Key Learning on AuroOtoSys IM100.
PDF attachment:http://www.obdexpress.co.uk/upload/pro/auro-otosys-im100-2004-2007-chrysler-key-learning.pdf
Two options are available when accessing the IMMO function:
Model Selection – the user can select the model and year of the vehicle to locate
the IMMO type.
Type Selection – the user can let the IM100 tablet automatically identify the
IMMO type.
 Procedures before getting started:
1. Connect the IM100 tablet to the vehicle’s DLC via the included main cable for
both communication and power source.
2. Make sure the user has access to WiFi service.
NOTE
Illustrations used in this manual are samples, and the actual testing screens may vary by
vehicle. Observe the menu titles and on-screen instructions to make correct selections
and operations.

Key Learning via Model Selection

1. Insert an original key into the ignition switch and then turn on the ignition.
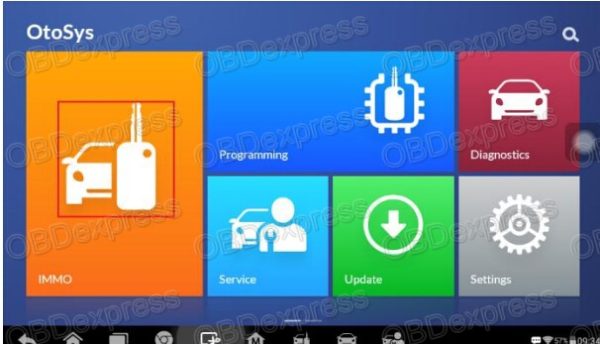
2. Turn on the IM100 tablet and then tap OtoSys > IMMO. A vehicle menu displays
and a disclaimer prompts up. Tap Accept to continue.
auro-otosys-im100-2004-2007-chrysler-key-learning-1 auro-otosys-im100-2004-2007-chrysler-key-learning-meun-2
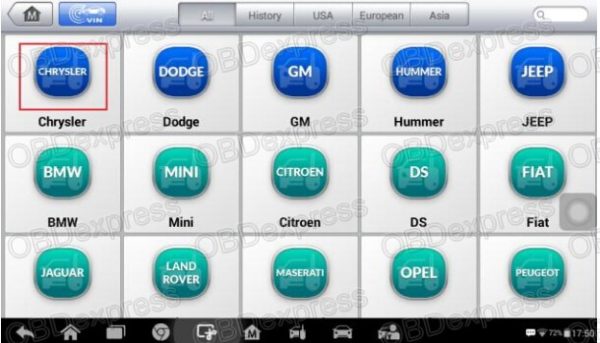
3. Tap Chrysler on the vehicle menu.
auro-otosys-im100-vehicle-mene-3
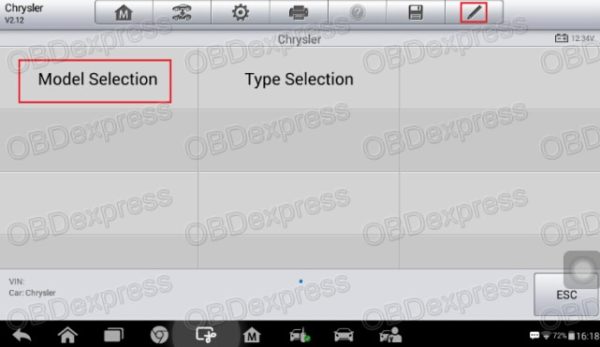
4. Tap Model Selection on the mode menu, and then select the model and year of the
vehicle.
NOTE
You can click the pen icon near the top-right corner to record the operation data. If you
encounter any difficulties, click the icon again to send us the data and the problem, so
that our engineers could help. The network should be connected when uploading the
data.
auro-otosys-im100-chrysler-model-selection-4 auro-otosys-im100-vehicle-menu-5 auro-otosys-im100-2004-2007-chrysler-6(1)
5. Tap Immobilizer Password Reading on the function menu to read the immobilizer
password. Then tap OK and exit to the function menu.
NOTE
The immobilizer password is needed when performing the Key Learning function, so
please memorize or take notes of the password.
auro-otosys-im100-2004-2007-chrysler-7 auro-otosys-im100-2004-2007-chrysler-key-learning-8
6. Tap Immobilizer Learning > Key Learning. Then a Key Learning menu displays.
NOTE
* Old Key Learning: If the BCM module is replaced or the original key(s) can’t work,
the user can perform this function to adapt the original key(s) to the IMMO system
of the vehicle.
* New Key Learning: The user can perform this function to adapt new key(s) to the
IMMO system of the vehicle.
auro-otosys-im100-2004-2007-chrysler-key-learning-9 auro-otosys-im100-2004-2007-chrysler-key-learning-10 auro-otosys-im100-2004-2007-chrysler-key-learning-11
7. Take New Key Learning as an example. Insert the key to be learned into the
ignition switch, turn the ignition on and tap New Key Learning on the menu.
auro-otosys-im100-2004-2007-chrysler-key-learning-12
8. Input the 4-digit immobilizer password and tap OK to continue.
auro-otosys-im100-2004-2007-chrysler-key-learning-13
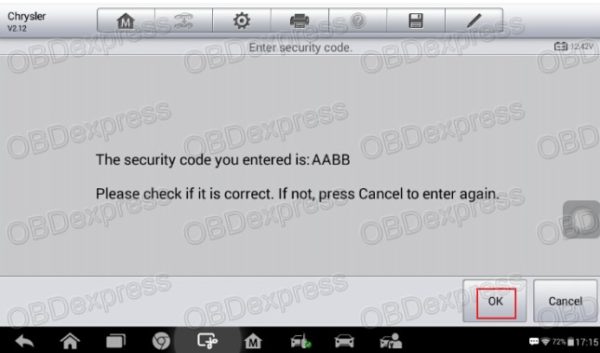
9. Verify the password and tap OK to continue.
auro-otosys-im100-2004-2007-chrysler-key-learning-14
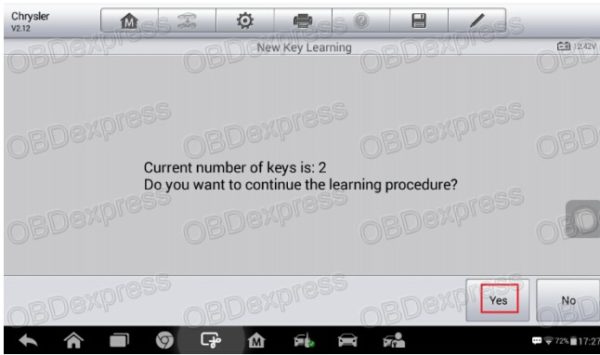
10. Read the information of keys and tap Yes to continue the learning procedure.
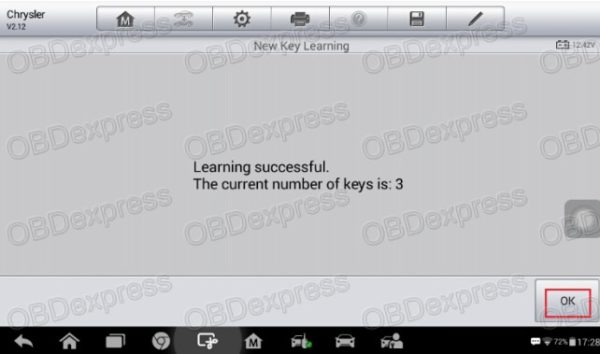
When New Key Learning is completed, tap OK to exit.
auro-otosys-im100-2004-2007-chrysler-key-learning-15 auro-otosys-im100-2004-2007-chrysler-key-learning-16

Key Learning via Type Selection

1. Insert an original key into the ignition switch and then turn on the ignition.
2. Turn on the IM100 tablet and then tap OtoSys > IMMO. A vehicle menu displays
and a disclaimer prompts up. Tap Accept to continue.
auro-otosys-im100-2004-2007-chrysler-key-learning-17 auro-otosys-im100-2004-2007-chrysler-key-learning-18
3. Tap Chrysler on the vehicle menu.
auro-otosys-im100-2004-2007-chrysler-key-learning-19
4. Tap Type Selection on the mode menu.
NOTE
You can click the pen icon near the top-right corner to record the operation data. If you
encounter any difficulties, click the icon again to send us the data and the problem, so
that our engineers could help. The network should be connected when uploading the
data.
auro-otosys-im100-2004-2007-chrysler-key-learning-20
5. Tap Immobilizer Password Reading on the function menu to read the immobilizer
password. Then tap OK and exit to the function menu.
NOTE
The immobilizer password is needed when performing the Key Learning function, so
please memorize or take notes of the password.
auro-otosys-im100-2004-2007-chrysler-key-learning-21 auro-otosys-im100-2004-2007-chrysler-key-learning-22
6. Tap Immobilizer Learning > Automatic Scanning to identify the IMMO type.
auro-otosys-im100-2004-2007-chrysler-key-learning-23 auro-otosys-im100-2004-2007-chrysler-key-learning-24
7. Tap Key Learning on the function menu. Then a Key Learning menu displays.
NOTE
* Old Key Learning: If the BCM module is replaced or the original key(s) can’t work,
the user can perform this function to adapt the original key(s) to the IMMO system
of the vehicle.
* New Key Learning: The user can perform this function to adapt new key(s) to the
IMMO system of the vehicle
auro-otosys-im100-2004-2007-chrysler-key-learning-25(1) auro-otosys-im100-2004-2007-chrysler-key-learning-26
8. Take New Key Learning as an example. Insert the key to be learned into the ignition
switch, turn the ignition on and tap New Key Learning on the menu.
auro-otosys-im100-2004-2007-chrysler-key-learning-27
9. Input the 4-digit immobilizer password and tap OK to continue. auro-otosys-im100-2004-2007-chrysler-key-learning-28
10. Verify the password and tap OK to continue.
auro-otosys-im100-2004-2007-chrysler-key-learning-29
11. Read the information of keys and tap Yes to continue the learning procedure.
When New Key Learning is completed, tap OK to exit.
auro-otosys-im100-2004-2007-chrysler-key-learning-30 auro-otosys-im100-2004-2007-chrysler-key-learning-31


Add:
1.
2.
3.
4.
5.
6.
7.
8.
Vihicle support list :

Src:

CG FC200 V1.2.5.0 Update: Added GM E83 Read and Write via Boot

 The newest software V1.2.5.0 of CG FC200 ECU Programmer was released on Jan.6th, 2025. Check the related updated details and update your...